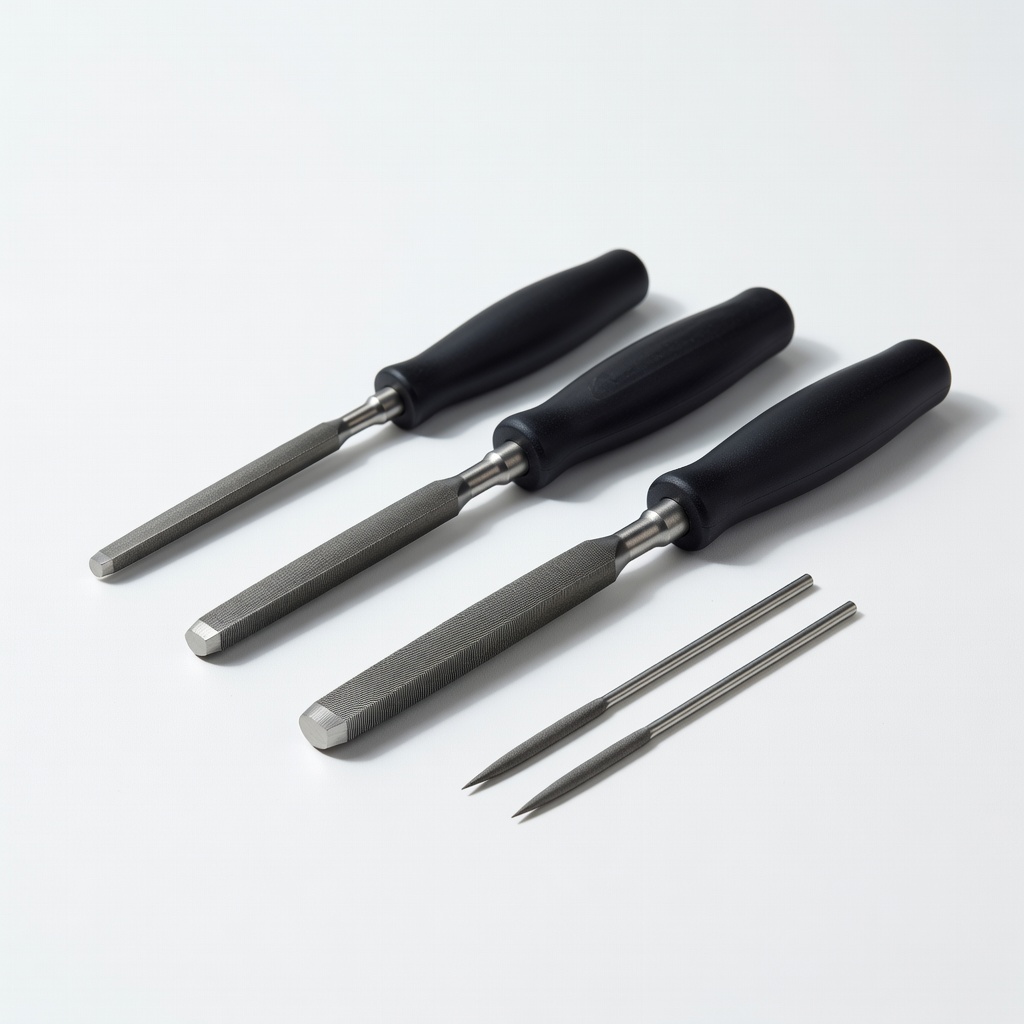
StewMac Fret Crowning File Set
Essential for post-leveling fret sharpening on Martins or Taylors.
$79.99
StewMac Fret Crowning File Set Precision curved edges for perfect oval crowns on acoustic frets; multiple sizes cover most wire gauges.
Get the App
Better experience on mobile
Master the essential tools for sharpening frets, nuts, and saddles to restore playability and intonation on your acoustic guitar.
Dull or uneven frets, worn nuts, and improperly shaped saddles can cause buzzing notes, poor intonation, and sluggish playability on your acoustic guitar—issues that advanced players know rob tone and responsiveness. Regular sharpening maintains factory-fresh feel and extends the life of expensive setups.
In this guide, you'll learn the precise tools for each sharpenable part (frets, nut, saddle), why they're needed, and pro techniques for flawless results. We'll break down specialized files, beams, and accessories with real-world examples and analogies to complex luthier processes.
Expect a deep dive into advanced concepts—no hands-on time required, just 15-20 minutes of reading to equip you for your next setup job.
Estimated Time: 15-20 minutes Difficulty: advanced
Before selecting tools, inspect your acoustic guitar under bright light and with a straightedge. Check frets for flat spots (high E and low E often wear first), nut slots for burrs causing string bind, and saddle for uneven height causing high action.
Why it matters: Sharpening the wrong part wastes time and risks damage. Expect to find wear after 5-10 years of play or post-travel humidity changes. Analogy: Like tuning up a car before a race—diagnosis first.
Mark high/worn spots with a marker for targeted work.
💡 Tips:
⚠️ Warnings:
Fret leveling evens highs before sharpening. Use a long, rigid beam (10-16" for acoustics) coated with 220-grit self-adhesive sandpaper.
Recommended: Serrated or slotted beams prevent string grooves. Why: Uneven frets cause dead spots; leveling ensures consistent action. Expect 10-20 minutes per neck, removing minimal material (0.001-0.003"). Analogy: Sanding a wavy board flat before planing edges.
💡 Tips:
After leveling, crown frets to restore the curved top. Use specialized fret files with curved cutting edges (e.g., triangle or knife-edge profiles) in sizes matching fret wire (0.036-0.055" for most acoustics).
Single-cut files for initial shaping, double-cut for finishing. Why it matters: Sharp crowns provide even string contact, eliminating buzz. File at 30-degree bevel, rocking side-to-side. Expect shiny, oval tops post-polish.
💡 Tips:
⚠️ Warnings:
Nut slots sharpen with precision files matching string gauges (e.g., .010-.046 sets for acoustics). Diamond-coated or high-carbon steel files cut cleanly without binding.
Why: Dull slots bind strings, causing sharp intonation. File bottom flat, sides vertical, depth to first-fret action height. Analogy: Whittling a groove for a pulley—precise angles matter. Expect slots 0.020-0.030" deep.
💡 Tips:
Acoustic saddles sharpen with straight or radius files (for 12-16" radius tops). Use 240-grit then 400-grit for smooth ramps.
Why: Custom height fixes high action or buzz. Secure in radius sanding jig. Expect 2-4mm total height adjustment. Analogy: Sculpting a ramp for optimal string break angle.
💡 Tips:
⚠️ Warnings:
Polish all parts with diamond lapping films (400-2000 grit) or Micro-Mesh pads. Buff frets with Cape Cod polish.
Why: Removes file marks, reduces wear on strings. Expect mirror shine enhancing tone sustain.
💡 Tips:
Enhance with fret bevelers, understring radius gauges, and digital calipers. Bevel fret ends to prevent cuts.
Why: Pro-level finish prevents string hang-up. Analogy: Finishing edges on a knife blade.
💡 Tips:
Problem: Persistent buzz after sharpening
Solution: Recheck neck relief and truss rod; may need professional refret if wire is too flat.
Problem: String binding in nut
Solution: Re-file slots with diamond file and apply nut sauce; ensure vertical walls.
Problem: High action post-saddle file
Solution: Measure break angle; reinstall with shims or seek luthier for bone/Tusq recarve.
Problem: File slips or chatters
Solution: Secure guitar in vise; use cutting oil and lighter pressure.
Precision curved edges for perfect oval crowns on acoustic frets; multiple sizes cover most wire gauges.
Best for: Essential for post-leveling fret sharpening on Martins or Taylors.
Price Range: $79.99
Diamond-coated for clean cuts without binding; exact widths (.010-.056") for steel-string acoustics.
Best for: Sharpening nut slots during full setups.
Price Range: $49.99
Rigid aluminum with adhesive sandpaper slots; prevents gouging on radiused acoustic necks.
Best for: Initial leveling before crowning.
Price Range: $39.99
Holds saddle secure for even filing; matches 16" acoustic radius.
Best for: Custom action adjustments.
Price Range: $24.99
Progressive grits for mirror polish on all metal/plastic parts; luthier standard.
Best for: Final buffing step.
Price Range: $34.99
Essential for post-leveling fret sharpening on Martins or Taylors.
StewMac Fret Crowning File Set Precision curved edges for perfect oval crowns on acoustic frets; multiple sizes cover most wire gauges.
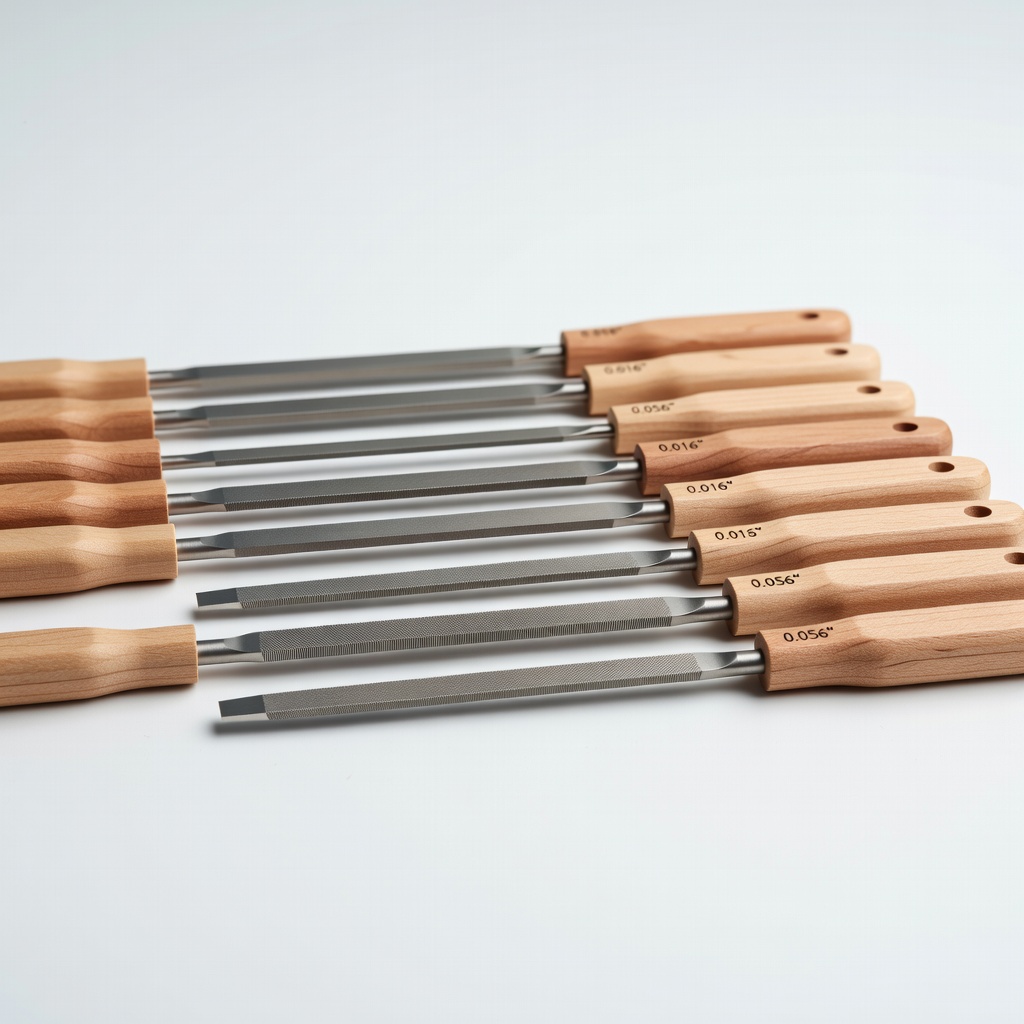
Sharpening nut slots during full setups.
Hosco Nut File Set (Acoustic Gauges) Diamond-coated for clean cuts without binding; exact widths (.010-.056") for steel-string acoustics.
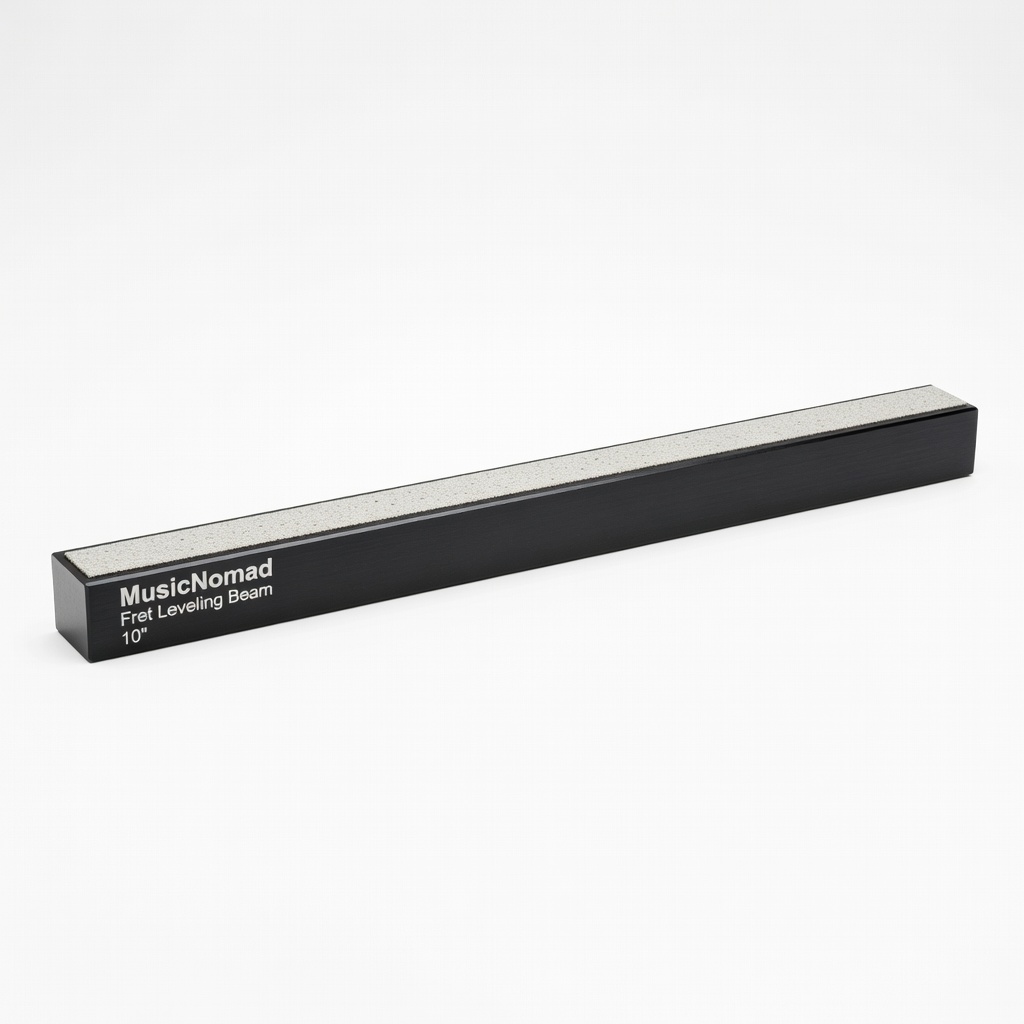
Initial leveling before crowning.
MusicNomad Fret Leveling Beam (10") Rigid aluminum with adhesive sandpaper slots; prevents gouging on radiused acoustic necks.

Custom action adjustments.
LMI Saddle Radius Sanding Jig Holds saddle secure for even filing; matches 16" acoustic radius.
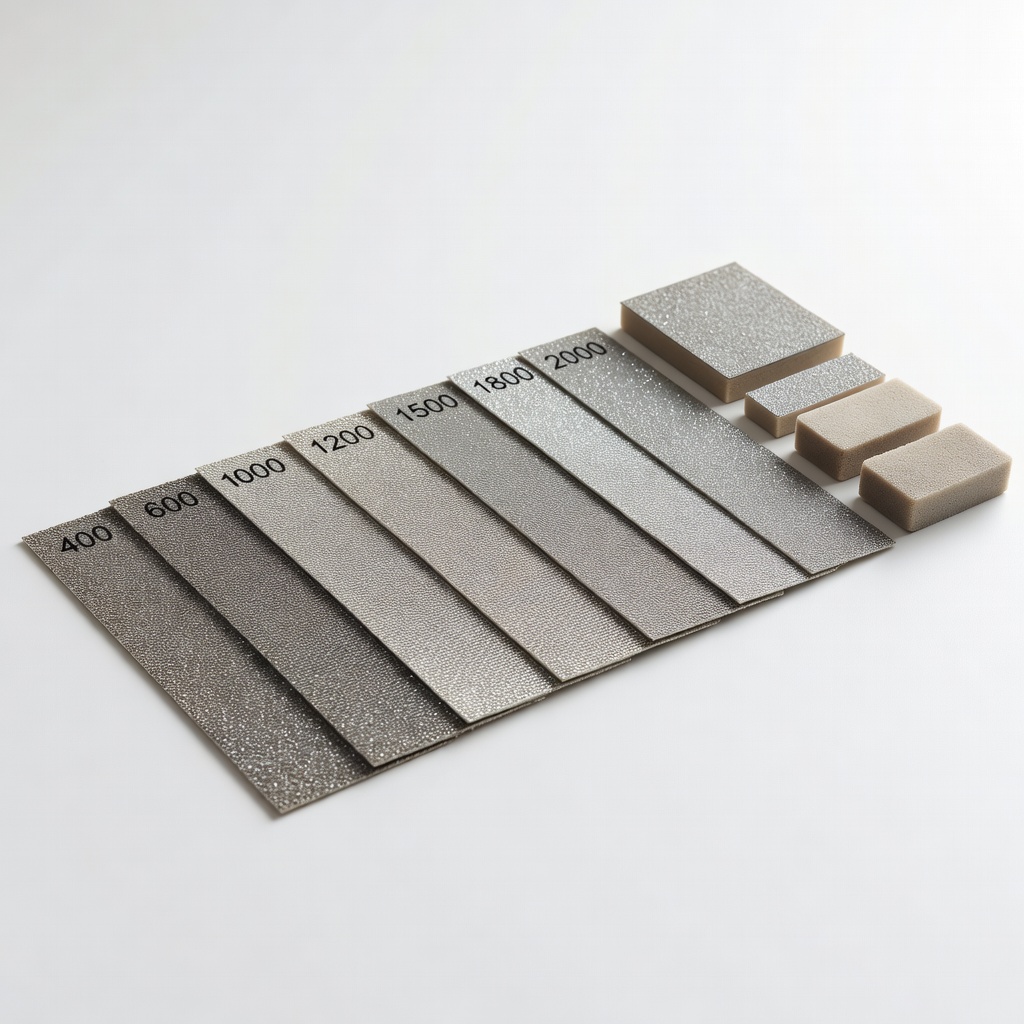
Final buffing step.
Micro-Mesh 400-2000 Grit Kit Progressive grits for mirror polish on all metal/plastic parts; luthier standard.