3D puzzles are an exciting twist on traditional puzzles, allowing you to build everything from intricate castles to working mechanical models. But with so many on the market, it can be overwhelming to decide which one to try. One of the biggest differentiators is the material used to make the puzzle. Each material—whether it's cardboard, wood, plastic, foam, or metal—brings its own set of benefits, challenges, and best-use scenarios.
In this guide, you'll learn about the most common materials used in 3D puzzles, how to recognize them, and what to expect from each type. We'll also share tips on choosing the right material for your skill level, budget, and interests. By the end, you'll feel confident picking your next 3D puzzle project.
▸What You'll Need
- •Basic understanding of different puzzle types
- •A computer or smartphone to browse examples
- •Optional: A few 3D puzzles of different materials to examine
- •Optional: Magnifying glass for inspecting small piece details
Estimated Time: 10-15 minutes read
Difficulty: beginner
▸Step-by-Step Instructions
Step 1: Understanding the 3D Puzzle Landscape
Before diving into specific materials, it's helpful to understand what 3D puzzles are. Unlike flat jigsaw puzzles, 3D puzzles are designed to be assembled into a three-dimensional object, such as a building, vehicle, or geometric shape. They typically come as pre-cut pieces that you snap, slide, or glue together.
There are several broad categories: architectural models (like famous landmarks), mechanical puzzles (with moving gears), and educational building sets. Knowing what you want to build will influence which material best suits your needs. For example, a detailed mechanical model may require the precision of plastic or metal, while a simple replica of a monument might be perfectly suited for foam or cardboard.
💡 Tips:
- •Think about the finished object’s intended use. Will it be a display piece or an interactive toy?
- •Check the recommended age range on the box—this often indicates complexity and material suitability.
⚠️ Warnings:
- •Don’t confuse 3D puzzles with standard jigsaw puzzles; they require a different assembly approach and often no glue.
Step 2: Cardboard and Paperboard Puzzles
Cardboard 3D puzzles are the most common and affordable type. They are made from thick, rigid cardboard that is cut by laser or die-cut into precision pieces. These puzzles are often printed with vibrant colors and patterns, making them visually appealing.
The main advantage of cardboard is accessibility: they are widely available, inexpensive, and suitable for kids and beginners. The pieces usually fit together with tabs and slots, and some require a bit of glue for permanence. However, cardboard can be fragile and susceptible to moisture, so they are best kept in a dry environment and handled gently.
💡 Tips:
- •If you want a model that will last, apply a thin layer of white glue to the edges during assembly.
- •Look for puzzles labeled 'laser-cut' for better piece precision.
⚠️ Warnings:
- •Keep cardboard puzzles away from water and humidity—they can warp quickly.
- •Avoid using excessive force when pressing pieces together, as cardboard can tear.
Step 3: Foam Board and EVA Foam Puzzles
Foam board puzzles are made from compressed foam sheets, often EVA (ethylene-vinyl acetate) foam, which is lightweight, slightly flexible, and water-resistant. These puzzles are commonly sold for children and come in bright, colorful designs. The pieces often punch out of a sheet and fit together with friction.
EVA foam is a great choice if you want a puzzle that is safe for young kids—it has a soft feel and no sharp edges. It's also more durable than cardboard in the sense that it won't crease or tear easily. On the downside, foam puzzles can be less precise than other materials, and the pieces may loosen over time with repeated handling. They usually don’t have the fine detail that wood or plastic offer.
💡 Tips:
- •If a foam piece feels too loose, add a small piece of double-sided tape to the tabs.
- •Clean foam puzzles with a damp cloth; they dry quickly.
⚠️ Warnings:
- •Foam can be bitten by pets or chewed by babies—store out of reach if needed.
- •Don't leave foam puzzles in direct sunlight for long periods, as they may fade.
Step 4: Wooden 3D Puzzles (Plywood and MDF)
Wooden 3D puzzles are beloved for their beauty, durability, and satisfying tactile feel. Most are cut from birch plywood, MDF (medium-density fiberboard), or sometimes bamboo. The pieces are typically laser-cut with high precision, resulting in tight-fitting joints that often click together without glue.
Wooden puzzles range from simple children's designs to complex mechanical models with hundreds of pieces. They can be left natural, painted, or stained, making them perfect for display. The main challenge is that some wooden puzzles require sanding to remove tiny splinters or using tools like craft knives to detach pieces from sprues. They also demand careful handling because forcing pieces can cause breaks.
💡 Tips:
- •Keep a small piece of fine-grit sandpaper on hand to smooth any rough edges.
- •Use a drop of wood glue on joints if you want a permanent display piece.
- •Look for mechanical wooden puzzle kits (like those from UGEARS) for a rewarding engineering experience.
⚠️ Warnings:
- •Freshly laser-cut wood may have a smoky smell; air it out for a day before assembling.
- •Avoid gluing pieces that need to move in mechanical models.
Step 5: Plastic and ABS 3D Puzzles
Plastic 3D puzzles are typically injection-molded from ABS or polycarbonate plastic. They are known for their high detail, smooth surfaces, and ability to create complex shapes with snap-fit parts. Many plastic puzzles are designed for older children and adults, including branded models like the official Star Trek or Marvel kits.
These puzzles often come on sprues, requiring you to snip pieces free with nippers or a craft knife. The fit is usually snug but may require a bit of gentle persuasion. Plastic is more durable than cardboard or foam and is resistant to moisture, so these puzzles can last for years. Some high-end plastic puzzles even feature moving parts or electronic components, making them a hybrid between a puzzle and a model kit.
💡 Tips:
- •Invest in a pair of plastic nippers to cleanly remove pieces from sprues.
- •Use a hobby knife to trim any rough molding marks.
- •If a piece feels stuck, gently twist it rather than using brute force.
⚠️ Warnings:
- •Plastic pieces can snap if twisted too hard, so be patient.
- •Some plastic puzzles require paint or glue, which may not be included in the box.
Step 6: Metal and Stainless Steel 3D Puzzles
Metal 3D puzzles are a niche but fascinating category. They are usually made from laser-cut steel or stainless steel sheets with a fine finish. These puzzles are known for their exceptional detail and complexity—some have hundreds of tiny pieces that are challenging to fold and connect.
Metal puzzles are often mechanical in nature, with gears or articulated parts. They require a combination of patience, precision, and sometimes tools like needle-nose pliers to bend tabs. The finished result is striking and durable, resembling a small metal sculpture. Because of their complexity, they are best suited for intermediate to advanced hobbyists or highly motivated beginners.
💡 Tips:
- •Work with small wire cutters and a flat-head screwdriver for bending tabs.
- •View every piece as part of a 3D assembly; avoid over-bending.
- •Use a magnifying lamp to see fine details clearly.
⚠️ Warnings:
- •Metal puzzles have sharp edges—handle carefully and keep away from children.
- •Do not bend pieces back and forth, as this can cause stress fractures.
Step 7: Magnetic 3D Puzzles and Building Sets
Magnetic 3D puzzles use small neodymium magnets embedded in pieces to snap together. These are often used in educational building sets (e.g., Magformers, PicassoTiles) but there are also flat-packed puzzles that assemble into geometric shapes. The magnetic connection allows for easy reconfiguration and quick disassembly.
Magnetic puzzles are excellent for teaching spatial reasoning and are great for kids who lose patience with traditional assembly. They are also very forgiving— if you make a mistake, just pull the pieces apart and start again. However, they are less 'permanent' than glued models and may not stay as rigidly connected if bumped.
💡 Tips:
- •Look for puzzles with strong magnets and smooth edges.
- •Use magnetic sets to experiment with different structures before committing to a final build.
⚠️ Warnings:
- •Keep magnetic puzzles away from electronics and credit cards—magnets can cause damage.
- •Younger kids should be supervised to avoid swallowing magnets.
Step 8: Comparing Materials: Which Is Right for You?
Now that you know the common materials, you can compare them based on your needs. Cardboard and foam are best for beginners, kids, and budget shoppers due to their low price and ease of assembly. Wood offers a classic look and durability, making it a great next step. Plastic provides the most detail and compatibility with painting, while metal is for those seeking a premium challenge.
Think about your space, time, and skill. If you want a quick afternoon project, choose a foam or cardboard puzzle with fewer than 100 pieces. If you're patient and want a keepsake, wooden or plastic kits with 200+ pieces will be more rewarding. Always read the product description to see if glue, paint, or tools are required—this can change your overall cost.
💡 Tips:
- •If you're unsure, start with a small wooden puzzle—it strikes a great balance of quality and manageability.
- •Check customer photos in reviews to gauge the actual size and finished look.
⚠️ Warnings:
- •Don't jump straight to metal puzzles as a first project—they can frustrate even experienced builders.
Step 9: Caring for Your 3D Puzzle
Proper care ensures your 3D puzzle stays looking great for years. Dust is the main enemy, especially for wooden and metal puzzles with intricate details. Use a soft brush or compressed air to clean them. For foam and cardboard, keep them away from humidity and direct sunlight.
If you plan to display your puzzle, consider placing it in a glass cabinet or on a shelf where it won't be knocked over. For glued puzzles, you can apply a clear acrylic sealer to protect the surface. For mechanical puzzles, occasionally lubricate moving parts with a dry silicone spray designed for plastic or metal.
💡 Tips:
- •Use a soft makeup brush to dust nooks and crannies.
- •If building a set, keep the original box and use it for storage when not displayed.
⚠️ Warnings:
- •Do not use water on wooden or metal puzzles—it can warp or rust them.
- •Avoid using compressor air when pieces are loose, as it may blow them apart.
Step 10: Conclusion and Starting Your Project
Now you're equipped to choose a 3D puzzle that matches your preferences. Remember that the material affects not only the assembly experience but also the final appearance and longevity. Start with a material that seems approachable, and don't be afraid to advance to more complex types as your confidence grows.
As a beginning step, pick a small cardboard, foam, or simple wooden puzzle. Give yourself a few hours, follow the instructions, and enjoy the process. Soon you'll understand why 3D puzzles are a beloved hobby for people of all ages.
💡 Tips:
- •Share your finished puzzle on social media—many puzzle makers love seeing their products completed.
- •Once you're comfortable, try a kit with moving parts for a new challenge.
⚠️ Warnings:
- •If you're buying a puzzle for a child, always check the recommended age range to avoid choking hazards.
▸Pro Tips
- •Look for laser-cut puzzles (wood or metal) for the most precise and easiest-fitting pieces.
- •Before gluing a puzzle, do a dry assembly to make sure everything fits—this lets you reposition pieces without difficulty.
- •Use a small plastic bowl or container to keep pieces from different sprues separated.
- •When working with wood or metal, rub a soft pencil on the edges of pieces that are tight—the graphite acts as a dry lubricant.
- •For cardboard puzzles, apply a thin layer of Mod Podge or diluted white glue to the seams after assembly to strengthen the structure.
- •Store partially completed puzzles in a flat box with a lid to prevent pieces from getting lost or damaged.
- •If a piece breaks, don't panic—you can often repair it with strong adhesive (cyanoacrylate or craft glue) and a bit of clamping.
- •Teach kids to sort pieces by color and shape before starting, making assembly easier and more educational.
▸Common Mistakes to Avoid
- •Choosing a metal or highly complex wooden puzzle as your first project—it can be frustrating and may discourage you from continuing the hobby.
- •Forcing pieces together without checking alignment, which often leads to breaks in cardboard and foam and damage to plastic tabs.
- •Using water or wet wipes to clean wooden or metal puzzles, causing warping or rust.
- •Following the instruction steps too hastily—many 3D puzzles require precise sequence, and a mistake may mean disassembly.
- •Ignoring the need for paint or glue, leaving some pieces falling apart later.
▸Troubleshooting
Problem: Pieces are loose and don't fit snugly (common in cardboard/foam puzzles).
Solution: Use a small drop of craft glue or double-sided tape on the tabs. For foam, a tiny piece of sticky tack can add friction.
Problem: Wooden piece has a splinter or rough edge.
Solution: Lightly sand the edge with fine-grit sandpaper (220 grit or higher). Remove any loose splinters with a craft knife, being careful not to cut yourself.
Problem: Plastic piece won't snap in completely.
Solution: Make sure you've removed all excess sprue material from the peg. Check for a small flashing burr and trim it with a hobby knife, then press firmly with a flat surface.
Problem: Metal tab won't bend without breaking.
Solution: Use needle-nose pliers to grip the tab near the fold line and bend gently. If it breaks, you can use cyanoacrylate (super glue) for a permanent fix, though the joint may be weaker.
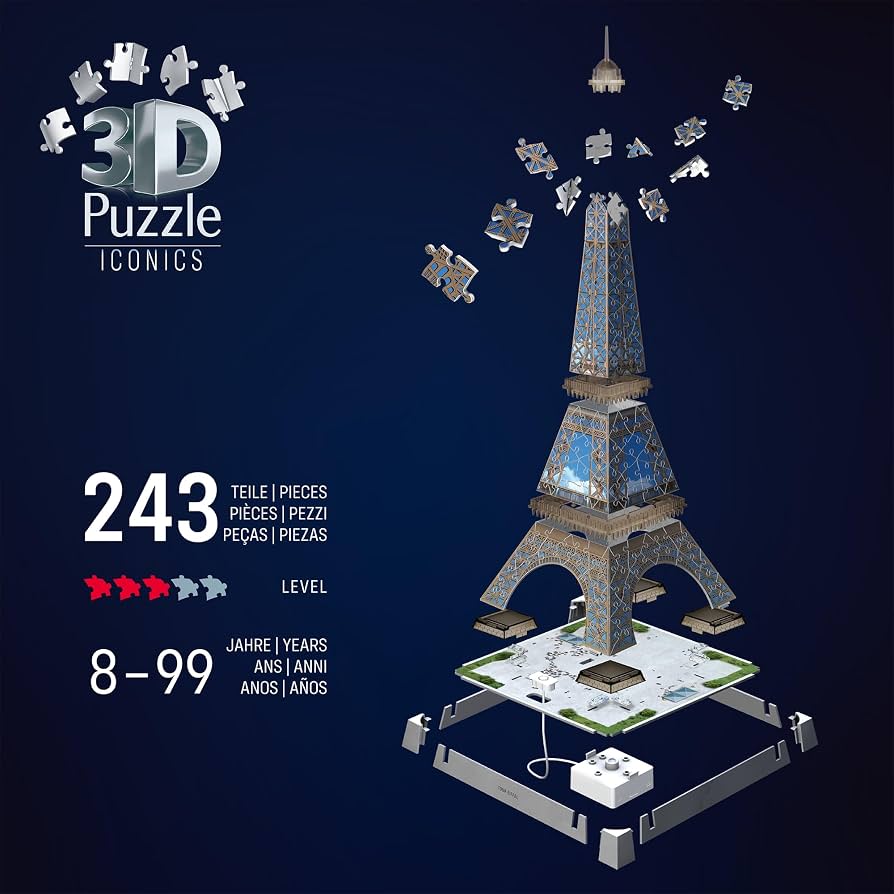
Ravensburger 3D Puzzle (e.g., Eiffel Tower)
High-quality cardboard puzzle pieces with non-gluing assembly. The plastic pieces are durable and the result looks like a model.
Best for: For beginners who want a simple architecture project that is easy to assemble and display.
Price Range: $40-$80
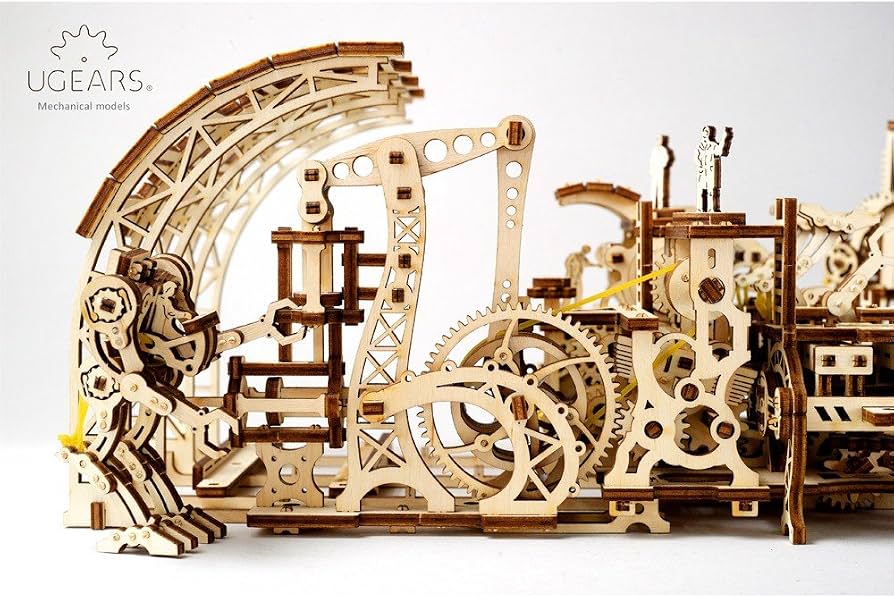
UGEARS Mechanical Wooden 3D Puzzle
Precision laser-cut plywood that fits beautifully without glue. Moving gears and mechanisms make it a fascinating project.
Best for: For hobbyists who enjoy engineering and want a unique, interactive wooden model.
Price Range: $50-$120
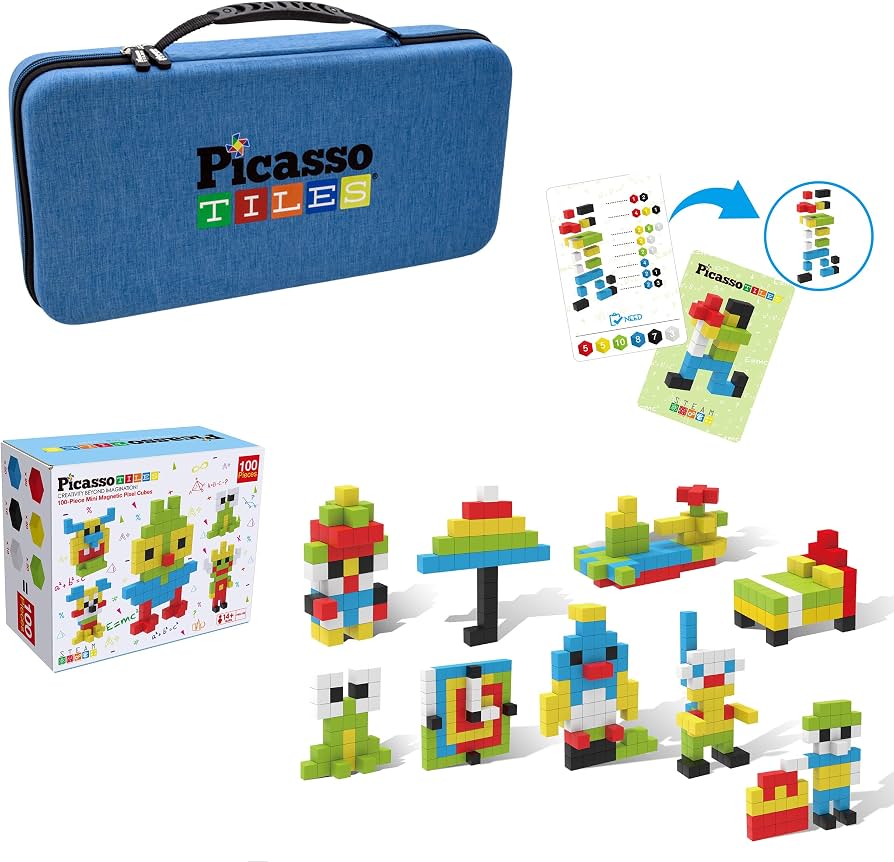
PicassoTiles 100-Piece Magnetic Building Blocks
EVA foam pieces with strong magnets that are safe for kids and encourage creativity. The pieces are easy to connect and reconfigure.
Best for: For families with young children who want an educational, reusable 3D puzzle set.
Price Range: $40-$100
Piececool Metal Model — Starry Sky
Laser-cut stainless steel sheets with impressive detail. A challenging but rewarding project that produces a metallic art piece.
Best for: For advanced beginners or intermediate builders who want a premium, display-worthy metal puzzle.
Price Range: $20-$40