In a world where space is limited and fresh produce can be expensive, hydroponics offers a game-changing solution for home gardeners. This method allows you to grow plants without soil, using nutrient-rich water to deliver everything plants need directly to their roots. Whether you're tired of patchy soil gardens or want year-round harvests in small apartments, hydroponics can boost yields by up to 30-50% compared to traditional methods.
In this guide, you'll first understand what hydroponics is, including its types and benefits, then follow step-by-step instructions to build a simple Deep Water Culture (DWC) system—one of the easiest for beginners transitioning to intermediate setups. Expect to spend 1-2 hours on assembly, with ongoing maintenance taking just 15-30 minutes weekly. No advanced skills required, but basic knowledge of pH and nutrients will help.
By the end, you'll have a functional system ready to plant, empowering you to experiment with sustainable, efficient growing right at home.
▸What You'll Need
- •5-10 gallon plastic storage bin (required - for reservoir)
- •Net pots (4-6, 2-3 inch size, required - for holding plants)
- •Clay pebbles or rockwool cubes (1-2 bags, required - inert growing medium)
- •Submersible air pump with tubing and air stone (required - for oxygenation)
- •Hydroponic nutrient solution (1 quart starter, required - provides plant food)
- •pH test kit or digital meter (required - to monitor water acidity)
- •Seeds or seedlings (herbs like basil or lettuce, required)
- •Black spray paint or liner (optional - to block light from reservoir)
- •LED grow light (optional but recommended - for indoor setups)
Estimated Time: 1-2 hours for setup; 15-30 minutes weekly maintenance
Difficulty: intermediate
▸Step-by-Step Instructions
Step 1: Understand the Fundamentals of Hydroponics
Hydroponics is a soilless growing technique where plants receive nutrients through water solutions, often oxygenated to mimic natural root environments. Unlike soil gardening, it eliminates pests and weeds while allowing precise control over nutrients, leading to faster growth—plants can mature 25-50% quicker.
Key types include Deep Water Culture (DWC), where roots dangle in aerated water; Nutrient Film Technique (NFT), with a thin water film flowing over roots; and Ebb and Flow, which periodically floods the roots. For your simple system, we'll use DWC—it's forgiving for intermediates and requires minimal equipment.
Why it matters: This setup saves space (ideal for countertops) and water (up to 90% less than soil). Expect steady growth once balanced, but monitor for imbalances early.
💡 Tips:
- •Start with easy crops like lettuce to build confidence before tackling tomatoes.
⚠️ Warnings:
- •Avoid confusing hydroponics with aquaponics, which involves fish—stick to basics here.
Step 2: Gather and Prepare Your Materials
Collect all items from the 'What You Need' list. Ensure your reservoir bin is clean and food-safe plastic to prevent chemical leaching. Rinse clay pebbles thoroughly to remove dust, which could clog your system.
Mix your initial nutrient solution per package instructions—typically 1-2 teaspoons per gallon of water at pH 5.5-6.5 for most plants. This balance is crucial because plants absorb nutrients best in slightly acidic water; too high or low pH locks out essentials like iron.
What to expect: Your setup will look like a basic aquarium at first, but it'll transform into a thriving garden. This prep prevents costly restarts.
💡 Tips:
- •Use distilled or RO water if your tap is hard to avoid mineral buildup.
⚠️ Warnings:
- •Don't skip pH testing—imbalanced water can stunt growth in days.
Step 3: Assemble the Reservoir
Drill or cut holes in the lid of your storage bin to fit the net pots—space them 4-6 inches apart for 4-6 plants. Line the bin's interior with black material or paint it to block light, preventing algae growth that competes with your plants for nutrients.
Place the air stone at the bottom, connect it to the pump via tubing, and position the pump outside the bin to avoid submersion issues. Fill the bin with your prepared nutrient solution, ensuring the water level is about 1-2 inches below the net pot holes.
Why this matters: Oxygenation via the air pump keeps roots healthy; without it, anaerobic bacteria cause rot. Expect bubbles creating a lively, oxygenated environment.
💡 Tips:
- •Test the air pump outside first to ensure no leaks.
⚠️ Warnings:
- •Overfill the reservoir—roots need air exposure above water.
Step 4: Plant Your Seeds or Seedlings
Fill net pots with rinsed clay pebbles, then insert rockwool cubes with sprouted seeds or transplant small seedlings (roots poking out). Gently place pots into the lid holes so roots dangle into the solution without touching the bottom initially.
For seeds, germinate them first in a damp medium under light for 3-7 days. Choose fast-growers like basil or spinach for quick results. This step integrates plants into the hydroponic loop, where they'll draw nutrients directly.
What to expect: Roots will seek the water within days, turning white and fibrous. Monitor for wilting, a sign of transplant shock.
💡 Tips:
- •Handle seedlings by leaves, not stems, to avoid bruising.
⚠️ Warnings:
- •Don't overcrowd—plants compete for light and nutrients.
Step 5: Set Up Lighting and Location
Position your system under an LED grow light 12-18 inches above plants, set to 14-16 hours daily for vegetative growth. If outdoors, ensure indirect sunlight to avoid scorching. Hydroponics thrives in stable temps (65-75°F) and humidity (40-60%).
Why it matters: Light drives photosynthesis; inadequate light leads to leggy, weak plants. For indoors, full-spectrum LEDs mimic sunlight efficiently.
Expect initial adjustment—plants may droop briefly but recover with consistent light cycles.
💡 Tips:
- •Use a timer for lights to automate and prevent forgetting.
⚠️ Warnings:
- •Avoid direct sun indoors via windows—use grow lights for control.
Step 6: Monitor and Maintain the System
Check pH and EC (nutrient strength) daily with your meter, adjusting as needed—add pH up/down solutions if off. Top off water every 2-3 days, refreshing the full solution every 1-2 weeks to prevent nutrient buildup.
Observe roots for health: white and fuzzy is good; brown and slimy signals issues. This ongoing care ensures balanced growth and harvest-ready plants in 4-8 weeks.
What to expect: Routine becomes second nature, yielding fresh produce far superior to store-bought.
💡 Tips:
- •Keep a log of pH readings to spot trends early.
⚠️ Warnings:
- •Ignore buildup— it can toxify the water over time.
▸Pro Tips
- •Start small with 4 plants to master the system before scaling up.
- •Use a fan for air circulation to strengthen stems and deter mold.
- •Add chelated iron supplements if leaves yellow—common in hydro setups.
- •Harvest outer leaves of lettuce to encourage continuous growth.
- •Invest in an automatic pH controller for hands-off maintenance once comfortable.
- •Experiment with CO2 enrichment via bubbling for 20% faster growth.
- •Clean equipment with hydrogen peroxide between cycles to kill pathogens.
▸Common Mistakes to Avoid
- •Neglecting pH balance: Causes nutrient lockout; test daily and adjust gradually.
- •Overloading nutrients: Burns roots; follow dilution rates precisely.
- •Poor oxygenation: Leads to root rot; ensure air pump runs 24/7.
- •Inconsistent lighting: Stunts growth; use timers for reliability.
- •Using tap water without treatment: Chlorine harms beneficial microbes; let it sit or filter.
▸Troubleshooting
Problem: Yellowing leaves
Solution: Check pH (aim 5.5-6.5) and add balanced nutrients; ensure 14+ hours of light.
Problem: Algae growth in reservoir
Solution: Block all light with opaque covering; clean and refresh solution immediately.
Problem: Wilting plants despite water
Solution: Verify air pump is working—roots need oxygen; raise light if too hot.
Problem: Slow growth
Solution: Test EC levels (1.0-2.5 mS/cm); increase if low, but dilute if high. Seek pro help if persists beyond a week.
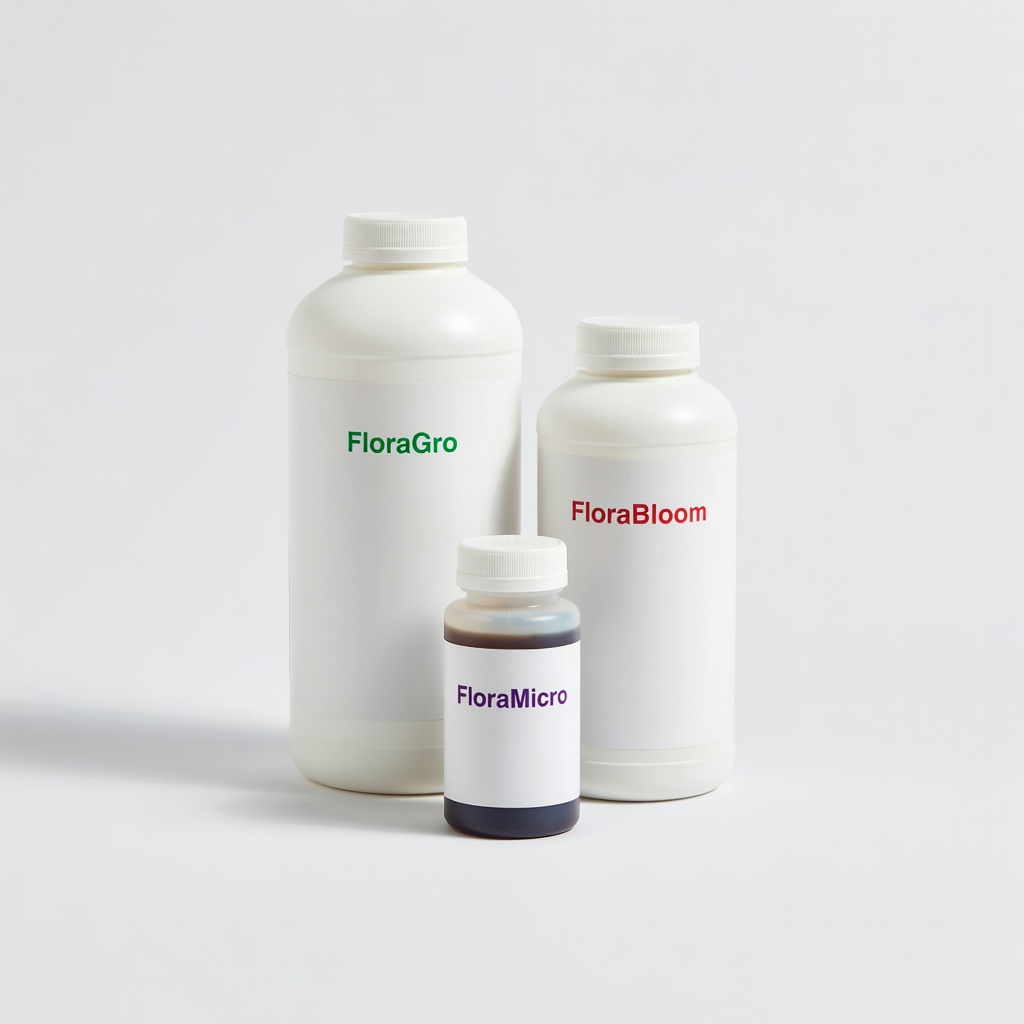
General Hydroponics Flora Series Nutrient Kit
Complete three-part formula provides balanced NPK for all growth stages, essential for hydroponic success without guesswork.
Best for: Mix into reservoir water weekly for veggies like lettuce; ideal for beginners scaling to intermediate.
Price Range: $30-$40
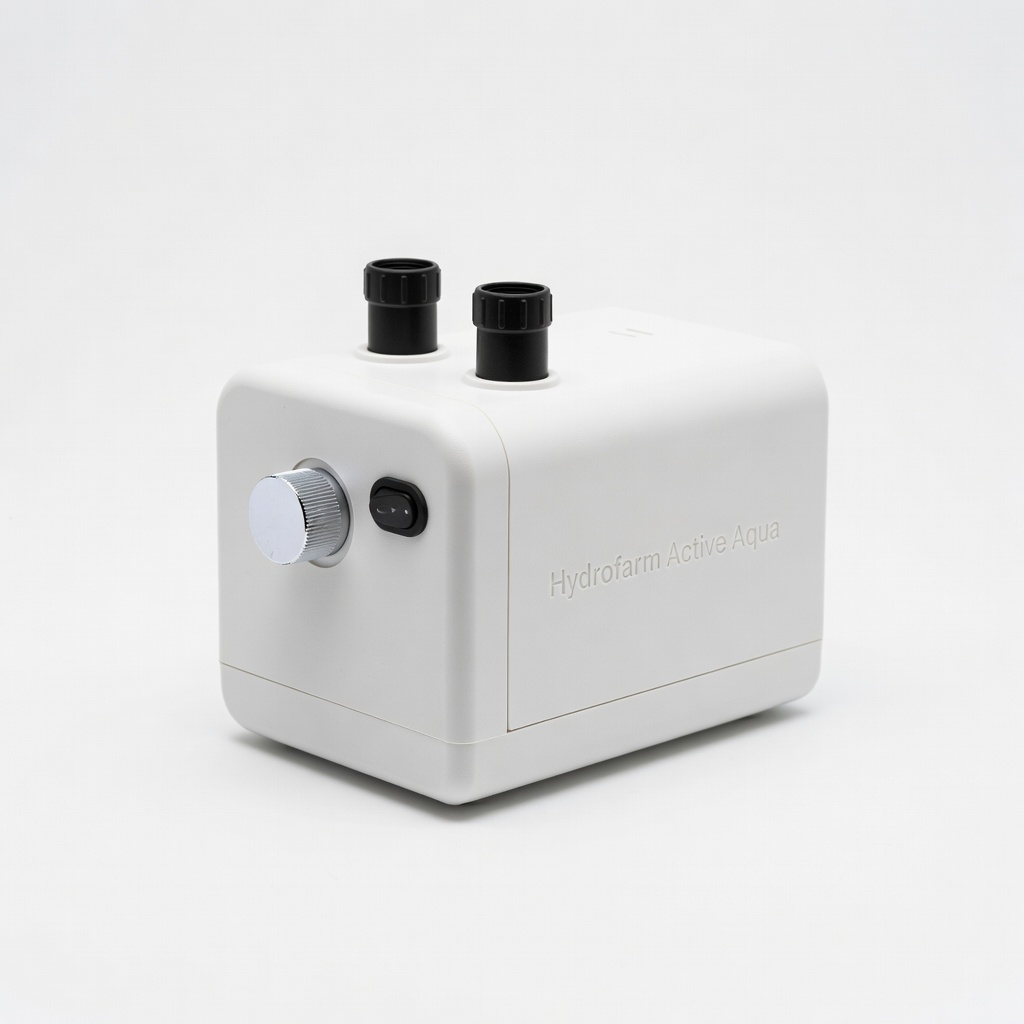
Hydrofarm Active Aqua Air Pump
Reliable 4-outlet pump ensures constant oxygenation, preventing root issues in DWC systems.
Best for: Connect to air stones for bubbling; use in setups up to 10 gallons for steady performance.
Price Range: $25-$35
Milwaukee pH600 Digital pH Meter
Accurate, waterproof meter with calibration for precise readings, crucial for intermediate hydroponics.
Best for: Test solution daily; calibrate monthly to maintain optimal pH and avoid lockout.
Price Range: $30-$40
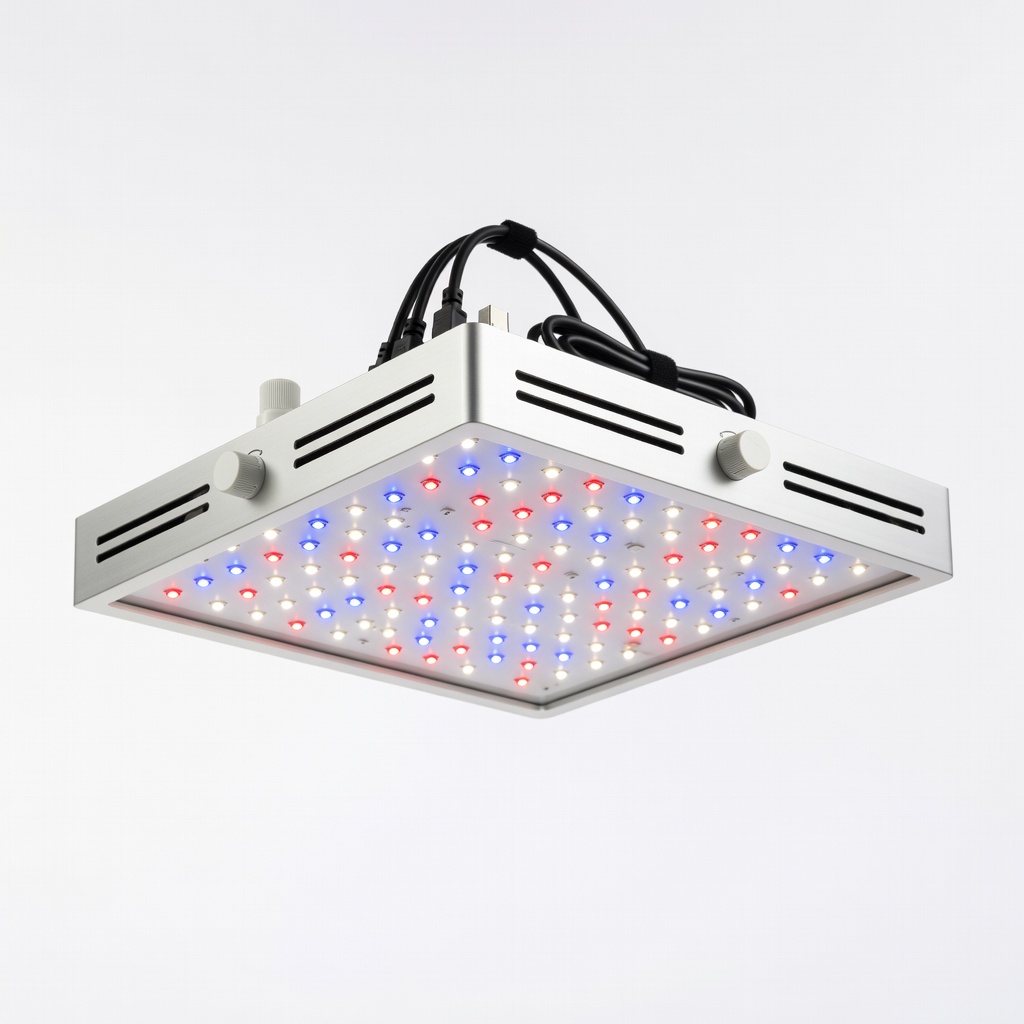
VIVOSUN Dimmable LED Grow Light
Full-spectrum, energy-efficient light covers 2x2 ft area, promoting healthy vegetative growth indoors.
Best for: Hang 12-18 inches above system for 14-16 hour cycles; dim for seedlings.
Price Range: $50-$70
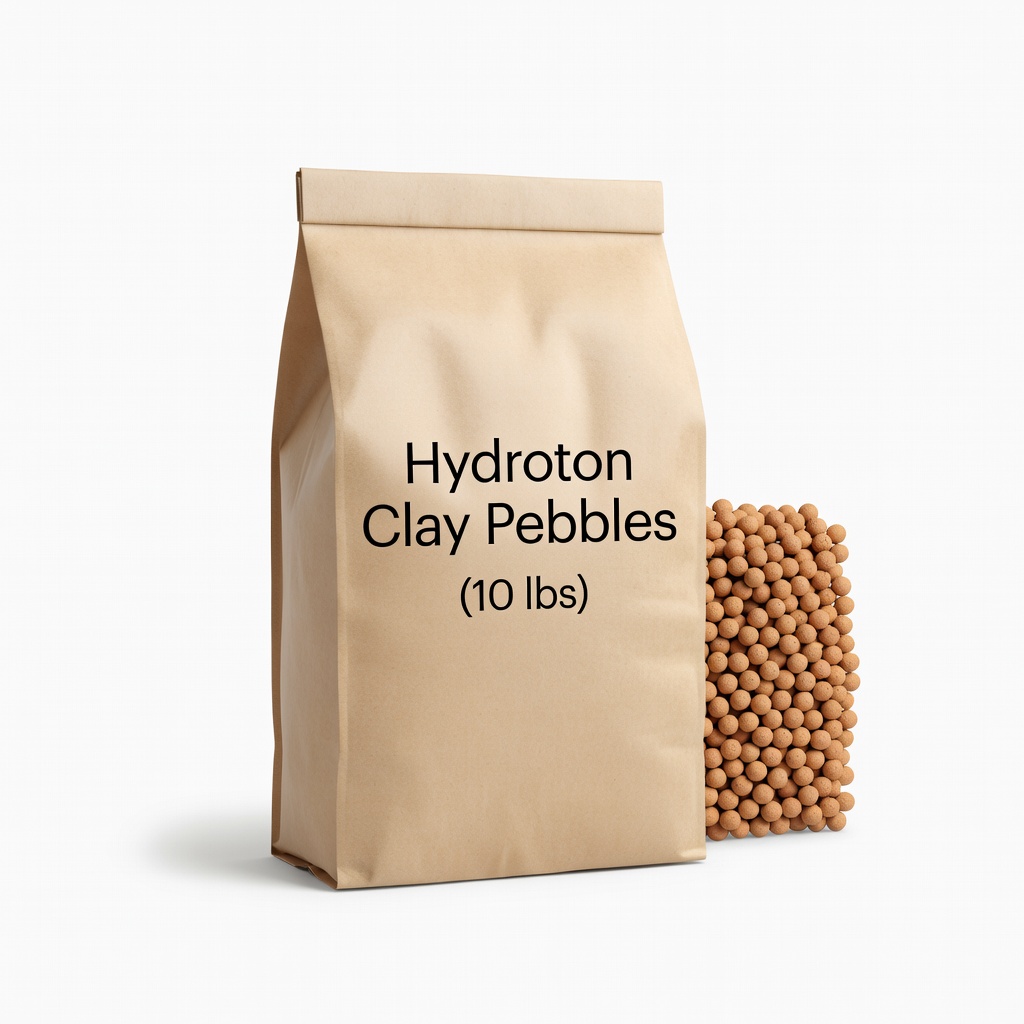
Hydroton Clay Pebbles (10 lbs)
Inert, pH-neutral medium supports roots without rotting, reusable after sterilization.
Best for: Fill net pots for seedlings; rinse before reuse to prevent clogs.
Price Range: $20-$25