If you've ever been mesmerized by the intricate, flowing sounds of acoustic guitarists like Tommy Emmanuel or Sungha Jung, you're likely hearing fingerstyle technique in action. This method replaces picks with your fingers to pluck individual strings, allowing for richer harmonies and expressive solos that feel more intimate than strumming. For beginners, it can seem daunting, but it's a rewarding skill that enhances your overall guitar playing and opens doors to genres like folk, classical, and blues.
In this guide, you'll learn what fingerstyle is, why it's valuable, and how to start practicing with simple, step-by-step instructions. We'll break it down from basics to exercises, focusing on acoustic guitars since they shine in this technique. Expect to spend 30-45 minutes on the initial setup and first practices, with daily sessions of 15-20 minutes recommended for progress. No prior advanced skills needed—just patience and consistency.
By the end, you'll understand the core principles and have actionable steps to play your first fingerstyle patterns, setting you on a path to confident playing without frustration.
▸What You'll Need
- •Acoustic guitar (steel-string recommended for beginners; nylon-string optional for classical feel)
- •Guitar tuner (clip-on or app-based)
- •Metronome (physical device or free app like Pro Metronome)
- •Comfortable seating (stool or chair without arms)
- •Optional: Capo for key changes, light-gauge strings for easier fretting
- •Prerequisite knowledge: Basic familiarity with guitar tuning and simple chords (e.g., open E, A, D)
Estimated Time: 30-45 minutes for initial learning and first practice session; 15-20 minutes daily for ongoing improvement over 1-2 weeks to see noticeable progress
Difficulty: beginner
▸Step-by-Step Instructions
Step 1: Understand the Fundamentals of Fingerstyle
Fingerstyle technique involves using your fingertips, nails, or flesh to pluck strings individually or in patterns, rather than strumming with a pick. It's like conducting an orchestra where each finger plays a different role: the thumb typically handles bass notes (root of the chord), while index, middle, and ring fingers manage melody and harmony on higher strings. This creates polyphonic music—multiple independent lines sounding simultaneously—mimicking a full band on one guitar.
Why it matters: Unlike strumming, fingerstyle builds dexterity, independence between hands, and musicality, making your playing more versatile and emotional. For acoustic guitars, it highlights the instrument's warm tone and resonance. Expect to feel awkward at first; it's normal as your fingers learn new movements.
Start by watching a short video demo (search 'beginner fingerstyle guitar basics') to visualize it.
💡 Tips:
- •Focus on relaxation—tense hands lead to sloppy plucks.
- •Use your fretting hand lightly to avoid muting strings.
⚠️ Warnings:
- •Don't rush into complex songs; build foundations first to prevent bad habits.
Step 2: Set Up Proper Posture and Hand Position
Sit comfortably with your guitar on your right thigh (for right-handed players), body at a 45-degree angle. Rest the neck in the web of your left thumb and index finger, keeping your fretting hand relaxed and curved like holding an orange. For your picking hand, anchor your pinky or ring finger lightly on the guitar body near the bridge for stability.
Position your thumb behind the neck for bass plucks (downward motion), and let fingers 1-3 (index, middle, ring) hover over strings 3-1 (G, B, high E). Why this matters: Good posture prevents strain and ensures clean notes; poor setup leads to fatigue or buzzing. You'll feel balanced and ready to play without hunching.
Tune your guitar first (standard EADGBE) using a clip-on tuner—essential for accurate practice.
💡 Tips:
- •Elevate your guitar slightly with a footstool for better ergonomics.
- •Practice hand positions without playing to build muscle memory.
⚠️ Warnings:
- •Avoid slouching; it can cause back pain over time.
Step 3: Develop Thumb Independence for Bass Lines
The thumb is your rhythmic foundation in fingerstyle, alternating bass notes on strings 6, 5, or 4 (low E, A, D) in a steady pattern, like a heartbeat. Pluck downward with a relaxed motion, syncing with a metronome at 60 BPM. Practice on an open E chord: Thumb plucks low E (6th string), then A (5th), repeating.
This matters because it separates bass from melody, creating depth—like a drummer and lead singer in one. Expect uneven timing initially; slow practice fixes this. Why bass first? It builds confidence before adding fingers.
Hold the chord shape lightly to let strings ring clearly.
💡 Tips:
- •Use a metronome to keep steady; apps are free and effective.
- •Alternate thumb directions if nails are short for better control.
⚠️ Warnings:
- •Don't let your thumb wander to higher strings—it muddies the sound.
Step 4: Practice Basic Finger Patterns on Treble Strings
Assign roles: Index (i) for string 3 (G), middle (m) for string 2 (B), ring (a) for string 1 (high E)—this 'i-m-a' pattern is classical roots. Start with arpeggios: On an open chord, pluck i-m-i-m-a in sequence, letting notes ring. Why? It teaches finger independence, like typing without looking.
Matters for melody creation; beginners often strum instead, missing nuance. Expect finger cramps at first—stretch beforehand. Combine with thumb: Thumb on bass, then i-m-a pattern.
Use simple open chords like Em or Am to start.
💡 Tips:
- •Start slow (40 BPM) and increase speed gradually.
- •Record yourself to hear clarity improvements.
⚠️ Warnings:
- •Avoid plucking with the same finger repeatedly—it causes fatigue.
Step 5: Combine into Simple Exercises and Songs
Now integrate: Practice Travis picking (thumb bass alternates while fingers play melody) on 'Dust in the Wind' intro—thumb on bass, fingers on G-B-E strings. Or try 'Blackbird' by Beatles for rolling patterns. Why? Applies theory to music, making practice fun.
Expect mistakes; it's about coordination. Matters for retention—exercises alone bore, but songs motivate. Play along with slowed-down tracks (YouTube has them).
Aim for 5-10 minutes per exercise, focusing on even volume across fingers.
💡 Tips:
- •Break songs into 4-bar sections.
- •Use lighter strings if fretting feels hard.
⚠️ Warnings:
- •Don't ignore dynamics—soft/loud variation adds expression.
Step 6: Build Speed and Accuracy with Repetition
Once comfortable, increase metronome speed by 5-10 BPM every few days. Focus on clean transitions between patterns, like switching chords mid-arpeggio. Why? Speed comes from repetition, turning awkward plucks into fluid music.
Matters for performance; beginners plateau without this. Expect plateaus—rest days help. Track progress in a journal.
Incorporate variations, like adding hammer-ons/pull-offs for flair.
💡 Tips:
- •Warm up with scales using fingerstyle.
- •Practice with eyes closed for feel-based playing.
⚠️ Warnings:
- •Pushing too fast leads to sloppy technique—quality over speed.
▸Pro Tips
- •Keep nails short and filed if using them—smooth edges prevent string snags.
- •Practice in short bursts (10-15 mins) to avoid hand fatigue; consistency beats marathon sessions.
- •Listen to masters like Chet Atkins for inspiration—mimic their patterns slowly.
- •Use a mirror to check hand position without straining.
- •Incorporate breathing exercises to stay relaxed during play.
- •Record daily sessions to track tone improvements over time.
- •Experiment with different guitars—steel-string acoustics give brighter fingerstyle sound.
▸Common Mistakes to Avoid
- •Tensing up the picking hand: Causes fatigue and uneven plucks; avoid by shaking out hands between exercises.
- •Ignoring left-hand muting: Mutes unwanted strings; fix by lightly touching non-played strings with fretting fingers.
- •Skipping the metronome: Leads to inconsistent rhythm; always use it to build timing.
- •Starting with complex songs: Overwhelms beginners; stick to basics for 1-2 weeks first.
- •Poor posture from the start: Results in pain; check setup daily.
▸Troubleshooting
Problem: Fingers cramp or tire quickly
Solution: Stretch wrists and fingers before playing; start with 5-minute sessions and build up. Use lighter tension strings if persistent.
Problem: Strings buzz or sound muted
Solution: Check fretting pressure—press just behind the fret. Ensure picking hand isn't damping strings; adjust anchor point.
Problem: Uneven rhythm or timing
Solution: Slow down to 50% speed with metronome; tap foot to internalize beat. If needed, consult a teacher for personalized feedback.
Problem: Thumb overpowers other fingers
Solution: Practice treble-only patterns first to balance volume. Pluck lighter with thumb.
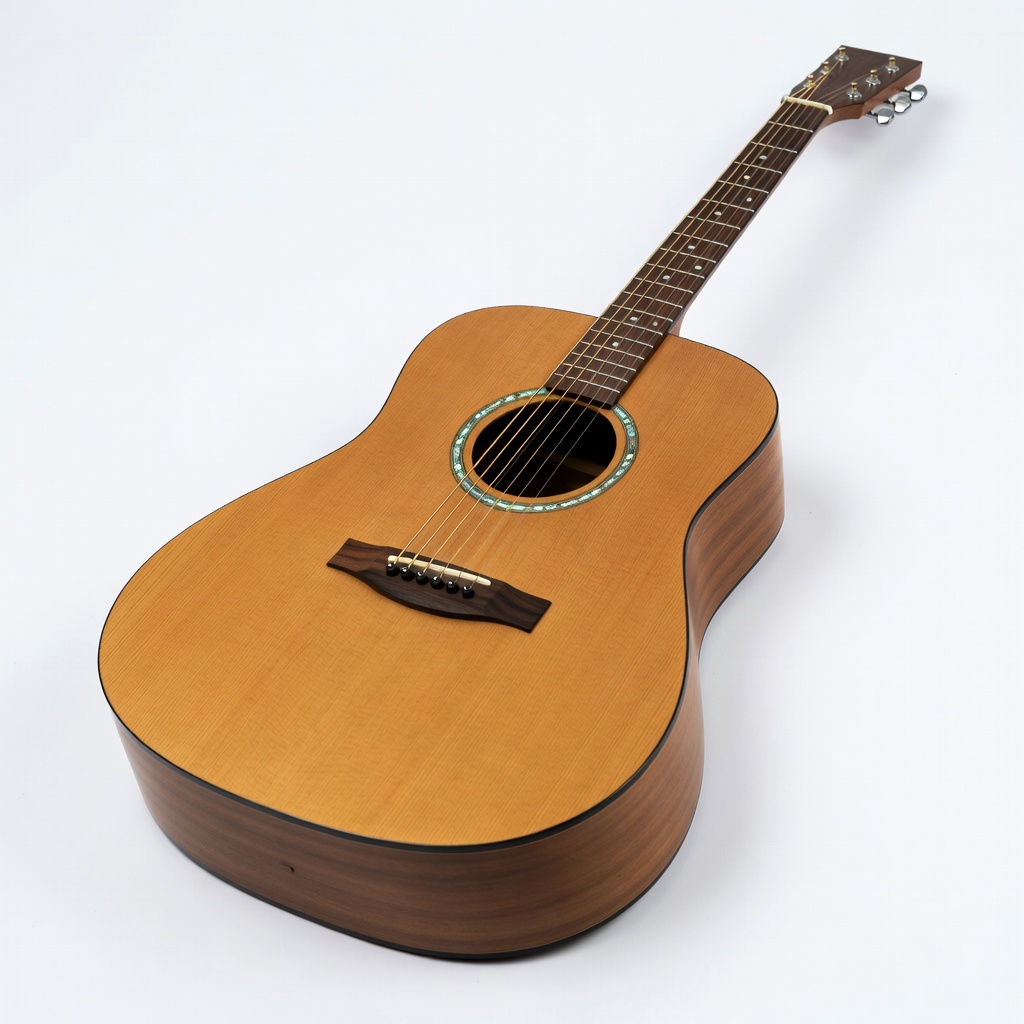
Yamaha FG800 Solid Top Acoustic Guitar
Excellent for beginners with its balanced tone and comfortable playability, ideal for fingerstyle as the solid spruce top enhances resonance without being too bright.
Best for: Daily practice and learning basic to intermediate patterns; great starter for acoustic fingerstyle.
Price Range: $200-$250
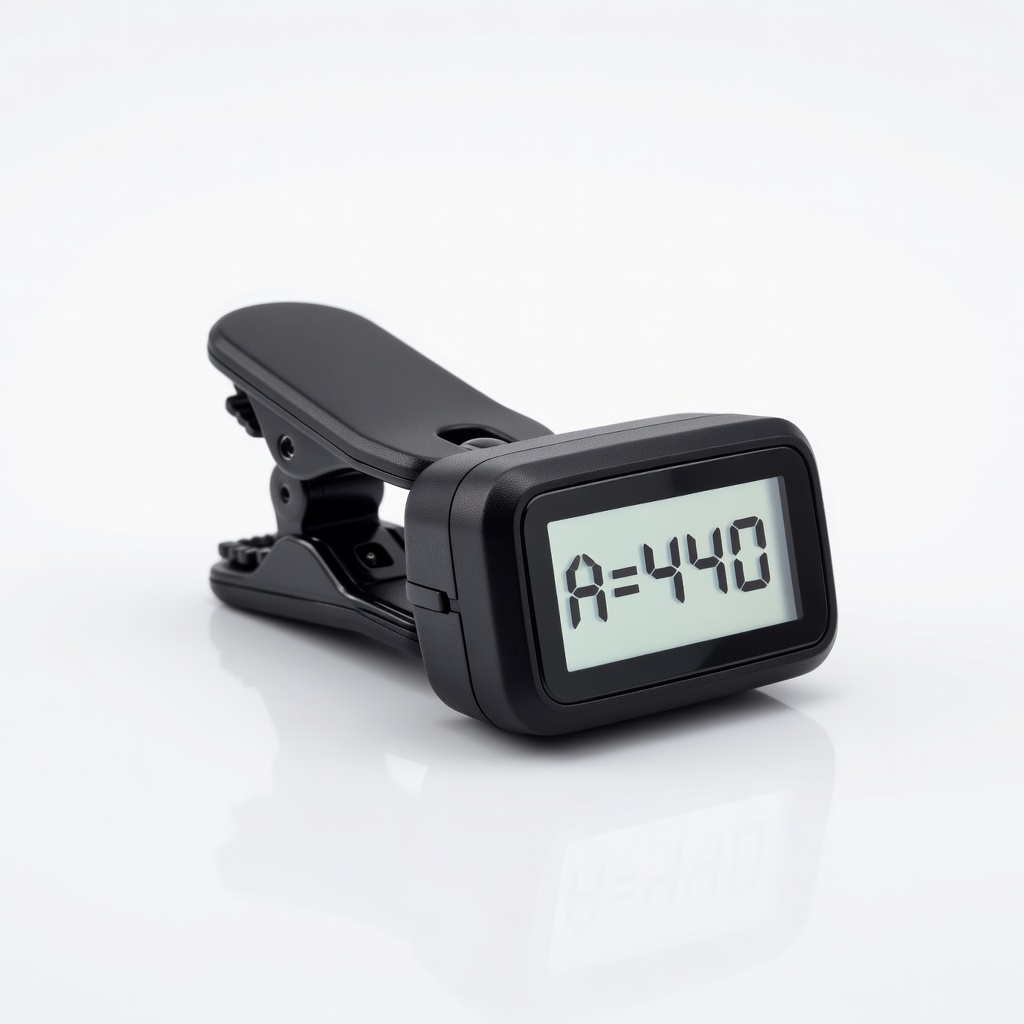
Snark SN-2 Clip-On Tuner
Accurate and easy-to-use for quick tuning, essential for clean fingerstyle where intonation matters; vibrates for silent practice.
Best for: Tuning before every session to ensure notes ring true, especially with open strings common in fingerstyle.
Price Range: $12-$15
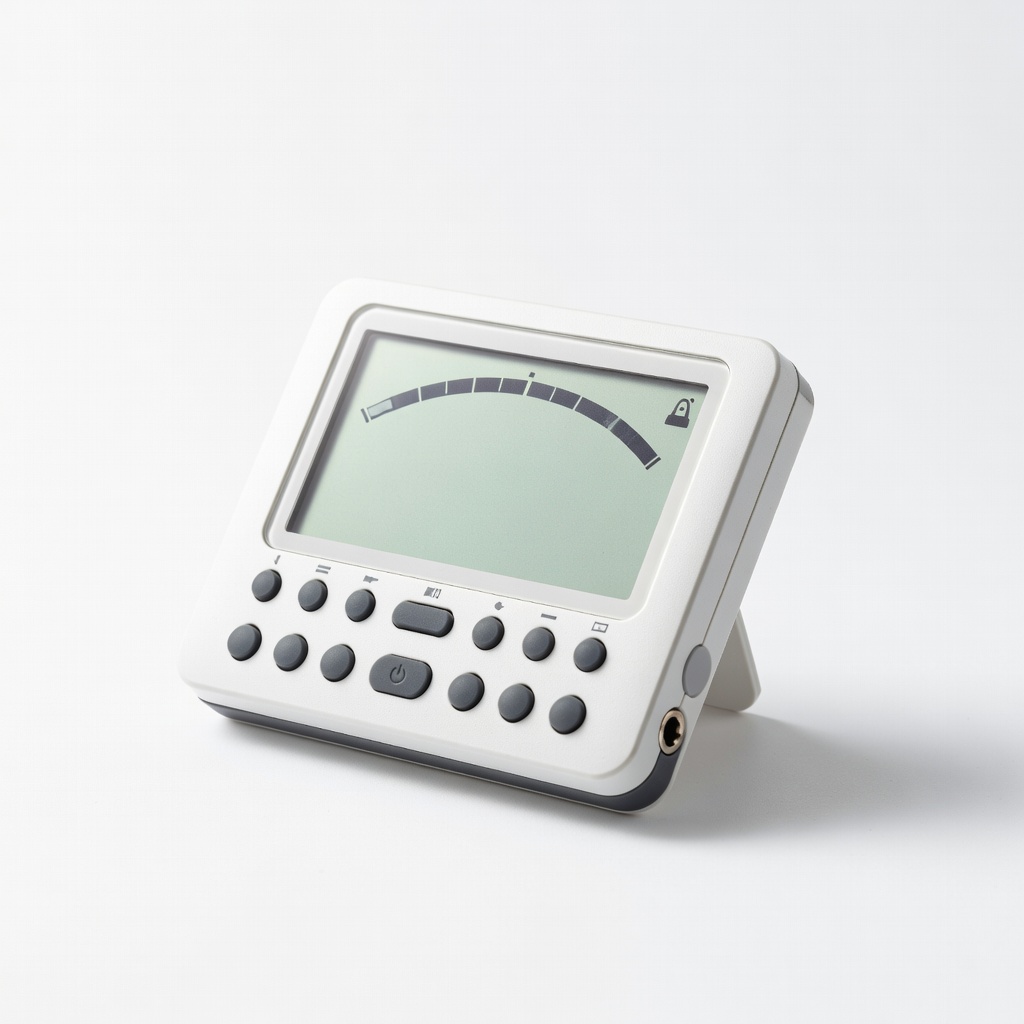
Korg TM-60 Combo Tuner Metronome
Combines tuner and metronome in one compact device, helping maintain rhythm crucial for fingerstyle independence.
Best for: Building speed in exercises; set to 60 BPM for bass patterns and gradually increase.
Price Range: $30-$40
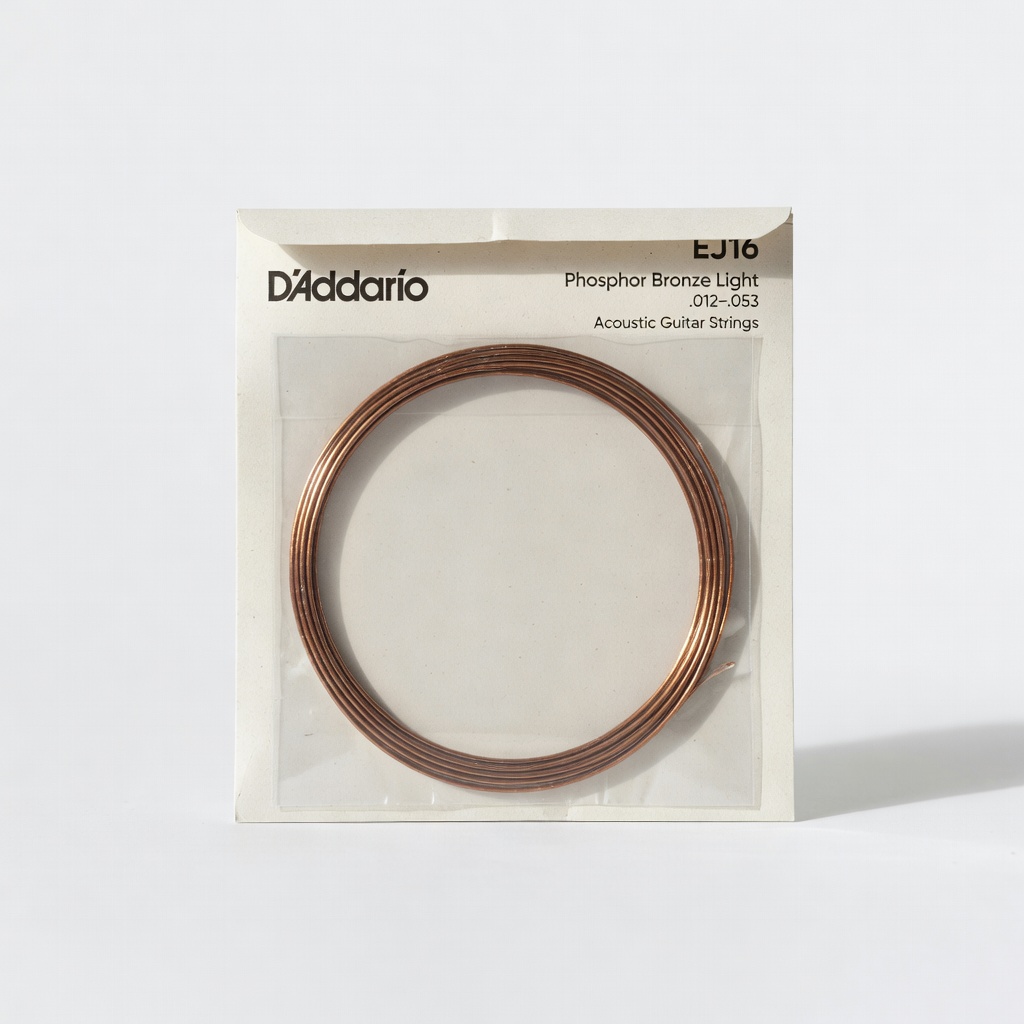
D'Addario EJ16 Phosphor Bronze Light Acoustic Guitar Strings
Light gauge (12-53) reduces finger pressure for easier fretting and plucking, preventing fatigue in beginners learning fingerstyle.
Best for: Change strings every 1-3 months for fresh tone; enhances clarity in polyphonic playing.
Price Range: $8-$12
Shubb C1 Classic Capo
Quickly changes keys without retuning, allowing experimentation with fingerstyle in different positions for variety.
Best for: Practice songs in higher keys to challenge patterns; rubber clamp protects fretboard.
Price Range: $18-$22