Kombucha has exploded in popularity as a tangy, effervescent drink touted for its gut-health benefits, but many beginners wonder what it really is and if brewing it at home is safe. With store-bought bottles often pricey and full of additives, DIY brewing offers a cost-effective way to enjoy fresh kombucha tailored to your taste. However, improper fermentation can lead to contamination or off-flavors, making safety knowledge essential.
In this guide, you'll learn what kombucha is—a fermented tea beverage—how the fermentation process works, and step-by-step instructions for safe home brewing. We'll cover the science simply, using analogies like comparing the process to making sourdough bread. Expect to spend just 30-60 minutes on active prep, with fermentation taking 7-14 days; it's beginner-friendly with no advanced skills needed, but patience is key for success.
By the end, you'll confidently brew your first batch, understanding risks like mold and how to avoid them, empowering you to experiment with flavors while prioritizing health.
▸What You'll Need
- •SCOBY (Symbiotic Culture of Bacteria and Yeast) - required; can be purchased or grown from store-bought kombucha
- •Black or green tea bags (8-10) - required for the base
- •White sugar (1 cup) - required; do not substitute with alternatives like honey initially
- •Filtered water (1 gallon) - required to avoid chlorine that kills cultures
- •Glass brewing jar (1-gallon wide-mouth) - required; avoid metal or plastic
- •Cloth cover and rubber band - required to keep out bugs while allowing air
- •pH strips or test kit - optional but recommended for safety monitoring
- •Bottles for secondary fermentation (glass swing-top) - optional for carbonation
- •Starter tea (1-2 cups unflavored kombucha) - required if not using a full SCOBY kit
Estimated Time: 30-60 minutes active time + 7-14 days fermentation
Difficulty: beginner
▸Step-by-Step Instructions
Step 1: Understand What Kombucha Is
Kombucha is a fermented tea drink made from sweetened tea that's transformed by a SCOBY—a rubbery, pancake-like culture of bacteria and yeast. Think of it like yogurt: beneficial microbes eat the sugar, producing acids, probiotics, and a bit of alcohol (under 0.5% typically), resulting in a tangy, fizzy beverage rich in antioxidants.
This process dates back thousands of years, originating in China, and gained modern fame for potential health perks like improved digestion, though scientific evidence is emerging. For beginners, knowing this basics helps demystify brewing—it's not magic, just controlled fermentation similar to sauerkraut or kefir.
Expect a vinegary smell during brewing; that's normal and indicates healthy activity. This step sets the foundation for safe DIY, as understanding the 'why' prevents mishandling the culture.
💡 Tips:
- •Start with unflavored store-bought kombucha to grasp the taste before customizing.
⚠️ Warnings:
- •Avoid confusing kombucha with alcohol; it's low-ABV but not suitable for children or those avoiding trace alcohol.
Step 2: Learn the Fermentation Science Basics
Fermentation in kombucha involves two phases: primary, where the SCOBY converts sugar and tea into acids and CO2 in an aerobic (with oxygen) environment, and secondary, where bottled kombucha ferments anaerobically for fizziness.
Analogize it to a garden: the SCOBY is the gardener (microbes) turning raw ingredients (tea and sugar) into a balanced ecosystem. Key players are acetic acid bacteria (for tang) and yeasts (for bubbles). The result? A drink with a pH of 2.5-3.5, naturally preserving it against bad bacteria.
Why it matters: This knowledge helps monitor progress—look for a new SCOBY layer forming on top, signaling success. For safety, maintain temperatures around 68-85°F to favor good microbes over pathogens.
💡 Tips:
- •Use a thermometer to track temp; apps can remind you to check.
Step 3: Gather and Sanitize Equipment
Before brewing, collect your materials and sanitize everything to prevent contamination, which is the top safety risk in DIY kombucha. Boil water for tea, and clean your jar with hot soapy water or a mild vinegar solution—avoid bleach, as it kills the SCOBY.
Sanitization mimics professional brewing hygiene; it's crucial because wild yeasts or molds can spoil the batch, leading to health issues like upset stomach. Expect this step to take 10-15 minutes, ensuring a clean start.
Pro tip: If using a kit, it often includes pre-sanitized tools, simplifying for beginners.
⚠️ Warnings:
- •Never use metal utensils; they react with acids and can leach toxins.
Step 4: Brew the Sweet Tea Base
Boil 1 gallon of filtered water, steep 8 tea bags for 10-15 minutes, then stir in 1 cup sugar until dissolved. Cool to room temperature (below 85°F) before adding SCOBY—this prevents killing the culture with heat.
The tea provides tannins for the microbes, sugar is their food, and cooling ensures survival. You'll have a sweet, tea-scented liquid ready for fermentation. This step is straightforward but vital for flavor balance.
What to expect: The mixture darkens and smells like strong tea; improper cooling can halt fermentation, so use an ice bath if needed.
💡 Tips:
- •Organic tea yields better results without pesticides harming the SCOBY.
Step 5: Add SCOBY and Starter Tea
Pour the cooled sweet tea into your sanitized jar, add 1-2 cups starter tea, then gently place the SCOBY on top. Cover with cloth secured by a rubber band to allow airflow while blocking fruit flies.
This inoculates the brew with acids that lower pH quickly, creating an acidic environment inhospitable to pathogens—key for safety. Fermentation starts immediately, with bubbles forming in 1-2 days.
Handle the SCOBY carefully; it's alive and reusable. If it's your first time, a kit's SCOBY is hydrated and ready, reducing shock.
⚠️ Warnings:
- •Don't touch the SCOBY with dirty hands; wash thoroughly to avoid introducing contaminants.
Step 6: Ferment and Monitor Safely
Place the jar in a warm, dark spot (68-85°F) for 7-14 days. Taste daily after day 7 using a clean straw—aim for a balance of sweet and tangy. Check for mold (fuzzy spots) and discard if seen.
Monitoring pH (below 4.2 is safe) prevents bacterial overgrowth. Why it matters: Time controls flavor; too long makes it vinegary. Expect a hotel-like SCOBY layer on top.
Safety first: If it smells rancid (not vinegary), stop and troubleshoot.
💡 Tips:
- •Taste-test helps personalize; beginners often prefer 7-10 days.
⚠️ Warnings:
- •Mold is rare with proper sanitation but dangerous—black/green fuzz means toss the batch.
Step 7: Bottle and Secondary Ferment
Remove SCOBY with clean hands, reserve 2 cups liquid as starter for next batch. Pour kombucha into bottles, add fruit juice for flavor if desired, seal, and ferment 1-3 days at room temp for carbonation.
Secondary fermentation builds fizz as yeasts produce more CO2 in sealed bottles. Burp daily to avoid explosions. Refrigerate to stop; it's now ready to drink.
This step enhances enjoyment but requires caution—over-fermentation can cause bottle bombs.
💡 Tips:
- •Start with 1 tsp juice per bottle for mild carbonation.
Step 8: Store and Enjoy Safely
Chill bottles for 24 hours, then consume within 1 month. Share or gift extras, but educate on storage. Track your batch notes for improvements.
Proper storage maintains probiotics; warm temps restart fermentation. You've now safely brewed kombucha, understanding its fermented nature and risks.
Celebrate your beginner success—each batch gets easier!
⚠️ Warnings:
- •Don't drink if it tastes alcoholic or off; start small (4-8 oz daily).
▸Pro Tips
- •Use filtered water always—tap chlorine kills SCOBY; a simple pitcher filter saves batches.
- •Experiment with teas after your first brew; green for milder, black for bolder flavors.
- •Keep a 'SCOBY hotel' jar with extra cultures in sweet tea to start future batches quickly.
- •Monitor with a kitchen thermometer; consistent 75°F speeds reliable fermentation.
- •Add flavors post-primary to avoid overwhelming the culture—ginger or berries work best.
- •Label bottles with dates to track carbonation and prevent over-ferment surprises.
- •If short on time, brew smaller 1/2 gallon batches to test variables faster.
▸Common Mistakes to Avoid
- •Using hot tea on SCOBY: Kills the culture, halting fermentation—always cool fully first.
- •Poor sanitation leading to mold: Introduces contaminants; rigorously clean to avoid wasting ingredients.
- •Ignoring temperature: Too cold slows process, too hot favors bad bacteria—use a stable spot.
- •Over-sweetening or under-fermenting: Results in sugary drink without benefits; taste-test diligently.
- •Sealing primary ferment tightly: Needs air; cloth cover prevents oxygen deprivation and off-flavors.
▸Troubleshooting
Problem: No bubbles or fermentation after 3 days
Solution: Check temperature (warm it up) or starter strength; add more starter tea and wait—may need a new SCOBY.
Problem: Mold appears on surface
Solution: Discard entire batch immediately; sanitize everything and start over with a fresh SCOBY to avoid health risks.
Problem: Kombucha tastes too vinegary
Solution: Shorten future ferments to 5-7 days; dilute with fresh sweet tea if salvageable.
Problem: Bottles are flat (no fizz)
Solution: Extend secondary ferment 1-2 days or add more sugar/juice; ensure tight seals next time.
Problem: SCOBY sinks instead of floats
Solution: Normal for new SCOBYs—healthy ones float eventually; doesn't affect brew quality.
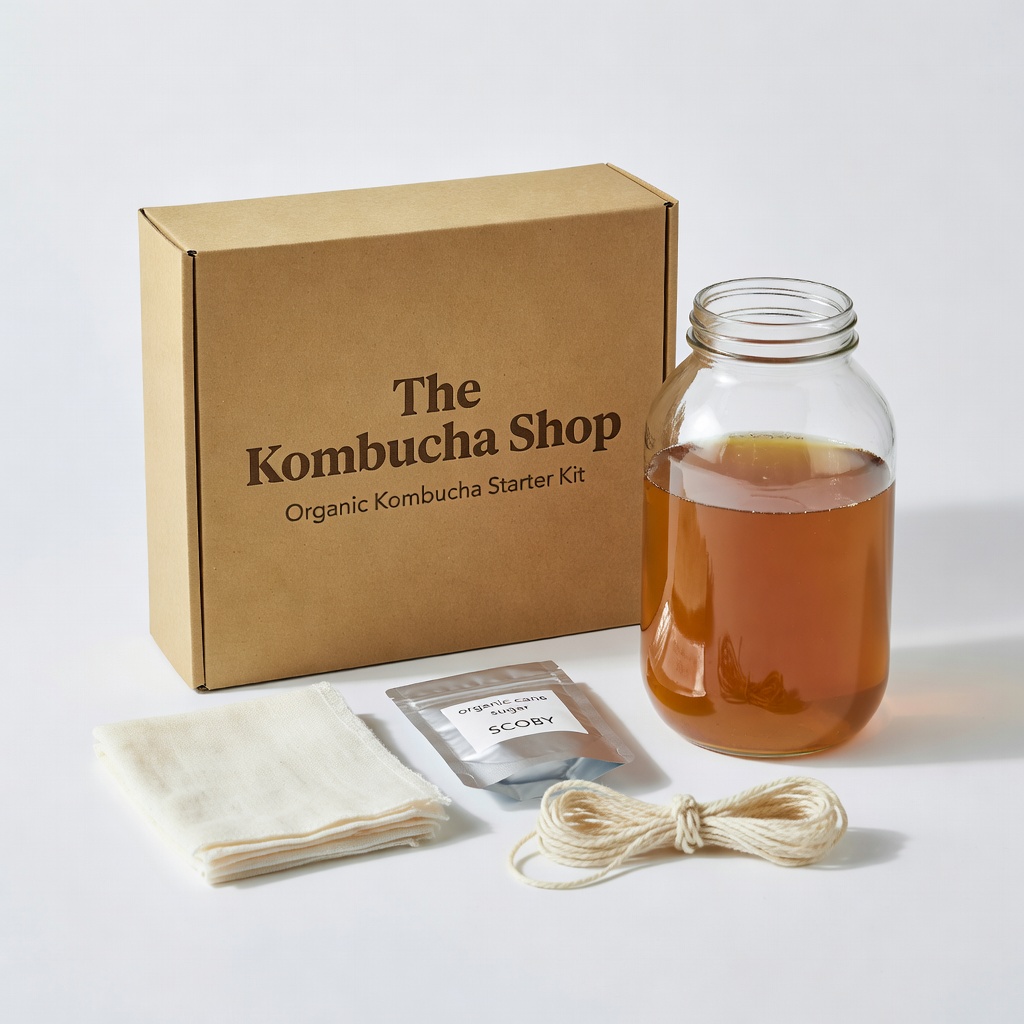
The Kombucha Shop Organic Kombucha Starter Kit
Includes a live SCOBY, organic tea, and sanitized jar—perfect for beginners to ensure safe, contamination-free starts without sourcing separately.
Best for: Ideal for your first brew; simplifies gathering materials and reduces errors in sanitation.
Price Range: $29.99
Cultures for Health Kombucha Brewing Kit
Comes with everything needed plus instructions; the glass jar is lead-free and fermentation-safe, promoting hygiene crucial for DIY safety.
Best for: Use for ongoing batches; reusable components make scaling up easy as you gain confidence.
Price Range: $39.99-$49.99
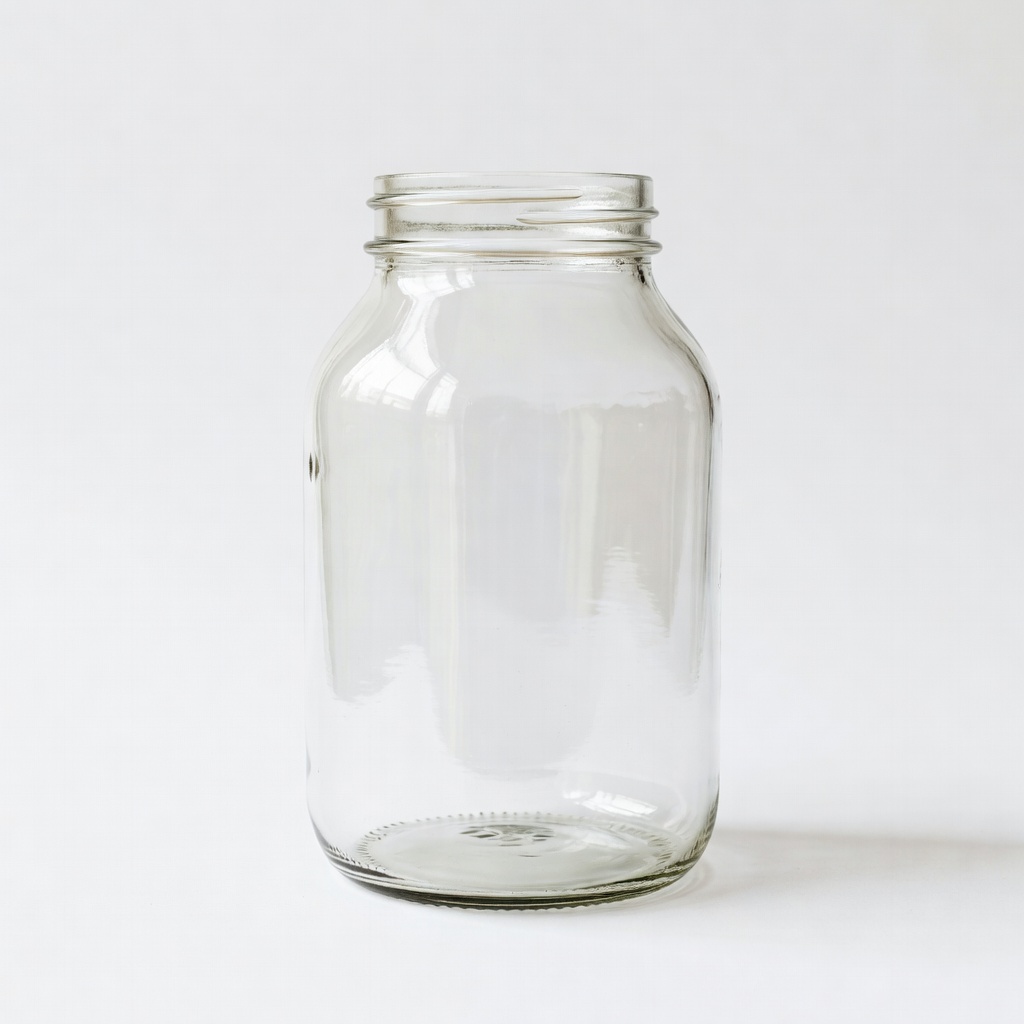
Fermentaholics 1 Gallon Wide Mouth Glass Jar
BPA-free glass designed for fermentation with airtight lid option; prevents metal reactions and allows easy monitoring, enhancing safety.
Best for: Essential for primary brewing; pair with cloth for breathable cover during the 7-14 day ferment.
Price Range: $14.99
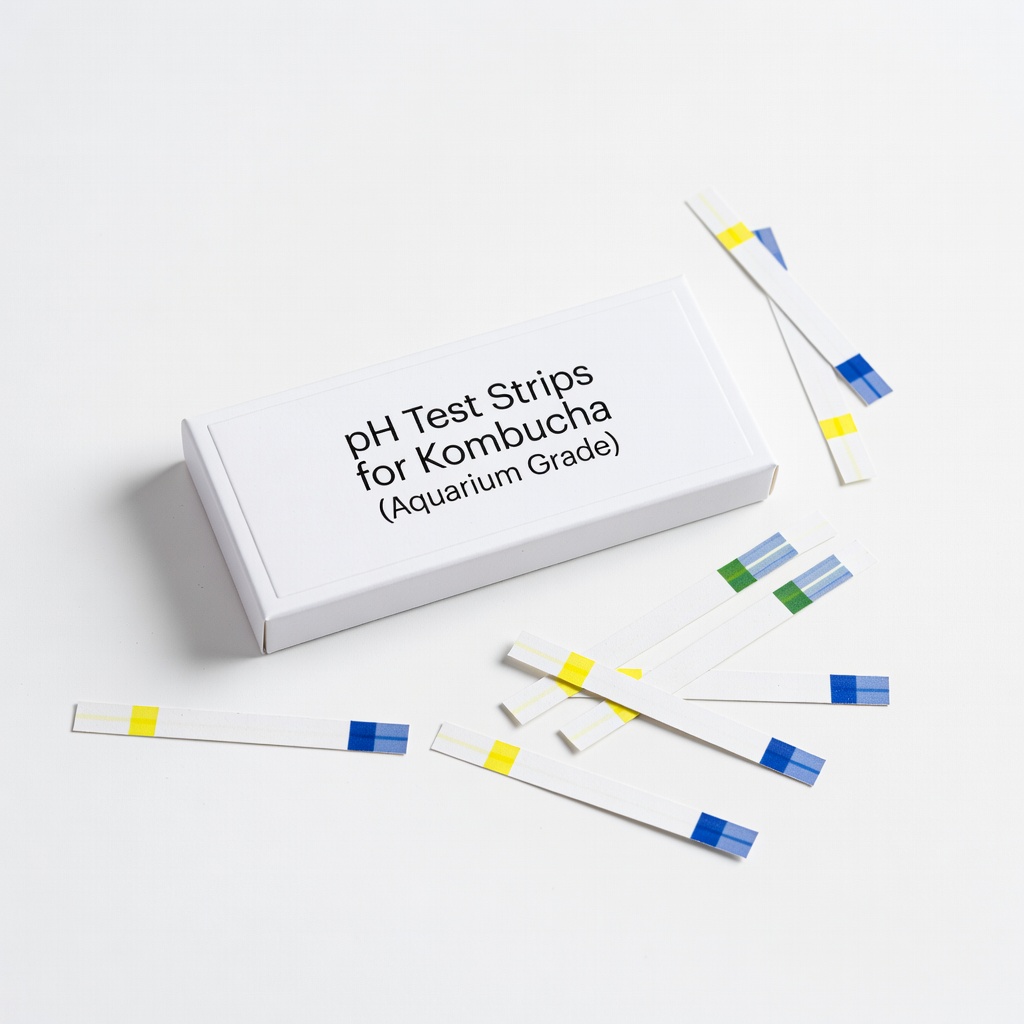
pH Test Strips for Kombucha (Aquarium Grade)
Accurate pH testing ensures safe acidity levels (below 4.2); vital for beginners to detect issues early without guesswork.
Best for: Test daily during fermentation to confirm healthy progress and avoid contaminated batches.
Price Range: $8.99
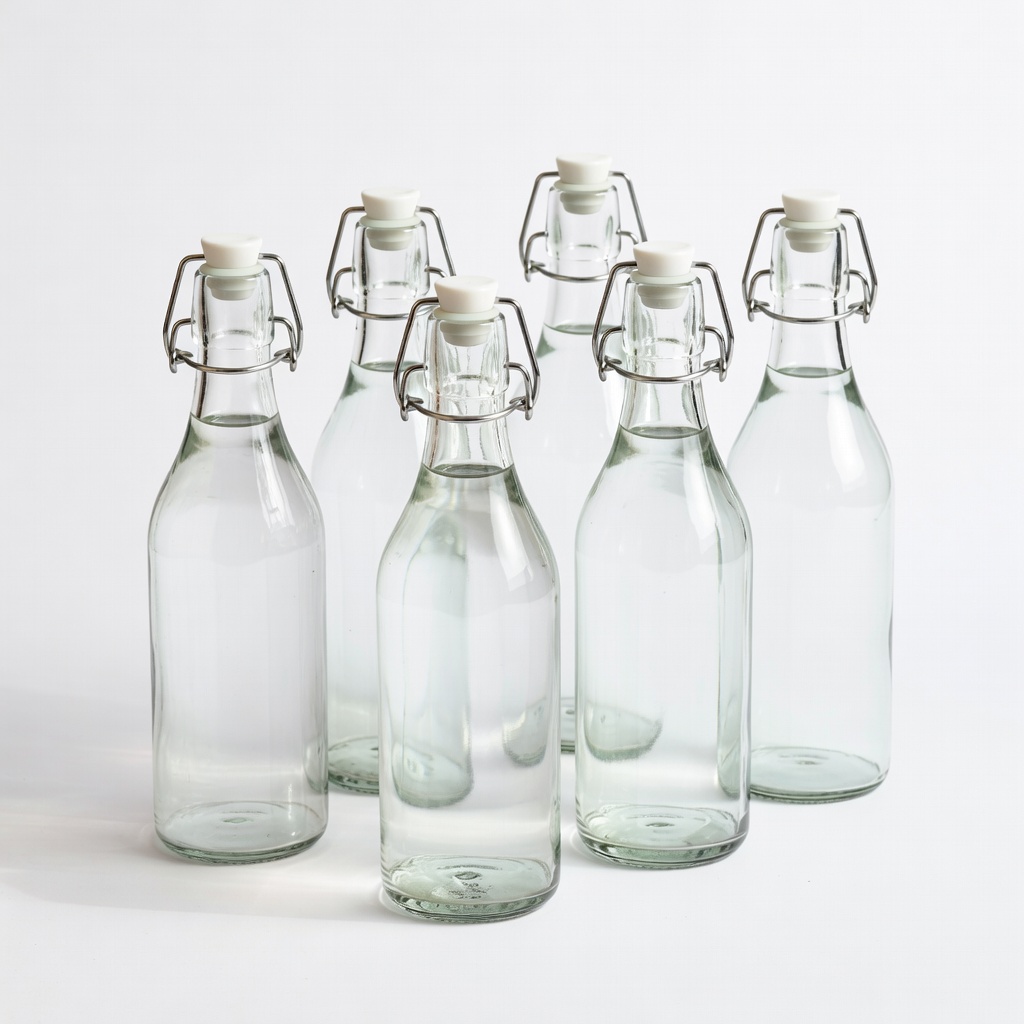
Bormioli Rocco Fido Glass Swing-Top Bottles (Set of 6)
Durable, airtight bottles perfect for secondary fermentation; flip-top seals build safe carbonation without leaks or explosions.
Best for: Bottle your finished kombucha for fizz; reusable for flavored batches over time.
Price Range: $19.99