Home brewing can be a rewarding hobby, turning simple ingredients into delicious beer, but one of the most crucial steps—fermentation—often trips up beginners. Without understanding it, you risk off-flavors, spoiled batches, or even health hazards. This guide demystifies fermentation, explaining how it works and why safety is non-negotiable.
You'll learn what fermentation is, its role in brewing, the step-by-step process, and practical safety tips to keep your brew safe and enjoyable. Whether you're just starting with a basic beer kit or dreaming of craft-level results, this explainer breaks it down simply. No prior experience needed—just curiosity and a desire to brew safely.
Expect a conceptual overview rather than a full recipe; the actual fermentation process takes 1-2 weeks, but grasping these basics will take you just 10-15 minutes to read. By the end, you'll feel confident tackling your first ferment.
▸What You'll Need
- •Basic brewing ingredients (malt, hops, yeast, water)—required for hands-on practice
- •Fermentation vessel (glass carboy or food-grade plastic bucket)—required
- •Sanitizer (like Star San or no-rinse iodophor)—essential for safety
- •Airlock and stopper—required to allow CO2 escape while blocking contaminants
- •Hydrometer (optional but recommended for monitoring progress)
- •Prerequisite knowledge: Basic understanding of sanitation and temperature control
Estimated Time: 10-15 minutes to read; 1-2 weeks for actual fermentation process
Difficulty: beginner
▸Step-by-Step Instructions
Step 1: Understand the Basics of Fermentation
Fermentation is a natural process where yeast converts sugars from malted grains into alcohol and carbon dioxide (CO2), creating beer. Think of it like a microscopic party: yeast 'eats' the sugars (from your wort, the pre-fermentation liquid) and produces ethanol as a byproduct, while CO2 gives beer its fizz.
In home brewing, this happens after boiling and cooling your wort. It's anaerobic (without oxygen), typically in a sealed vessel. For beginners, start with ale yeast, which ferments at room temperature (65-75°F), making it forgiving.
Why it matters: Without fermentation, you'd have sweet, flat wort—not beer. Expect bubbling and a yeasty smell as signs it's working.
💡 Tips:
- •Use a yeast starter for faster, healthier fermentation.
- •Analogy: It's like baking bread, but instead of rising dough, you get bubbly beer.
⚠️ Warnings:
- •Avoid wild yeast contamination by always sanitizing equipment.
Step 2: Prepare Your Fermentation Setup
Before adding yeast, sanitize everything that touches the wort. Fill your fermenter with cool, aerated wort (the boiled, hopped malt liquid), then pitch (add) the yeast.
Seal with an airlock filled with sanitizer water to let CO2 escape without letting air or bacteria in. Place in a dark, stable spot away from vibrations.
This step ensures a clean start. Expect the yeast to activate within 12-24 hours, shown by krausen (foamy head).
💡 Tips:
- •Aerate the wort by stirring vigorously to give yeast oxygen for initial growth.
⚠️ Warnings:
- •Never skip sanitizing—it's the #1 cause of infected batches.
Step 3: Monitor Temperature During Fermentation
Yeast is picky about temperature; too hot (above 80°F) and it creates fusel alcohols (harsh flavors), too cold (below 60°F) and it stalls.
Use a thermometer or temperature-controlled fermenter. Primary fermentation lasts 3-7 days for ales, secondary (optional) 1-2 weeks for clarity.
Why it matters: Consistent temps yield balanced beer. You'll see activity slow as sugars deplete.
💡 Tips:
- •Wrap the fermenter in a towel for insulation in varying room temps.
⚠️ Warnings:
- •Sudden temp swings can stress yeast, leading to off-flavors.
Step 4: Recognize Signs of Successful Fermentation
Look for vigorous bubbling in the airlock (1-2 per second initially), then slowing. Use a hydrometer to check specific gravity (SG): Start at 1.050, end around 1.010 for 5% ABV beer.
Taste a sample if siphoning to secondary— it should taste alcoholic, not sweet.
This confirms the yeast did its job. Expect a beer-like aroma by day 5.
💡 Tips:
- •Take daily gravity readings after day 3 to track progress without opening the vessel much.
⚠️ Warnings:
- •Don't bottle too early; under-attenuated beer can explode from CO2 buildup.
Step 5: Implement Key Safety Measures
Safety starts with sanitation: Use food-grade materials and no-rinse sanitizers. Wear gloves when handling, and avoid breathing CO2-heavy air in enclosed spaces (it can displace oxygen).
Check for contamination signs like foul odors (vinegar or rot). If infected, discard safely—don't drink.
Why it matters: Poor hygiene risks bacterial growth, causing illness. Fermentation vessels can build pressure, so use blow-off tubes if needed.
💡 Tips:
- •Test sanitizer strength with strips for effectiveness.
⚠️ Warnings:
- •Never use bleach for sanitizing—it leaves residues that kill yeast.
Step 6: Bottle and Store Safely Post-Fermentation
Once gravity stabilizes (no change for 2-3 days), siphon to a bottling bucket, add priming sugar for carbonation, and bottle. Store at 70°F for 1-2 weeks to carbonate.
Chill and enjoy, but age some styles longer for better flavor.
This wraps fermentation safely. Expect clear, carbonated beer if done right.
💡 Tips:
- •Use a bottling wand to avoid sediment disturbance.
⚠️ Warnings:
- •Over-carbonation from excess sugar can cause bottle bombs—measure precisely.
▸Pro Tips
- •Keep a brewing journal to note temps, gravities, and notes for future batches.
- •Invest in a fermentation chamber (like a mini-fridge) for precise temp control.
- •Use dry yeast packets for beginners—they're foolproof and store easily.
- •Ferment in a closet or basement to minimize light exposure, preventing skunking.
- •Add yeast nutrients if using extracts to boost fermentation health.
- •Time your pitch for evening so activity starts overnight without disturbance.
- •Clean equipment immediately after use to prevent hard-to-remove residues.
▸Common Mistakes to Avoid
- •Skipping sanitation, leading to wild yeast or bacteria infections—always sanitize twice.
- •Ignoring temperature, resulting in fruity or solvent off-flavors—use a consistent environment.
- •Bottling too early before full attenuation, causing gushers or bottle explosions—wait for stable gravity.
- •Over-pitching yeast, which can make beer bland—follow packet instructions.
- •Exposing wort to oxygen post-fermentation, oxidizing flavors—minimize splashing when transferring.
▸Troubleshooting
Problem: No bubbling after 24 hours
Solution: Check temperature (warm it up if cold) and re-pitch fresh yeast. Ensure airlock isn't clogged.
Problem: Foul smell like vinegar or sulfur
Solution: Likely infection—discard the batch. Sanitize everything thoroughly next time.
Problem: Fermentation stuck midway
Solution: Gently swirl the vessel to rouse yeast, or add fresh yeast. Check for low temps.
Problem: Beer tastes too sweet after bottling
Solution: Under-attenuated; next time, use a more attenuative yeast strain and monitor gravity.
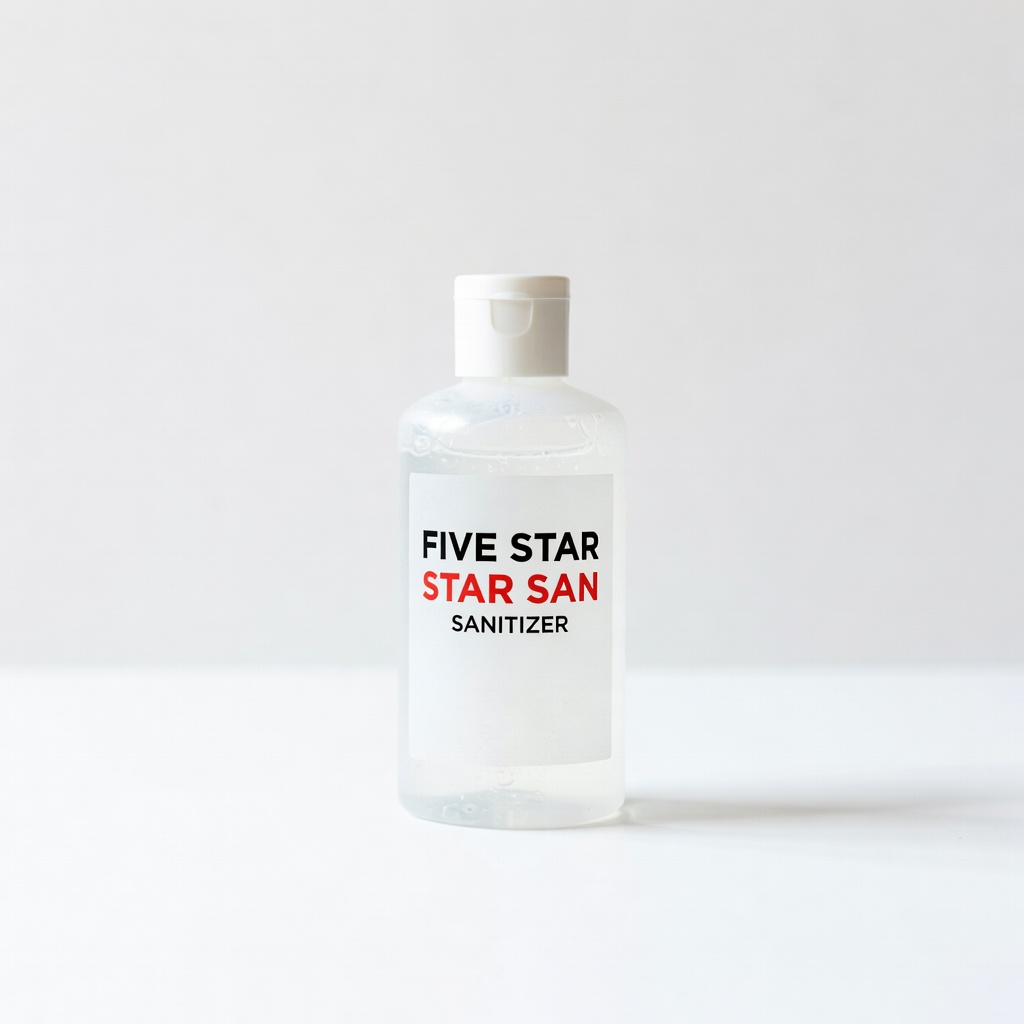
Five Star Star San Sanitizer
It's a no-rinse, acid-based sanitizer that kills 99.9% of bacteria without harming yeast, essential for preventing contamination in fermentation.
Best for: Use before every fermentation step, like cleaning your carboy and airlock—mix 1 oz per 5 gallons of water.
Price Range: $15-$20
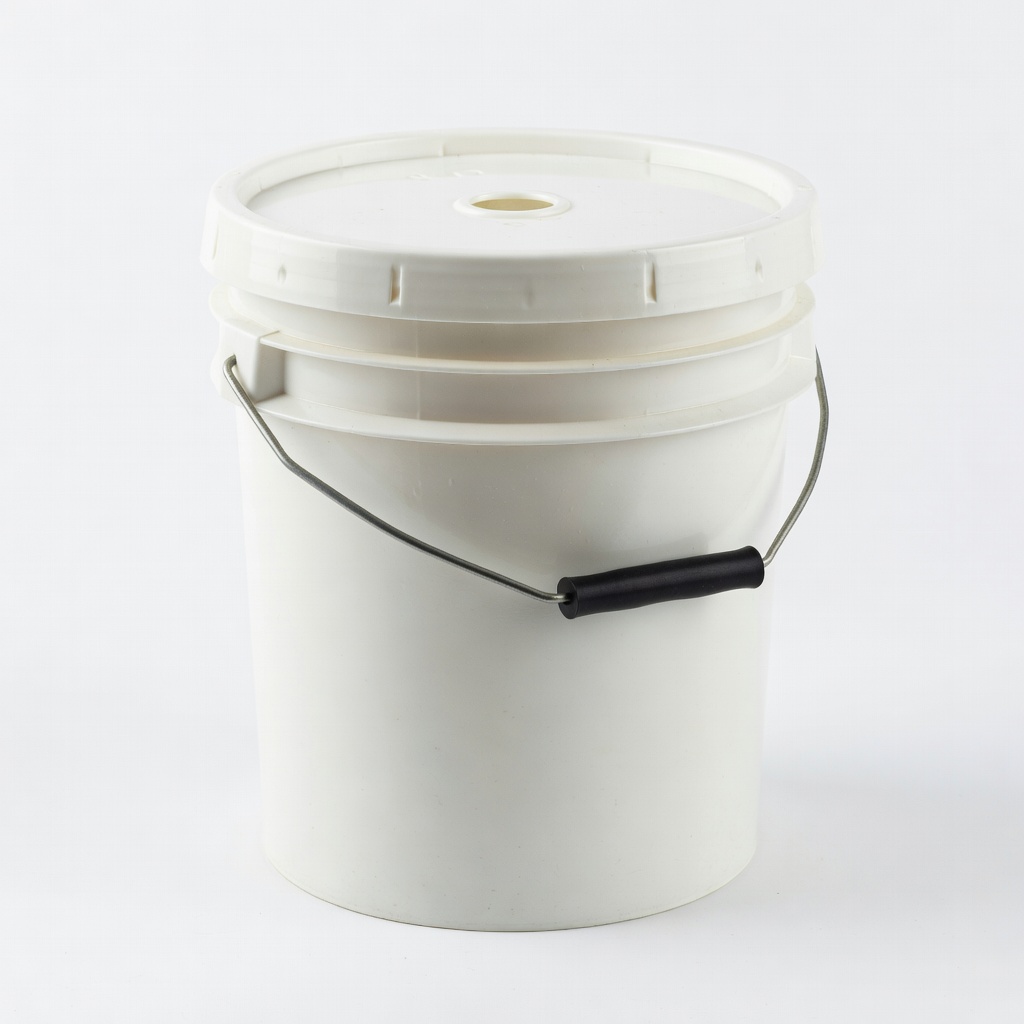
Northern Brewer Plastic Fermenter Bucket
Food-grade, durable bucket with drilled lid for airlocks, perfect for beginners starting fermentation without breaking the bank.
Best for: Primary fermentation vessel for 5-gallon batches; easy to sanitize and store.
Price Range: $15-$25
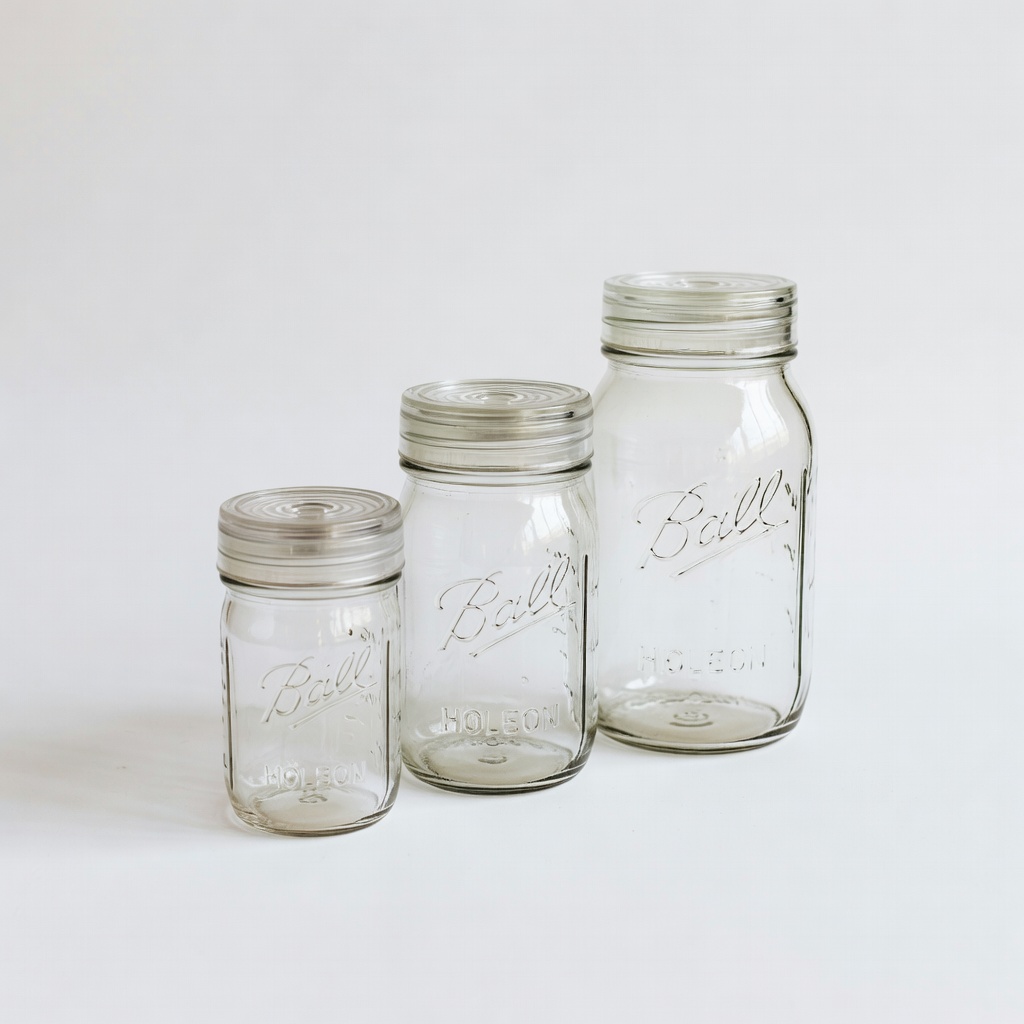
Ball Mason Jars with Airlock Lids (for small batches)
Affordable way to experiment with small ferments, including built-in airlocks for safety and monitoring.
Best for: Ideal for beginner test batches of mead or kombucha before scaling to beer.
Price Range: $20-$30 for set
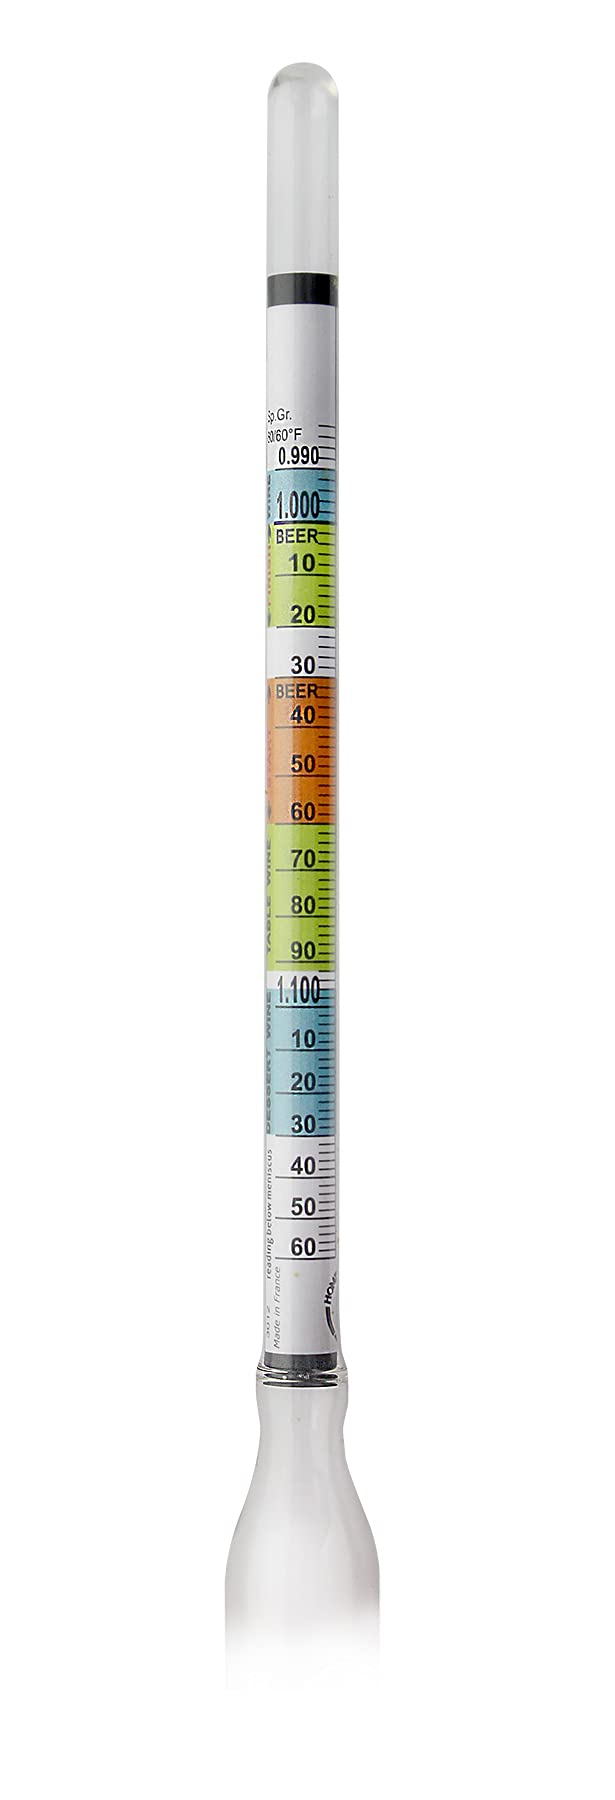
Triple Scale Hydrometer
Accurate tool to measure specific gravity, helping track fermentation progress and ensure safety by confirming completion.
Best for: Take readings before and after fermentation to calculate ABV and avoid under-carbonation.
Price Range: $10-$15
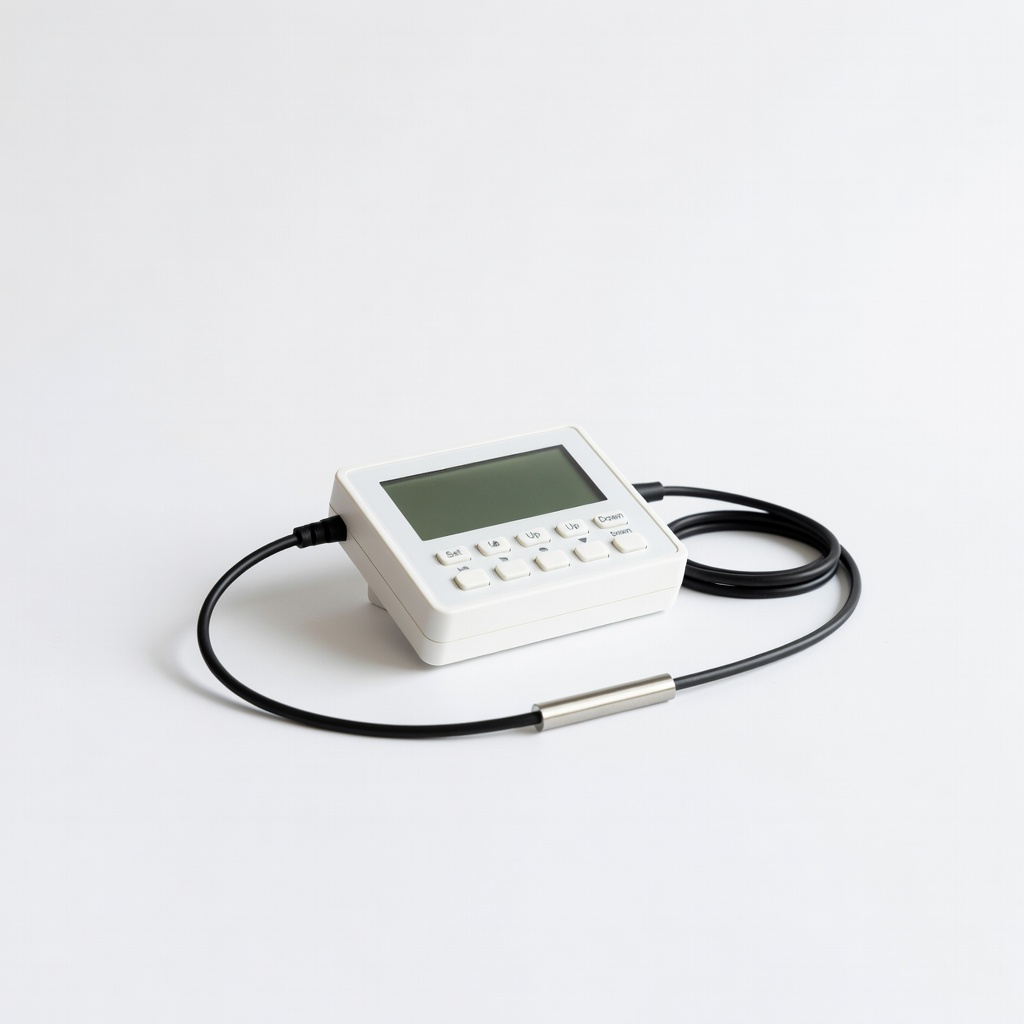
Inkbird ITC-308 Temperature Controller
Digital controller for maintaining precise fermentation temps, preventing common errors in variable home environments.
Best for: Plug in a heat mat or fridge to keep temps stable during the 1-2 week ferment.
Price Range: $35-$45