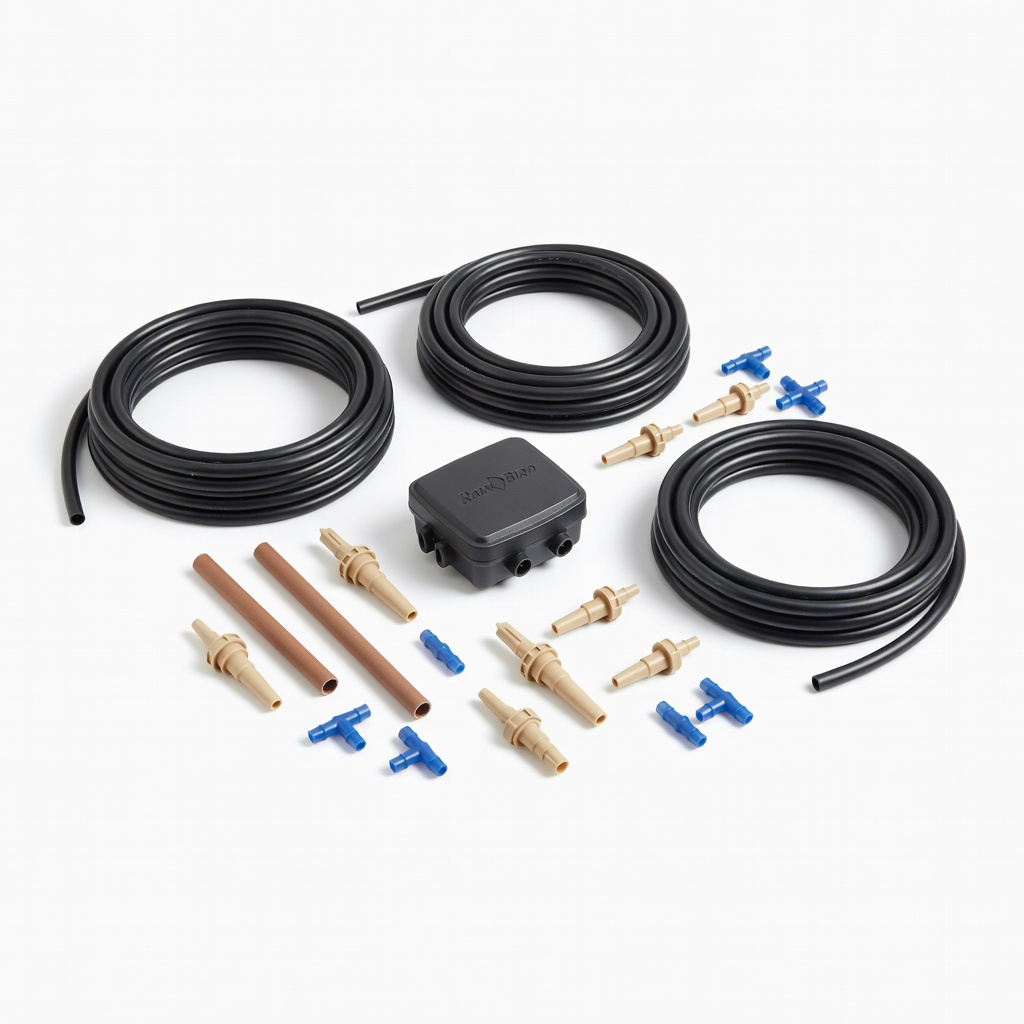
Rain Bird PKIT0035S Drip Irrigation Kit
Small veggie gardens or raised beds up to 100 sq ft.
$29.99
Rain Bird PKIT0035S Drip Irrigation Kit Complete beginner kit with 150 ft tubing, emitters, fittings—everything matched and easy.
Get the App
Better experience on mobile
Discover drip irrigation basics and follow simple steps to install it in your garden, saving water and boosting plant health effortlessly.
Tired of wasting water and time hand-watering your garden? Traditional sprinklers lose up to 50% of water to evaporation, but drip irrigation delivers moisture directly to roots, cutting water use by 30-50% and reducing weeds. This guide explains what drip irrigation is and walks you through installation.
You'll learn the concept, benefits, and get beginner-friendly steps to set up a system for vegetable beds, flower gardens, or raised planters. Expect lush growth with less effort—no green thumb required.
Total setup takes 1-2 hours for a 100 sq ft garden; it's DIY-easy with basic tools.
Estimated Time: 1-2 hours for a small garden (100 sq ft) Difficulty: beginner
Drip irrigation is a low-pressure system that slowly drips water to plant roots via tubes and emitters, mimicking natural rainfall without waste. Unlike sprinklers, it targets soil, preventing leaf diseases and evaporation.
Key components: Mainline tubing (1/2-inch backbone), 1/4-inch distribution lines, emitters (0.5-2 GPH), filters, and regulators. Analogy: It's like an IV drip for plants—precise and efficient.
Why it matters: Saves 20-50% water, automates watering, ideal for beginners.
💡 Tips:
Sketch your garden: Measure beds, note plant rows. Place mainline along edges, branch distribution lines every 12-18 inches parallel to plants.
Calculate needs: 0.5-1 gallon/hour per emitter; for 50 plants, ~25 emitters. Factor sun exposure—drip more in hot areas.
Expect: A simple map prevents leaks later.
⚠️ Warnings:
Unbox your kit. Cut mainline tubing to bed length + 5 ft extra. Test fit connectors.
Attach filter and regulator to faucet end—crucial for clog prevention (filters debris).
Pro tip: Work on a flat surface.
💡 Tips:
Screw hose adapter to outdoor faucet. Wrap threads with Teflon tape for seal. Attach pressure regulator (25-30 PSI), then filter, then mainline.
Turn water on briefly to flush lines—remove end cap, let run 1 min.
Why: Prevents bursts from high pressure.
Run 1/2-inch tubing along garden perimeter or bed edges. Stake every 3-5 ft to hold in place.
Use elbows/tees for corners—push firmly until snug.
Expect: Secure base for branches.
💡 Tips:
Punch holes in mainline where branches needed (use tool perpendicular). Insert barbed fittings, attach 1/4-inch lines.
Punch emitters into lines near plants. Space per plant needs.
Analogy: Like plugging Christmas lights—simple snaps.
⚠️ Warnings:
Cap tubing ends with figure-8 or plugs. Attach battery timer to faucet for schedules (e.g., 30 min daily).
Why timer: Automates, prevents overwatering.
💡 Tips:
Run system 10 min. Check for leaks, even flow. Dig near emitters—water should moisten 6-8 inches deep.
Tweak spacing if dry spots appear. Cover with mulch.
Success: Uniform drips, no sprays.
Problem: Low flow or uneven drips
Solution: Clean filter/emitter clogs with vinegar soak; check for kinks.
Problem: Leaks at fittings
Solution: Replace loose barbs; use Teflon on threads.
Problem: No water at ends
Solution: Flush lines; ensure regulator <30 PSI.
Problem: Tubing bursts
Solution: Install regulator; reduce pressure.
Complete beginner kit with 150 ft tubing, emitters, fittings—everything matched and easy.
Best for: Small veggie gardens or raised beds up to 100 sq ft.
Price Range: $29.99
Battery-powered, reliable scheduling prevents manual watering errors.
Best for: Automate daily/weekly runs for forgetful gardeners.
Price Range: $39.99
Sharp, durable for precise holes without tearing tubing.
Best for: Custom emitter placement in any kit.
Price Range: $9.99
Self-cleaning, pressure-compensating for consistent flow on slopes.
Best for: Adding to existing systems or uneven terrain.
Price Range: $12.99
Small veggie gardens or raised beds up to 100 sq ft.
Rain Bird PKIT0035S Drip Irrigation Kit Complete beginner kit with 150 ft tubing, emitters, fittings—everything matched and easy.
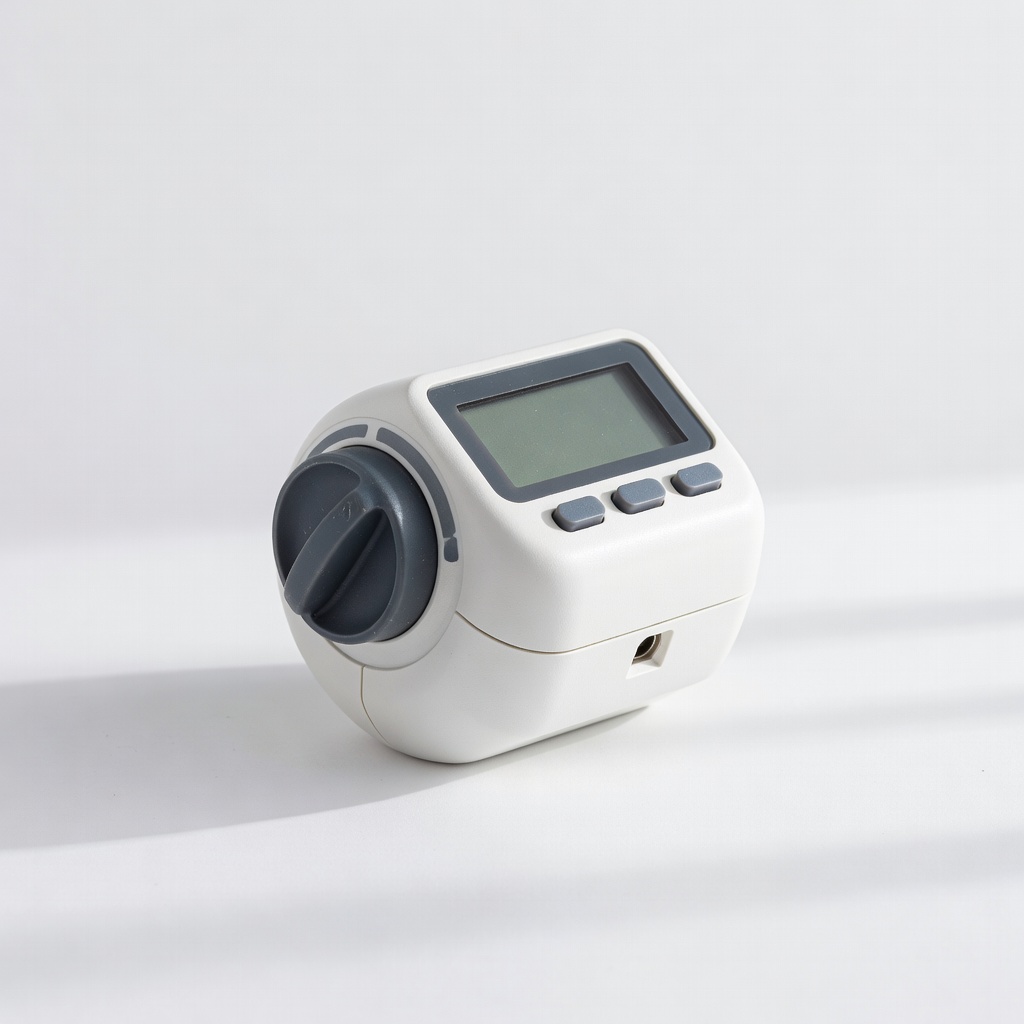
Automate daily/weekly runs for forgetful gardeners.
DIG 0501A Automatic Watering Timer Battery-powered, reliable scheduling prevents manual watering errors.
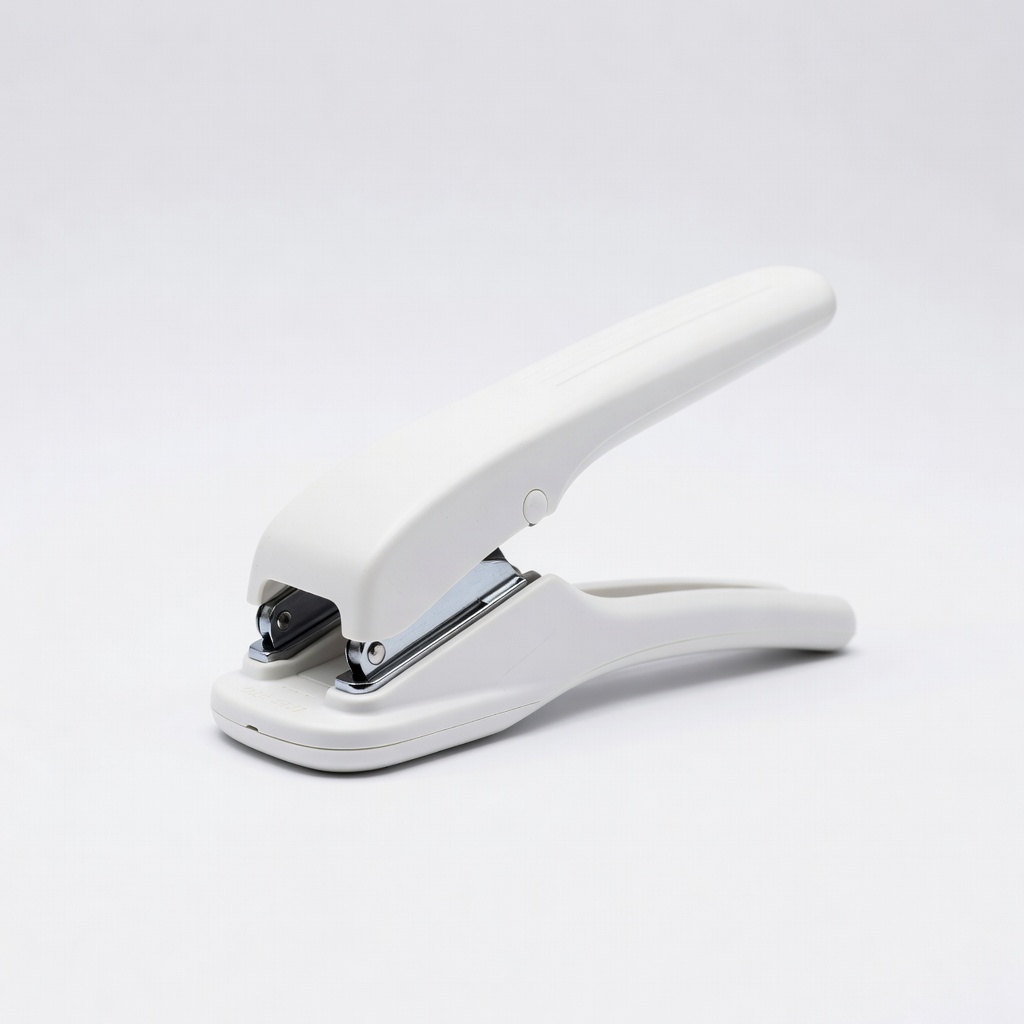
Custom emitter placement in any kit.
Orbit 56247 Hole Punch Tool Sharp, durable for precise holes without tearing tubing.
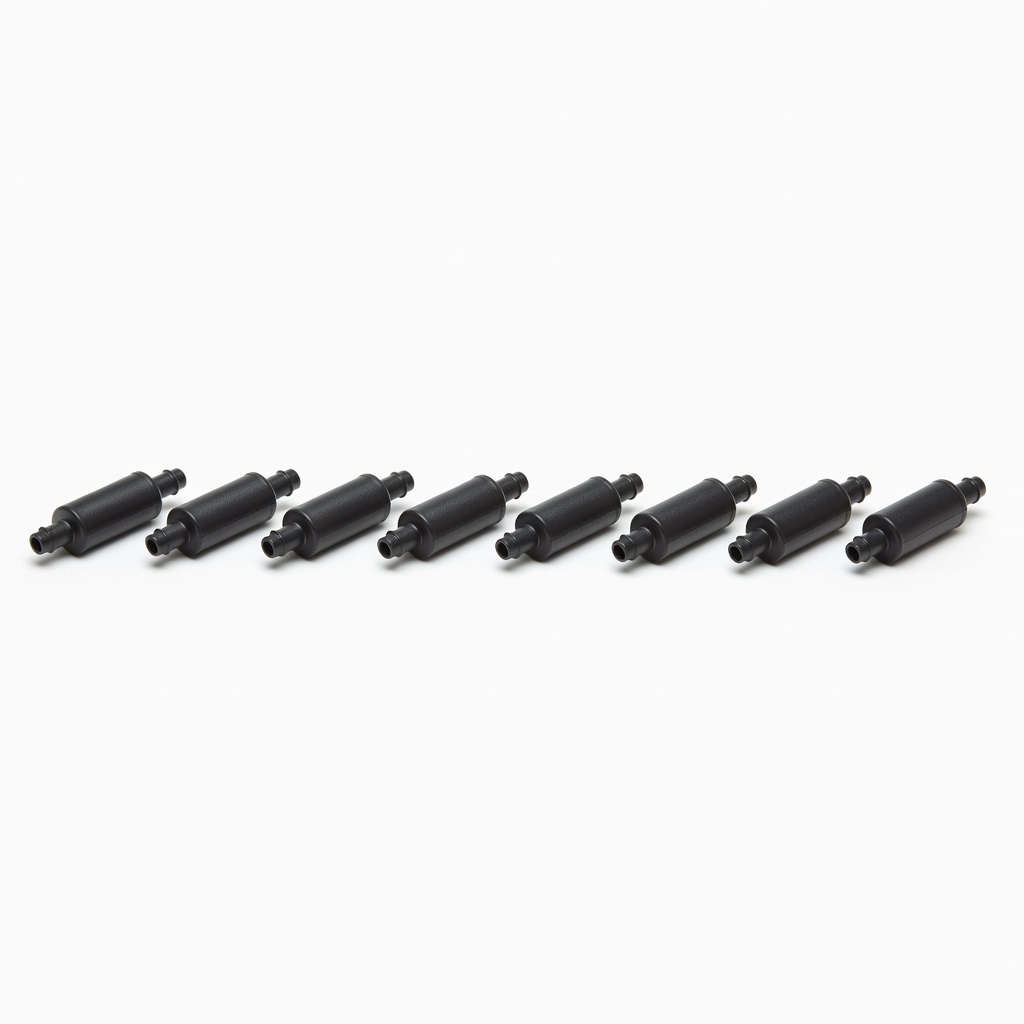
Adding to existing systems or uneven terrain.
Rain Bird SW10 In-Line Drip Emitter (10-pack) Self-cleaning, pressure-compensating for consistent flow on slopes.