Ever sanded wood only to end up with swirl marks, scratches, or a dull orange-peel texture that ruins your stain or clear coat? Achieving a true mirror finish—ultra-smooth and reflective—transforms ordinary projects into professional heirlooms, but it requires the right grit sequence.
In this beginner-friendly guide, you'll learn the science-backed progression of sandpaper grits from coarse to ultra-fine, why each step matters, and how to execute it flawlessly. Whether hand-sanding or using a power tool, expect visible results in under an hour on a small project like a tabletop or box.
No advanced skills needed—just patience and the proper sequence. By the end, your wood will gleam like polished glass.
▸What You'll Need
- •Sandpaper sheets or discs in grits: 120, 220, 320, 400, 600, 800, 1200, 2000 (wet/dry type recommended)
- •Sanding block (for hand sanding) or random orbital sander
- •Clean water and spray bottle (for wet sanding)
- •Tack cloth or vacuum/dust brush
- •Lumber or project piece (flat surface ideal)
- •Optional: Finishing compound or automotive polish for final buff
Estimated Time: 45-90 minutes for a 1 sq ft surface
Difficulty: beginner
▸Step-by-Step Instructions
Step 1: Prepare Your Wood Surface
Start with a flat, planed wood surface free of major dents or gouges. Inspect for roughness and remove any old finish with a coarse scraper if needed.
Why it matters: A poor starting point amplifies scratches later. Expect a slightly rough but even surface after prep.
Secure your wood with clamps to prevent movement.
💡 Tips:
- •Work in a dust-free area with good lighting.
⚠️ Warnings:
- •Avoid starting on warped wood—it won't finish mirror-smooth.
Step 2: Sand with 120 Grit (Flatten and Level)
Use 120-grit sandpaper to remove planer marks, mill glaze, or imperfections. Sand with the grain using light, even pressure in overlapping strokes.
This coarse grit establishes a level base—too aggressive for final work but essential for efficiency. You'll see deep scratches disappear, leaving a uniformly scratched surface.
Hand sand or use an orbital sander at low speed.
💡 Tips:
- •Progress to next grit only when no ridges remain.
⚠️ Warnings:
- •Don't press too hard to avoid dish-out (uneven depressions).
Step 3: Progress to 220 Grit (Smooth Medium Scratches)
Switch to 220 grit and sand until all 120-grit scratches vanish. This medium grit refines the surface for better adhesion of finer abrasives.
Why: Each grit removes the previous one's marks. Expect a velvety feel, no visible scratches under normal light.
💡 Tips:
- •Clean dust thoroughly between grits with a tack cloth.
Step 4: Refine with 320-400 Grit (Pre-Finish Dry Sanding)
Use 320 then 400 grit dry. Sand progressively until the surface feels silky and shows no prior scratches.
These fine dry grits build the foundation for wet sanding. Your wood now looks polished but not yet mirror-like—ready for ultra-fine work.
💡 Tips:
- •Use a sanding block for flatness on edges.
⚠️ Warnings:
- •Skipping dulls the final shine.
Step 5: Transition to 600 Grit (Enter Ultra-Fine)
Sand with 600 grit dry or lightly dampened. This bridges to wet sanding, minimizing dry-grit limitations.
Expect emerging smoothness; light reflects evenly but hazily.
💡 Tips:
- •Random orbital sanders excel here to avoid swirls.
Step 6: Wet Sand 800-1200 Grit (Remove Haze)
Lubricate with water spray, use 800 then 1200 grit wet/dry paper. Sand gently in circular motions with the grain overlay.
Wet sanding cuts faster without clogging, erasing haze for clarity. Water evaporates to reveal sharper reflection.
💡 Tips:
- •Change water frequently to avoid re-embedding grit.
⚠️ Warnings:
- •Dry immediately after to prevent raising grain.
Step 7: Ultra-Fine Wet Sand 2000 Grit (Mirror Polish)
Final wet sand with 2000 grit. Use minimal pressure; the surface will gleam under light.
This achieves the mirror effect—scratches invisible to the naked eye. Buff lightly with a clean cloth.
💡 Tips:
- •Test shine by reflecting light or phone screen.
Step 8: Inspect and Final Buff
Wipe clean, inspect at angles. Buff with polishing compound if hazy.
Your wood now has a mirror finish, ready for oil, stain, or lacquer—no sanding marks visible.
▸Pro Tips
- •Always sand with the grain to avoid cross-scratches.
- •Vacuum or blow off dust between every grit change.
- •Use a shop light to spot remaining scratches.
- •Random orbit sanders prevent swirls better than orbital.
- •For curves, wrap paper around soft sponges.
- •Progress slowly: one grit per 5-10 minutes per sq ft.
- •Practice on scrap wood first.
▸Common Mistakes to Avoid
- •Skipping grits: Leaves deep scratches visible in finish—always double previous grit.
- •Sanding across grain: Creates visible lines—stick to wood direction.
- •Not cleaning between steps: Contaminates finer paper, causing gouges.
- •Over-sanding fine grits: Wastes time and clogs paper—light pressure only.
- •Ignoring grain raise in wet sanding: Dry and re-sand lightly if fuzzy.
▸Troubleshooting
Problem: Swirl marks or holograms
Solution: Switch to random orbit sander or finer grit wet; polish out.
Problem: Uneven shine or dull spots
Solution: Re-sand missed areas progressively; ensure even pressure.
Problem: Paper clogs quickly
Solution: Use wet/dry paper with lubricant or anti-clog stearated sheets.
Problem: Raised grain after wet sanding
Solution: Let dry fully, then light 400-grit dry sand.
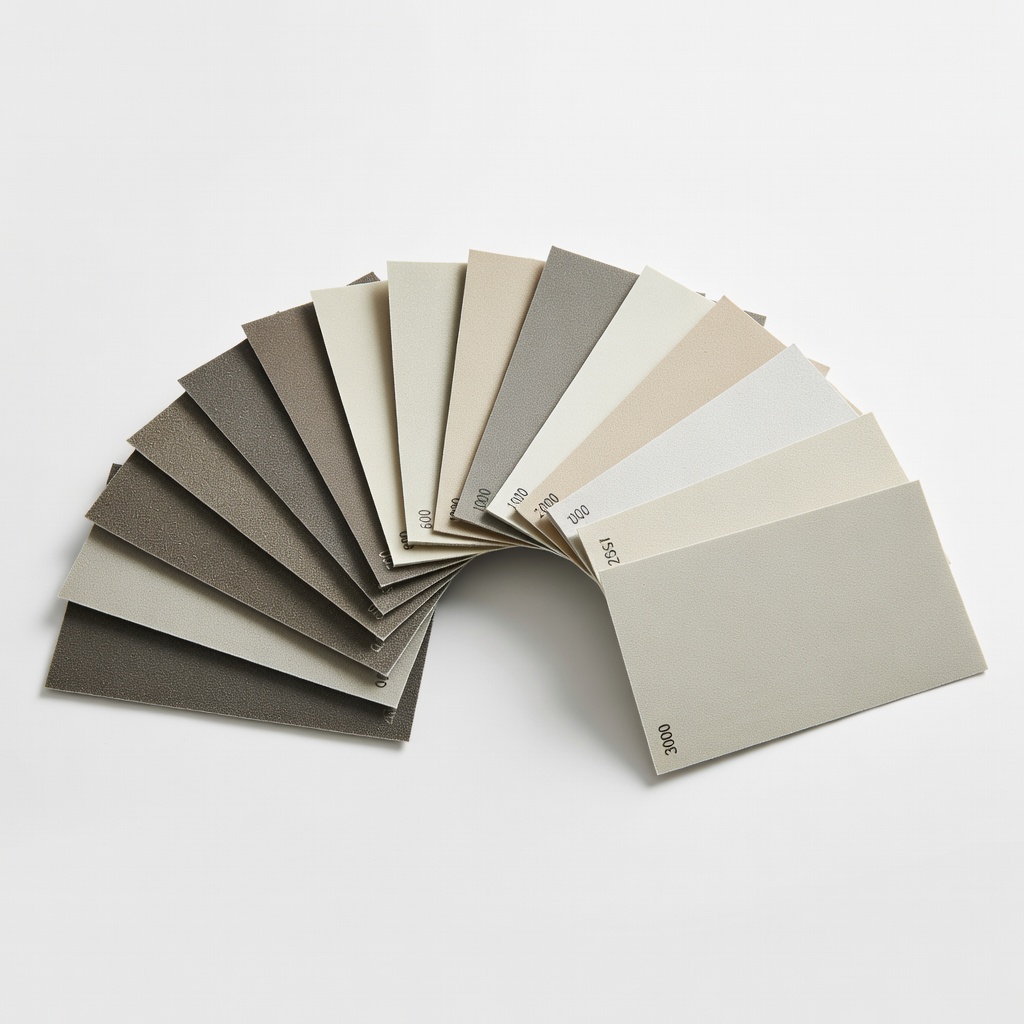
uxcell 177pcs Wet Dry Sandpaper Assortment 400-3000 Grit
Complete kit with all grits needed for full sequence, waterproof for wet sanding.
Best for: Ideal for beginners tackling small to medium projects.
Price Range: $16.99
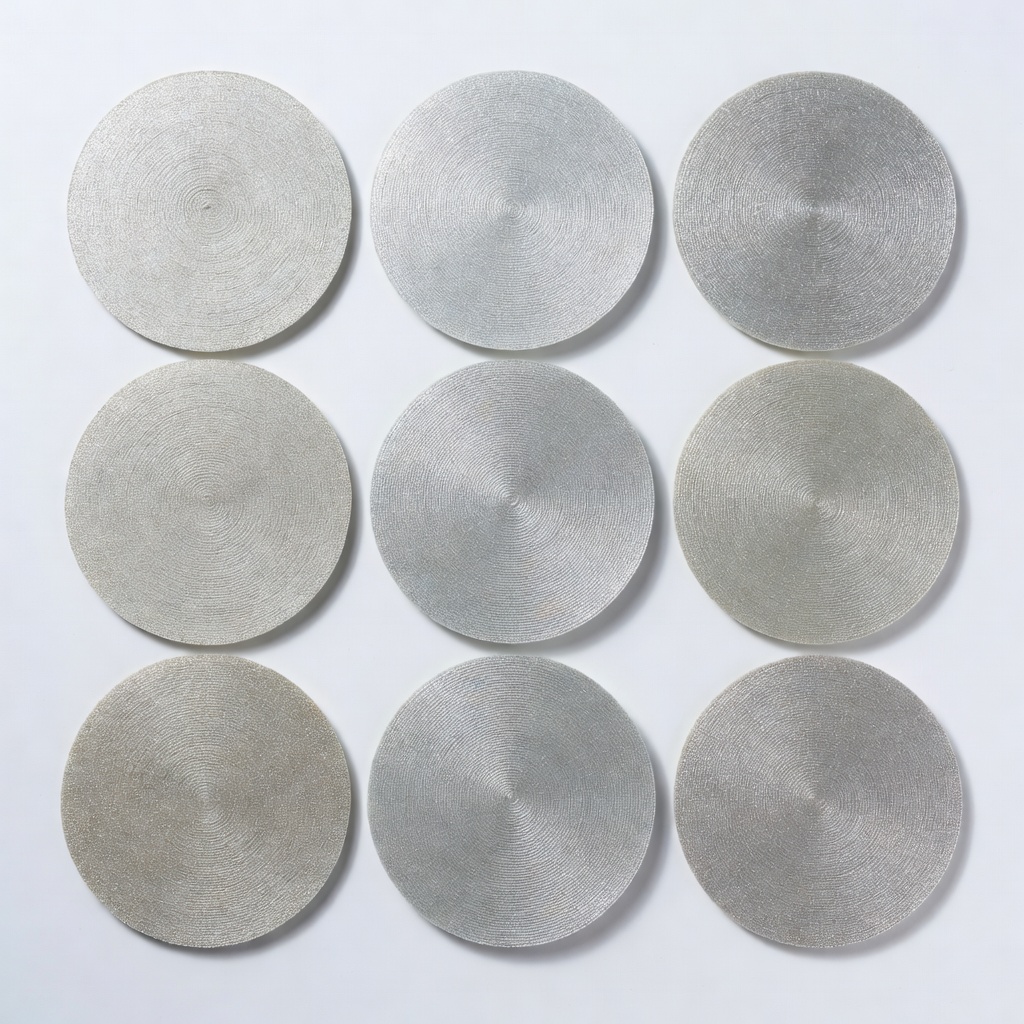
Micro-Mesh 6 Inch 9pc. Finishing Abrasive 1500-12000 Grit
Ultra-fine grits perfect for the final mirror polish stage.
Best for: Hand or machine sanding for high-end furniture finishes.
Price Range: $24.99
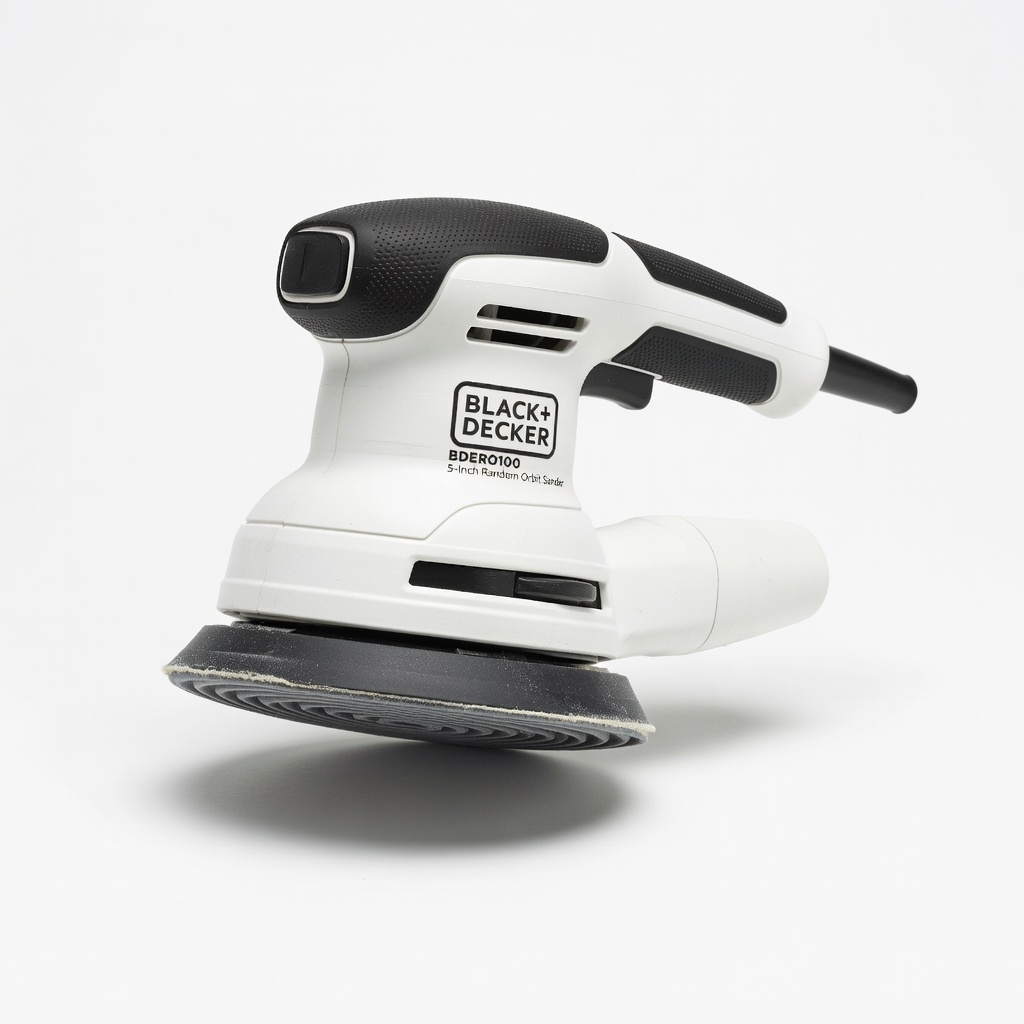
BLACK+DECKER 5-Inch Random Orbit Sander BDERO100
Prevents swirls during progressive sanding; lightweight for beginners.
Best for: Power sanding flat surfaces faster than hand.
Price Range: $29.97
3M Wetordry Sandpaper Sheets 734 5"x5" 1000 Grit (Pack of 5)
Premium quality for wet stages; cuts fast without loading.
Best for: Mid-to-fine progression on detailed work.
Price Range: $9.99
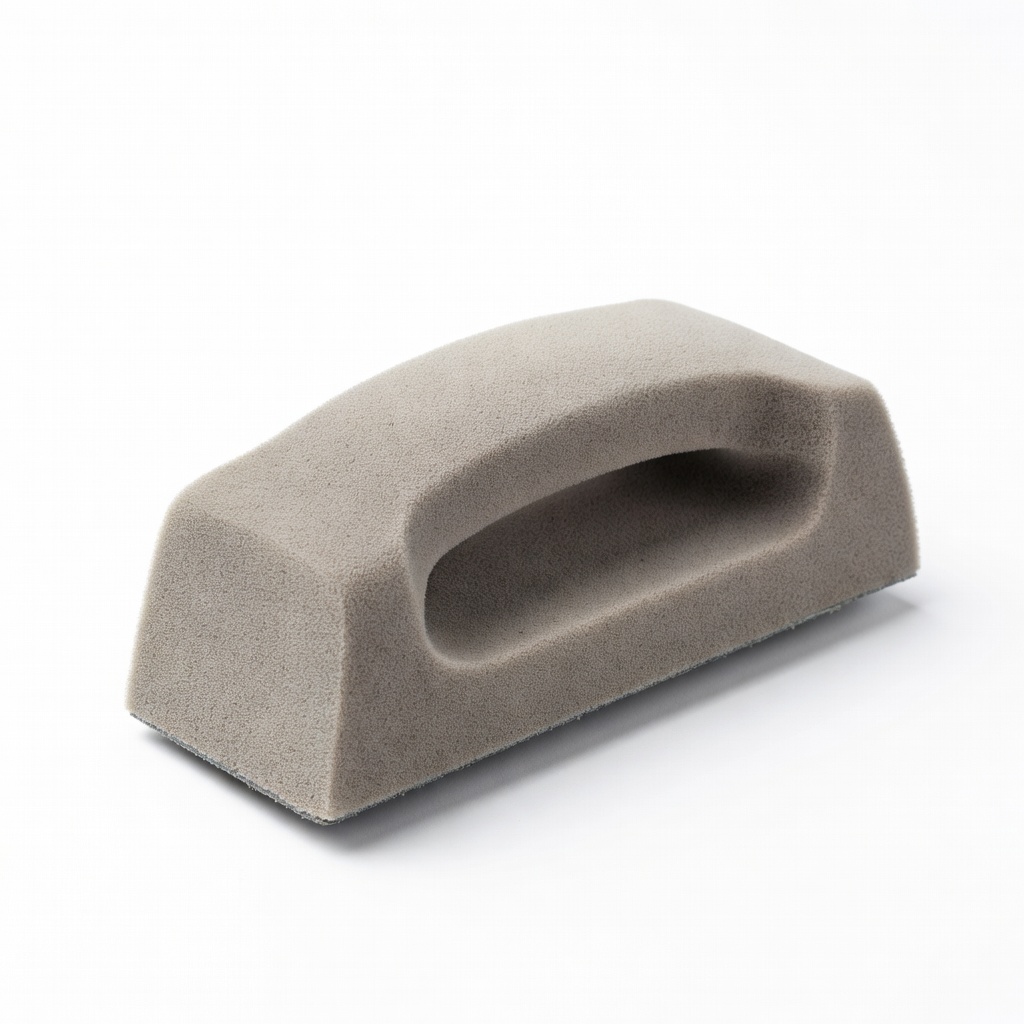
Sanding Block with Foam Grip
Maintains flatness during hand sanding; comfortable for long sessions.
Best for: Edges and contours where power tools can't reach.
Price Range: $8.99