In the competitive world of jewelry design, additive manufacturing (AM) offers unparalleled precision, intricate detailing, and rapid prototyping that traditional methods can't match. Advanced jewelers are turning to AM to create complex geometries, custom rings, and investment casting patterns with micron-level accuracy, reducing material waste and production time by up to 70%.
This guide breaks down the essential AM products for jewelry, from printers and resins to post-processing tools. You'll learn key technologies like SLA and DLP, material properties for casting, and product comparisons to select the right setup for professional workflows. Expect a deep dive into specs, real-world applications, and pro recommendations—no fluff, just actionable insights for experienced users.
Reading time: 25-35 minutes. No hands-on required, but familiarity with CAD software like Rhino or MatrixGold is assumed.
▸What You'll Need
- •Advanced knowledge of 3D printing processes (SLA/DLP preferred)
- •Experience with jewelry CAD software (e.g., Rhino 3D, ZBrush)
- •Access to a computer for design review and slicing
- •Basic understanding of photopolymer resins and post-curing
- •Optional: Investment casting setup for production
Estimated Time: 25-35 minutes
Difficulty: advanced
▸Step-by-Step Instructions
Step 1: Understand Core AM Technologies for Jewelry
Jewelry demands ultra-high resolution (under 50 microns XY) and smooth surfaces for casting. Start with Stereolithography (SLA) or Digital Light Processing (DLP/MSLA), which cure liquid resin layer-by-layer using lasers or LCD masks. SLA offers superior accuracy for fine features like filigree; DLP excels in speed for batch production.
Compare to FDM (filament-based)—unsuitable for jewelry due to visible layer lines (100+ microns). Expect surface finishes Ra < 5 microns post-processing, critical for burnout without residue.
Image description: Side-by-side diagram of SLA laser curing vs. DLP LCD projection, highlighting jewelry ring model layers.
💡 Tips:
- •Prioritize printers with 4K+ LCD for 35-50 micron pixels.
⚠️ Warnings:
- •Avoid SLS (powder) for jewelry—porous results complicate casting.
Step 2: Select Castable Resins and Materials
Jewelry AM relies on photopolymer resins formulated for clean burnout, leaving no ash residue (<0.02%). Standard resins warp or contaminate molds; use castable wax-like resins (e.g., 405nm sensitive, low viscosity <500 cps).
Key properties: High green strength (no fragility), elongation 5-10% for demolding, burnout temp 700-800°C. Examples include hybrid ceramic-filled for rigidity or clear for visualization. Test compatibility with your investment powder (e.g., Kerr Satin Cast).
Image description: Burnout cycle chart showing resin weight loss vs. temperature, with before/after cast gold ring.
💡 Tips:
- •Mix resins for custom properties—add flexible for larger pieces.
⚠️ Warnings:
- •Never use non-castable resins; residue ruins molds.
Step 3: Choose High-Resolution 3D Printers
Look for build volumes 100-200mm height (fits multiple rings), Z-resolution 25-50 microns, and auto-leveling for consistency. Advanced models feature resin heaters (40°C) to reduce viscosity and improve flow in cold studios.
Benchmark: Print a 1mm prong test model—successful if no breakage. Top specs: 8K LCD, 19-micron pixels for engravings <0.2mm.
Image description: Comparison table of printer specs (resolution, speed, volume) with printed jewelry samples.
💡 Tips:
- •Use open-source slicers like Chitubox for fine-tuning exposure (20-40s base layers).
Step 4: Integrate Design and Slicing Software
Advanced jewelry workflows start in CAD, then slice for optimal orientation (45° angles minimize supports). Software hollows models (1-2mm walls) to save resin, adds drain holes, and simulates supports.
Why it matters: Poor slicing causes failures—e.g., trapped resin leads to explosions. Expect 20-50% resin savings.
Image description: Screenshot of Lychee Slicer showing jewelry tree with supports, hollowing preview.
💡 Tips:
- •Nest 50+ rings per build for efficiency.
Step 5: Master Post-Processing Workflow
Post-print: Ultrasonic wash in IPA (10-20 min), air dry, UV cure (405nm, 10-30 min). This vitrifies resin, boosting strength 3x and ensuring clean burnout.
Advanced: Use heated chambers (60°C) for uniform curing. Inspect for undercures (sticky spots).
Image description: Workstation setup photo: wash station, curing box, gloves, IPA vat.
⚠️ Warnings:
- •Overexposure causes brittleness—follow TDS.
Step 6: Prepare for Investment Casting
Tree models on wax bases, flask in phosphate-bonded investment. Burnout schedule: Ramp 1°C/min to 750°C, hold 2-4hrs. AM patterns shrink 1.2-1.5%—compensate in CAD.
Success metric: Zero defects in 14k gold pours.
Image description: Flask burnout sequence: green pattern, ashed shell, poured gold jewelry.
Step 7: Compare Budget vs. Professional Setups
Budget (<$1k): MSLA printers for prototyping. Pro (>$5k): SLA with HEPA filtration for production. ROI: Pro setups pay off in 6 months via 10x throughput.
Image description: Cost-benefit chart: printer tiers vs. output (pieces/day), jewelry quality scale.
💡 Tips:
- •Scale up with printer farms.
▸Pro Tips
- •Calibrate Z-axis weekly—use calibration pins for jewelry tolerance.
- •Pre-heat resin to 25-30°C for 20% faster prints.
- •Use FEP release agents sparingly to extend film life (1000+ prints).
- •Batch post-process 10+ parts for efficiency.
- •Log exposure curves per resin/printer combo in a spreadsheet.
- •Ventilate workspace—resin vapors are irritants.
- •Test small batches before full trees.
▸Common Mistakes to Avoid
- •Using consumer resins—leads to ash contamination; always verify castable TDS.
- •Ignoring orientation—trapped supports waste resin; slice at 45°.
- •Skipping full cure—brittle parts shatter; UV 360° for 20min.
- •Overpacking trees—blocks airflow, uneven burnout; max 70% flask fill.
- •Neglecting shrinkage compensation—distorted finals; measure and adjust STL scale.
▸Troubleshooting
Problem: Elephant's foot (bulging base layers)
Solution: Reduce base exposure 20%; add 0.03mm Z-lift.
Problem: Sucking forces detach models
Solution: Increase tilt angle to 20° or use peel settings.
Problem: Residue in burnout
Solution: Switch to low-ash resin; extend hold at 650°C.
Problem: Warped prints
Solution: Level build plate; cure flat under weight.
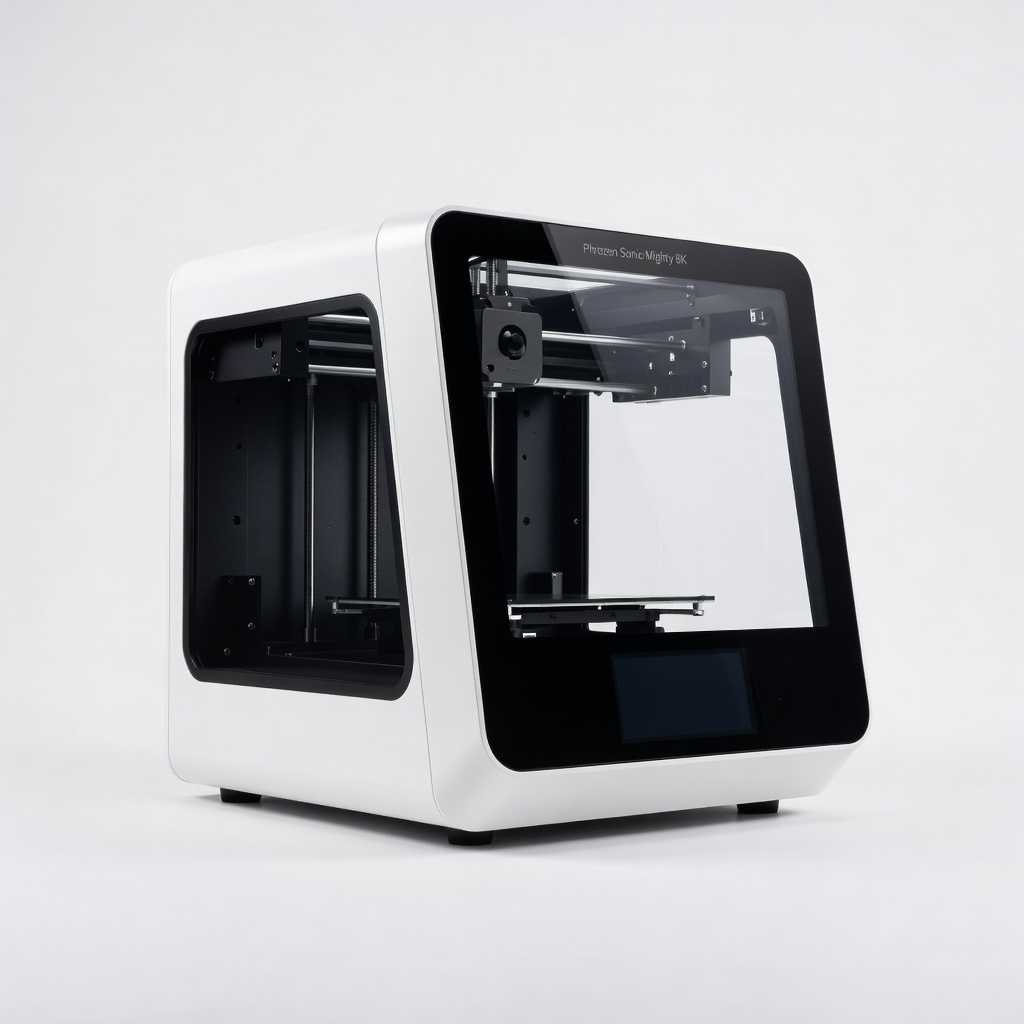
Phrozen Sonic Mighty 8K (ASIN B0BQPZ5C4N)
8K monochrome LCD delivers 19-micron XY resolution ideal for intricate jewelry details under 0.2mm.
Best for: High-volume ring and pendant prototyping; nests 100+ small pieces.
Price Range: $450-$550
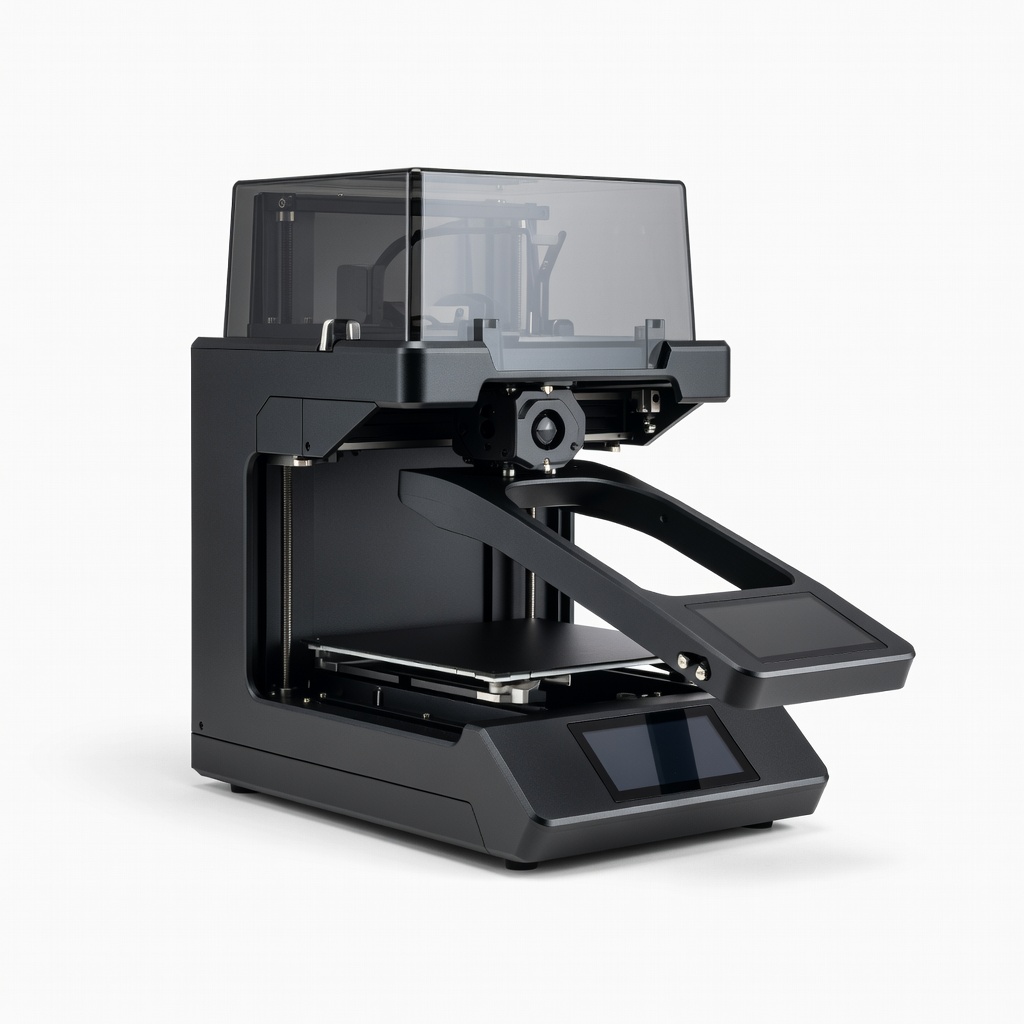
Elegoo Saturn 3 Ultra 12K (ASIN B0D2L7KQPJ)
12K screen with auto-leveling and resin heater ensures consistent micron precision for casting patterns.
Best for: Professional casting trees; large 218x123x250mm volume.
Price Range: $500-$600
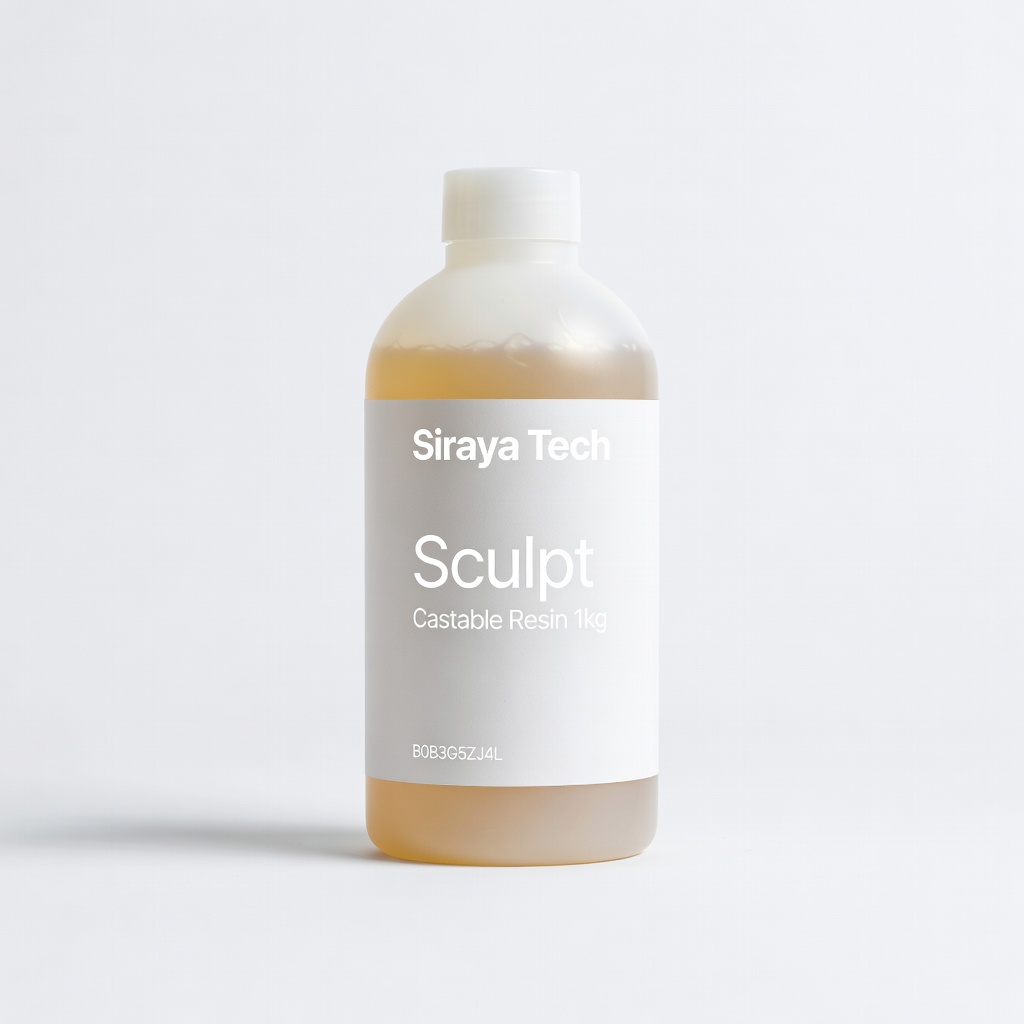
Siraya Tech Sculpt Castable Resin 1kg (ASIN B0B3G5ZJ4L)
Ultra-low ash (<0.01%) with smooth burnout for 14k-18k gold/silver; high detail retention.
Best for: Investment casting of filigree and prongs.
Price Range: $40-$50
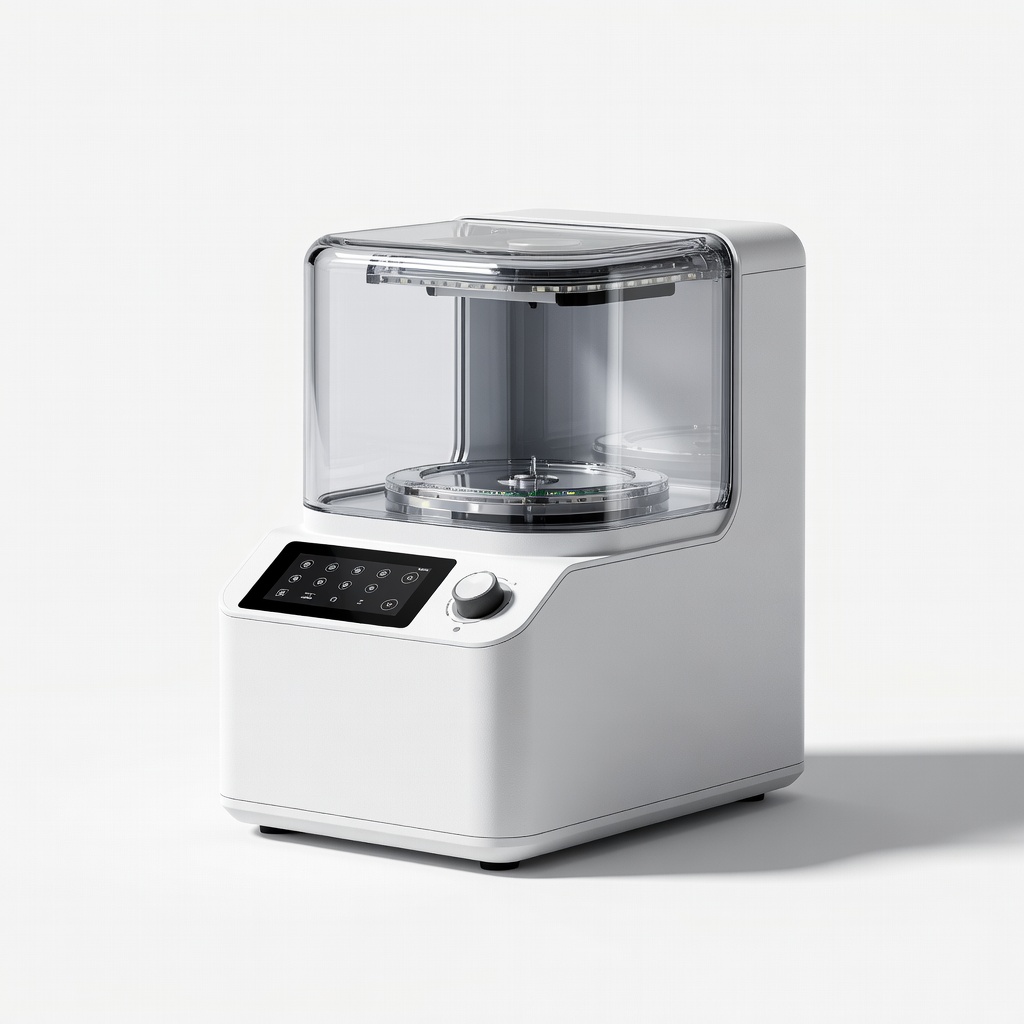
Creality UW-02 Pro Wash and Cure (ASIN B0C7C9QJ5M)
Dual-station with 360° UV and heated wash prevents undercures, boosting part strength 300%.
Best for: Post-processing batches of 20-50 jewelry pieces.
Price Range: $150-$200
Anycubic Photon Mono M5s (ASIN B0B5Y5R1N1)
Leveling-free 12K printer with fast print speeds (105mm/h) for advanced users scaling production.
Best for: Rapid iteration of custom engagement rings.
Price Range: $400-$500