Smoothing plastics is tricky—too aggressive an abrasive causes deep gouges or melting from friction heat, while too mild leaves haze. Whether you're finishing 3D prints, acrylic sheets, or molded parts, choosing the right abrasives saves time and delivers professional results. This guide breaks down the best products and methods for intermediate makers and fabricators.
You'll learn plastic-safe abrasives, grit progressions, wet vs. dry techniques, and pro tips to achieve mirror finishes. Expect 20-30 minutes to read and 1-2 hours for hands-on practice with sample pieces. No advanced machinery needed—just basic tools and patience.
From silicon carbide sheets to cushioned micro-abrasives, we'll cover what works, why, and real-world applications like polishing ABS or polycarbonate.
▸What You'll Need
- •Safety glasses and nitrile gloves (required for protection)
- •Plastic samples (e.g., ABS, acrylic scraps—required)
- •Distilled water and spray bottle (for wet sanding)
- •Progressive grit abrasives (wet/dry sandpaper 400-2000 grit, Micro-Mesh—required)
- •Soft cloths or microfiber towels (required)
- •Electric drill with backup pad or hand sanding block (optional but recommended)
- •Polishing compound (e.g., Novus #2—optional for final shine)
Estimated Time: 20-30 minutes to read; 1-2 hours for practice
Difficulty: intermediate
▸Step-by-Step Instructions
Step 1: Understand Plastic Properties
Plastics like ABS, PVC, acrylic, and polycarbonate vary in hardness and heat sensitivity. Softer thermoplastics (e.g., ABS) melt easily under friction, while harder ones (e.g., acrylic) scratch deeply but polish well. Why it matters: Wrong abrasives cause micro-melting (gumming) or crazing (fine cracks).
Test your plastic: Rub a coarse grit (400) briefly—if it melts or gums, use finer starts and wet methods. Analogy: Think of plastic like soft butter vs. hard cheese—gentle tools for butter.
💡 Tips:
- •Match abrasives to durometer (hardness rating) from material specs.
⚠️ Warnings:
- •Avoid diamond abrasives initially—they embed and scratch soft plastics.
Step 2: Master Grit Progression Basics
Abrasives are graded by grit: lower (coarse, e.g., 400) removes bulk material; higher (fine, e.g., 2000+) refines. For plastics, progress in steps: 400 → 600 → 800 → 1200 → 2000 → polish.
Why it matters: Skipping grits leaves 'orange peel' texture. Expect each stage to halve visible scratches from prior.
💡 Tips:
- •Rule: Each next grit at least 2x previous (e.g., 400 to 800).
Step 3: Choose Wet vs. Dry Abrasives
Wet sanding (silicon carbide sheets) cools and lubricates, preventing heat buildup—ideal for 90% of plastics. Dry uses aluminum oxide but risks clogging. Why: Plastics deform at 150-250°F; water keeps temps low.
Dip sheet in water, spray surface continuously. Expect slurry formation—that's normal, rinse often.
⚠️ Warnings:
- •Never dry sand heat-sensitive plastics without airflow.
Step 4: Select Cushioned Micro-Abrasives
Standard sandpaper is rigid; Micro-Mesh or foam-backed abrasives conform to curves, reducing gouges. Made with aluminum oxide on cushioned cloth.
Why it matters: Plastics have uneven surfaces post-machining—cushioning evens pressure. Start at 1500 grit for pre-sanded pieces.
💡 Tips:
- •Hook-and-loop backing speeds swaps.
Step 5: Apply Progressive Sanding Technique
Sand in straight lines or circles (alternate directions per grit), light pressure, 1-2 minutes per area. Rinse, inspect under light.
What to expect: Haze reduces progressively; full sequence yields satin finish.
⚠️ Warnings:
- •Heavy pressure digs trenches—let abrasive do work.
Step 6: Finish with Polishing Compounds
After 2000 grit, apply plastic-specific polishes (e.g., cerium oxide or plastic rubbing compound) with microfiber or wool pad on low-speed drill.
Why: Removes final haze for optical clarity. Buff 3-5 minutes; expect mirror shine on acrylic.
💡 Tips:
- •Use speed <1500 RPM to avoid heat.
Step 7: Inspect and Repeat if Needed
View at 45° under LED light—haze or swirls? Back up one grit. Final test: shine like glass?
Why it matters: Plastics amplify defects visually.
▸Pro Tips
- •Always wet sand thermoplastics; add dish soap to water for better lube.
- •Use a flat sanding block for even pressure on flats.
- •Progressive grits: 400-600-800-1200-2000-3000 for best results.
- •Air blow or compressed air clears dust between steps.
- •For curves, flexible sanding sponges outperform sheets.
- •Test on scrap first—plastics react differently.
- •Low tack tape masks edges to prevent stray scratches.
▸Common Mistakes to Avoid
- •Starting too coarse (e.g., 220 grit)—causes deep scratches hard to remove; start at 400+.
- •Dry sanding without cooling—melts plastic into gummy residue; always wet for soft materials.
- •Skipping grits—leaves visible transition lines; double grit each time.
- •High-speed buffing—generates heat cracks; keep under 1500 RPM.
- •Using wood/metal abrasives—too aggressive, embeds particles; stick to plastic-rated.
▸Troubleshooting
Problem: Plastic melting or gumming
Solution: Switch to wet sanding with more water; reduce pressure/speed. Use finer grit.
Problem: Persistent haze after polishing
Solution: Re-sand to 2000 grit, then re-polish. Check light angle for true defects.
Problem: Deep gouges appearing
Solution: Back to coarser grit (400), fill if structural with filler, then progress.
Problem: Dust clogging abrasive
Solution: Rinse frequently; switch to fresh sheet every 5-10 min.
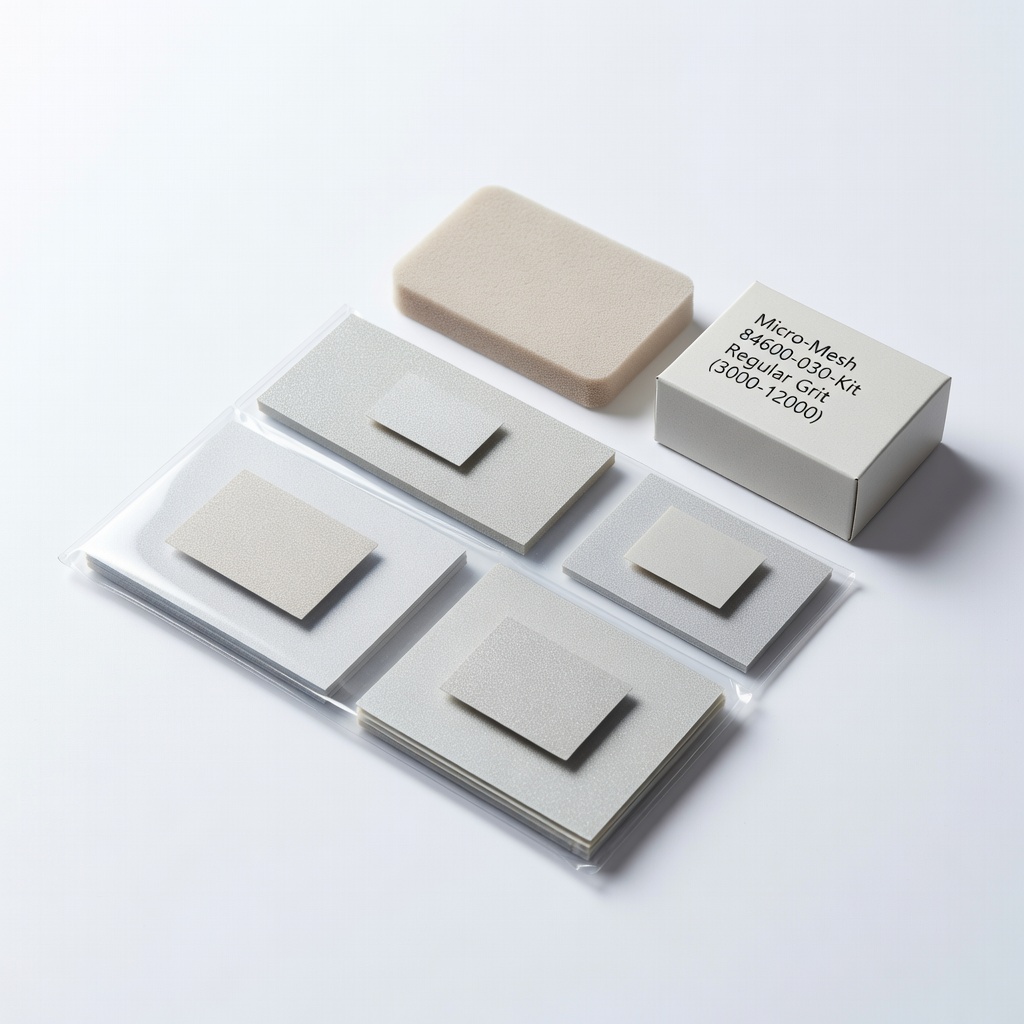
Micro-Mesh 84600-030-Kit Regular Grit (3000-12000)
Cushioned design prevents gouging on curved/soft plastics; progressive fine grits for haze-free finish.
Best for: Final smoothing on 3D prints or acrylic; intermediate users love the consistency.
Price Range: $25-$35
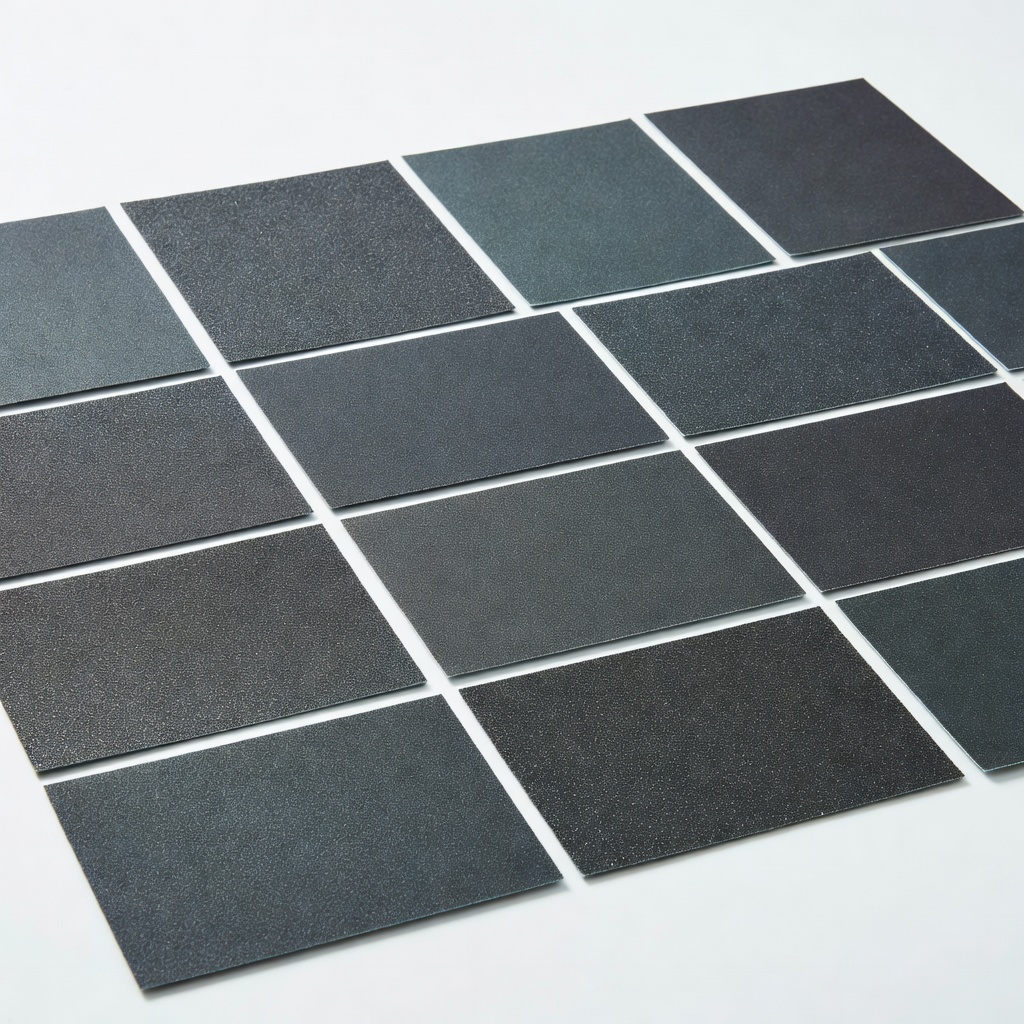
3M Wetordry Sandpaper Assortment (400-2000 grit)
Silicon carbide cuts fast without loading; waterproof for cooling critical on plastics.
Best for: Initial bulk removal on ABS/PVC; sheets cut to size.
Price Range: $10-$15 for 5-pack
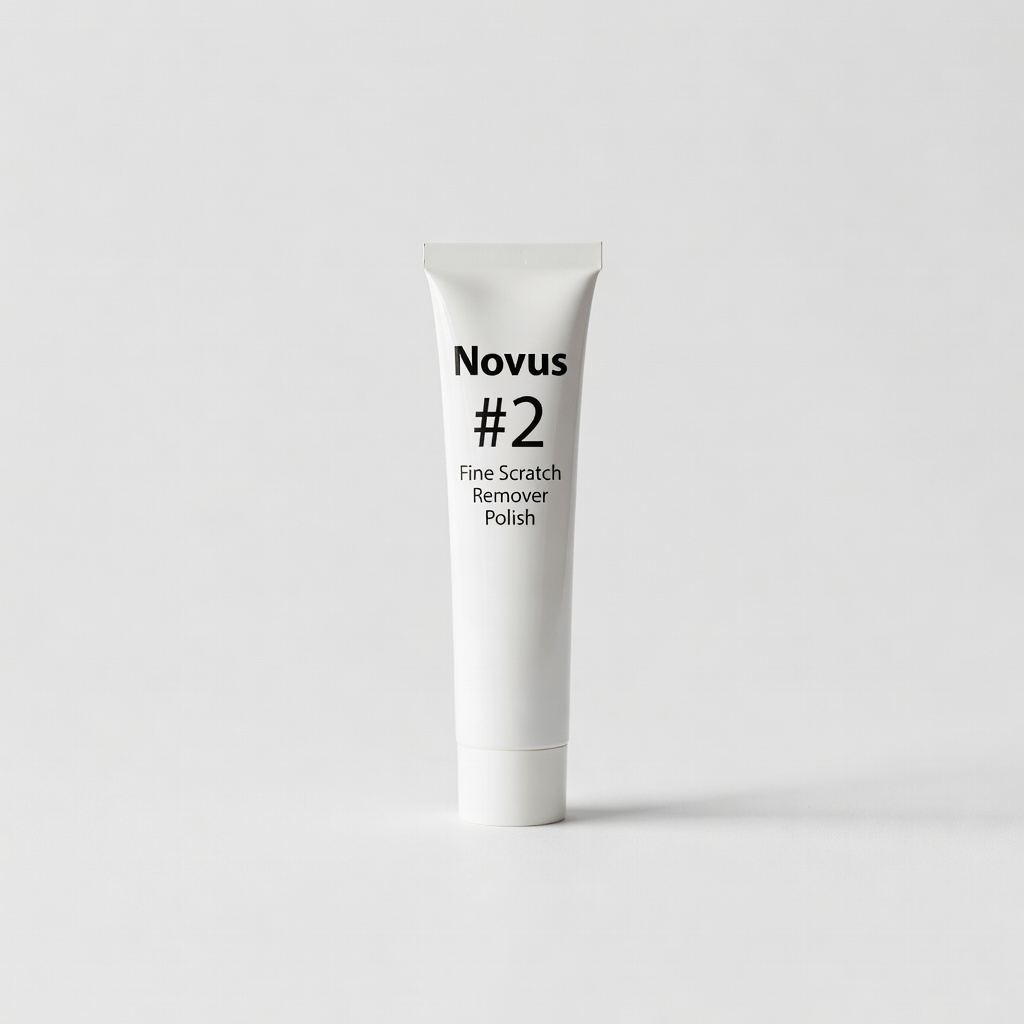
Novus #2 Fine Scratch Remover Polish
Plastic-specific formula removes light scratches post-sanding without abrasion.
Best for: Final polish on clear plastics like polycarbonate lenses.
Price Range: $8-$12
Meguiar's PlastX Clear Plastic Cleaner Polish
Restores oxidized plastics; safe non-abrasive follow-up to sanding.
Best for: Headlight restoration or hazy panels.
Price Range: $10-$15
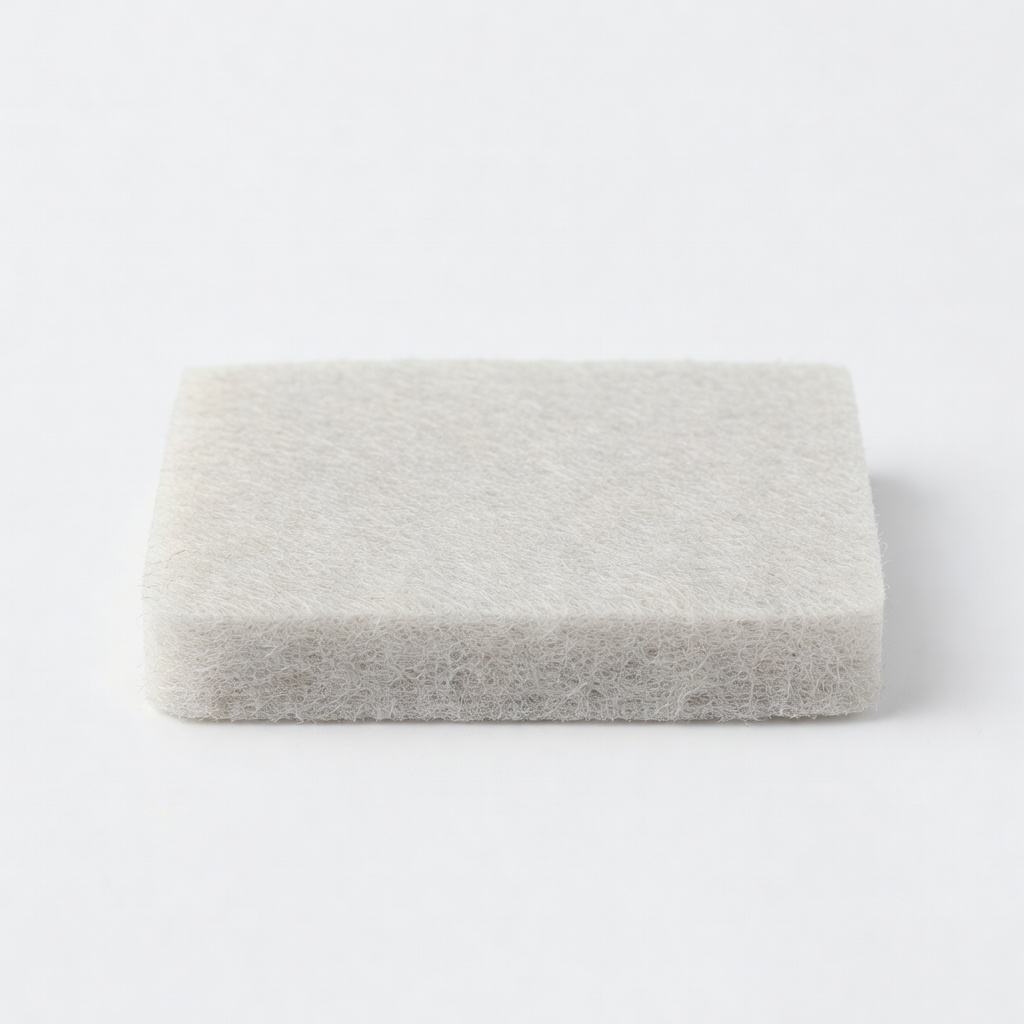
3M Scotch-Brite Light Duty Finishing Pad
Non-woven foam abrasive for ultra-fine finishing without scratches.
Best for: Pre-polish step on molded parts.
Price Range: $5-$8