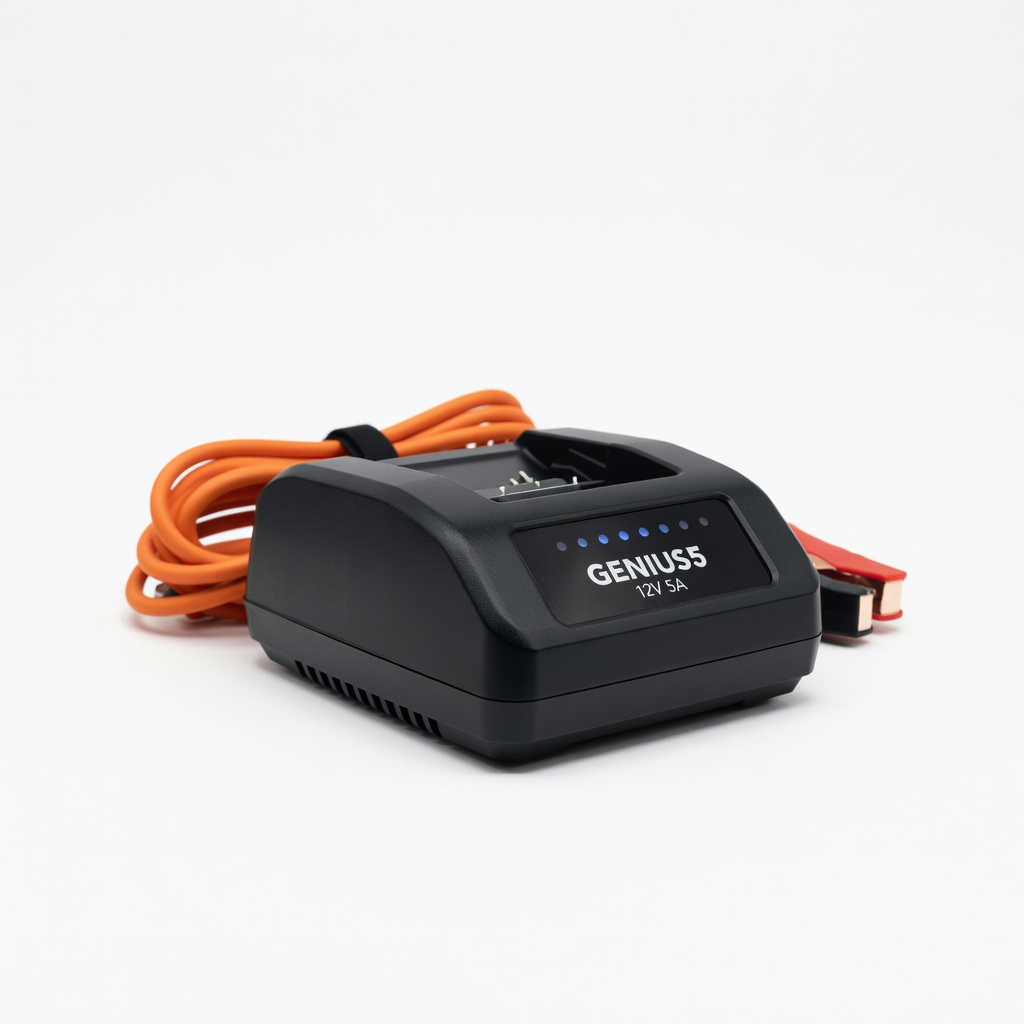
NOCO GENIUS5 12V 5A Battery Charger
Full charging and winter maintenance to prevent sulfation.
$69.95
NOCO GENIUS5 12V 5A Battery Charger Smart, waterproof charger with AGM/flooded modes, desulfation, and maintenance—perfect for marine batteries.
Get the App
Better experience on mobile
Step-by-step guide to safely store your 12V marine batteries through winter, preventing sulfation and extending battery life by years.
Winter's freezing temperatures can wreak havoc on 12V marine batteries, causing sulfation, reduced capacity, and premature failure. If you've ever returned to your boat in spring only to find dead batteries, you're not alone—many boaters lose expensive batteries due to improper storage. This guide equips intermediate boat owners with proven methods to winterize batteries effectively.
You'll learn a complete process covering inspection, cleaning, charging, and storage for flooded lead-acid and AGM types common in marine use. Expect clear steps, safety tips, and pro advice to achieve batteries that hold 100% charge next season.
The process takes 1-2 hours per battery and requires basic tools—no advanced skills needed beyond safe handling of lead-acid batteries.
Estimated Time: 1-2 hours per battery Difficulty: intermediate
Choose a well-ventilated area, ideally outdoors or in a garage with good airflow, away from flames or sparks. Batteries can release explosive hydrogen gas during charging. Put on rubber gloves, safety goggles, and an apron to protect against acid spills.
Why it matters: Safety prevents burns, explosions, or poisoning. Success looks like a clean, ventilated workspace with gear ready—no rushing means fewer accidents.
Lay down cardboard or a tarp to catch spills.
💡 Tips:
⚠️ Warnings:
Turn off all boat electronics. Disconnect the negative (-) terminal first using a wrench, then the positive (+). This order prevents sparks. Remove hold-down straps and lift the battery out using a carrier—12V marine batteries weigh 40-60 lbs.
Why it matters: Proper disconnection avoids short circuits or damage to boat systems. Expect the battery to feel heavy; success is clean removal without spills or terminal damage.
Label cables if multiple batteries for easy reinstallation.
💡 Tips:
⚠️ Warnings:
Visually check the battery case for cracks, bulges, or leaks. Inspect terminals for heavy corrosion (white powdery buildup). Test voltage with a multimeter set to DC 20V—healthy batteries read 12.6V+ fully charged.
Why it matters: Damaged batteries are unsafe and unrecoverable. Success: No cracks and voltage above 12.4V; if below 12.2V, plan replacement.
Note AGM/gel batteries—no electrolyte check needed.
💡 Tips:
⚠️ Warnings:
Mix 1 tbsp baking soda per quart of water. Scrub the case with a rag or brush to neutralize acid residue—rinse with water. Dry thoroughly with rags.
Why it matters: Dirt and acid accelerate corrosion. Expect fizzing from the reaction; success is a clean, dry case.
Avoid getting cleaner inside vent caps.
💡 Tips:
⚠️ Warnings:
Disconnect cables if not already. Brush off corrosion with a wire brush, then spray with terminal cleaner or baking soda solution. Rinse, dry, and apply dielectric grease or terminal protectant.
Why it matters: Clean terminals ensure good connections next season. Success: Shiny metal, no white residue.
Reattach cables loosely if storing connected.
💡 Tips:
⚠️ Warnings:
Remove vent caps (if present). Electrolyte should cover plates by 1/4-1/2 inch—use a hydrometer or flashlight to check. Add distilled water only if low; never acid.
Why it matters: Low levels cause plate damage. Success: Even levels across cells.
AGM/sealed: Skip this.
💡 Tips:
⚠️ Warnings:
Connect to a smart marine charger (2-10A) in a ventilated area. Charge until it reaches 12.6-12.8V and holds (may take 8-24 hours). Disconnect once complete.
Why it matters: Full charge prevents sulfation in storage. Success: Green light on charger, stable voltage.
Use mode for flooded/AGM.
💡 Tips:
⚠️ Warnings:
Store in a cool (32-50°F), dry place off concrete (use wood shelf). Check voltage monthly—recharge if below 12.6V. Cover loosely for dust.
Why it matters: Ideal conditions minimize self-discharge (1-3%/month). Success: Battery ready for spring with full capacity.
Remove in spring before first use.
💡 Tips:
⚠️ Warnings:
Problem: Battery won't hold charge after full cycle
Solution: Test each cell with hydrometer; sulfated plates mean replacement. Desulfate with a pulse charger first.
Problem: Corrosion returns quickly
Solution: Apply anti-corrosion spray like No-Ox-Id; check boat ground wires for issues.
Problem: Voltage drops fast in storage
Solution: Connect a smart maintainer; if persists, battery is failing—replace.
Problem: Acid spills during cleaning
Solution: Neutralize with baking soda, rinse; seek pro if skin contact.
Smart, waterproof charger with AGM/flooded modes, desulfation, and maintenance—perfect for marine batteries.
Best for: Full charging and winter maintenance to prevent sulfation.
Price Range: $69.95
Compact, automatic trickle charger plugs into outlet for hands-off monthly storage checks.
Best for: Long-term winter storage without overcharging.
Price Range: $29.95
Accurate voltage/load testing with auto-ranging—essential for diagnostics.
Best for: Pre- and post-winter voltage checks.
Price Range: $32.99
Prevents corrosion on terminals for months—marine-proven.
Best for: Post-cleaning protection before storage.
Price Range: $14.99
Tests electrolyte specific gravity accurately for flooded batteries.
Best for: Health check before winterizing.
Price Range: $9.99
Full charging and winter maintenance to prevent sulfation.
NOCO GENIUS5 12V 5A Battery Charger Smart, waterproof charger with AGM/flooded modes, desulfation, and maintenance—perfect for marine batteries.
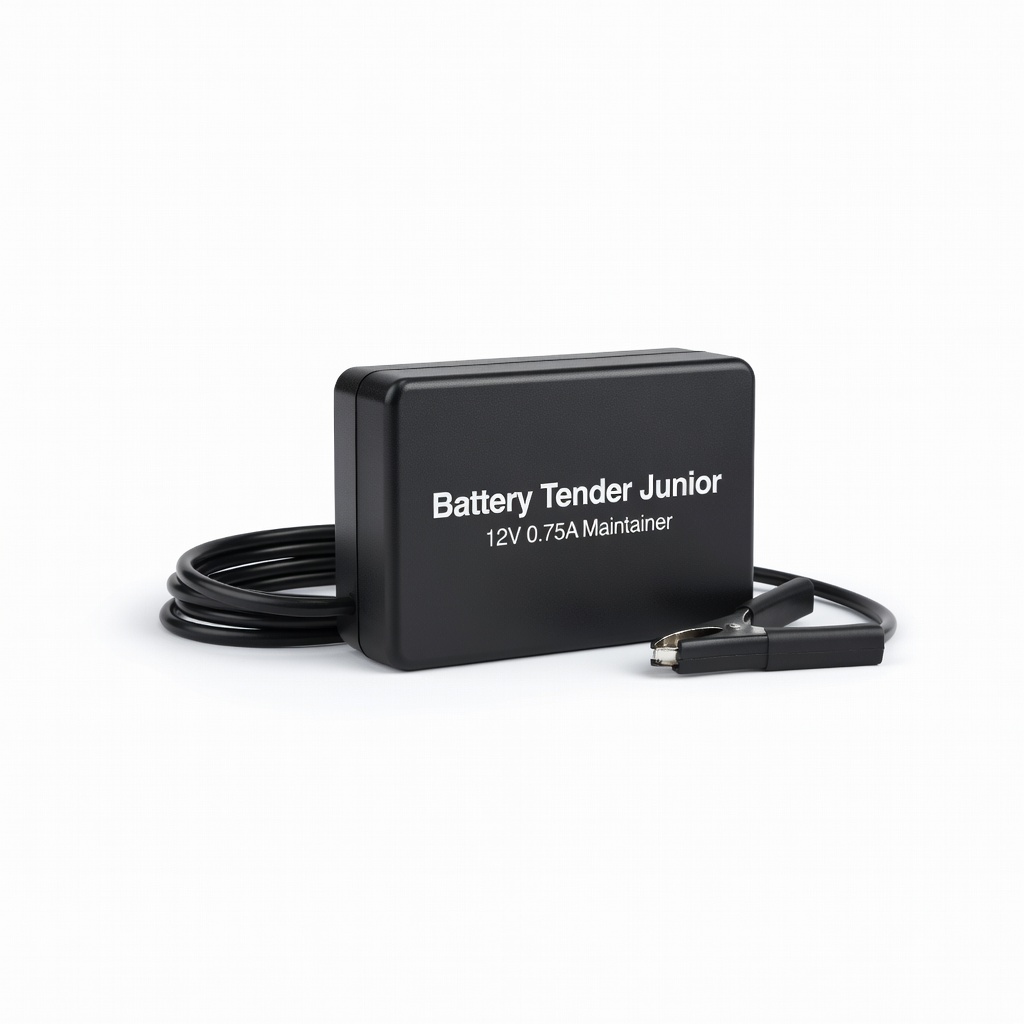
Long-term winter storage without overcharging.
Battery Tender Junior 12V 0.75A Maintainer Compact, automatic trickle charger plugs into outlet for hands-off monthly storage checks.
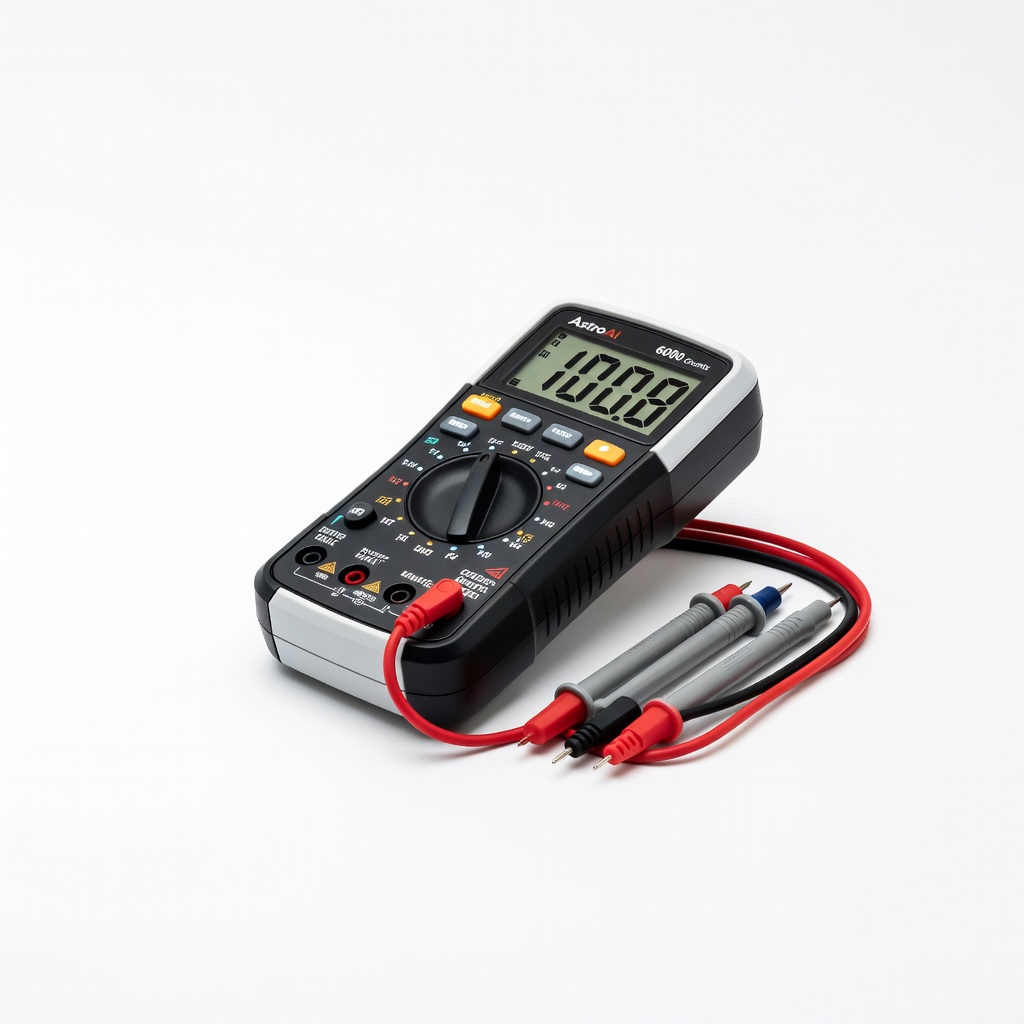
Pre- and post-winter voltage checks.
AstroAI Digital Multimeter 6000 Counts Accurate voltage/load testing with auto-ranging—essential for diagnostics.

Post-cleaning protection before storage.
No-Ox-Id Electrical Contact Enhancer Prevents corrosion on terminals for months—marine-proven.
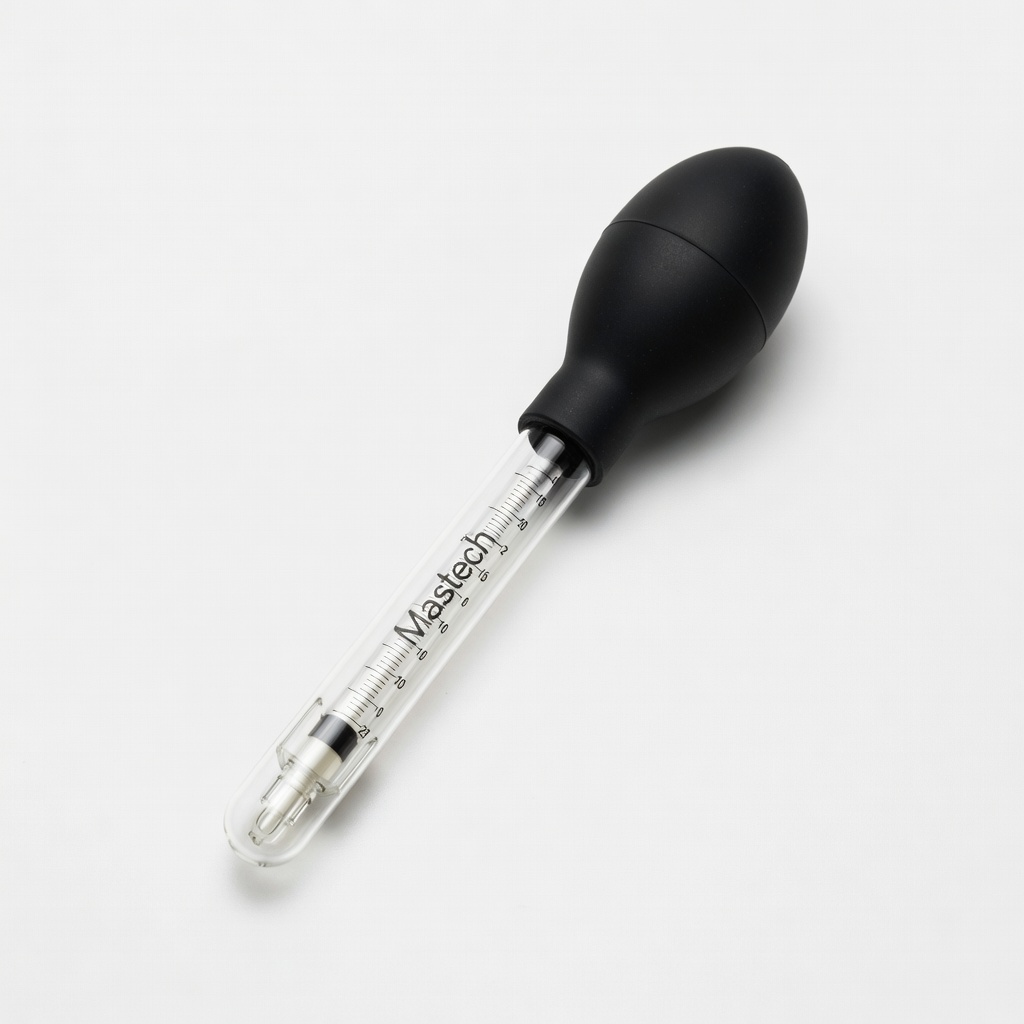
Health check before winterizing.
Mastech Battery Hydrometer Tests electrolyte specific gravity accurately for flooded batteries.