Struggling with sluggish skis that stick to the snow? Proper waxing is the secret to achieving that effortless glide, helping you carve turns faster and enjoy longer runs without fatigue. For intermediate skiers, learning to wax at home not only improves performance but also saves money compared to frequent shop visits.
In this guide, you'll learn the complete step-by-step process to wax your skis effectively, from preparation to finishing touches. We'll cover everything needed for a hot wax application, which is ideal for most recreational and backcountry skiing. Expect to spend 1-2 hours per pair, depending on your setup and experience level—it's rewarding work that pays off on your next slope day.
By the end, your skis will have a smooth, hydrophobic base ready for optimal snow contact, reducing friction for better control and speed. No advanced tools required, just patience and the right technique.
▸What You'll Need
- •Ski-specific wax iron (temperature-controlled, 110-150°C for most waxes; required)
- •All-temperature or cold-weather ski wax (e.g., hydrocarbon or fluoro blend; required, match to snow conditions)
- •Plastic ski scraper (sharp-edged for clean removal; required)
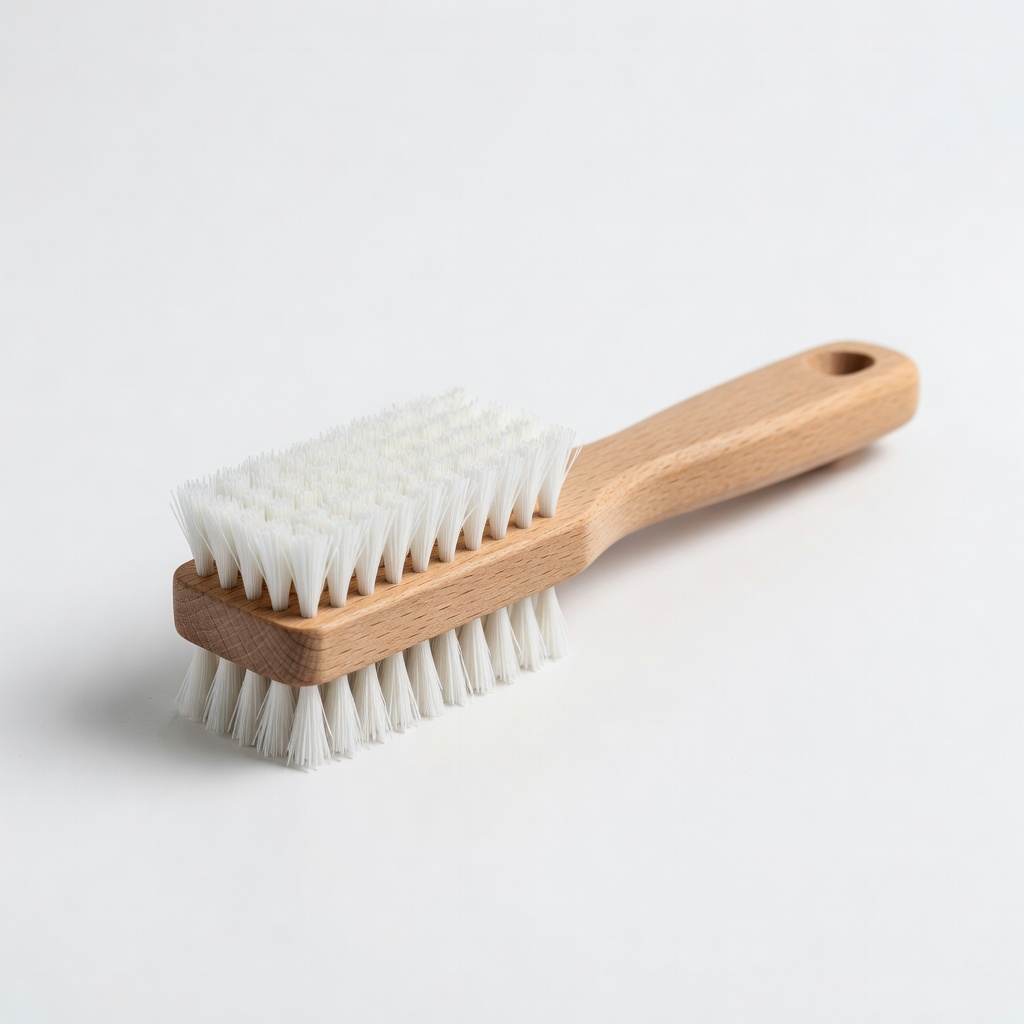
- •Nylon or horsehair brush (for structure and polishing; required)
- •Base cleaner or citrus-based degreaser (to remove old wax and dirt; required)
- •P-Tex repair kit (for filling minor base scratches; optional but recommended)
- •Workbench or stable surface with clamps (to secure skis; required)
- •Gloves and safety glasses (to protect from heat; optional)
- •Waxing paper or cork for buffing (optional for extra shine)
Estimated Time: 1-2 hours per pair of skis
Difficulty: intermediate
▸Step-by-Step Instructions
Step 1: Prepare Your Workspace and Skis
Set up a clean, well-ventilated area like a garage or basement with good lighting. Clamp your skis securely to a workbench, bases facing up, using ski vises or padded clamps to prevent damage. Remove any bindings if needed, but for most tuning, they're fine in place.
Inspect the bases for dirt, old wax buildup, or scratches. Why it matters: A clean starting point ensures even wax absorption and prevents contaminants from weakening the bond. Expect to see a dull, oxidized base if it's been a while since last tuning— that's normal and fixable.
If there are deep scratches, skip to repairs later; minor ones can wait until after cleaning.
💡 Tips:
- •Work in a dust-free zone to avoid particles embedding in the wax.
- •Label your skis to avoid mixing up left and right.
⚠️ Warnings:
- •Never clamp too tightly—risk of delaminating the base.
Step 2: Clean the Ski Bases Thoroughly
Apply a ski-specific base cleaner to a lint-free cloth and wipe down the entire base, focusing on the running surface (the center 60-80% of the ski). Let it sit for 1-2 minutes to break down old wax and grime, then scrape lightly with your plastic scraper to remove residue. Follow up with a clean cloth to dry.
This step is crucial because residue can create uneven glide and hotspots that wear the base prematurely. You'll notice the base looking cleaner and more porous, ready for new wax— a sign of success.
For stubborn dirt, repeat the process; avoid household cleaners as they can damage the polyethylene base material.
💡 Tips:
- •Use short, firm strokes when wiping to lift debris without scratching.
⚠️ Warnings:
- •Don't use water-based cleaners—they can cause delamination over time.
Step 3: Repair Minor Base Damage (If Needed)
If you spot small scratches or gouges during cleaning, melt P-Tex candles directly onto the base using your iron set to low heat (around 120°C). Let it cool slightly, then scrape level with the plastic scraper.
Repairs ensure a smooth surface for wax adhesion, preventing drag from imperfections. Success looks like filled, flush repairs blending seamlessly with the base—no raised edges.
This is optional for light tuning but essential for performance; skip if bases are pristine.
💡 Tips:
- •Work in thin layers to avoid excess buildup.
⚠️ Warnings:
- •Overheat P-Tex and it can discolor or weaken the base.
Step 4: Set Up and Heat Your Waxing Iron
Plug in your wax iron and set it to the recommended temperature for your wax type—typically 130-150°C for all-temp hydrocarbon waxes. Let it preheat for 5-10 minutes while you prepare the wax bar.
Proper heat melts the wax without scorching the base, allowing deep penetration for durable glide. Expect the iron to feel hot to the touch and the wax to drip smoothly when tested on scrap paper.
Test on a small area if unsure; too low and wax won't penetrate, too high and it burns off volatiles.
💡 Tips:
- •Keep a thermometer handy for precision if your iron lacks controls.
⚠️ Warnings:
- •Unplug when not in use to prevent accidents.
Step 5: Apply the Wax Evenly
Hold the wax bar at a 45-degree angle and rub it along the base while moving the hot iron slowly behind it (about 1-2 inches ahead). Drip wax directly from the iron in a zigzag pattern, then iron it in with overlapping passes from tip to tail.
This melts the wax into the base pores for a strong bond and hydrophobic layer that repels water. Aim for a thin, even coat—too much leads to waste, too little to poor coverage. Success: The base looks uniformly glossy and waxy, with no dry spots.
Cover the entire running surface, avoiding edges and topsheets to prevent mess.
💡 Tips:
- •Move the iron at walking speed for even melt.
- •Use different waxes for specific snow temps: softer for cold, harder for warm.
⚠️ Warnings:
- •Don't dwell the iron in one spot—risk of base damage.
Step 6: Let the Wax Cool Completely
Set the skis aside in a cool, draft-free area for 20-30 minutes (or until the wax hardens to a dull finish). Avoid touching or stacking them to prevent uneven cooling.
Cooling allows the wax to contract and set deeply into the base structure. You'll see the shiny layer turn matte, indicating it's ready for scraping—rushing this causes poor durability.
For best results, let them cool overnight if time allows, especially in humid conditions.
💡 Tips:
- •Cool in the same temp as your expected snow for optimal performance.
⚠️ Warnings:
- •Impatient scraping can pull wax out unevenly.
Step 7: Scrape Off Excess Wax
Using your plastic scraper at a 45-degree angle, pull it firmly from tip to tail in one smooth motion, removing the surface wax layer. Repeat 3-5 passes until no more wax flakes off.
This exposes the embedded wax for glide while leaving a thin protective film. Expect shavings to pile up—clean them away to see a smooth, slightly textured base.
Sharpen your scraper edge with a file if it's dull for cleaner removal.
💡 Tips:
- •Apply body weight for leverage on longer skis.
⚠️ Warnings:
- •Metal scrapers can gouge the base—stick to plastic.
Step 8: Brush and Polish the Base
Brush vigorously from tip to tail with your nylon or horsehair brush to raise the base structure and polish the wax. Do 10-20 passes, then wipe with waxing paper for shine.
Brushing opens the sintered pores for better snow interaction and removes fine debris. The base should feel smooth and look subtly patterned, ready for snow—your glide test will confirm.
Finish with a final light brush to avoid over-fuzzing.
💡 Tips:
- •Brush in the direction of travel to mimic snow friction.
⚠️ Warnings:
- •Dirty brushes embed grit—clean them between uses.
▸Pro Tips
- •Match wax to snow temperature: Use harder waxes below freezing for durability.
- •Wax both skis identically to maintain balance and even wear.
- •Store skis base-to-base after waxing to preserve the layer longer.
- •For racing, add a fluoro topcoat for extra speed in dry conditions.
- •Practice on old skis first to build confidence without risking your mains.
- •Keep your iron clean with wax scraps to prevent contamination.
- •Tune edges lightly before waxing for all-around performance.
▸Common Mistakes to Avoid
- •Overheating the iron, which burns the wax and base—always use a thermometer.
- •Skipping the cleaning step, leading to poor wax adhesion and patchy glide—always degrease first.
- •Uneven wax application, causing drag on one side—iron in consistent passes.
- •Scraping too soon while wax is soft, resulting in shallow penetration—wait full cool time.
- •Using the wrong wax type for conditions, like soft wax in cold snow that ices up—check forecasts.
▸Troubleshooting
Problem: Wax not penetrating evenly or beading up
Solution: Ensure the base is clean and dry; re-clean if needed. Lower iron temp slightly for better absorption. If persistent, the base may need professional stone grinding.
Problem: Skis feel draggy after waxing
Solution: Re-brush thoroughly to open structure. Test on snow; if still slow, apply a fresh layer or check for base contamination. Seek pro tuning for deeper issues.
Problem: Base damaged by iron heat
Solution: Cool immediately with a damp cloth and avoid further heat. For burns, sand lightly and repair with P-Tex. Prevent by using controlled irons; consult a shop for severe damage.
Problem: Excess wax buildup after scraping
Solution: Use more pressure or sharpen the scraper. Brush multiple times. If it persists, the wax may be too hard—switch to a softer blend next time.
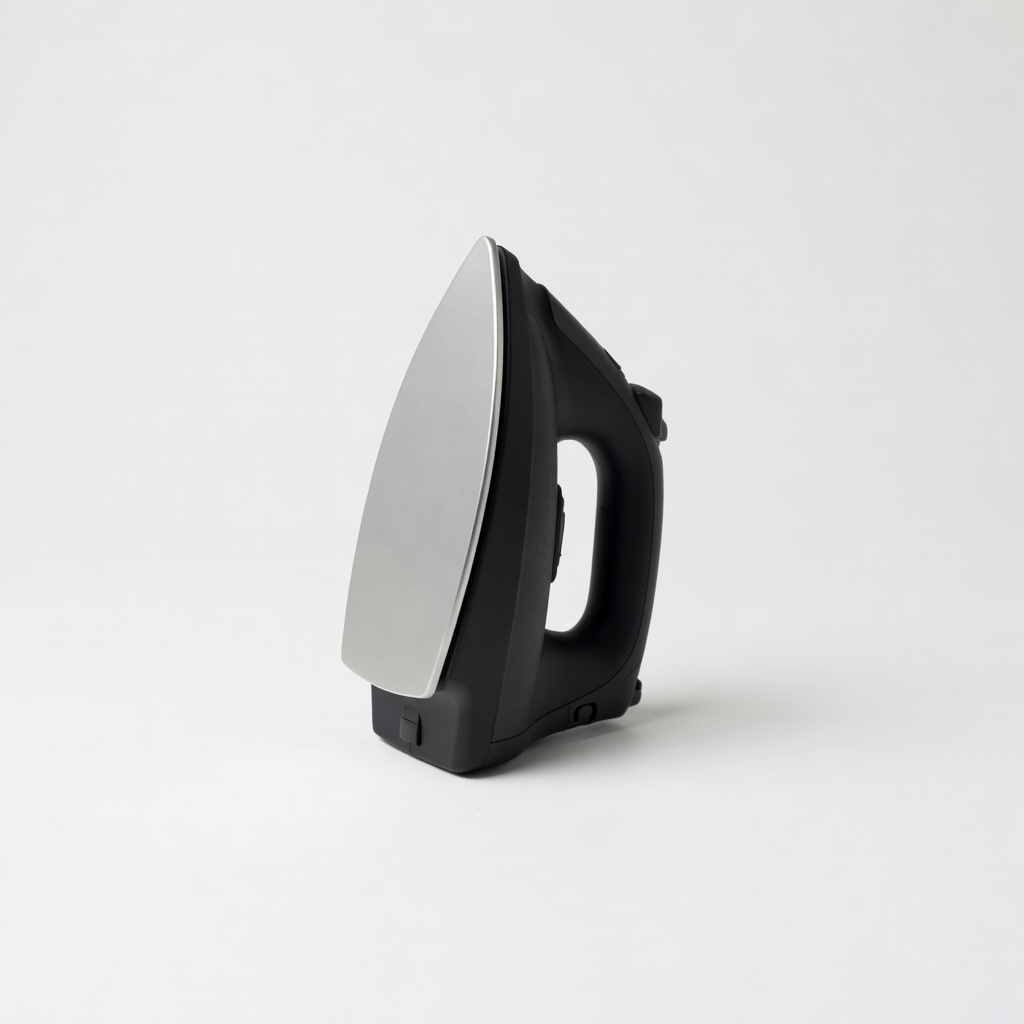
Dakine Low-Temp Wax Iron
Precise temperature control prevents base damage while ensuring deep wax melt—essential for consistent results.
Best for: Ideal for home waxing sessions on all ski types, especially for intermediates avoiding overheating mishaps.
Price Range: $50-$60
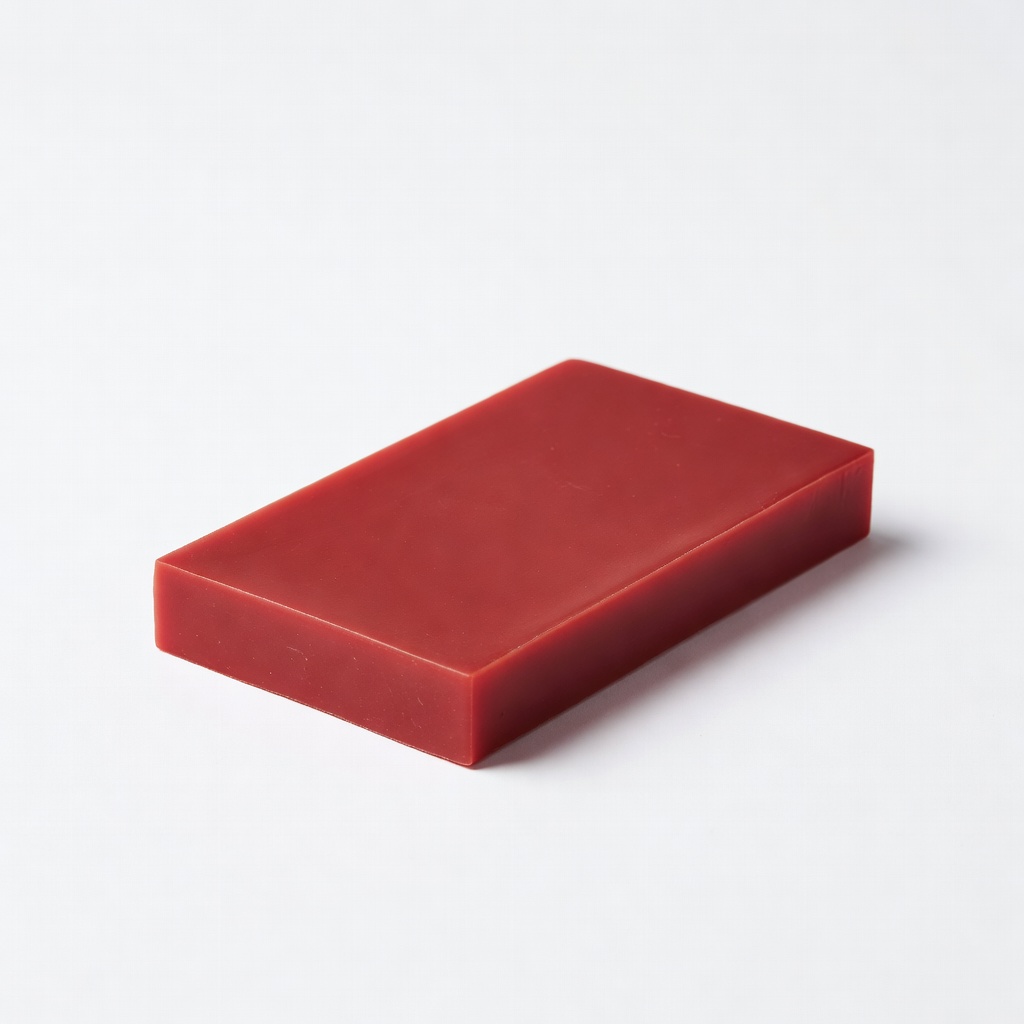
Swix CH8 All-Temp Wax
Versatile hydrocarbon formula works in varied conditions, providing reliable glide without fluoros for eco-friendly tuning.
Best for: Great for recreational skiing in mixed temps; apply hot for bases needing everyday performance boost.
Price Range: $25-$30
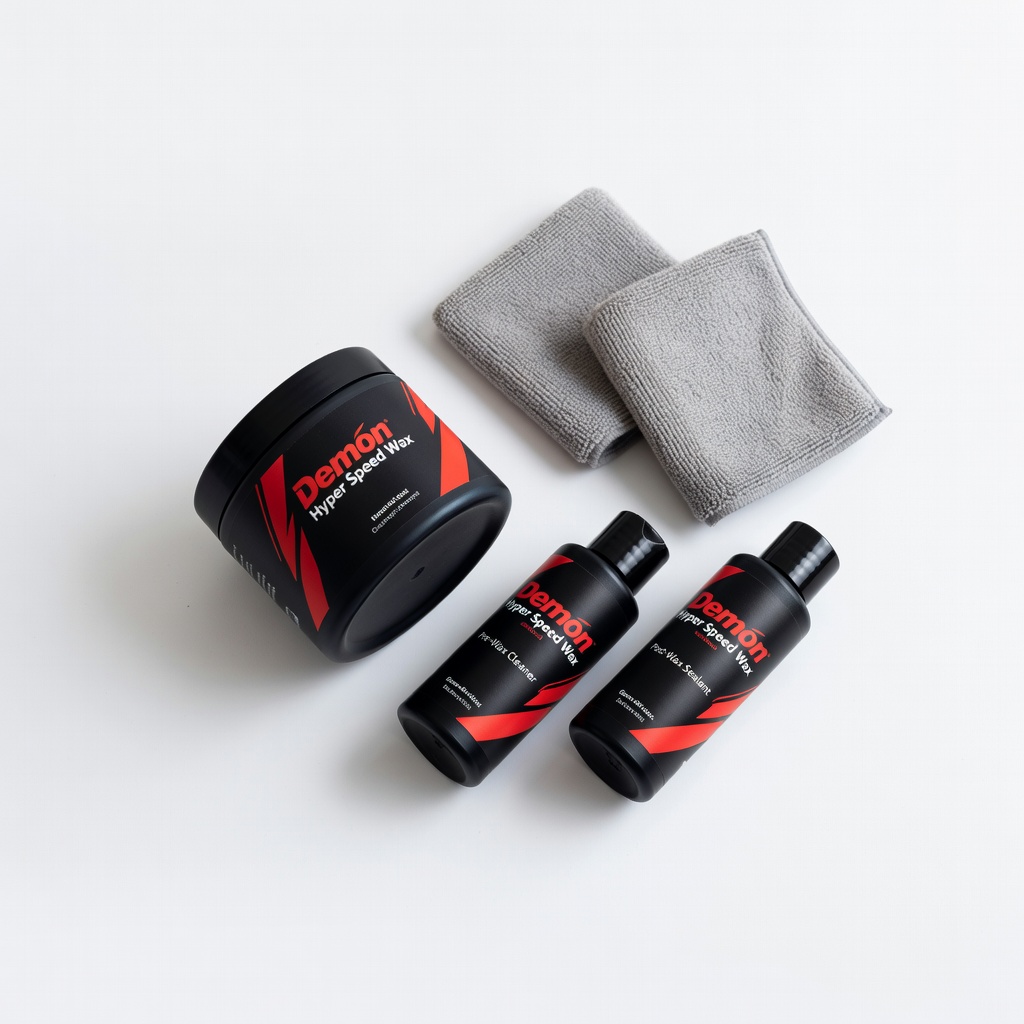
Demon Hyper Speed Wax Kit
Includes wax, scraper, and brush in one affordable set—perfect starter kit with high-performance blend for better speed.
Best for: Use for quick tune-ups before trips; the kit simplifies the process for intermediate users.
Price Range: $40-$50
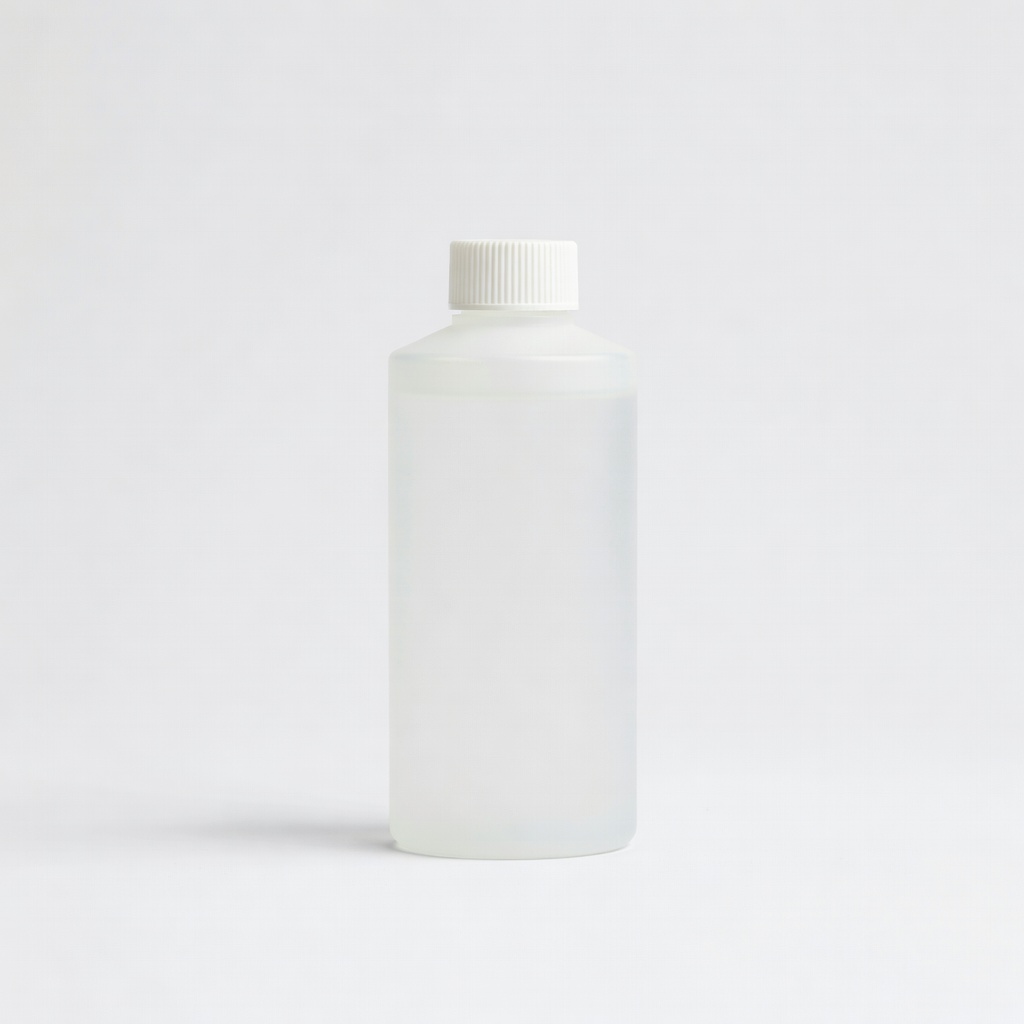
Holmenkol Base Cleaner
Effective citrus-based formula removes old wax and dirt without residue, prepping bases optimally for new applications.
Best for: Apply before every wax job to ensure clean adhesion; especially useful for neglected skis.
Price Range: $15-$20
Swix Nylon Polishing Brush
Durable and effective for finishing wax, raising structure for superior glide without scratching.
Best for: Final step in tuning; use after scraping to polish and test-ready your skis.
Price Range: $10-$15