Refrigerant recovery is a critical skill for HVAC technicians, mandated by EPA Section 608 regulations to prevent the release of harmful substances like R-410A or R-134a into the atmosphere. Improper recovery can lead to fines, equipment damage, or voided warranties, while mastering it ensures efficient service and system longevity.
In this guide, you'll learn the complete step-by-step process for active refrigerant recovery using manifold gauges, recovery machines, and cylinders. Expect to handle real-world scenarios like recovering from residential split systems or commercial units. This advanced tutorial assumes familiarity with AC basics and safe handling of refrigerants.
The process takes 45-90 minutes per unit depending on charge size and system condition, with moderate physical effort and high attention to pressure readings.
▸What You'll Need
- •EPA 608 certification (required by law)
- •Manifold gauge set (e.g., 4-port with R-410A/R-134a gauges)
- •Refrigerant recovery machine (2-stage, capable of 15-20 inHg vacuum)
- •DOT-approved recovery cylinder (empty, 30-50 lb capacity, with liquid level indicator)
- •Recovery hoses (1/4" SAE with ball valves, color-coded)
- •Micron gauge or digital vacuum gauge
- •PPE: safety glasses, gloves, refrigerant-rated apron
- •Scale for weighing recovered refrigerant (optional but recommended)
- •Nitrogen tank and regulator (optional for purging)
Estimated Time: 45-90 minutes per AC unit
Difficulty: advanced
▸Step-by-Step Instructions
Step 1: Prepare Workspace and Safety Gear
Clear the work area around the AC unit, ensuring good ventilation to avoid refrigerant vapor buildup. Don full PPE including ANSI-rated safety glasses, nitrile gloves, and a refrigerant-resistant apron. Verify EPA certification and locate service ports on the outdoor condenser (high-side and low-side Schrader valves).
Why it matters: Refrigerants are asphyxiants and can cause frostbite or chemical burns. Success looks like a clutter-free, ventilated space with all gear worn.
Inspect tools for damage: check hoses for cracks, gauges for leaks, and ensure recovery machine oil is full.
💡 Tips:
- •Work with a partner for large systems.
- •Use a refrigerant identifier if contamination is suspected.
⚠️ Warnings:
- •Never recover without ventilation—risk of oxygen displacement.
- •Confirm cylinder is for the specific refrigerant type (e.g., no mixing R-410A and R-22).
Step 2: Connect Manifold Gauges to AC Unit
Attach the blue hose (low-side) to the suction (low-pressure) port and red hose (high-side) to the liquid (high-pressure) port on the condenser. Purge air from hoses by cracking the manifold valves briefly.
This establishes baseline pressures. Expect static pressures based on ambient temp (e.g., 100-150 psi for R-410A at 80°F). Zero the gauges if digital.
Close both manifold hand valves after connection.
💡 Tips:
- •Use short, high-quality hoses to minimize volume.
- •Note initial pressures for later verification.
⚠️ Warnings:
- •Avoid over-purging—releases refrigerant unnecessarily.
Step 3: Set Up Recovery Cylinder and Machine
Place the empty recovery cylinder on a scale, tare it, and connect the yellow hose from the manifold center port to the machine's inlet. Connect the machine outlet to the cylinder vapor port (use liquid port for push-pull on large charges >15 lbs).
Position cylinder upright on a stable, non-flammable surface away from the unit. Success: All connections hand-tight plus 1/4 turn with wrench; no leaks when soapy water tested.
Prime the recovery machine per manufacturer instructions.
💡 Tips:
- •Invert cylinder briefly if liquid recovery to ensure vapor start.
- •Label cylinder with refrigerant type, weight, and date immediately.
⚠️ Warnings:
- •Overfill cylinder to 80% max—explosion risk from thermal expansion.
Step 4: Purge Hoses and Evacuate Air
Open the manifold high-side valve briefly to purge yellow hose to recovery machine, then close. Open low-side manifold valve to pull vacuum on hoses using the machine (run 1-2 minutes to 25 inHg).
This removes non-condensables. Expect manifold to show vacuum; listen for machine hum without abnormal noise.
Close all valves once evacuated.
💡 Tips:
- •Use a micron gauge (<500 microns ideal) for precision.
⚠️ Warnings:
- •Skipping purge contaminates cylinder with air/moisture.
Step 5: Perform Vapor Recovery
Start recovery machine in vapor mode. Open low-side manifold valve first, then high-side if pressures allow (recover vapor until 0-5 psi or vacuum).
Monitor cylinder weight and pressures continuously. Recovery complete when suction pressure holds at 15 inHg vacuum for 5 minutes, or per EPA guidelines (95% vapor recovery).
Shut off machine, close low-side valve.
💡 Tips:
- •Recover vapor first to prevent liquid slugging the compressor.
⚠️ Warnings:
- •Don't run to deep vacuum without triple evac if reusing refrigerant.
Step 6: Switch to Liquid Recovery (If Needed)
For charges >10 lbs, switch to push-pull: Connect high-side manifold hose to cylinder liquid port. Run machine, opening valves to circulate liquid refrigerant faster.
Expect 2-3x speed over vapor. Stop when 5-10 lbs remain (switch back to vapor).
Total recovery: aim for 90-99% depending on method.
💡 Tips:
- •Ideal for commercial systems; saves 20-30 minutes.
⚠️ Warnings:
- •Liquid slugging damages machine—monitor closely.
Step 7: Disconnect, Triple Evacuate, and Finalize
With system at vacuum, close all valves, shut off machine. Disconnect hoses starting from cylinder (bleed remaining refrigerant into cylinder). Triple evacuate unit to 500 microns if opening system.
Weigh cylinder final: record amount recovered. Cap ports, label cylinder (refrigerant, purity, date).
Success: Cylinder at <80% full, labeled, pressures stable.
💡 Tips:
- •Store cylinder in cool, shaded area.
⚠️ Warnings:
- •Leak test disconnections with soap solution.
▸Pro Tips
- •Always recover in ambient temps >50°F for better efficiency.
- •Use app-based digital manifolds (e.g., Testo or Fieldpiece) for wireless pressure logging.
- •Pre-chill recovery cylinder in ice bath for faster recovery.
- •For hybrid cars, use dedicated automotive recovery tools.
- •Document recovery on service invoice for EPA audits.
- •Maintain recovery machine weekly: change oil, clean filters.
- •Batch small recoveries to minimize cylinder openings.
▸Common Mistakes to Avoid
- •Recovering liquid first: Slugs compressor, causes failure—always start vapor.
- •Overfilling cylinder: Exceeds 80% DOT limit, rupture risk—use scale always.
- •Skipping hose purge: Introduces air/moisture, ruins refrigerant purity.
- •Ignoring vacuum levels: Leaves contaminants, reduces future efficiency.
- •Mixing refrigerants: Violates EPA, contaminates cylinder—verify type first.
▸Troubleshooting
Problem: Recovery machine won't start or hums weakly
Solution: Check power, oil level, fuses. Ensure hoses purged—no blockage.
Problem: Pressures not dropping—slow recovery
Solution: Verify no leaks with electronic detector. Clean machine inlet filter. Switch to push-pull.
Problem: Cylinder frosting excessively
Solution: Normal for liquid recovery; insulate hoses. Stop if machine strains.
Problem: Vacuum won't hold post-recovery
Solution: Leak in system—use nitrogen sniff test. Triple evac longer.
Problem: When to call pro: Contaminated refrigerant or machine failure—seek certified shop.
Solution: undefined
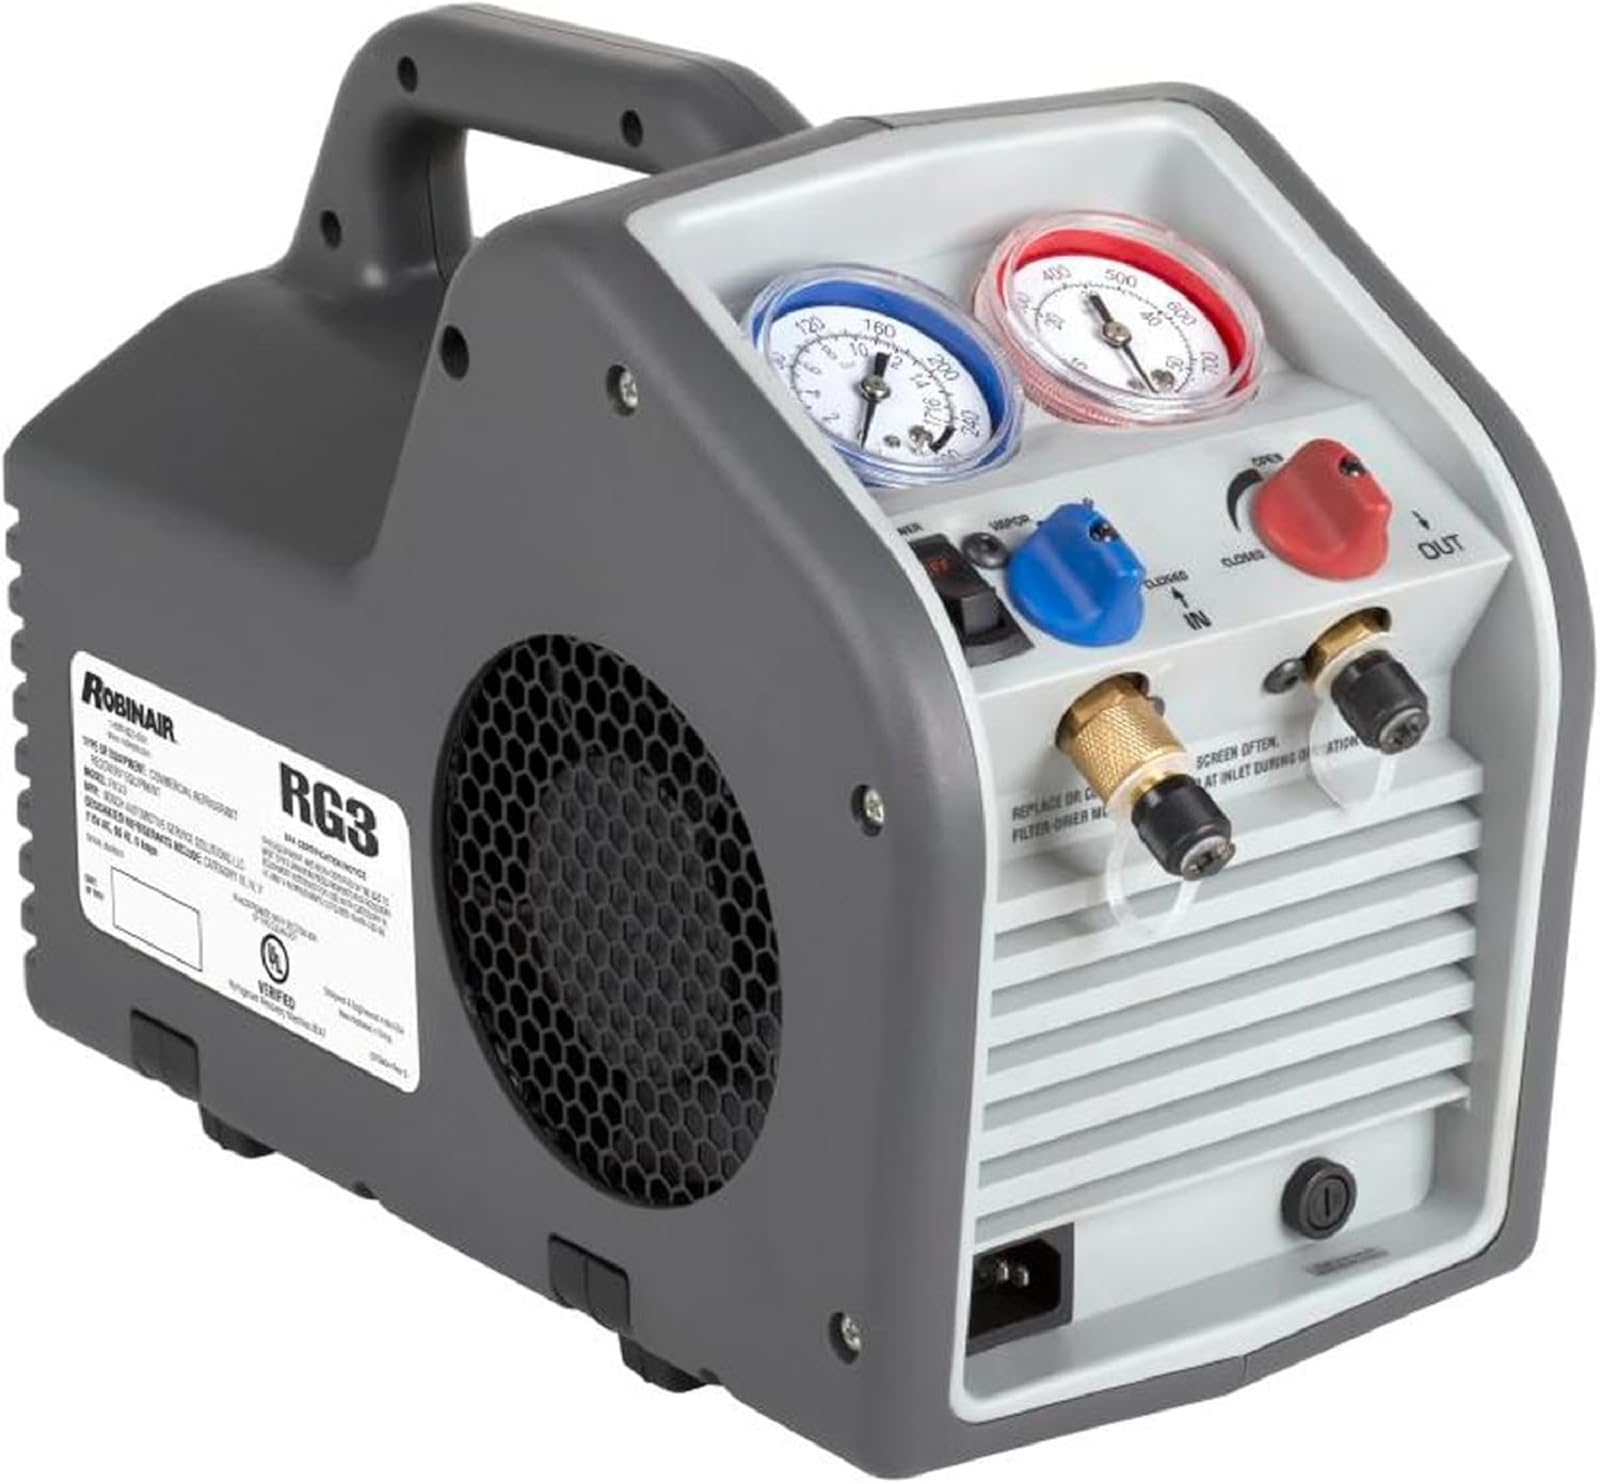
Robinair RG3 Twin Refrigerant Recovery Machine
Compact 2-stage design recovers vapor/liquid fast, handles R-410A/R-134a efficiently with auto-oil drain.
Best for: Ideal for residential AC service; portable for field techs.
Price Range: $350-$450
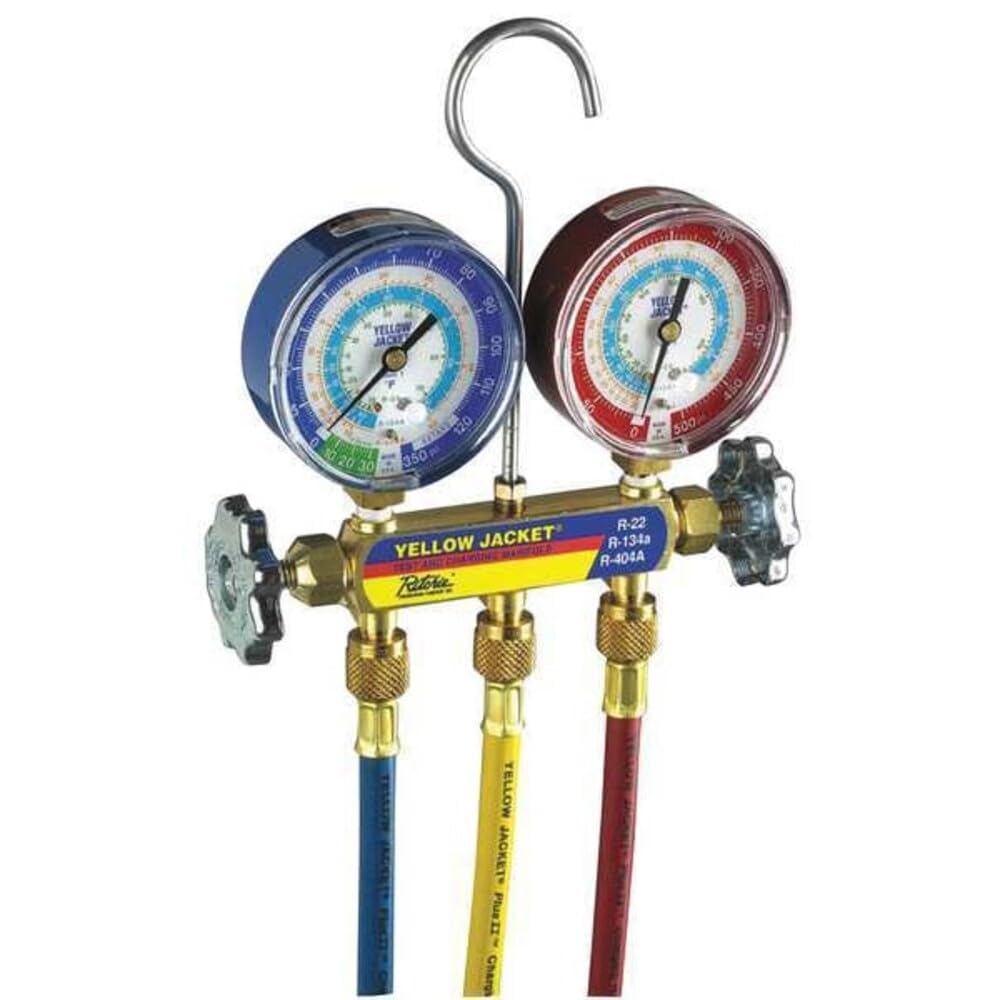
Yellow Jacket 46006 Series 41 Manifold Gauge Set
Durable 4-port with large gauges, accurate for high-pressure refrigerants, includes protective case.
Best for: Daily use on split systems; extras ports for vacuum/recovery.
Price Range: $100-$130
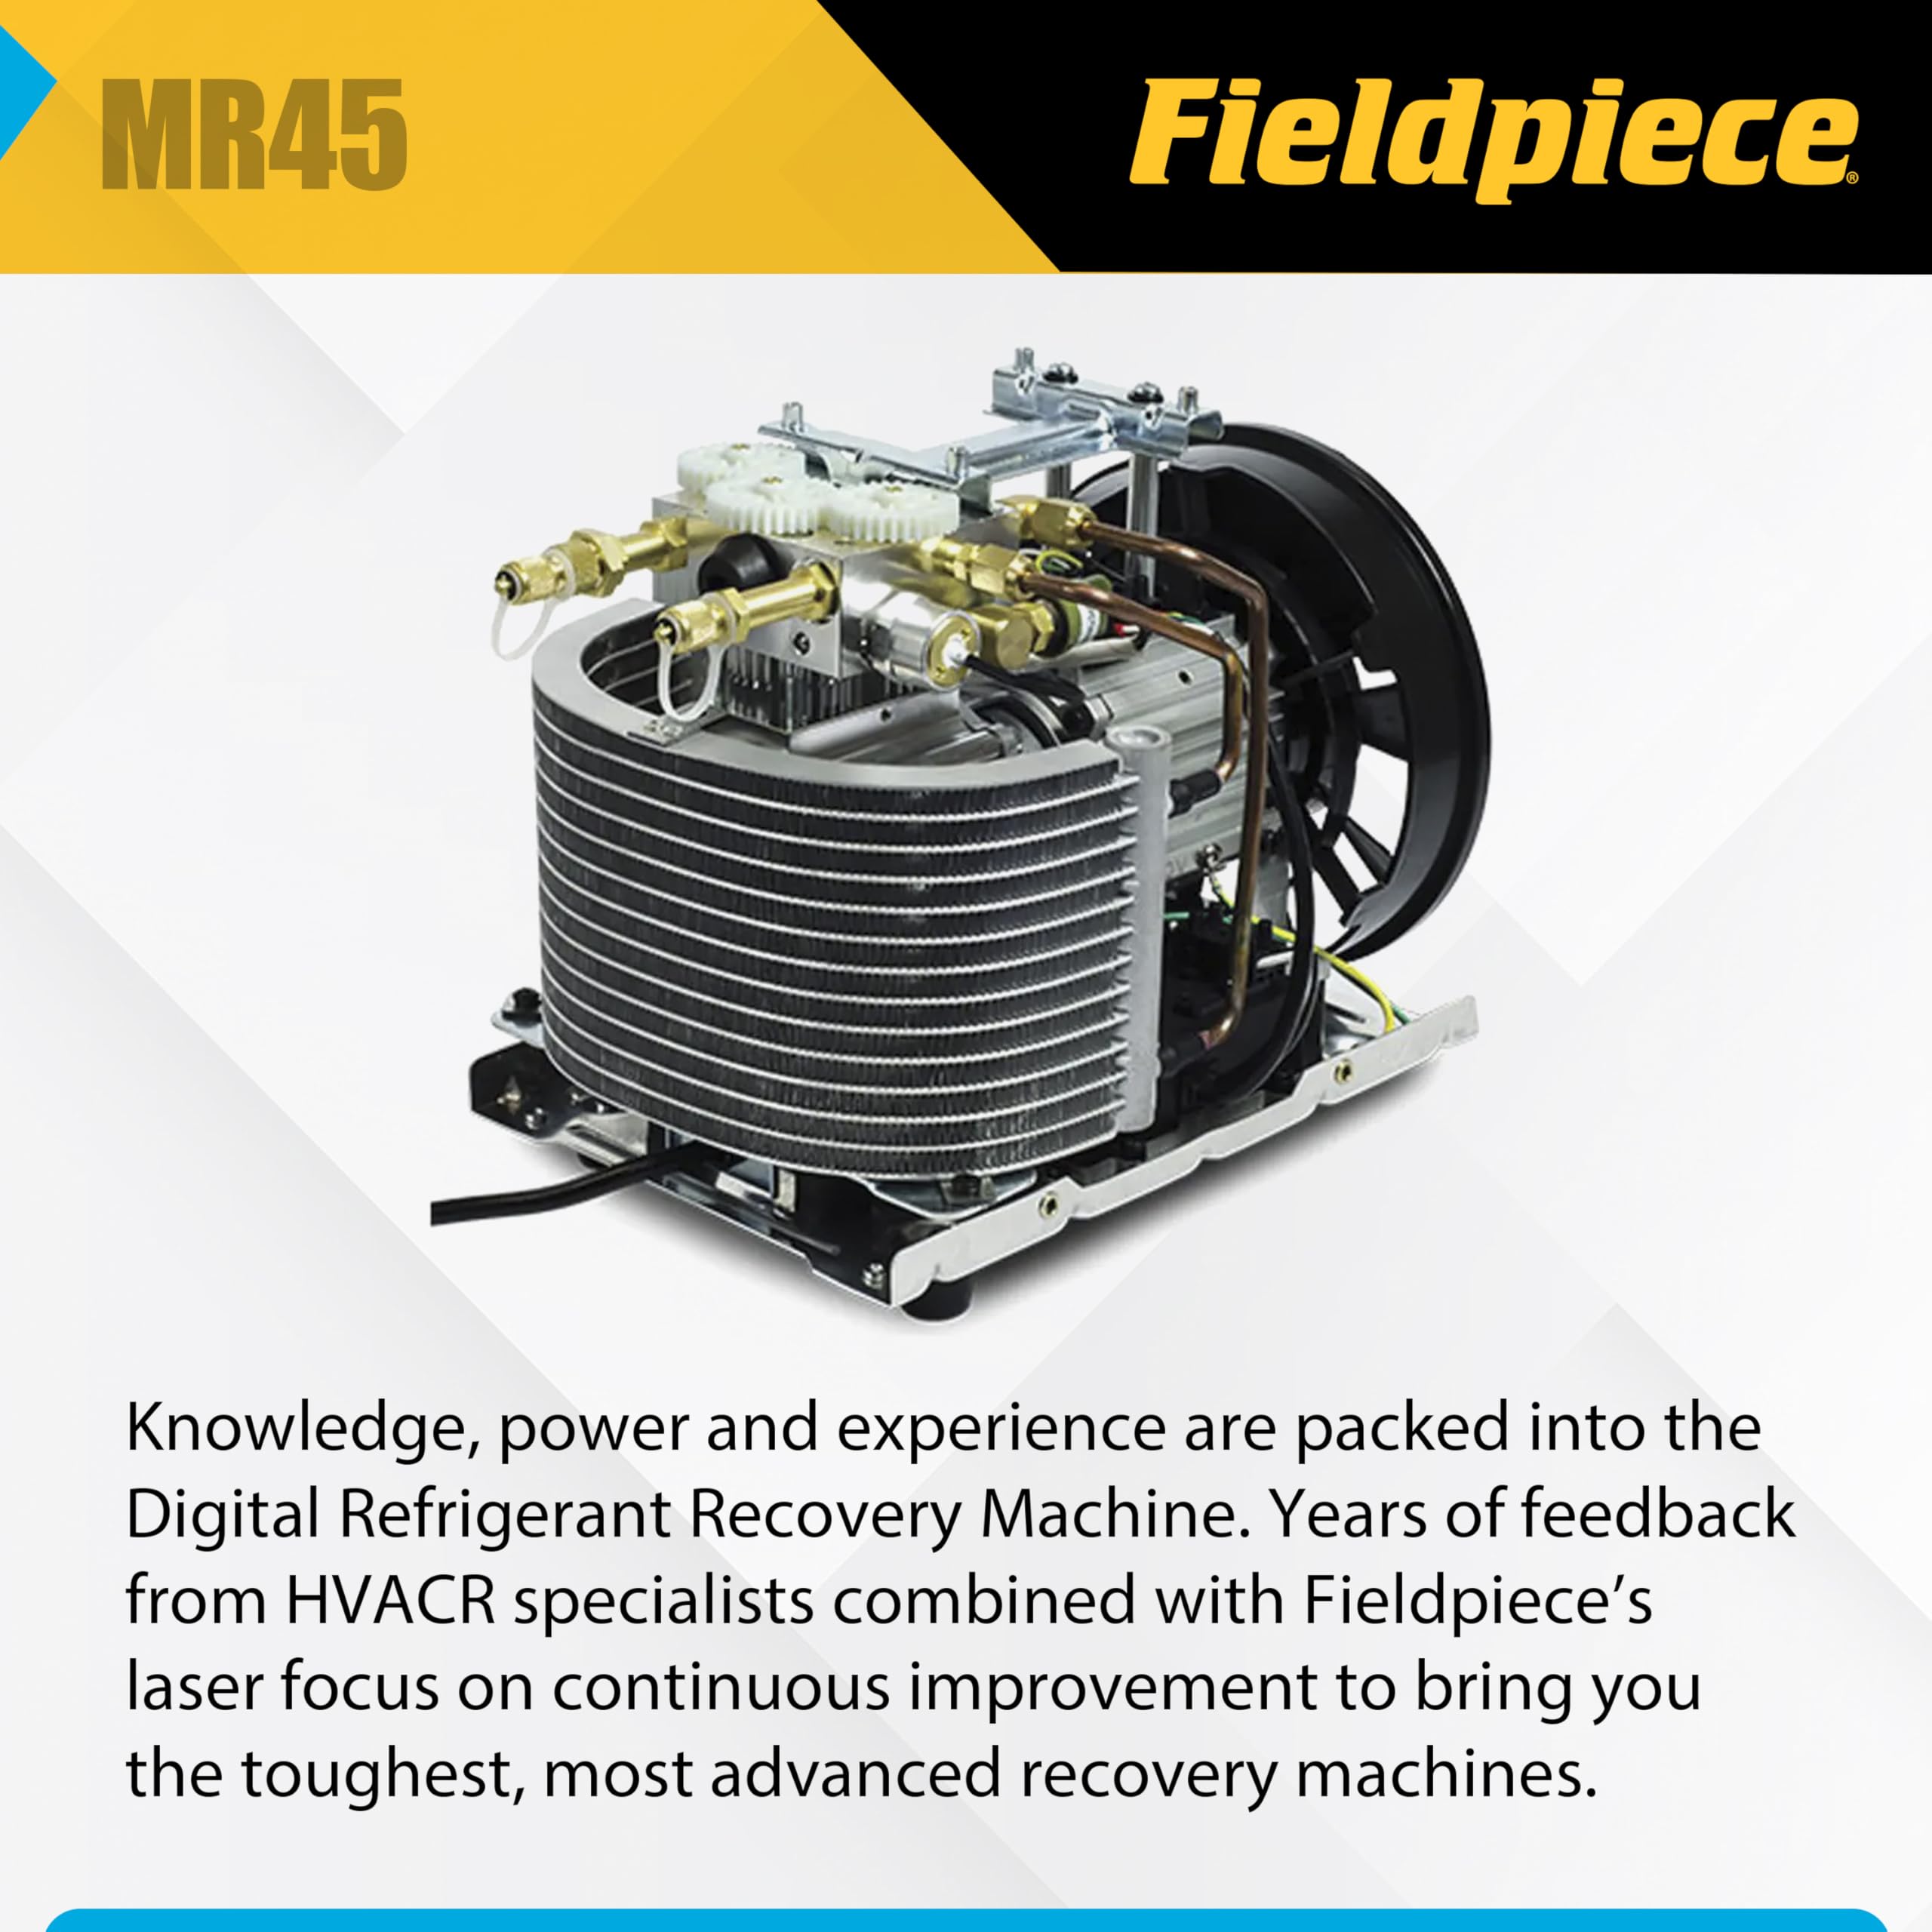
Fieldpiece MR45 Digital Recovery Machine
Variable speed, digital display for precise control, low-temp operation down to -22°F.
Best for: Advanced techs needing diagnostics; commercial/large residential.
Price Range: $550-$650
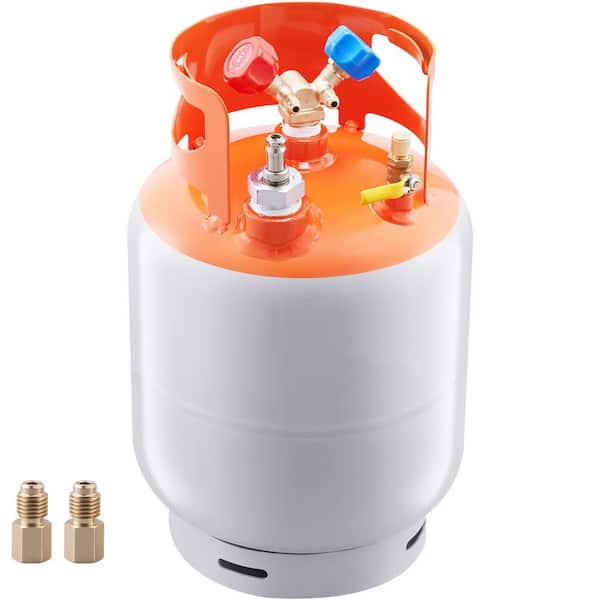
Mastercool 90066-A 30lb Recovery Cylinder
DOT-approved aluminum, with sight glass and 80% fill line for safe, visible monitoring.
Best for: Standard residential charges; lightweight alternative to steel.
Price Range: $120-$150
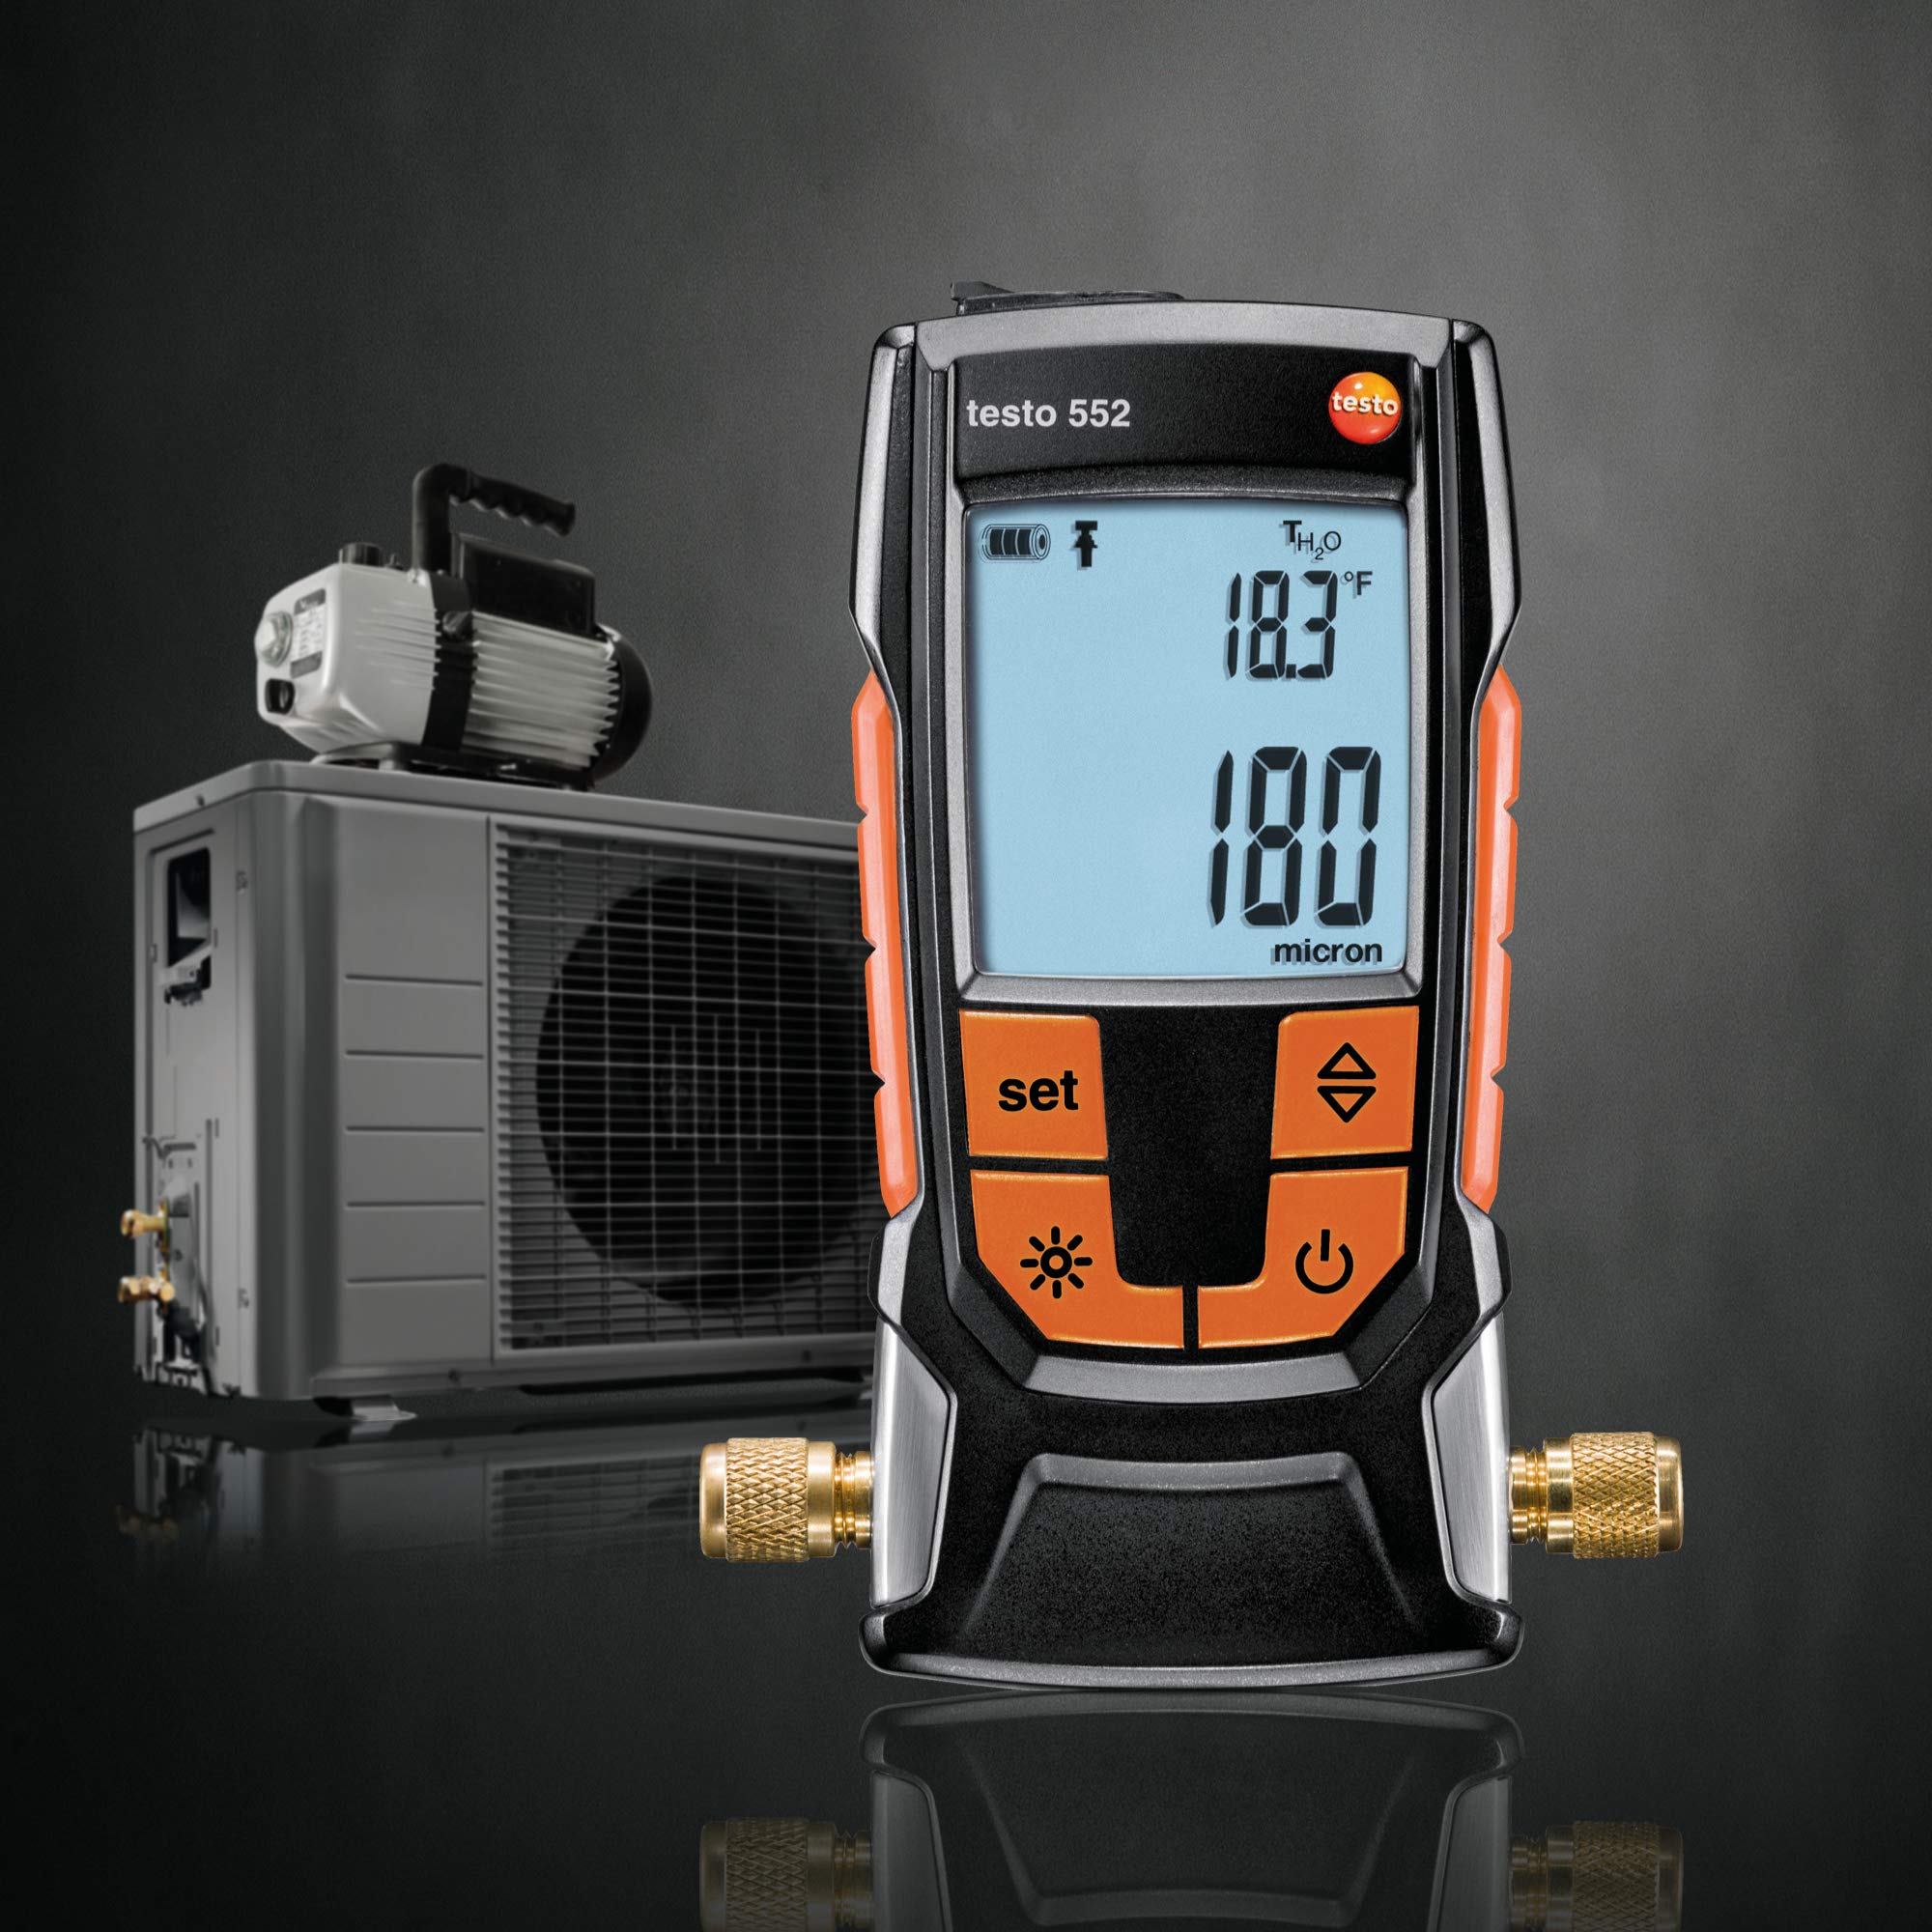
Testo 552 Digital Vacuum Gauge
Precise micron readings with app connectivity for troubleshooting evacuations.
Best for: Verify deep vacuum post-recovery; pairs with any manifold.
Price Range: $200-$250