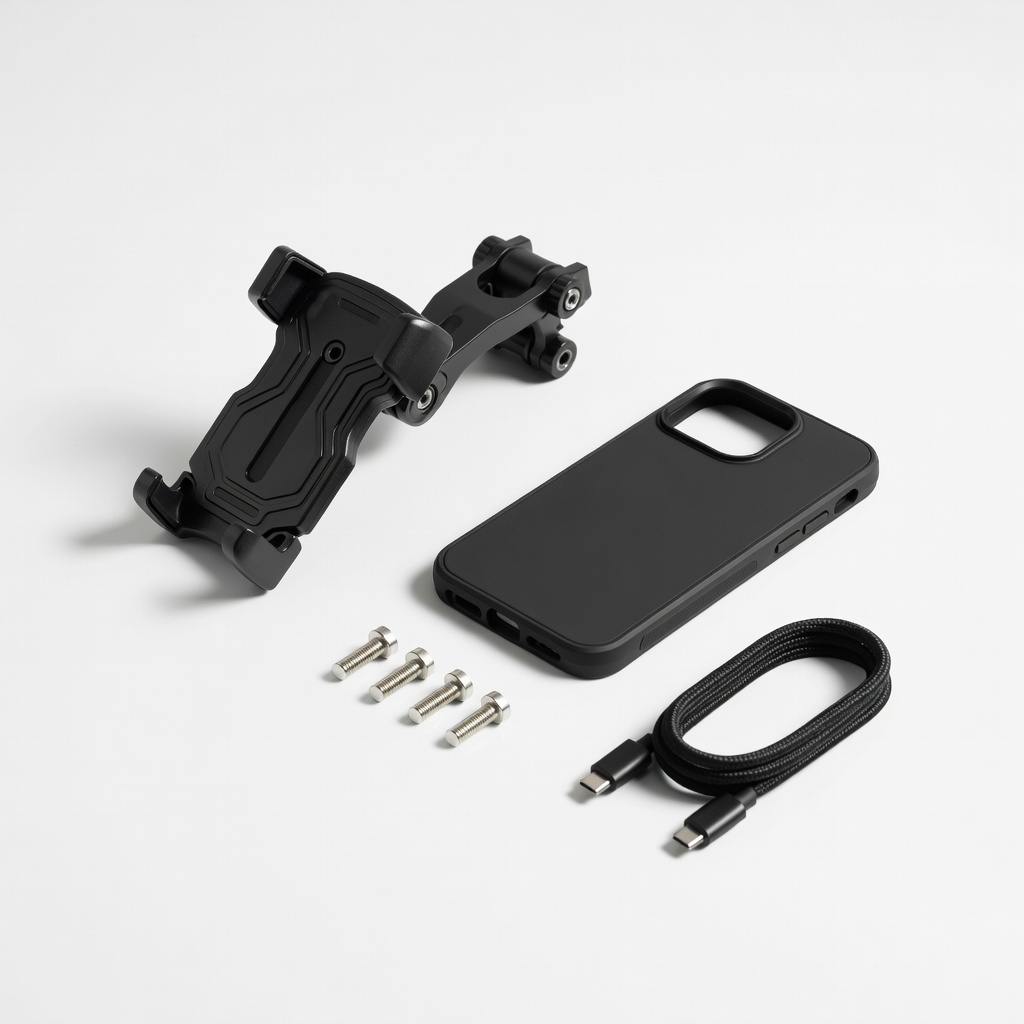
Quad Lock Complete Motorcycle Kit
Handlebar or fork installs for intermediate riders needing secure phone holding.
$89.99
Quad Lock Complete Motorcycle Kit Vibration-dampened phone/GPS mount with all hardware—perfect starter kit for nav setups.
Get the App
Better experience on mobile
Master installing crash bars, phone mounts, and luggage kits on your bike in under 2 hours for safer, customized rides.
Customizing your motorcycle with accessory kits like crash bars, phone mounts, or luggage racks boosts safety, convenience, and style—but botched installs can lead to vibrations, failures, or warranty voids. If you're an intermediate rider tired of stock limitations, this guide equips you to install kits confidently.
You'll learn a universal step-by-step process applicable to most bolt-on kits, from unpacking to test riding. Expect 1-2 hours per kit, depending on complexity—no advanced fab skills needed, just basic tools and torque precision.
By the end, your bike will sport pro-level accessories, vibration-free and secure, ready for adventures.
Estimated Time: 1-2 hours Difficulty: intermediate
Park your motorcycle on a flat, stable surface in a well-lit garage. Use a paddock stand or jack to elevate the bike securely, ensuring it can't tip. Clean the installation areas (e.g., frame tubes for crash bars) with degreaser to remove dirt and oil—this ensures strong adhesion.
Why it matters: A clean, stable setup prevents slips and contamination that weaken bolts. Success looks like a rock-solid bike with spotless mounting points, ready for work without wobbles.
💡 Tips:
⚠️ Warnings:
Open the kit and lay out all parts: brackets, bars/pads, bolts, spacers, instructions. Match each against the manual's diagram, checking for damage or missing items (contact seller if short).
This step avoids mid-install halts. Success: All components identified and grouped by install sequence, like base brackets first.
💡 Tips:
Consult your service manual for any fairings, guards, or bolts to remove (e.g., plastic covers on frame). Use sockets/Allen keys gently—label bolts for reinstall.
Why: Kits bolt to OEM points; obstructions cause misalignment. Expect minor disassembly; success is clean access without scratches.
⚠️ Warnings:
Position brackets on frame/engine mounts per instructions. Hand-thread bolts with spacers, then snug with wrench. Apply thread locker to threads first.
This is the foundation—loose here dooms the kit. Success: Brackets align perfectly, no gaps or stress.
💡 Tips:
Slide on crash bars, phone mounts, or racks. Secure with remaining bolts, torquing in a cross-pattern (e.g., 25-35 Nm for most M8 bolts—check manual).
Why torque matters: Prevents loosening from vibes. Expect firm resistance; success is snug, rattle-free fit.
⚠️ Warnings:
Re-torque all bolts after a gentle rock of the bike. Ensure no contact with exhaust/tires; adjust spacers if rubbing.
Prevents failures on road. Success: Everything symmetric, no play when tugged.
💡 Tips:
Lower bike, start engine, idle for 5 mins checking heat/noises. Short ride (10 mins): note vibes or shifts.
Confirms install. Success: Smooth ride, accessories stable.
⚠️ Warnings:
Problem: Vibrations or rattles post-install
Solution: Re-torque all bolts; add spacers or locknuts. Check for frame contact.
Problem: Accessory rubs tire/exhaust
Solution: Loosen, realign with more spacers. Test at full suspension travel.
Problem: Bolts won't thread
Solution: Clean threads, chase with tap if damaged. Wrong size? Verify kit-bike fit.
Problem: Kit doesn't fit model
Solution: Confirm compatibility pre-buy. Seek pro shop for adapters.
Vibration-dampened phone/GPS mount with all hardware—perfect starter kit for nav setups.
Best for: Handlebar or fork installs for intermediate riders needing secure phone holding.
Price Range: $89.99
Universal pannier mounting kit with precise brackets—durable for luggage expansion.
Best for: Adding side cases for touring; bolts directly to OEM points.
Price Range: $120-$150
PU pucks and sliders protect fairings in drops—easy bolt-on for sportbikes.
Best for: Track or street protection; quick install on swingarm/fairings.
Price Range: $79.95
Medium-strength formula for vibrations—essential for all kits.
Best for: Apply to every bolt; prevents loosening without drill-out.
Price Range: $12.99
Compact 1/4" drive for precise 10-50 Nm—must-have for safe installs.
Best for: All motorcycle torque needs; accurate to 2%.
Price Range: $69.99
Handlebar or fork installs for intermediate riders needing secure phone holding.
Quad Lock Complete Motorcycle Kit Vibration-dampened phone/GPS mount with all hardware—perfect starter kit for nav setups.
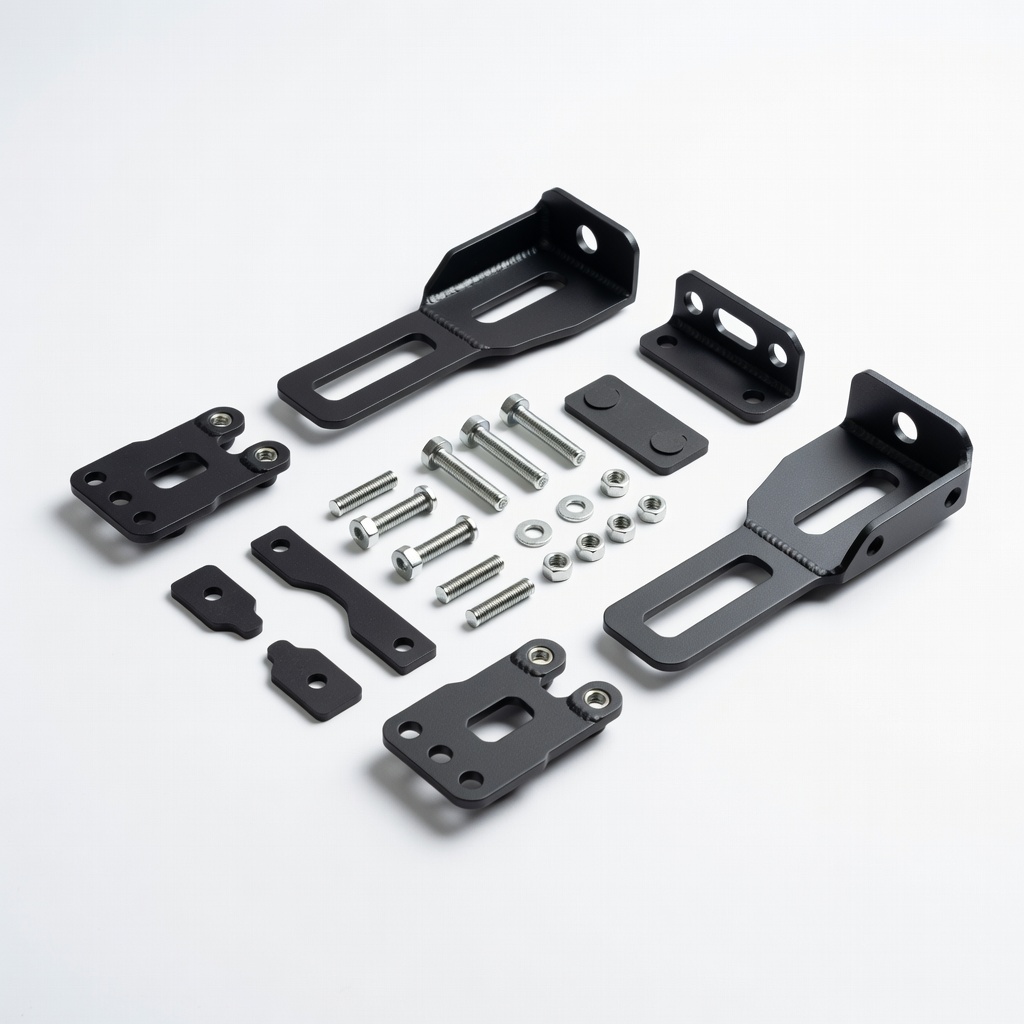
Adding side cases for touring; bolts directly to OEM points.
GIVI SR3473M Side Case Holder Kit Universal pannier mounting kit with precise brackets—durable for luggage expansion.
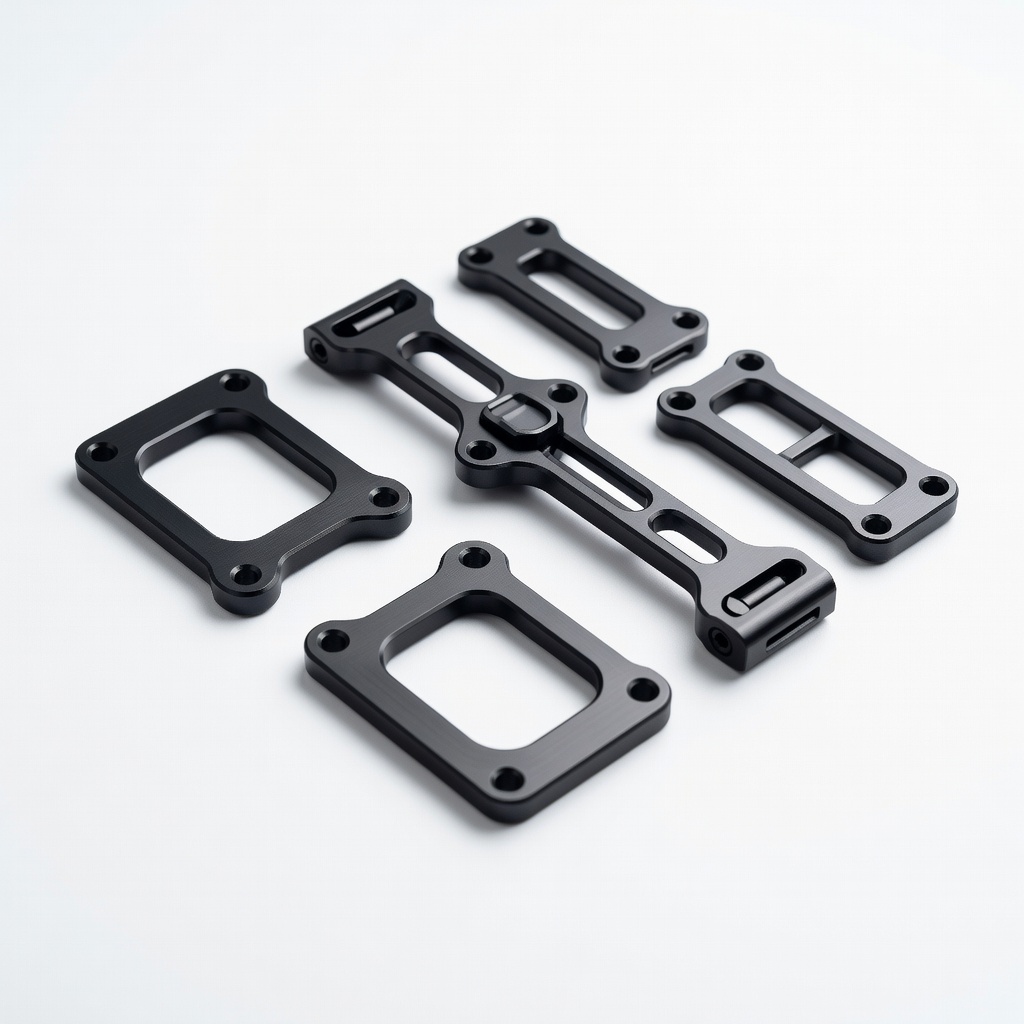
Track or street protection; quick install on swingarm/fairings.
T-Rex Racing GPS Crash Protector Kit PU pucks and sliders protect fairings in drops—easy bolt-on for sportbikes.

Apply to every bolt; prevents loosening without drill-out.
Loctite 243 Blue Threadlocker Medium-strength formula for vibrations—essential for all kits.
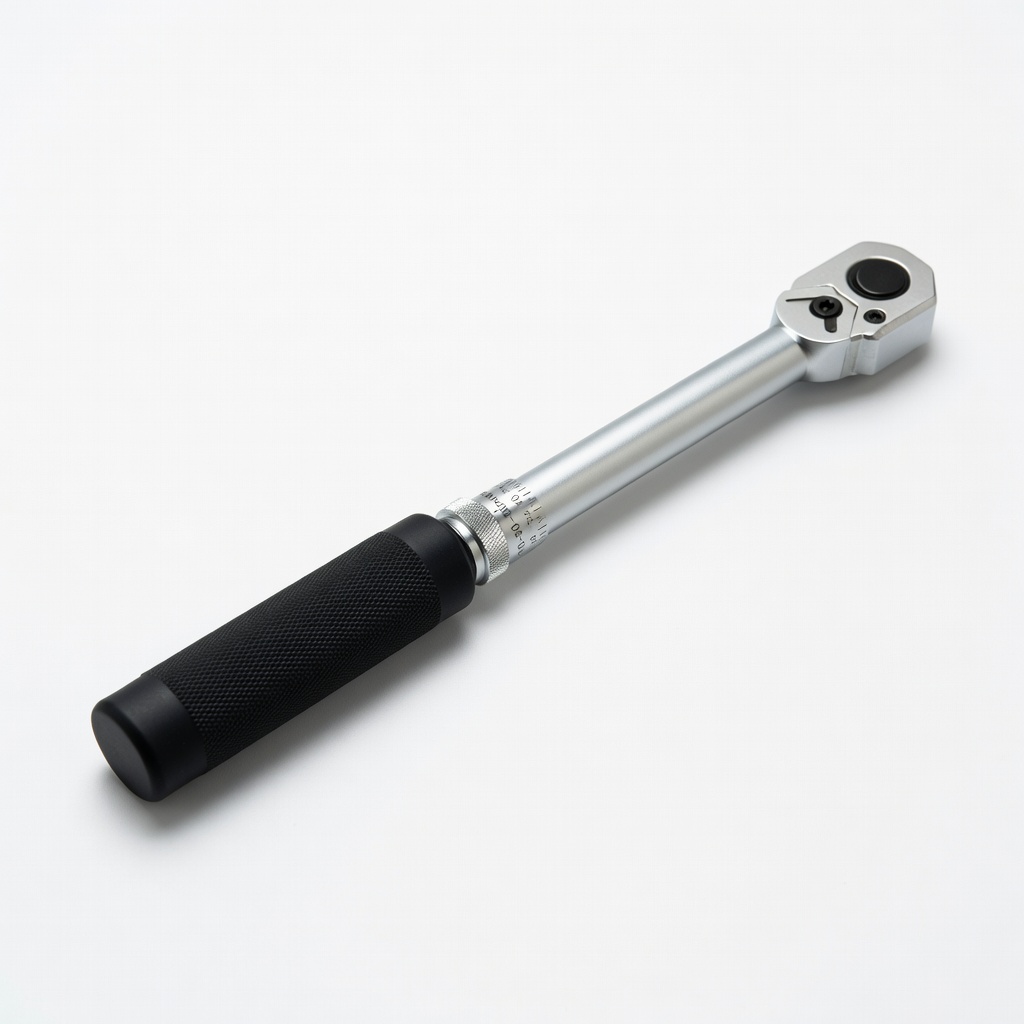
All motorcycle torque needs; accurate to 2%.
Motion Pro Torque Wrench Compact 1/4" drive for precise 10-50 Nm—must-have for safe installs.