Struggling to see tools, cargo, or gear in your dark truck bed at night? Accent lighting solves this by providing targeted, stylish illumination without the harsh glare of floodlights. Perfect for off-road enthusiasts, contractors, or anyone customizing their truck, these LED strips or pods enhance functionality and aesthetics.
In this guide, you'll learn how to plan, install, wire, and use accent lighting safely. We'll cover everything from layout to testing, assuming basic electrical knowledge. Expect a clean, professional setup that turns heads and lights your way.
The process takes 1-2 hours for most trucks (e.g., Ford F-150, Chevy Silverado). It's intermediate difficulty—no advanced fabrication needed, but wiring requires care to avoid shorts.
▸What You'll Need
- •LED accent light strips or pods (e.g., waterproof 12V RGB or white LEDs, 20-50ft total)
- •Wiring harness kit (14-16 gauge wire, connectors, fuses)
- •Electrical tape, heat-shrink tubing, zip ties
- •On/off rocker switch (12V, illuminated optional)
- •Drill with bits, screwdriver, wire strippers, crimpers
- •Multimeter for testing
- •Cleaner (isopropyl alcohol) and mounting adhesive or brackets
- •Optional: Inline fuse holder, relay for high-power setups
Estimated Time: 1-2 hours
Difficulty: intermediate
▸Step-by-Step Instructions
Step 1: Plan Your Lighting Layout
Start by visualizing where lights will go: along bed rails, tailgate, wheel wells, or tonneau cover edges. Sketch positions for even coverage—aim for 4-8 lights spaced 2-3 feet apart.
Why it matters: Proper planning prevents rewiring and ensures no dark spots. Measure bed length/width (e.g., 6.5ft short bed needs ~20ft strips). Decide on power source: battery, tail light tap, or upfitter switch.
Success: A marked diagram with wire routes avoiding pinch points like tailgate hinges.
💡 Tips:
- •Use painter's tape to mock up positions before mounting.
- •Opt for RGB for customizable colors/moods.
⚠️ Warnings:
- •Avoid blocking bed drains or cargo space.
Step 2: Clean and Prep the Surface
Park on level ground, disconnect battery negative terminal. Thoroughly clean mounting areas with isopropyl alcohol to remove dirt, wax, or grease.
Dry completely. This ensures adhesive sticks or brackets hold firm.
Success: Shiny, residue-free surfaces ready for install.
💡 Tips:
- •Work in shade to avoid adhesive curing too fast.
⚠️ Warnings:
- •Battery disconnect prevents shocks or shorts.
Step 3: Mount the Accent Lights
For adhesive strips: Peel backing, press firmly for 30 seconds along planned path. For pod lights: Drill pilot holes, secure with screws/brackets.
Route lights in a continuous line if using strips; cut only at marked points. Why? Secure mounting withstands vibration and weather.
Success: Lights fixed firmly, wires dangling for next step.
💡 Tips:
- •Use 3M VHB tape for vibration-prone trucks.
Step 4: Route and Secure Wiring
Run positive (+) and ground (-) wires from lights along frame, using zip ties every 12 inches. Avoid exhaust, moving parts, sharp edges—use loom tubing for protection.
Plan ~10-15ft extra wire for slack. Why? Prevents chafing, rattles, and shorts.
Success: Neat wiring bundles hidden from view.
⚠️ Warnings:
- •Never route near fuel lines or hot exhaust.
Step 5: Connect Wires to Power Source
Tap into 12V constant power (battery + terminal) or switched (tail lights/fuse box) using T-tap connectors or posi-taps. Install inline fuse (10-15A) near power source.
For high draw (>50W), add relay. Strip 1/2 inch, crimp connectors, seal with heat-shrink.
Success: Wires soldered/crimped, insulated, ready for switch.
💡 Tips:
- •Use multimeter to confirm 12V at tap point.
Step 6: Install the On/Off Switch
Mount rocker switch in cab (dash pod or panel hole). Wire: power to switch input, output to lights (+), ground lights to chassis.
Label wires. Why? Convenient control without exiting cab.
Success: Switch wired inline, panel reinstalled.
Step 7: Test the System
Reconnect battery. Turn on switch—lights should illuminate evenly, no flickering. Test tailgate open/close, drive over bumps.
Check polarity: Red +, black -. Adjust brightness/colors if RGB.
Success: Bright, stable lighting; no heat or sparks.
⚠️ Warnings:
- •If no light, check fuses first.
Step 8: Secure and Waterproof Everything
Double-check zip ties, apply dielectric grease to connectors, seal with silicone if exposed. Trim excess wire.
Why? Ensures longevity in rain, mud, off-road abuse.
Success: Pro-looking, weatherproof install ready for use.
💡 Tips:
- •IP67+ rated lights for best waterproofing.
▸Pro Tips
- •Choose dimmable LEDs for adjustable brightness.
- •Pair with app-controlled RGB for smartphone operation.
- •Use wire loom for a factory look.
- •Install during daylight for better visibility.
- •Add motion sensor for hands-free activation.
- •Test voltage drop over long runs—upgrade to 14AWG if needed.
- •Combine with underglow for full truck glow-up.
▸Common Mistakes to Avoid
- •Skipping fuse: Causes battery drain or fire risk—always add 10-15A inline.
- •Poor wire routing: Leads to shorts from abrasion—use protective tubing.
- •Ignoring polarity: Lights won't work or damage driver—double-check +/-.
- •Overloading adhesive: Vibration loosens mounts—use screws for pods.
- •No waterproofing: Rain kills LEDs fast—seal all connections.
▸Troubleshooting
Problem: Lights won't turn on
Solution: Check battery connection, fuses, switch wiring. Use multimeter for 12V at lights.
Problem: Flickering or dimming
Solution: Tighten loose connections, check for thin wire/voltage drop. Upgrade gauge if >20ft run.
Problem: One light out
Solution: Inspect strip cut points or pod fuses. Replace section if parallel wired.
Problem: Lights drain battery
Solution: Switch to triggered power (door/tail light) or add cutoff relay.
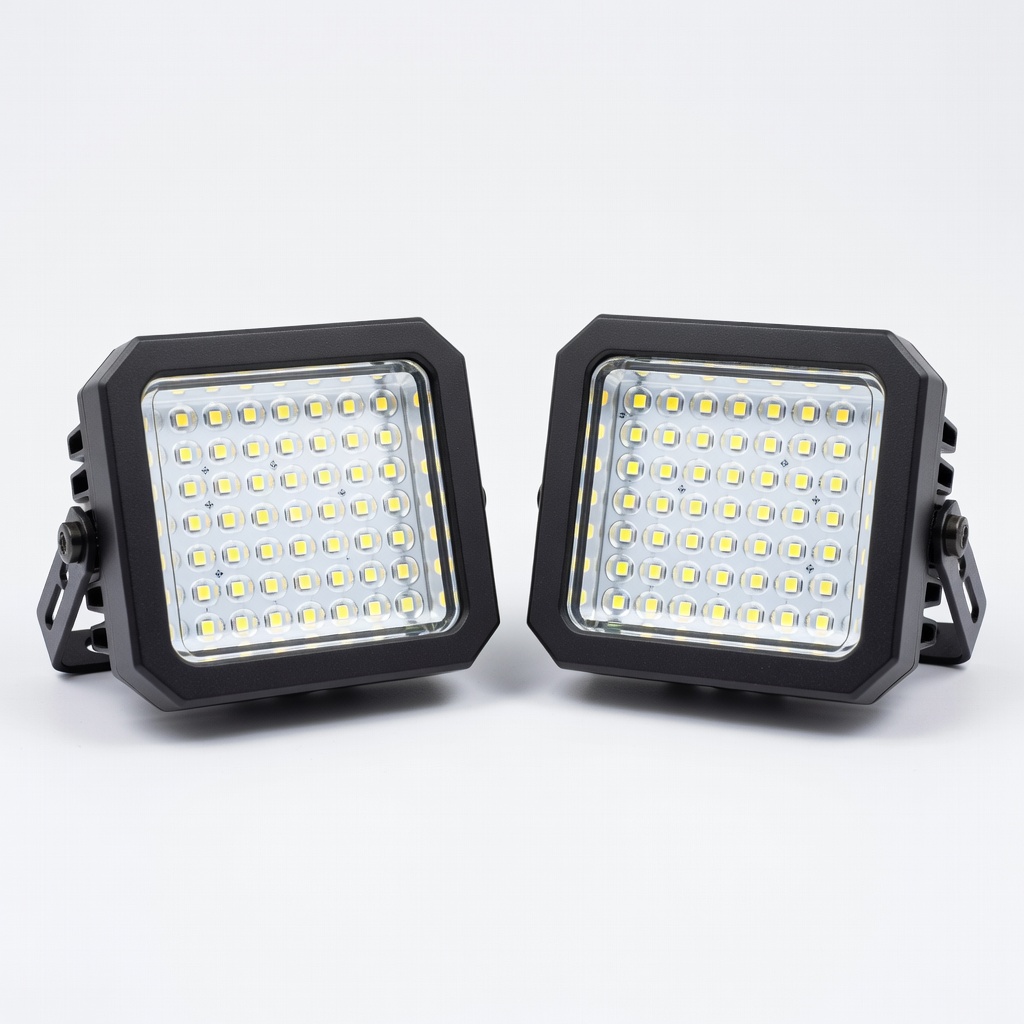
Nilight BA07 2PCS 18W LED Pods (ASIN B07D4R8Z3S)
Compact, waterproof pods perfect for targeted accent spots in wheel wells or rails—bright 1800 lumens with spot beam.
Best for: Ideal for short beds needing punchy light without full strips.
Price Range: $19.99
Nilight 90107E 12V Wiring Harness (ASIN B07R8V5J5J)
Pre-wired with relay and switch for plug-and-play install—handles up to 180W safely.
Best for: High-power RGB strips or multiple pods to avoid DIY wiring errors.
Price Range: $15.99
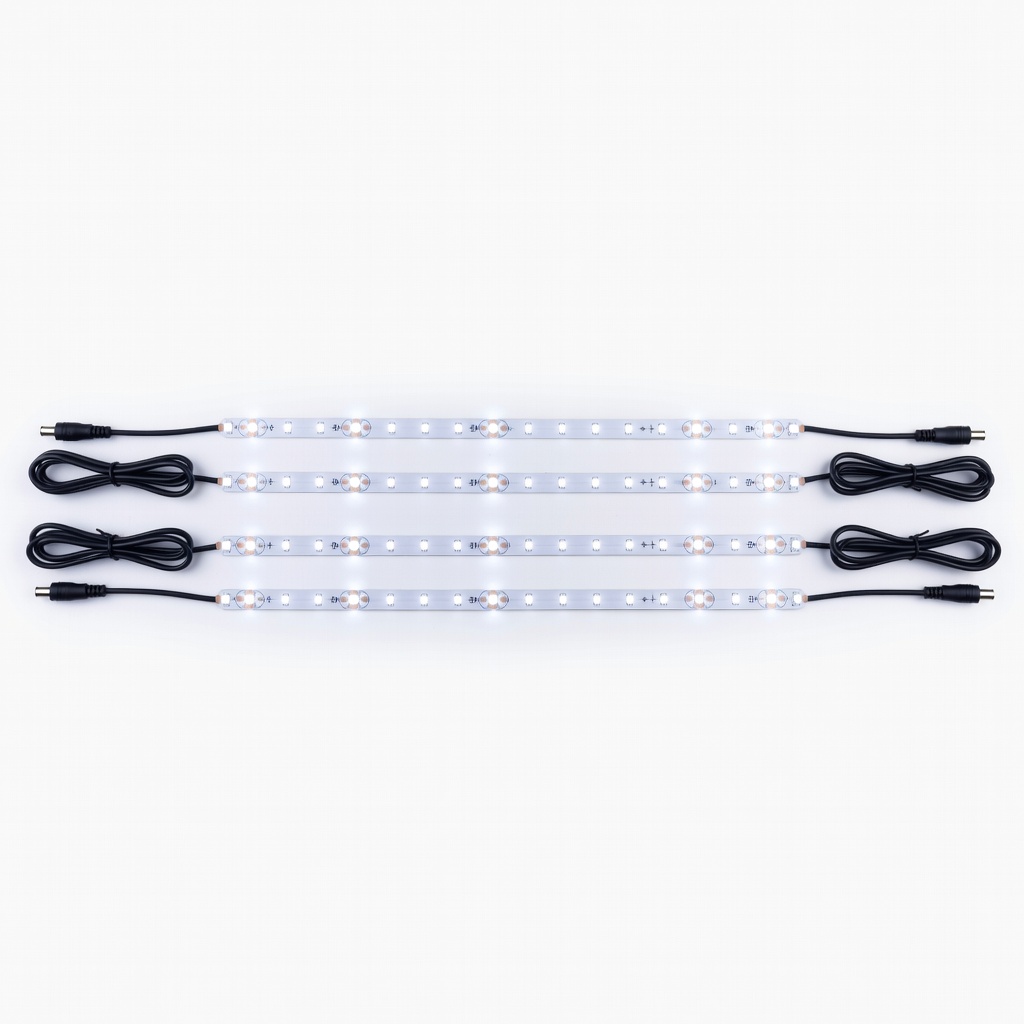
Partsam 4PCS 12V 36LED Truck Bed Strip Lights (ASIN B01N4QJ3K8)
Flexible, cuttable strips for custom rail lighting—white or RGB options, easy adhesive mount.
Best for: Full bed perimeter glow for contractors or show trucks.
Price Range: $29.99
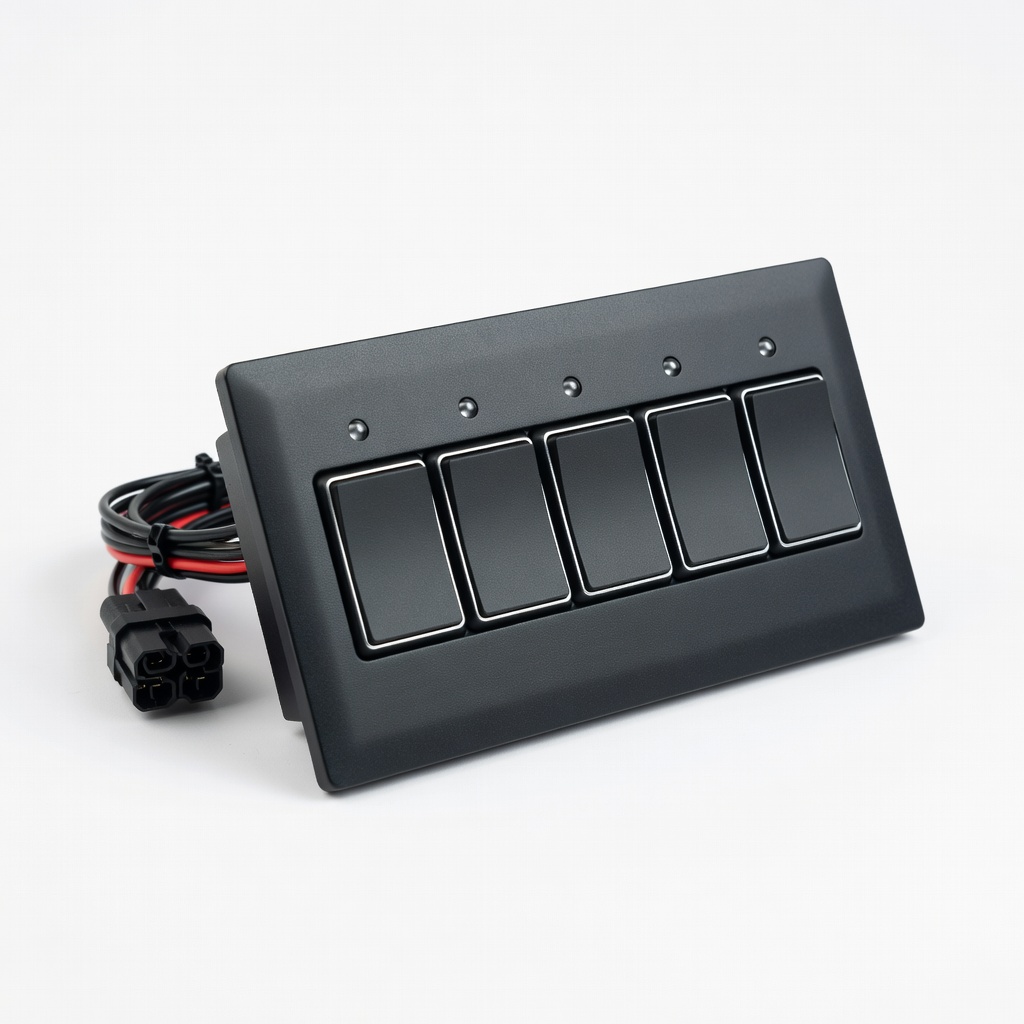
Nilight Rocker Switch Panel (ASIN B07Z8G5Q5Q)
Weatherproof switches with LED backlights for cab control—multiple circuits supported.
Best for: Organize controls for lights + other accessories.
Price Range: $25.99
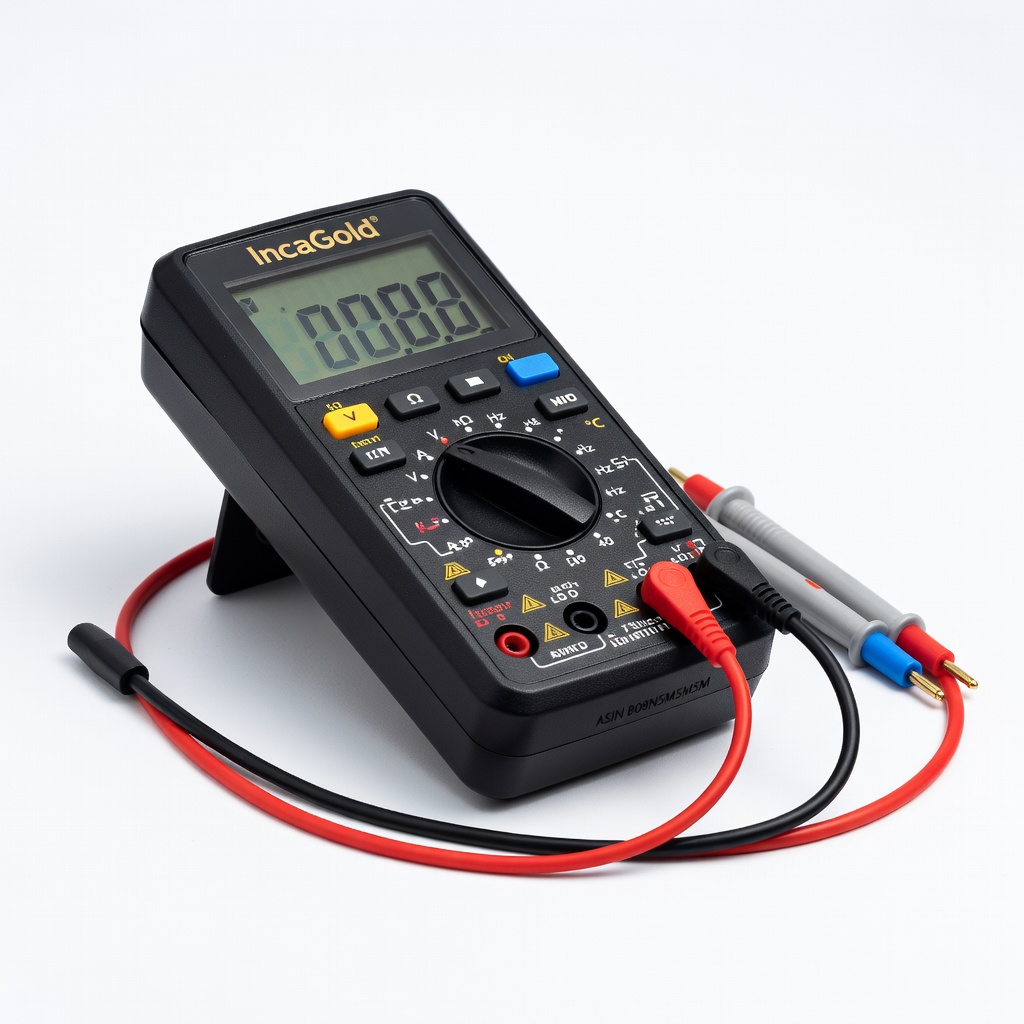
IncaGold Multimeter (ASIN B08N5M5M5M)
Affordable digital tester for voltage/polarity checks—essential for safe wiring.
Best for: Troubleshoot any 12V system during install.
Price Range: $12.99