Struggling to see clearly in your truck bed during evening loading, repairs, or off-road tasks? Poor lighting leads to dropped tools, injuries, and frustration. Accent lighting—compact LED strips, pucks, or bars—provides targeted illumination without bulky setups.
In this guide, you'll learn how to select, install, and optimize accent lights for your truck bed work area. We'll cover planning, mounting, wiring, and maintenance for professional results. Expect a brighter, safer workspace in 1-2 hours.
This intermediate tutorial assumes basic wiring knowledge; no advanced electrical skills needed. Follow along for hands-on success.
▸What You'll Need
- •Accent LED lights (strips, pucks, or bars; see recommendations)
- •Wiring kit (12-16 gauge wire, connectors, inline fuse)
- •Tools: drill with bits, wire strippers/crimpers, screwdriver, zip ties, electrical tape
- •Power source: truck battery or auxiliary switch
- •Cleaner and isopropyl alcohol (for surface prep)
- •Optional: multimeter for testing, heat shrink tubing for waterproofing
Estimated Time: 1-2 hours
Difficulty: intermediate
▸Step-by-Step Instructions
Step 1: Plan Your Lighting Layout
Start by assessing your truck bed. Identify key work zones: tailgate area, wheel wells, side walls, and center bed. Sketch a simple diagram marking light positions for even coverage without shadows.
Accent lighting works best when layered—use strips along edges for ambient glow and pucks in corners for focused beams. Measure distances (e.g., 4-6 ft strips per side) and note power draw to avoid overloading circuits. Why it matters: Proper planning prevents rework and ensures 100-200 lumens per sq ft for work visibility.
Expect a layout that lights up 80% of the bed evenly. Test with phone flashlight to simulate.
💡 Tips:
- •Aim for IP67 waterproof rating for durability.
- •Position lights 6-12 inches above bed floor for optimal angle.
⚠️ Warnings:
- •Avoid blocking bed access or cargo space.
Step 2: Gather and Prep Materials
Collect all tools and lights. Unpack and inspect for damage. Clean truck bed surfaces with isopropyl alcohol to remove dirt, ensuring strong adhesive or mount bonds.
Cut wires to length (add 20% extra for routing). Strip ends 1/2 inch and crimp connectors. This prep saves time later and reduces wiring errors. Success: Organized workspace with prepped components ready for install.
💡 Tips:
- •Label wires (positive/negative) with tape.
Step 3: Mount the Accent Lights
For adhesive strips: Peel backing and press firmly along bed rails or walls, following your layout. Hold 30 seconds per foot.
For puck or bar lights: Drill pilot holes (use template if provided), secure with screws. Space evenly (e.g., 2-3 ft apart). Why: Secure mounting withstands vibration. Expect lights flush and stable—no wobble.
⚠️ Warnings:
- •Wear eye protection; drill slowly to avoid metal shavings.
Step 4: Route the Wiring Harness
Run wires from lights along bed frame, using zip ties every 12 inches. Route to cab or battery compartment via existing grommets. Avoid sharp edges or exhaust heat.
Connect lights in parallel (positive to positive) for independent operation. Solder or crimp joints, then insulate with heat shrink. Purpose: Clean, protected wiring prevents shorts. Check: Wires taut but not strained.
💡 Tips:
- •Use loom tubing for extra protection.
Step 5: Connect to Power Source
Attach inline fuse (10-15A) near battery positive terminal. Ground to clean chassis metal. For switched control, tap into cab accessory wire or add toggle switch.
Use a relay for high-draw setups (>50W). Why safe: Fuse protects circuits. Test continuity with multimeter. Success: Secure connections with no exposed wire.
⚠️ Warnings:
- •Disconnect battery before wiring to avoid shocks.
Step 6: Install Control Switch (Optional)
Mount wireless remote receiver or cab switch for easy on/off. Pair remotes per instructions. This adds convenience for work without climbing in bed.
Route switch wire neatly. Expect instant response post-pairing.
💡 Tips:
- •Dimmer switches enhance versatility for low-light tasks.
Step 7: Test and Adjust
Reconnect battery, turn on lights. Check for even illumination—no dark spots or flickers. Adjust angles if needed; tighten mounts.
Walk-test bed area: Load tools, simulate work. Tweak for glare-free light. Final success: Bright, uniform glow ideal for detailed tasks.
💡 Tips:
- •Test at night for true visibility.
⚠️ Warnings:
- •If hot, disconnect immediately—check for shorts.
Step 8: Secure and Waterproof
Double-check ties, add silicone sealant around mounts. Apply dielectric grease to connections. Clean up.
Why: Weatherproofing ensures longevity. Your bed is now a lit workshop—ready for use!
▸Pro Tips
- •Layer lighting: Combine cool white (5000K) for tasks with warm for ambiance.
- •Use magnetic mounts for removable setups on rentals.
- •Add motion sensors for hands-free activation during loading.
- •Battery-powered options for no-wiring installs under 30 minutes.
- •Clean lenses monthly with microfiber for max brightness.
- •Pair with bed liners to diffuse light evenly.
- •Overclock with PWM dimmer for adjustable intensity.
▸Common Mistakes to Avoid
- •Overloading circuits without fuses—causes fires; always fuse at 80% capacity.
- •Poor surface prep—adhesives fail; clean thoroughly.
- •Twisted polarity—lights won't work; double-check +/-.
- •Exposed wires—vibration shorts them; use full protection.
- •Uneven spacing—creates shadows; measure precisely.
▸Troubleshooting
Problem: Lights flicker or dim
Solution: Check loose connections or weak ground; tighten and clean terminals. Upgrade wire gauge if voltage drop.
Problem: No power at all
Solution: Verify fuse intact and battery connected. Test with multimeter.
Problem: One light out
Solution: Inspect that circuit's wiring; replace faulty LED.
Problem: Overheating
Solution: Ensure airflow; reduce runtime or add heatsinks. Seek pro if persistent.
Nilight 4PCS Truck Bed Lights LED Strip with Wireless Remote
Easy wireless control, IP67 waterproof, 288W equivalent brightness for full bed coverage.
Best for: Ideal for quick install on Ford F-150 or Chevy Silverado work areas.
Price Range: $35.99
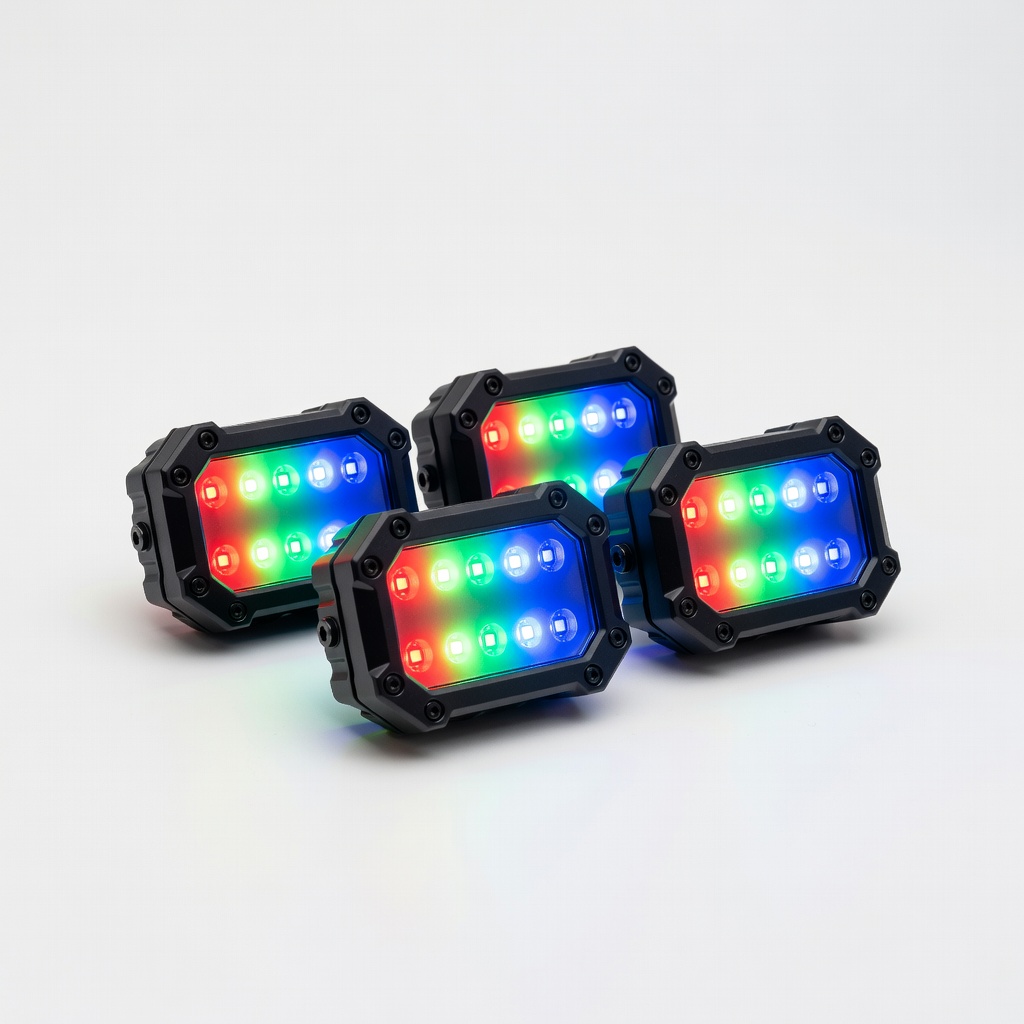
AUXBEAM 4PCS RGB LED Rock Lights
Versatile accent with color modes, app control for customizable work lighting.
Best for: Off-road trucks needing mood + functional light.
Price Range: $39.99
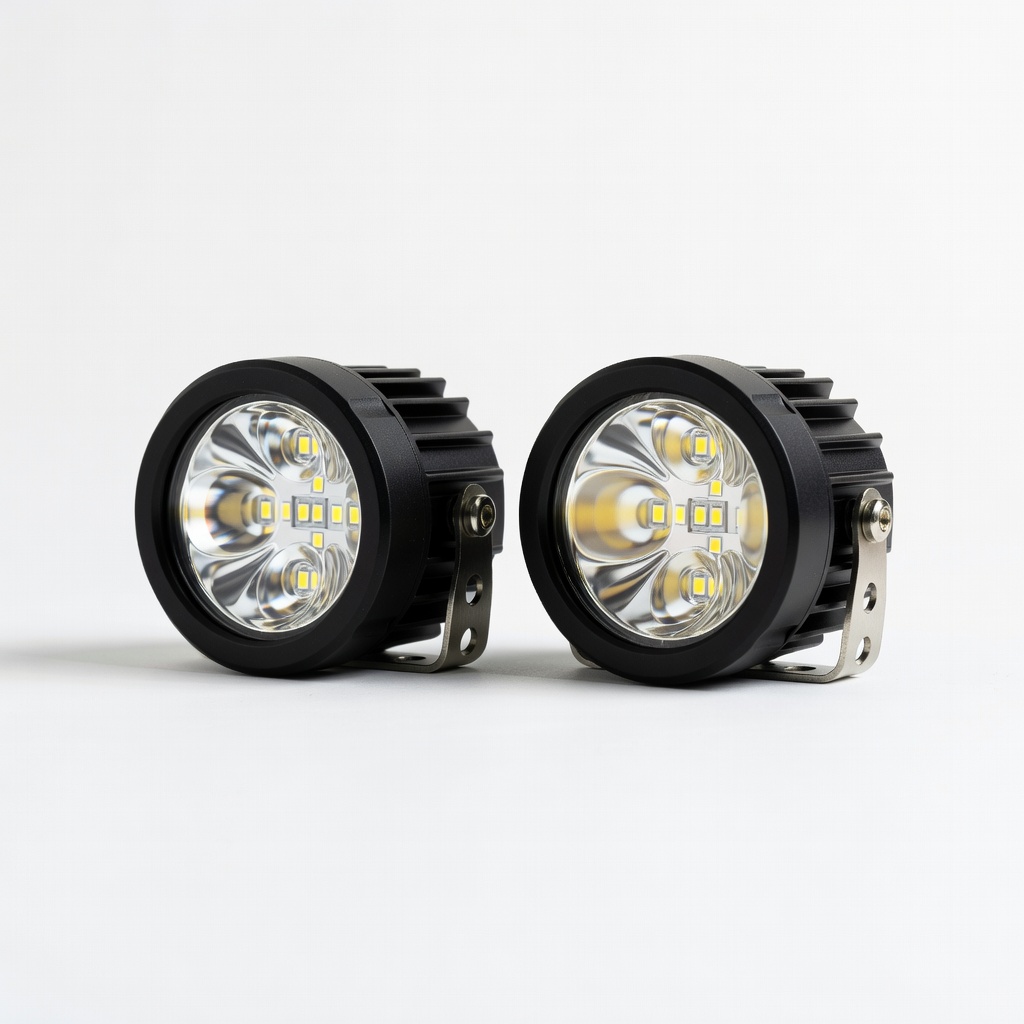
Nilight 2PCS 4" LED Pod Lights Spot Flood Combo
Compact pucks for targeted spots, durable aluminum housing.
Best for: Corners or tool areas in heavy-duty beds.
Price Range: $29.99
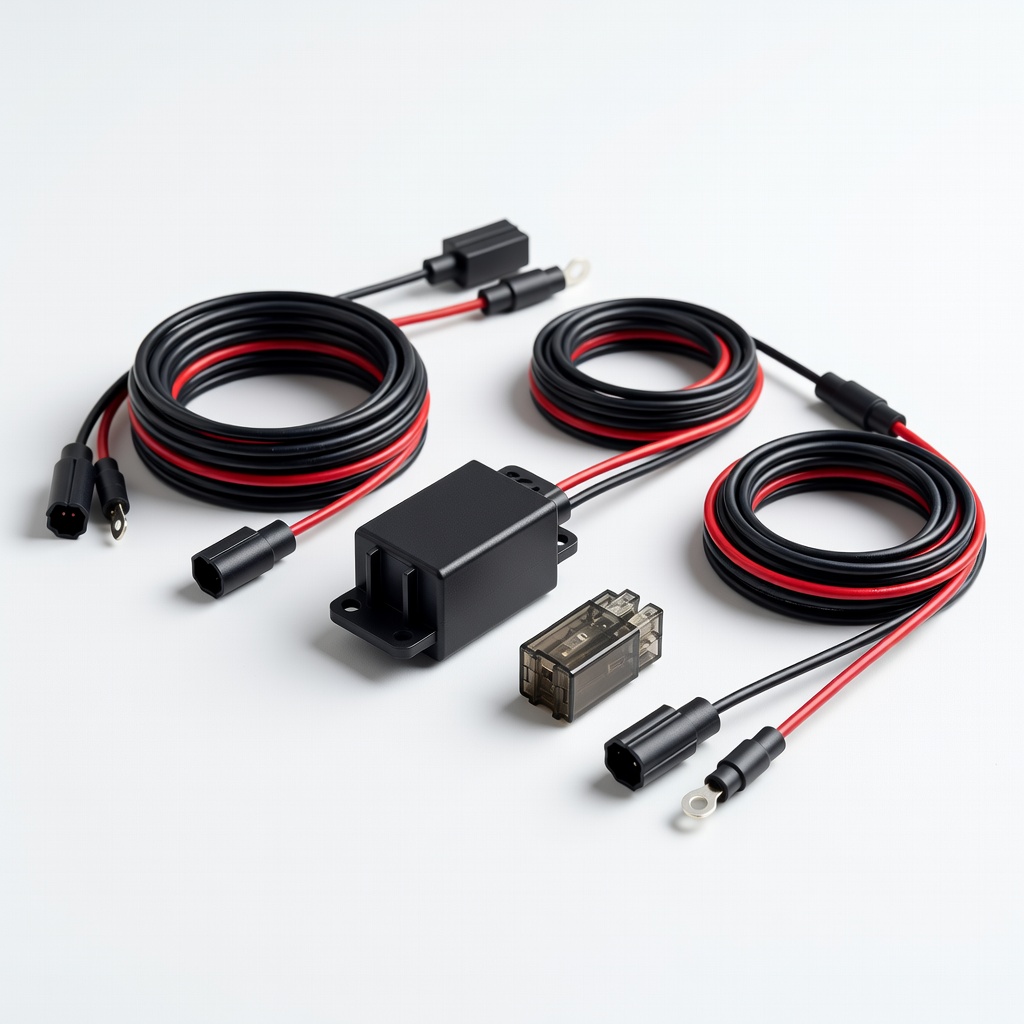
Bayite Wiring Harness Kit with Relay and Fuse
Complete kit simplifies safe power connections.
Best for: Any DIY install needing reliable wiring.
Price Range: $15.99