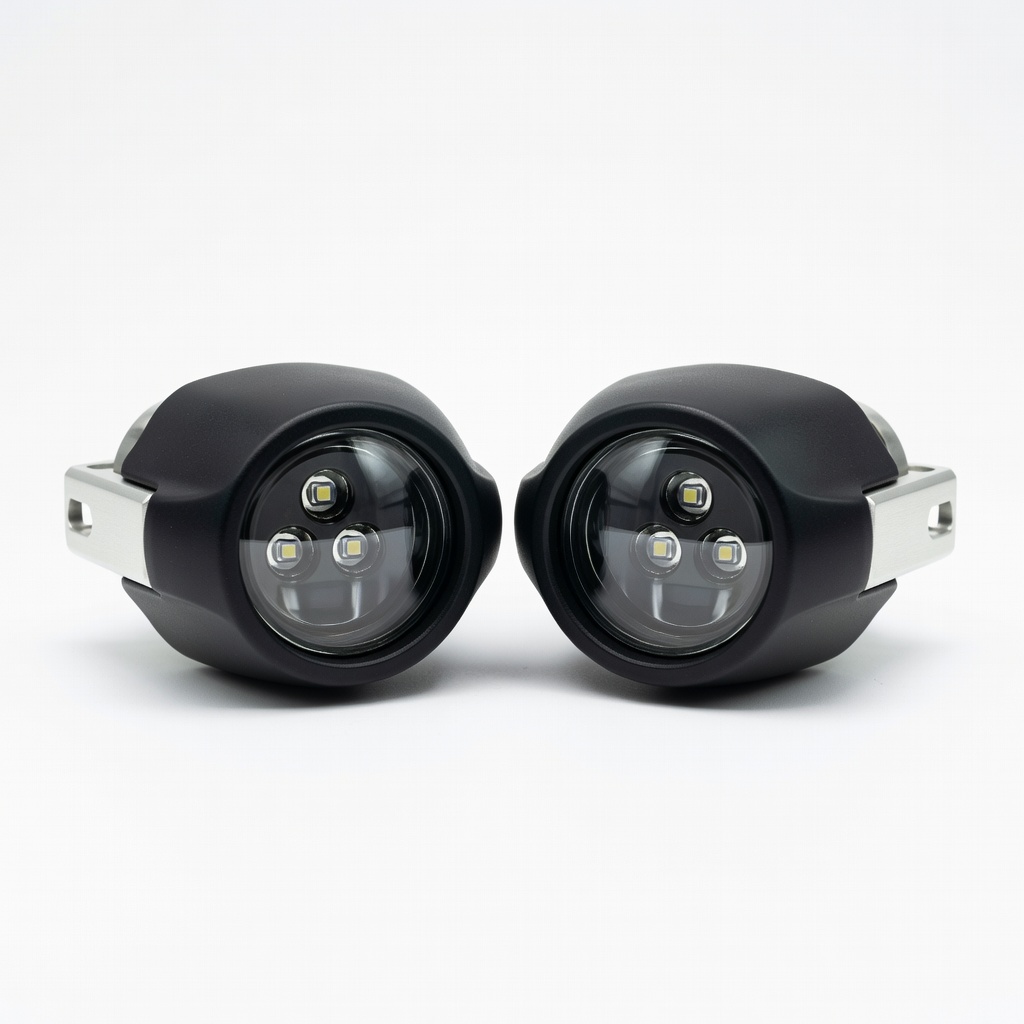
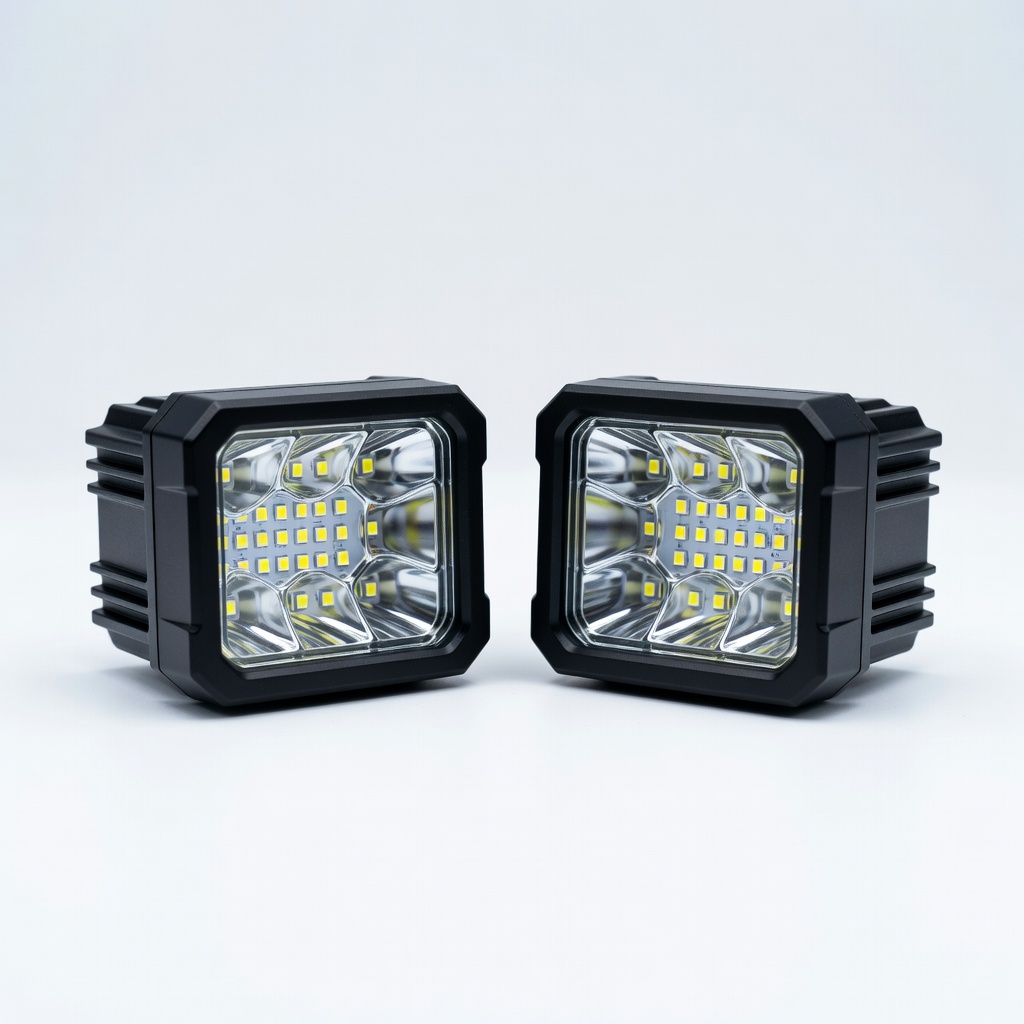
Diode Dynamics SS3 SAE/DOT Fog Light Pods (Pair)
Ditch/A-pillar mounts for forward visibility on narrow trails.
$150-$200
Diode Dynamics SS3 SAE/DOT Fog Light Pods (Pair) Exceptional build quality, perfect beam pattern for trail edges, DOT legal.
Get the App
Better experience on mobile
Boost night trail visibility and safety by mastering accent light installation and setup in this intermediate guide.
Off-roading at night can turn an exhilarating adventure into a nightmare without proper visibility. Dark trails hide rocks, ruts, and obstacles that can damage your vehicle or worse. Accent lighting—think rock lights, ditch pods, and A-pillar mounts—provides targeted illumination exactly where headlights fall short, revealing the trail ahead and underneath your rig.
In this guide, you'll learn how to select, install, and optimize accent lights for maximum off-road trail visibility. We'll cover planning, mounting, wiring, aiming, and usage tips tailored for intermediate enthusiasts with some basic mechanical skills. Expect clear steps with real-world advice to get you trail-ready.
The process takes 3-5 hours depending on your vehicle, with intermediate difficulty involving wiring and drilling. By the end, your setup will light up trails like daylight, enhancing safety and confidence.
Estimated Time: 3-5 hours Difficulty: intermediate
Start by evaluating your off-road vehicle (Jeep, truck, UTV) and typical trails. Note clearance heights, common obstacles like rocks or mud puddles, and blind spots from headlights. Accent lights excel for low-angle illumination—rock lights under chassis for ground view, ditch lights on hood/A-pillars for forward paths.
Why it matters: Proper assessment ensures lights target visibility gaps, preventing overkill or blind spots. Expect to map 3-5 key positions (e.g., frame rails, bumper corners).
Success looks like: A sketched diagram labeling mount spots and beam patterns needed (spot for distance, flood for width).
💡 Tips:
⚠️ Warnings:
Choose LED accent lights with 3,000-5,000 lumens per pod, SAE/DOT compliant for road legality, and beam types: flood (120° wide) for trails, spot (10° narrow) for distance. Rock lights for underglow (RGB optional), ditch pods for side/forward. Match voltage (12V) to your battery.
Why: High-quality LEDs last 50,000+ hours, resist vibration. Expect 4-6 lights for balanced coverage.
Success: Lights in hand, specs matching your 4x4's power draw (under 5A per light).
💡 Tips:
Mark positions: rock lights on frame rails 12-18" apart; ditch lights on hood hinges or A-pillars; cubes on bumper corners. Ensure 45-60° downward angle for trail wash.
Why: Optimal angles prevent glare, maximize ground coverage. Measure twice.
Success: Secure, vibration-proof spots without interfering with suspension.
⚠️ Warnings:
Bolt or clamp brackets using vehicle-specific kits. Drill pilot holes if needed, use self-tapping screws for clean installs.
Why: Stable mounts endure jumps. Torque to spec (10-15 ft-lbs).
Success: Brackets rock-solid, lights preview-fitted.
💡 Tips:
Attach lights to brackets, apply dielectric grease to seals. Zip-tie excess wiring away from moving parts.
Why: Weatherproofing prevents failures. Expect snug, no-rattle fit.
Success: Lights mounted, beams aimed roughly downward.
⚠️ Warnings:
Route harness from battery to lights: red to positive via relay (30/40A), black to ground. Install dash switch. Crimp connections, heat-shrink, fuse inline.
Why: Relay protects battery, switch enables on-demand use. Test continuity with multimeter.
Success: Clean wiring, no shorts.
💡 Tips:
⚠️ Warnings:
Reconnect battery, test on low beam. Adjust angles on a wall/trail: rock lights 10-20° down, ditches parallel to ground. Fine-tune for even wash.
Why: Precise aiming = zero glare, full coverage.
Success: Crystal-clear trail visibility, no hotspots.
Seal connections, add covers. Clean monthly, check wiring quarterly.
Why: Longevity in harsh conditions.
Success: Setup ready for trails.
💡 Tips:
Problem: Lights flicker or dim
Solution: Check loose grounds/connections; upgrade wire gauge if draw high.
Problem: No power to lights
Solution: Verify fuse/relay; test switch continuity.
Problem: Overheating
Solution: Ensure airflow; check for pinched wires.
Problem: Poor visibility
Solution: Re-aim beams; clean lenses.
Exceptional build quality, perfect beam pattern for trail edges, DOT legal.
Best for: Ditch/A-pillar mounts for forward visibility on narrow trails.
Price Range: $150-$200
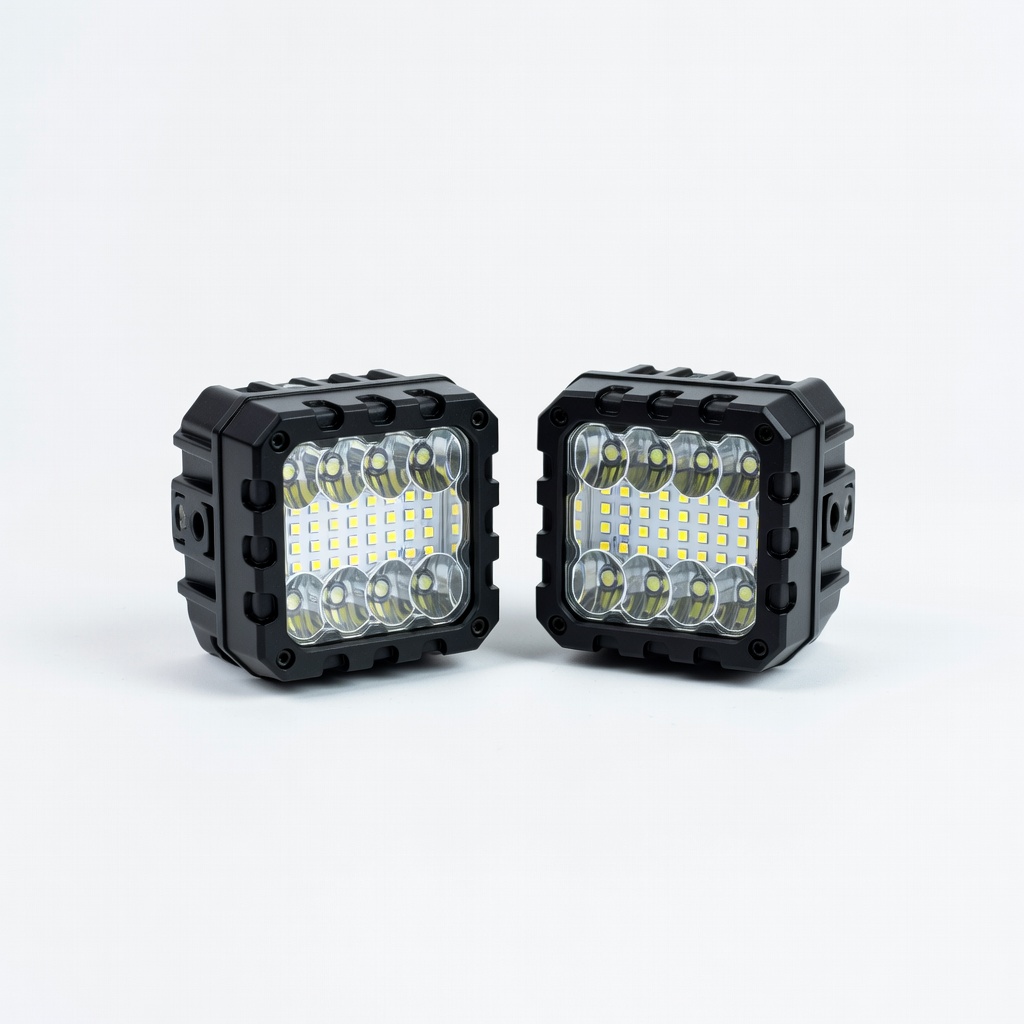
Affordable, durable aluminum housing, 3,200 lumens bright.
Best for: Bumper corners or roof for spot lighting distant obstacles.
Price Range: $50-$80
RGB color options, IP68 waterproof, easy underbody install.
Best for: Frame rails for ground-level trail rock/mud visibility.
Price Range: $40-$60
Plug-and-play, 12AWG wire handles multiple lights safely.
Best for: All accent installs to prevent battery drain.
Price Range: $20-$30
Premium optics, vibration-proof for rough trails.
Best for: High-end forward lighting on UTVs/Jeeps.
Price Range: $150-$250
Ditch/A-pillar mounts for forward visibility on narrow trails.
Diode Dynamics SS3 SAE/DOT Fog Light Pods (Pair) Exceptional build quality, perfect beam pattern for trail edges, DOT legal.
Bumper corners or roof for spot lighting distant obstacles.
Rough Country 3" Cube LED Pods (Pair) Affordable, durable aluminum housing, 3,200 lumens bright.
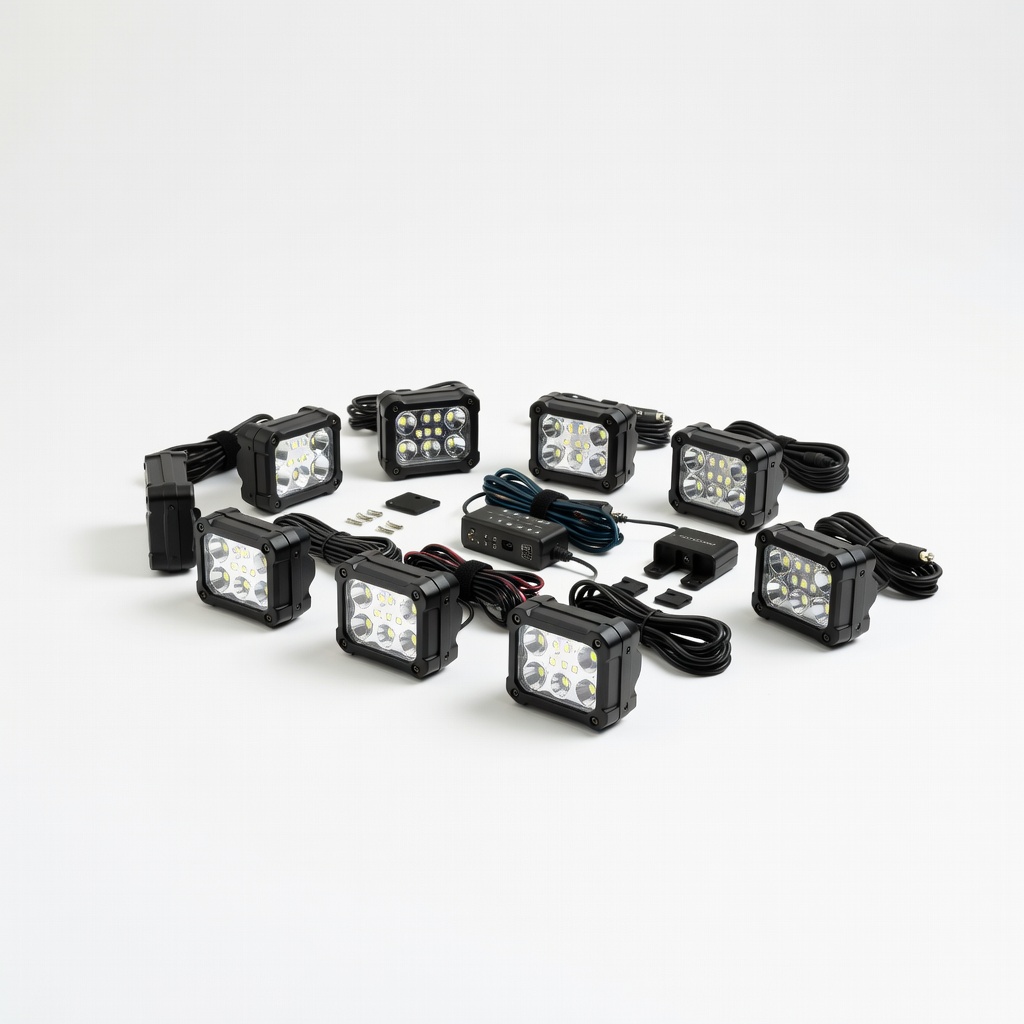
Frame rails for ground-level trail rock/mud visibility.
Nilight 8PCS Rock Lights Kit RGB color options, IP68 waterproof, easy underbody install.
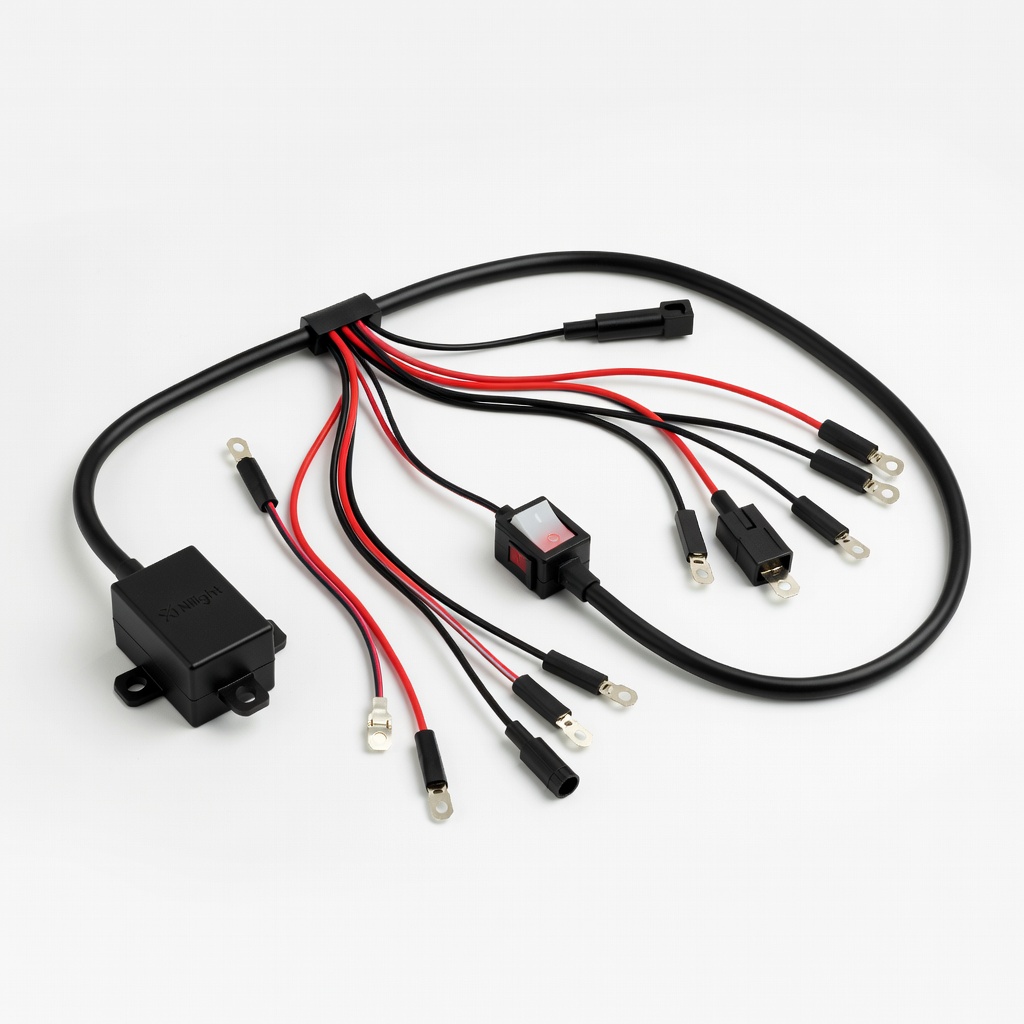
All accent installs to prevent battery drain.
Nilight Universal Wiring Harness with Switch Plug-and-play, 12AWG wire handles multiple lights safely.
High-end forward lighting on UTVs/Jeeps.
Baja Designs Squadron Sport Pods Premium optics, vibration-proof for rough trails.