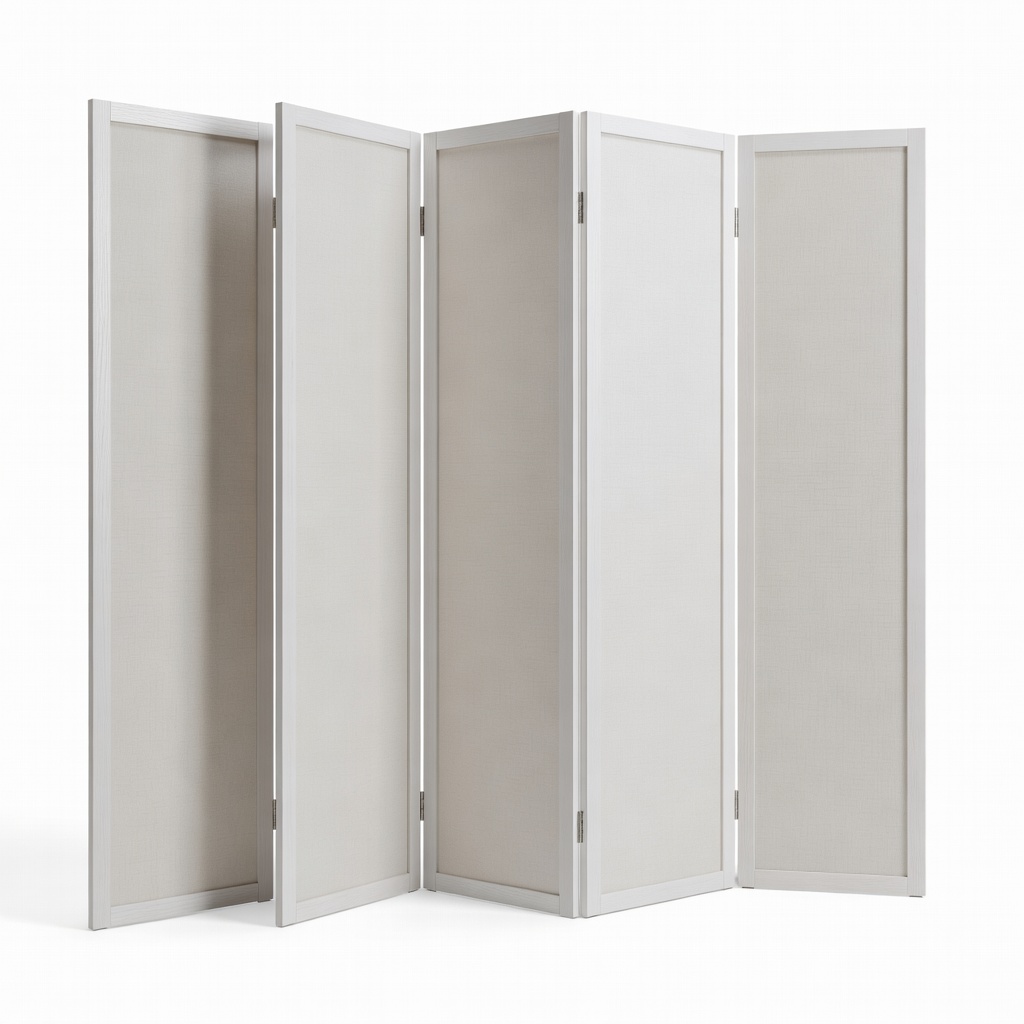
ODK 6 Panel Room Divider Screen
Separate living from dining in medium open spaces.
$60-$80
ODK 6 Panel Room Divider Screen Freestanding and foldable, perfect for quick zoning without permanent changes.
Get the App
Better experience on mobile
Transform your chaotic open living area into organized, functional zones using stylish accent pieces in just a few simple steps.
Open-plan living spaces offer flexibility and a sense of spaciousness, but they can quickly feel overwhelming without clear boundaries. If your living room, dining area, and kitchen blend into one big mess, you're not alone—many homeowners struggle with defining zones without walls. The good news? Accent furniture is your secret weapon to create visual separation while adding personality and style.
In this beginner-friendly guide, you'll learn how to assess your space, select the right accent pieces, and arrange them step-by-step to zone your open area effectively. By the end, you'll have a more functional, inviting home that feels both open and organized. No design degree required—this takes about 1-2 hours and uses everyday tools.
Expect clear, actionable steps with real-world tips to avoid common pitfalls like overcrowding or poor flow.
Estimated Time: 1-2 hours Difficulty: beginner
Walk through your open living area and note how it feels. Identify pain points like traffic flow issues, underused corners, or areas that feel too cramped. Take photos from multiple angles to visualize changes.
Why it matters: Understanding your space's strengths (natural light, views) and weaknesses (awkward layouts) ensures your zoning enhances functionality. Expect to spend 10-15 minutes here—mark high-traffic paths with tape if helpful.
Sketch a rough floor plan on graph paper, noting fixed elements like doors, windows, and outlets.
💡 Tips:
⚠️ Warnings:
Decide on 2-4 key zones, such as living/TV area, dining, reading nook, or play space. Consider daily routines: where do you eat, relax, or work?
This step creates purpose. For example, separate conversational seating from dining to reduce noise bleed. Draw boundaries on your sketch, aiming for 4-6 feet between zones for flow.
Success looks like a labeled floor plan with clear, logical zones that fit your lifestyle.
💡 Tips:
⚠️ Warnings:
Measure each zone's dimensions, including door swings and walkways (at least 3 feet wide). Use a free app to test virtual layouts.
Why measure? Prevents buying oversized pieces that block paths. Expect a bird's-eye view plan with scaled furniture outlines.
Adjust for furniture you already own, noting gaps for accent pieces.
💡 Tips:
⚠️ Warnings:
Choose pieces that define boundaries without walls: rugs for floors, shelves/screens for height. Opt for lightweight, movable items for flexibility.
Focus on scale—rugs 8x10 ft for living zones, 70-inch screens for dividers. Mix textures/colors for cohesion.
Success: A shopping list of 3-5 pieces that match your style (modern, boho, etc.).
💡 Tips:
⚠️ Warnings:
Start with rugs under each zone's main furniture (sofa front legs on rug for living area). Position to overlap slightly at edges for unity.
Rugs instantly ground spaces, signaling 'this is the living zone.' Expect softer acoustics and defined perimeters.
Vacuum first for a clean base.
💡 Tips:
⚠️ Warnings:
Place open bookshelves or folding screens perpendicular to walls to separate zones (e.g., shelf between kitchen and living).
These add storage/privacy without enclosing. Position 2-3 feet from walls for access.
Result: Height contrast that guides the eye and improves flow.
💡 Tips:
⚠️ Warnings:
Add accent chairs, ottomans, or console tables to reinforce zones (ottoman as coffee table in living, bistro set in dining nook).
These create intimacy within zones. Cluster seating conversationally.
Test: Sit in each zone—should feel cozy yet open.
💡 Tips:
⚠️ Warnings:
Walk through paths, rearrange as needed. Add lamps/plants for cohesion.
Live with it a day, then tweak. Success: Intuitive navigation, balanced visuals.
Photograph before/after for motivation.
💡 Tips:
⚠️ Warnings:
Problem: Zones feel too separated or closed off
Solution: Remove one divider or shorten screens; overlap rugs slightly.
Problem: Poor lighting or shadows from dividers
Solution: Add floor lamps behind shelves; choose sheer screens.
Problem: Furniture feels unstable or wobbly
Solution: Secure with brackets/wall anchors; opt for weighted bases.
Problem: Space looks unbalanced
Solution: Mirror elements symmetrically; add plants for height.
Freestanding and foldable, perfect for quick zoning without permanent changes.
Best for: Separate living from dining in medium open spaces.
Price Range: $60-$80
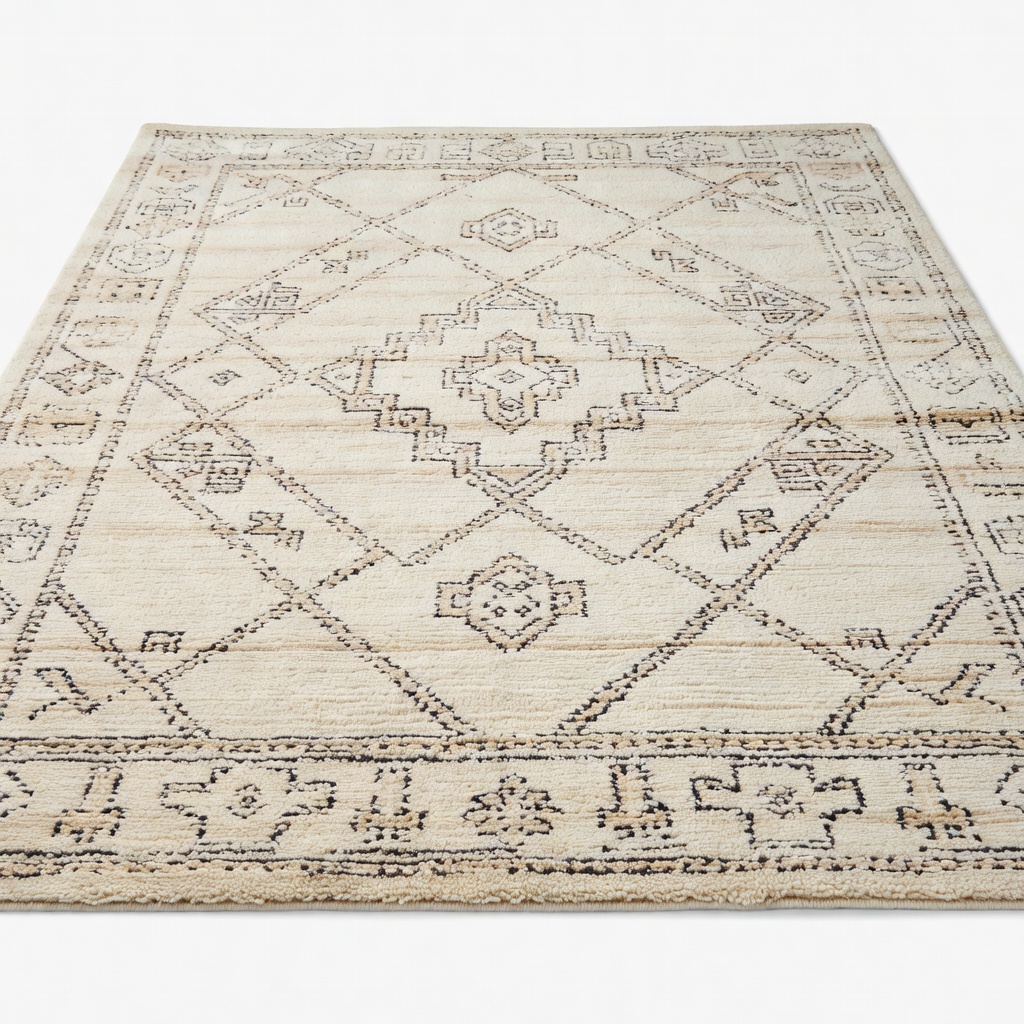
Durable low-pile anchors furniture perfectly, defining zones with style.
Best for: Under sofas or dining tables for instant boundaries.
Price Range: $150-$200
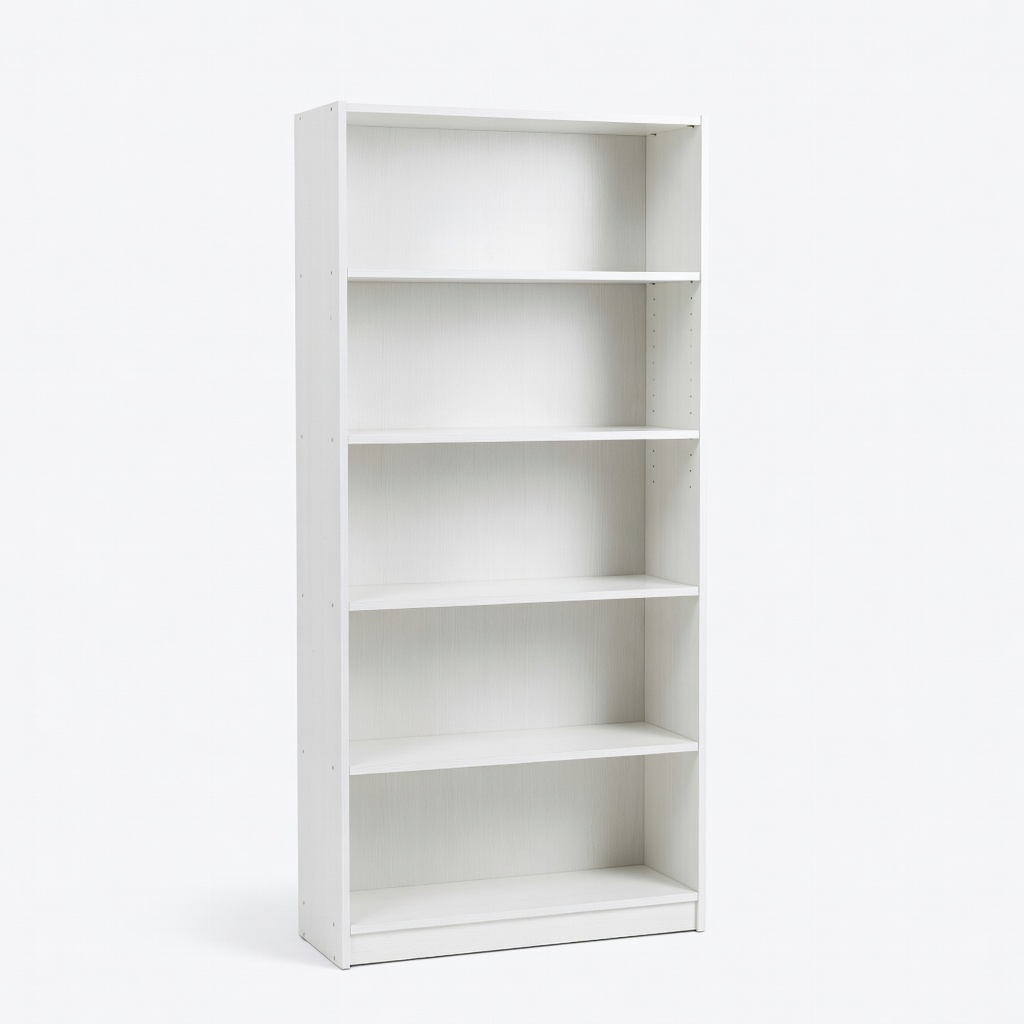
Affordable, lightweight with open shelves for storage and visual division.
Best for: As a semi-transparent barrier between zones.
Price Range: $40-$50
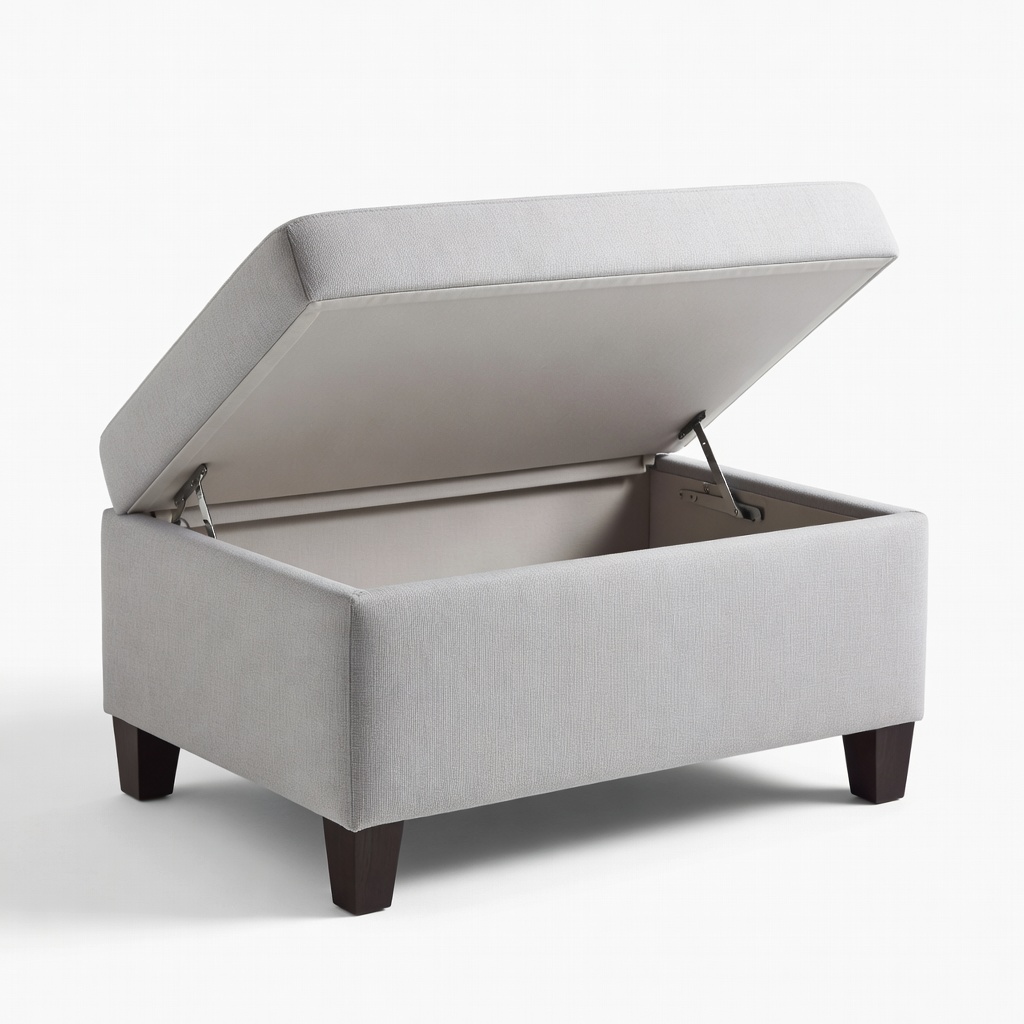
Versatile as seating/table/divider with hidden storage.
Best for: In reading nooks or to break up long walls.
Price Range: $80-$100
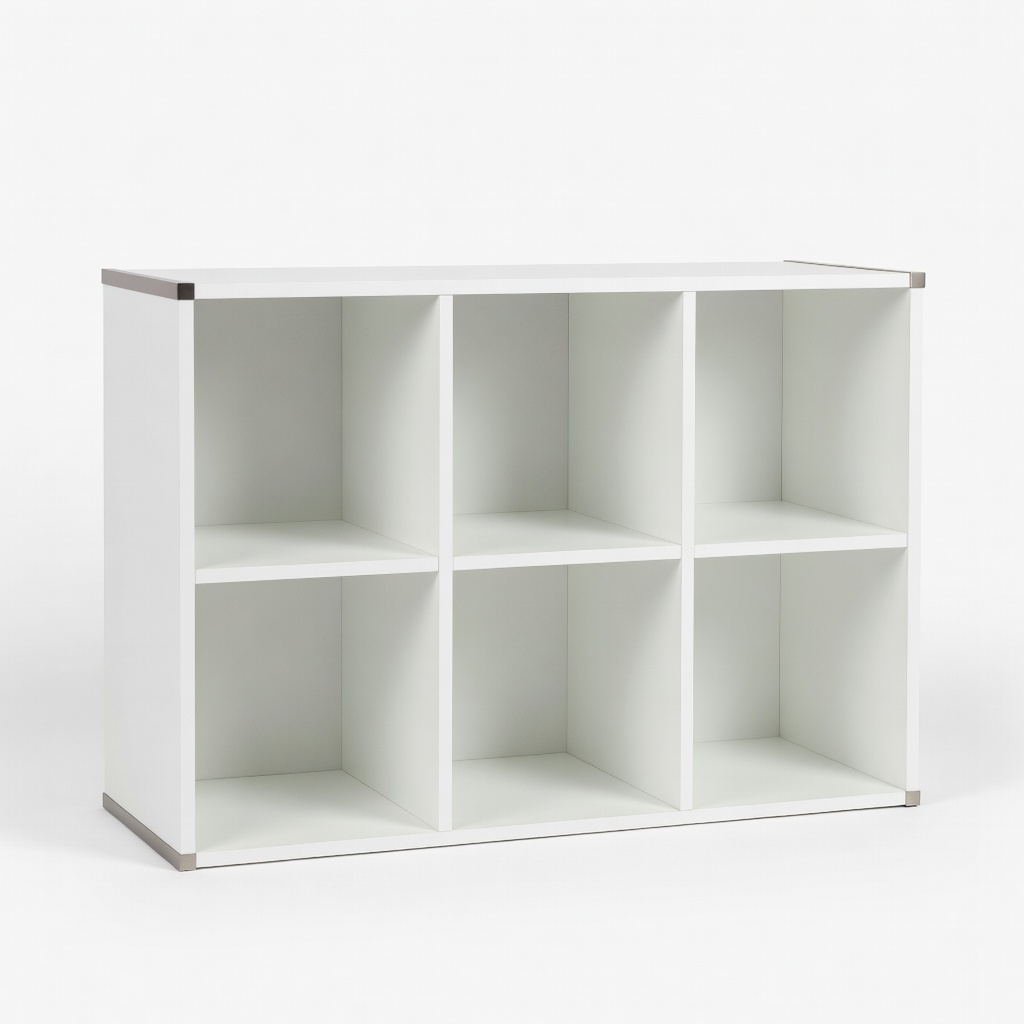
Modular for custom heights, adds display space.
Best for: Vertical zoning in larger open plans.
Price Range: $70-$90
Separate living from dining in medium open spaces.
ODK 6 Panel Room Divider Screen Freestanding and foldable, perfect for quick zoning without permanent changes.
Under sofas or dining tables for instant boundaries.
nuLOOM Hand Tufted Moroccan Blythe Area Rug 8x10 Durable low-pile anchors furniture perfectly, defining zones with style.
As a semi-transparent barrier between zones.
Furinno Jaya 5-Tier Open Bookshelf Affordable, lightweight with open shelves for storage and visual division.
In reading nooks or to break up long walls.
Christopher Knight Home Upholstered Storage Ottoman Versatile as seating/table/divider with hidden storage.
Vertical zoning in larger open plans.
Walker Edison Modern 6-Cube Organizer Modular for custom heights, adds display space.