Struggling with stubborn rust, paint, or grime on metal, wood, or automotive parts? Abrasive brushes attached to your drill make light work of tough cleaning jobs, saving hours compared to manual scrubbing. They're versatile for DIYers tackling garage projects or home maintenance.
In this guide, you'll learn step-by-step how to select, attach, and use abrasive brushes safely. Expect clear instructions for intermediate users familiar with power tools. The process takes 10-20 minutes total, depending on your project size—no advanced skills required.
By the end, you'll achieve smooth, clean surfaces without damaging the base material, ready for painting or refinishing.
▸What You'll Need
- •Cordless or corded drill with variable speed (minimum 1,000 RPM)
- •Abrasive brush attachment (nylon or wire wheel/cup brush, 2-4 inches diameter)
- •Safety gear: safety goggles, dust mask or respirator, heavy-duty gloves, ear protection
- •Workpiece (e.g., rusty metal tool, car wheel, or wooden surface)
- •Stable workbench or vise to secure workpiece
- •Optional: lubricant like WD-40 for rusty areas, shop vac for cleanup
Estimated Time: 10-20 minutes (setup + first use)
Difficulty: intermediate
▸Step-by-Step Instructions
Step 1: Gather and Inspect Materials
Collect all items from the 'What You Need' list. Inspect your drill's chuck (the clamping mechanism) for damage and ensure it opens to fit the brush shank (usually 1/4-inch quick-change or hex). Check the abrasive brush for bent bristles or loose parts—discard if damaged.
Why it matters: Proper inspection prevents accidents like brushes detaching mid-use. Success looks like organized tools and confirmed compatibility.
💡 Tips:
- •Match brush shank to your drill's chuck type (e.g., Jacobs taper or keyless).
⚠️ Warnings:
- •Never use damaged brushes—they can shatter at speed.
Step 2: Choose the Right Abrasive Brush
Select based on material: nylon abrasive for wood/plastic (less aggressive), wire wheel for rust/metal. Match size to surface—small for details, large cup for broad areas.
Why it matters: Wrong type scratches or ineffectively cleans. Expect nylon to flex and polish, wire to grind aggressively. Test firmness by hand.
💡 Tips:
- •Start with medium grit nylon for versatility.
⚠️ Warnings:
- •Avoid fine wire on soft metals like aluminum to prevent gouging.
Step 3: Prepare Your Workspace
Set up in a well-ventilated area, outdoors if possible. Secure workpiece in a vise or with clamps—never hold by hand. Lay down drop cloth to catch debris.
Why it matters: Stability prevents slips; ventilation reduces dust inhalation. Success: workpiece immovable, area clear of flammables.
💡 Tips:
- •Use bright lighting to spot missed areas.
Step 4: Attach the Brush to the Drill
Unplug corded drill or remove battery. Open chuck fully, insert brush shank straight in until seated, then tighten clockwise (use chuck key if needed). Tug firmly to confirm secure.
Why it matters: Loose attachment causes vibration or ejection. Expect 1/4 turn past finger-tight. Reattach if it spins freely.
💡 Tips:
- •For quick-change: push until it clicks.
⚠️ Warnings:
- •Always power off before attaching.
Step 5: Gear Up and Test Run
Put on all PPE. Hold drill firmly with both hands. Test on scrap material at low speed (500-1,000 RPM)—no load first, then light contact. Listen for smooth whir, no wobble.
Why it matters: Identifies balance issues early. Success: even spin, no shaking; adjust speed up gradually.
💡 Tips:
- •Use drill's side handle if available for control.
⚠️ Warnings:
- •High speed on first try overheats brush.
Step 6: Clean the Surface
Apply light pressure at 1,000-1,500 RPM, moving in overlapping passes. Let bristles do the work—don't force. Pause to clear debris. For rust, pre-spray lubricant.
Why it matters: Consistent technique removes material evenly. Expect visible grime lift in seconds; surface brightens without gouges.
💡 Tips:
- •Work in sections; clean brush midway with a wire.
⚠️ Warnings:
- •Excess pressure dulls brush or damages surface.
Step 7: Inspect, Clean Up, and Store
Stop drill, inspect surface for smoothness. Vacuum debris, wipe tools. Rinse brush if nylon (air dry). Store brushes in case, drill charged.
Why it matters: Prevents contamination; extends tool life. Success: clean, residue-free surface ready for next step.
💡 Tips:
- •Wipe with mineral spirits post-clean for shine.
▸Pro Tips
- •Start slow: Low RPM preserves brush life and control.
- •Angle 15-30 degrees for curved surfaces.
- •Pre-wet nylon brushes for wet sanding/dust control.
- •Use pulse technique: Short bursts for precision spots.
- •Combine with degreaser spray for greasy engines.
- •Mark RPM settings on drill for repeat jobs.
- •Extend reach with extension shank for awkward spots.
▸Common Mistakes to Avoid
- •Skipping PPE: Leads to eye/dust injuries—always suit up.
- •Over-tightening chuck: Strips threads—finger-tight plus 1/4 turn.
- •High speed on delicate surfaces: Causes burns/gouges—ramp up gradually.
- •Hand-holding workpiece: Unsafe wobble—always clamp.
- •Ignoring heat buildup: Brush melts—take 10-sec breaks every minute.
▸Troubleshooting
Problem: Brush wobbles or detaches
Solution: Re-seat shank fully and tighten; replace if bent. Use balanced brushes.
Problem: Excessive vibration
Solution: Lower RPM; check for uneven bristles and trim with pliers.
Problem: Brush clogs with debris
Solution: Stop, tap out or blow clean; use shop vac during work.
Problem: Surface scratches
Solution: Switch to softer nylon; reduce pressure and speed.
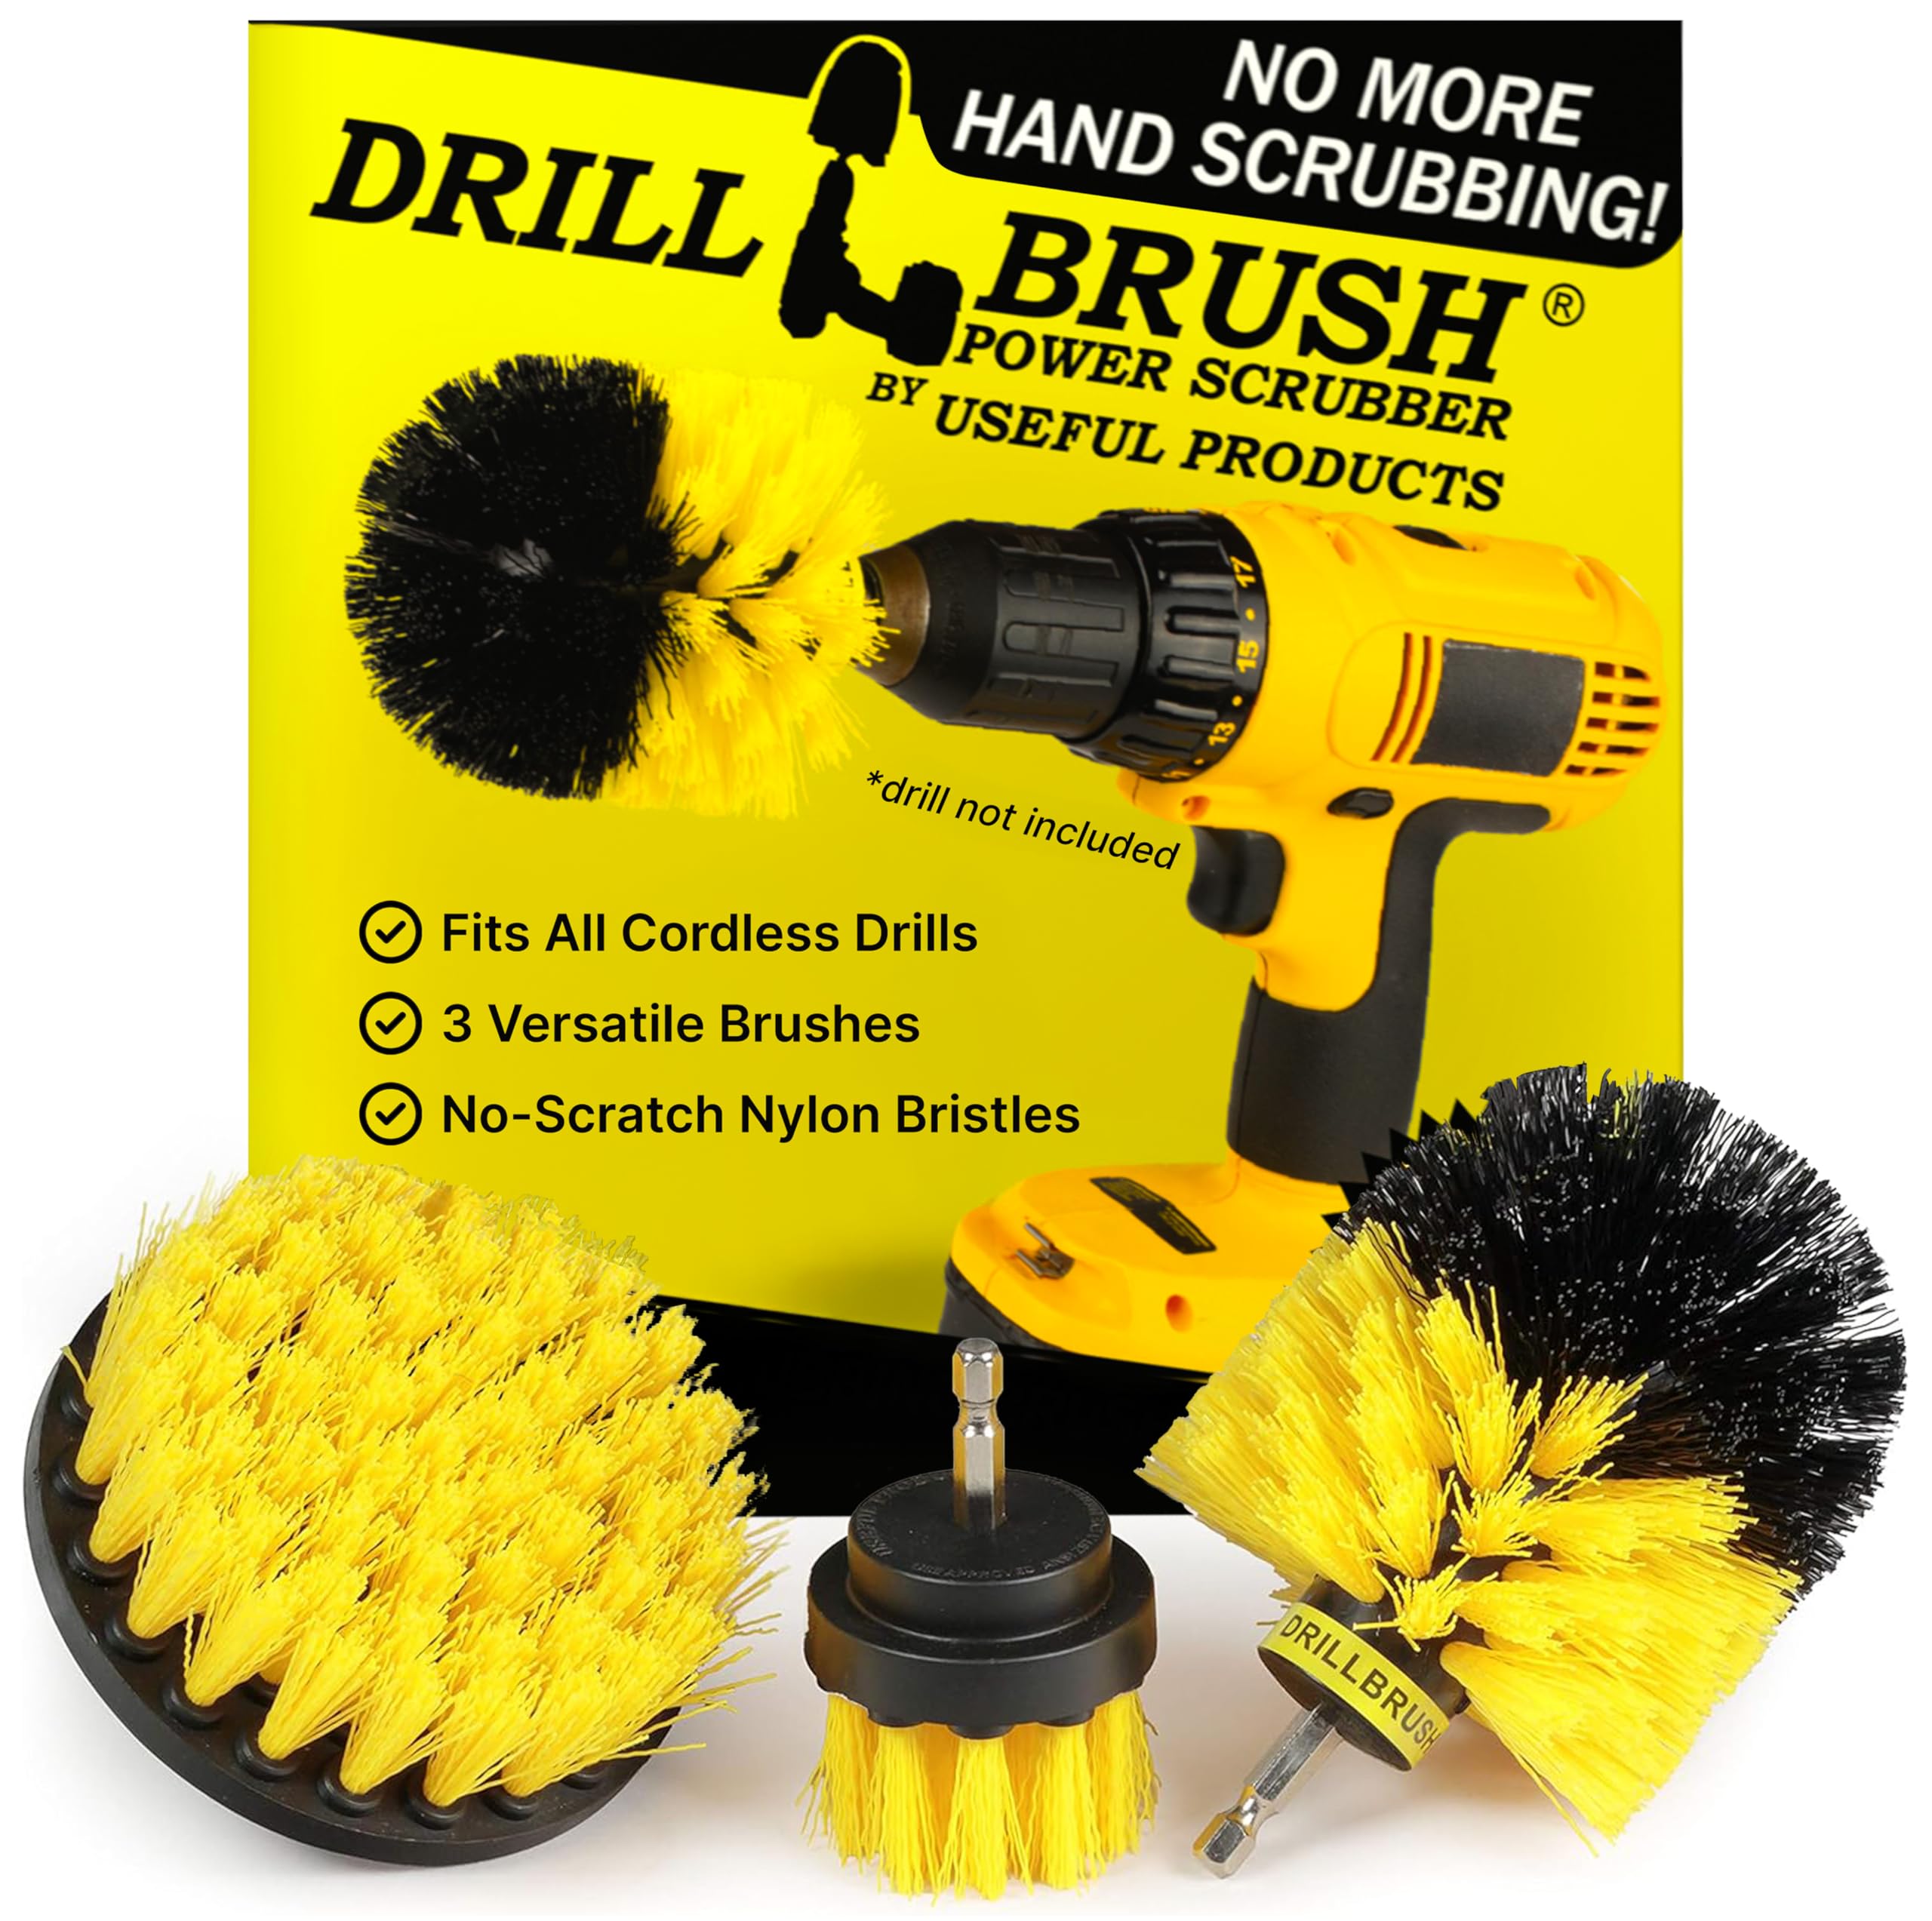
Drillbrush 4-Piece Nylon Bristle Drill Cleaning Kit
Versatile nylon abrasive bristles for rust/paint removal without scratching; color-coded stiffness levels.
Best for: General cleaning on metal, autos, grout—great starter kit.
Price Range: $14.95
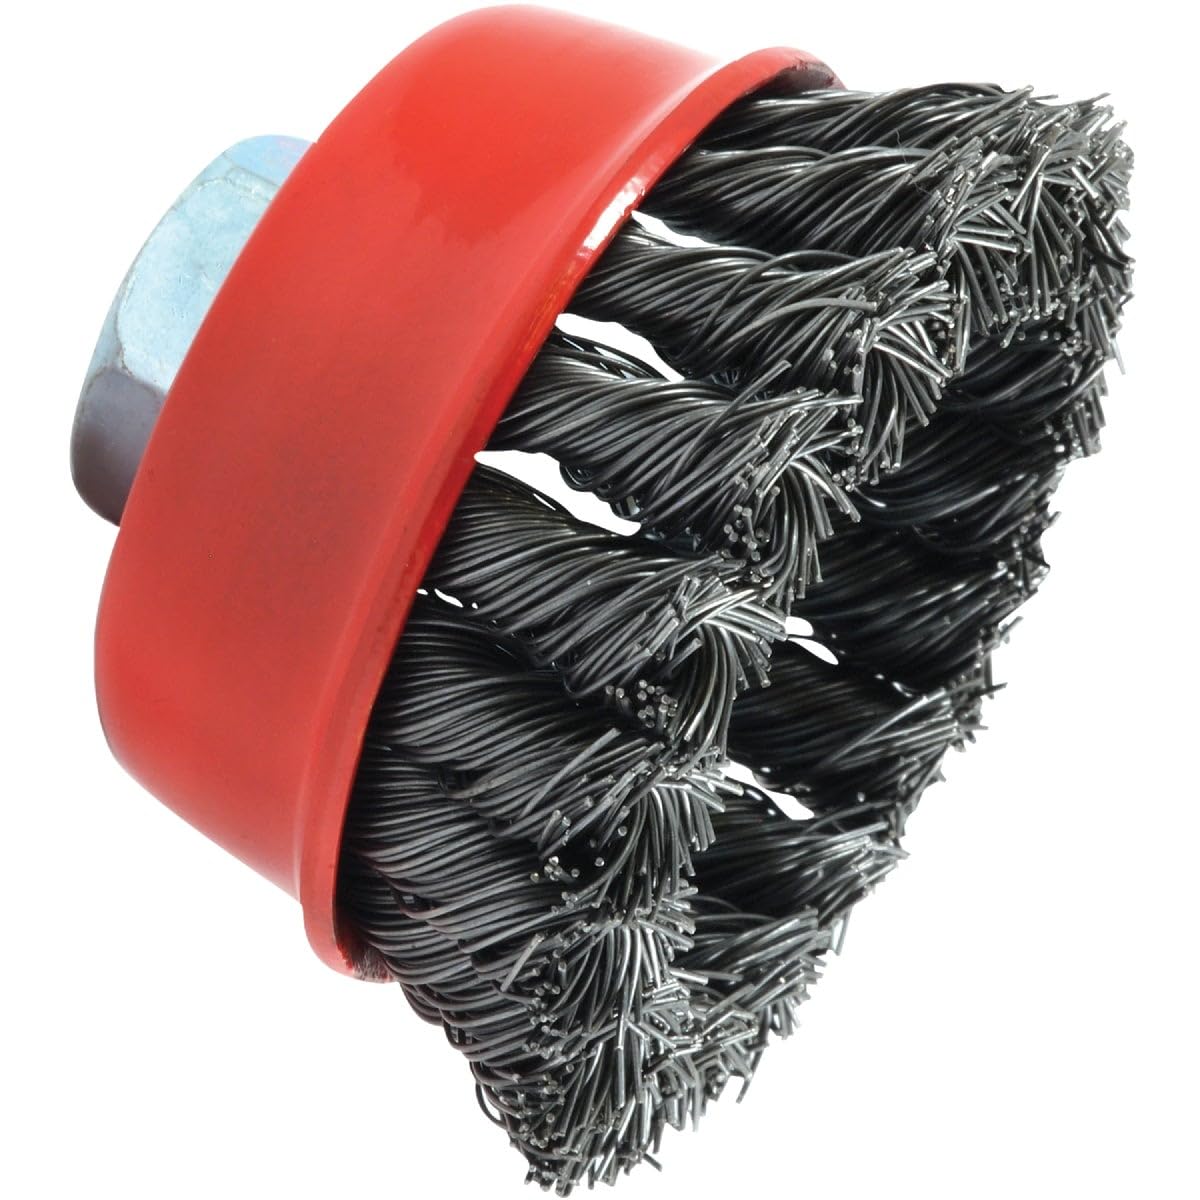
Forney 72757 3-Inch Wire Wheel Brush
Durable crimped steel wire for heavy rust; fits most 1/4-inch chucks securely.
Best for: Aggressive metal prep like tools or frames.
Price Range: $9.99
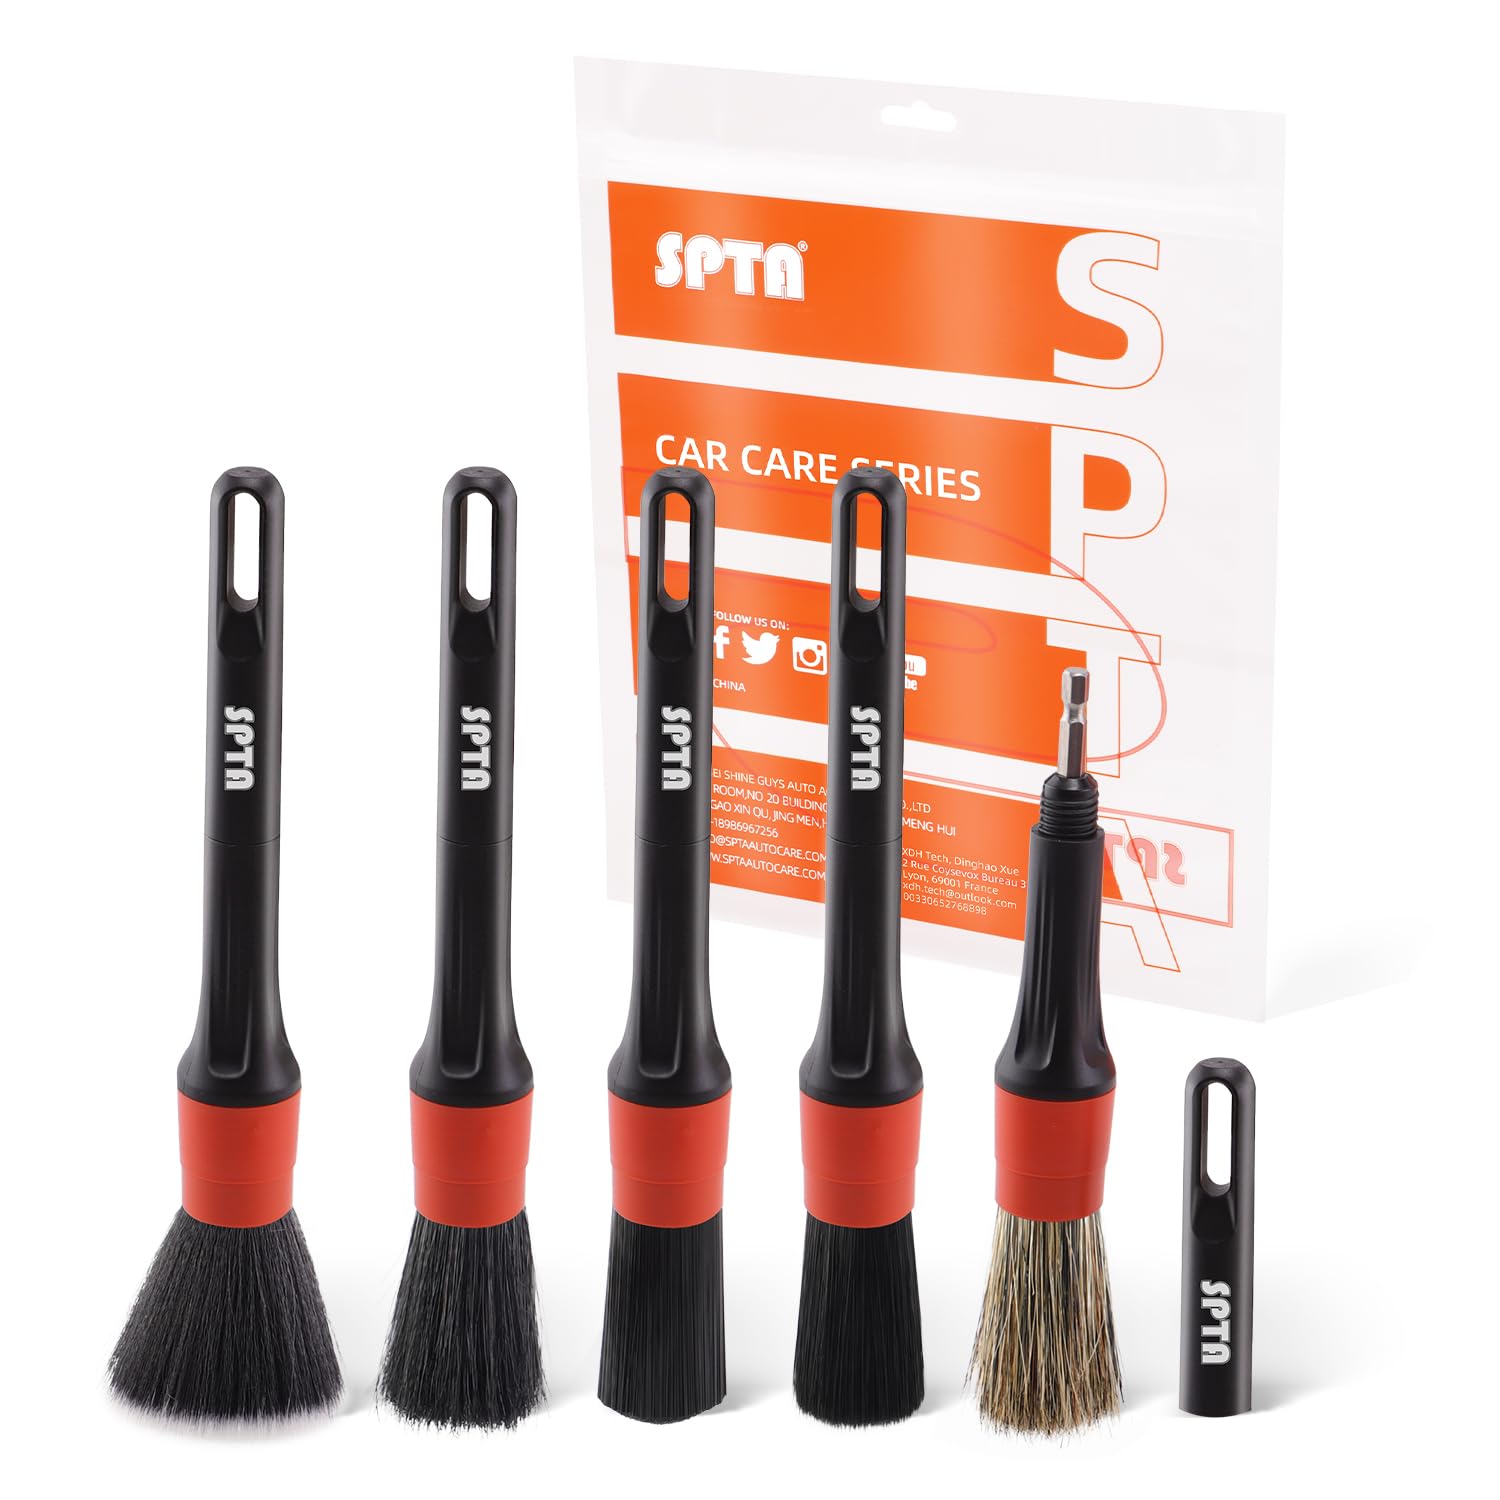
SPTA 17pcs Drill Brush Attachment Set
Extensive kit with various shapes/sizes including abrasive nylon; value for multiple projects.
Best for: Varied tasks from wheels to tubs.
Price Range: $15.99
ABN Copper Wire Brush Drum Set
Knotted copper wire for softer abrasion on brass/aluminum; less spark risk.
Best for: Non-ferrous metals or delicate rust.
Price Range: $19.99