Sanding is often the most tedious part of any woodworking or DIY project, but it’s also the most critical for a professional-looking result. If you’ve ever struggled with swirl marks, uneven surfaces, or just can’t seem to get that glass-smooth finish, you’re not alone. The good news is that a random orbital sander is one of the most forgiving and effective tools for achieving a smooth finish—when used correctly.
In this guide, you’ll learn everything you need to know to use a random orbital sander like a pro: how to choose the right grit, maintain proper technique, and avoid common mistakes that lead to frustration. We’ll walk through each step from setup to final polish, so you can tackle your next project with confidence.
This tutorial is designed for complete beginners. You don’t need any prior sanding experience, just a willingness to learn. With about 30 minutes of practice, you’ll be able to produce a surface that’s ready for stain, paint, or clear finish.
▸What You'll Need
- •Random orbital sander (e.g., 5-inch or 6-inch hook-and-loop pad)
- •Assorted sanding discs: 80, 120, 180, 220, 320 grit (avoid discs with holes that don't match your sander's dust ports)
- •Dust collection: vacuum attachment (preferred) or dust bag
- •Safety glasses and a dust mask or respirator
- •Scrap piece of wood or softwood (like pine) for practice
- •Tack cloth or vacuum for cleaning between grits
- •Optional: work light to angle across the surface to see swirls
Estimated Time: 30–60 minutes for a small project (e.g., a tabletop or shelf), including setup and practice.
Difficulty: beginner
▸Step-by-Step Instructions
Step 1: Prepare Your Workpiece and Workspace
Why it matters: A clean, stable surface ensures even sanding and prevents debris from scratching your work.
What to do: Secure your workpiece on a workbench using clamps or a non-slip mat. The piece should not move during sanding. Clear the area of loose items and ensure good lighting—position a work light to shine across the surface at a low angle; this will reveal imperfections and swirl marks you might otherwise miss.
Pro tip: If you’re working on a large piece like a tabletop, work on a flat, sturdy surface to avoid flexing that could cause uneven pressure.
💡 Tips:
- •Use a dust collector or shop vac connected to the sander for best dust management.
- •Wear a dust mask even with collection—fine wood dust is harmful.
Step 2: Select the Right Grit and Attach the Disc
Why it matters: Starting with too coarse a grit can leave deep scratches that are hard to remove; too fine a grit will take forever to remove material.
What to do: For general smoothing of raw wood (no existing finish), start with 80 or 100 grit. If your wood is already fairly smooth or has a previous coating removed, start with 120 grit. Peel off the backing of a disc and center it on the sander’s hook-and-loop pad, pressing firmly. Ensure the holes in the disc align with the sander’s dust ports—if misaligned, dust won’t be collected properly.
Pro tip: Always use high-quality discs (like 3M or Norton) – cheap discs may shed grit or leave uneven scratches.
💡 Tips:
- •Keep extra discs handy; you’ll change grits multiple times.
- •If you have a variable speed sander, set it to a medium speed (3–4 out of 6) for most work.
⚠️ Warnings:
- •Do not use discs that are too large or too small for your pad—they must match exactly.
Step 3: Start Sanding with the Correct Technique
Why it matters: The random orbital sander’s motion is designed to prevent swirl marks, but only if you use it properly. Pushing down hard or moving in arcs can create unevenness.
What to do: Hold the sander with both hands—one on the top handle, one on the side or body. Turn it on and let it come to full speed before contacting the wood. Lower the sander flat onto the surface—do not tilt it. Apply only the weight of the sander; resist the urge to press down. Move the sander in slow, overlapping passes, following the grain of the wood. Work in a systematic pattern (e.g., rows going left to right) to cover the entire surface.
Pro tip: Imagine you’re ironing a shirt—long, slow passes with consistent speed. Each pass should overlap the previous by about 50%.
💡 Tips:
- •Keep the sander moving constantly; never stop in one spot or you’ll create a depression.
- •Listen to the motor—if the RPM drops significantly, you’re pressing too hard.
⚠️ Warnings:
- •Do not tilt the sander—only the flat pad should contact the wood.
- •Avoid sanding edges aggressively; approach them carefully to avoid rounding over.
Step 4: Progress Through the Grit Sequence
Why it matters: Skipping grits leaves scratches that become visible after finishing. Each finer grit removes the scratches from the previous grit.
What to do: After you’ve covered the entire surface with 80 or 100 grit, stop and inspect. Use a bright light to look for any remaining rough spots. Then switch to 120 grit and repeat the same movement pattern. Then 150, 180, 220, and optionally 320 for a super-smooth finish. Always clean the surface between grits—use a vacuum or tack cloth to remove dust, because leftover coarse dust will cause new scratches when you sand with finer grit.
Pro tip: For most furniture, stopping at 180 or 220 grit is sufficient. Higher grits (320+) can actually burnish the wood and reduce stain absorption, so test on scrap first.
💡 Tips:
- •If you see scratches from the previous grit, stay on that grit until they’re gone.
- •Change discs frequently—a worn disc is less aggressive and may burnish instead of cut.
⚠️ Warnings:
- •Don’t skip more than one grit jump (e.g., 80 to 120 is fine, but 80 to 220 is too much).
Step 5: Check for Swirl Marks and Unevenness
Why it matters: Even with proper technique, you might still see faint swirl marks, especially on softwoods. Catching them now saves rework later.
What to do: After finishing with your final grit (e.g., 220), wipe the surface clean and shine a bright light across it at a low angle. Look for circular or scratch marks. If you see any, you may have pressed too hard or moved too fast. To fix, re-sand that area with the same grit using lighter pressure and slower movement. If swirls persist, try a finer grit (320) or even hand sand with the grain using a sanding block.
Pro tip: For a truly flawless finish, some woodworkers do a final “vacuum sanding” where they hold the sander while also using a shop vac to maximize dust removal—this prevents dust from causing micro-scratches.
💡 Tips:
- •If you’re working with plywood, be extra careful because thin veneers can be sanded through quickly.
- •Always sand with the grain on the final passes; the random orbit helps but finishing with the grain reduces visible scratches.
⚠️ Warnings:
- •If you sand through veneer, you’re usually out of luck—stop immediately if you see discoloration from the glue line.
Step 6: Final Cleanup and Prep for Finish
Why it matters: Any dust left on the surface will ruin your stain or paint finish by creating bumps or fish eyes.
What to do: After the last grit, thoroughly vacuum the entire workspace and the workpiece. Use a tack cloth to wipe down the surface—it’s a sticky cloth that picks up fine dust. Use a clean, lint-free rag if you don’t have a tack cloth. Now your surface is ready for stain, paint, or clear coat.
Pro tip: If you plan to apply a water-based finish, some woodworkers lightly dampen a cloth with mineral spirits to wipe the surface (mineral spirits evaporate quickly and don’t raise the grain). For oil-based finishes, a dry tack cloth is sufficient.
💡 Tips:
- •For natural stains, a final pass with 220 grit is often ideal. For paint, 180 grit provides good adhesion.
- •Wipe with a damp cloth to raise the grain, then lightly sand with 220 after it dries for an even smoother result.
⚠️ Warnings:
- •Never skip the tack cloth step—dust is invisible until you apply finish and see all the imperfections.
▸Pro Tips
- •Let the sander do the work—applying only the weight of the tool prevents gouging and swirl marks.
- •Use a vacuum attachment instead of the dust bag for much better dust collection and visibility.
- •Work in a well-lit area and use a raking light to spot imperfections as you go.
- •Keep your sanding discs in a labeled storage box to avoid mixing grits.
- •When sanding edges, move the sander off the edge halfway so the pad doesn’t tilt and round over the corner.
- •For large surfaces, divide the area into sections and finish each section completely before moving on.
- •Clean the sander’s pad periodically with a brush to remove built-up dust and adhesive.
▸Common Mistakes to Avoid
- •Pressing too hard: This slows the sander, creates heat, and leaves deep swirls. Let the sander’s weight do the work.
- •Skipping grits: Moving from 80 to 180 leaves scratches that show through finish. Always follow a progressive sequence.
- •Not cleaning between grits: Coarse dust left on the surface will be ground in by the next grit, causing new scratches.
- •Moving the sander too fast: Fast passes don’t allow the grit to cut effectively, leaving an uneven texture. Slow down.
- •Using worn discs: A clogged or worn disc won’t cut properly and may burnish the wood, making it hard to stain evenly.
▸Troubleshooting
Problem: Swirl marks appear after sanding.
Solution: You likely pressed too hard or used too coarse a grit. Drop to a finer grit (e.g., 220) and re-sand with light pressure and slow movement. Also check that your pad and disc are clean.
Problem: The sander leaves a pattern of circular scratches.
Solution: This can happen if the hook-and-loop pad is worn or the disc is misaligned. Replace the pad and ensure the disc is centered exactly. Also verify you’re not tilting the sander.
Problem: Wood surface feels rough after sanding with fine grit.
Solution: The wood may have raised grain from moisture in the air. Lightly dampen the surface with a cloth, let dry, and sand again with the same grit.
Problem: Dust collection is poor.
Solution: Check that the disc holes align with the sander’s dust ports. Clean the ports and bag/vacuum filter. If using a vacuum, ensure it’s switched on and the hose is not blocked.
Problem: The sander jumps or vibrates excessively.
Solution: This usually means the disc is not attached evenly or the pad is damaged. Replace the disc or pad. Also check that the sander’s backing pad is not warped.
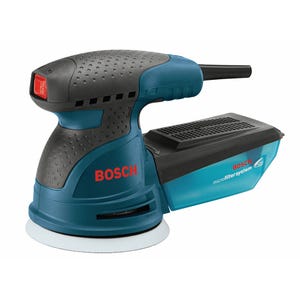
Bosch ROS20VSC Random Orbital Sander
Excellent dust collection through a pad that aligns with discs, variable speed control, and low vibration. Perfect for beginners.
Best for: General woodworking, furniture refinishing, drywall sanding.
Price Range: $60–$70
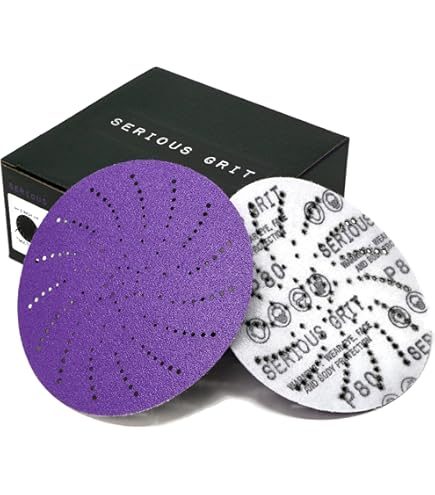
3M Xtract Cubitron II Sanding Discs (5-inch, 80-grit, 50-pack)
These discs use precision-shaped ceramic grains that stay sharp longer and cut faster with less pressure, reducing swirl marks.
Best for: Sanding hardwoods, softwoods, and painted surfaces. Great for progression through grits.
Price Range: $20–$30
Festool CT MIDI Dust Extractor
High-efficiency dust extraction with automatic filter cleaning and HEPA filtration. Keeps your workspace clean and improves sander performance.
Best for: For anyone serious about dust control during sanding. Ideal for workshops.
Price Range: $400–$500
3M 6502QL Half Facepiece Respirator
Comfortable, reusable respirator with quick latch to drop down when not needed. Protects from fine wood dust that can cause lung issues.
Best for: Any sanding task, especially in enclosed spaces or without good ventilation.
Price Range: $20–$30
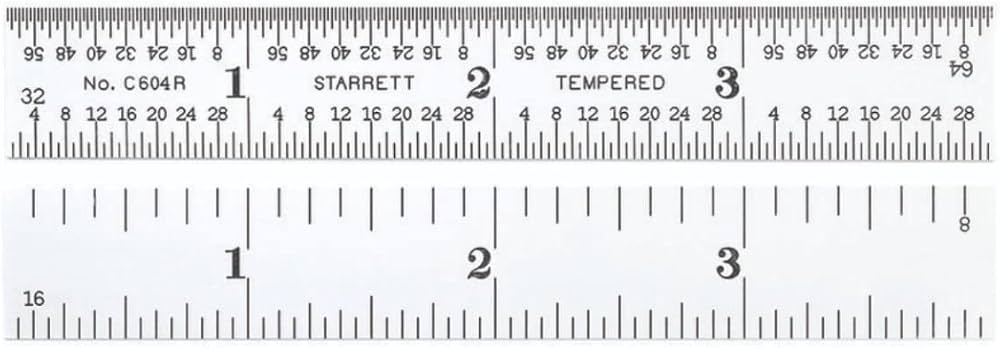
Starrett Bright Back Steel Rule (12-inch)
A metal straightedge helps you check for flatness and high spots when sanding large surfaces. Not essential but very helpful.
Best for: Checking flatness of sanded surfaces, especially for tabletops or countertops.
Price Range: $15–$25