
Pirastro Evah Pirazzi Gold Viola Strings
Full set replacement for enhanced harmonics and stability.
$80-$90
Pirastro Evah Pirazzi Gold Viola Strings Synthetic core with gold wrapping delivers brilliant projection and warmth ideal for pro upgrades.
Get the App
Better experience on mobile
Transform your acoustic viola's tone, projection, and responsiveness with advanced DIY upgrades for professional performance quality.
As an advanced violist, you know that even high-end acoustic violas can underperform without precise setup tweaks. Dull tone, weak projection, or uneven response often stem from outdated components or suboptimal adjustments, robbing your playing of its full potential. Upgrading key elements like strings, bridge, and soundpost can unlock a richer, more vibrant sound rivaling pro instruments.
In this guide, you'll learn step-by-step how to assess, upgrade, and fine-tune your viola for professional-level acoustics. We'll cover essential hardware swaps and adjustments, drawing from luthier best practices. Expect hands-on work requiring precision tools and experience—no beginner fluff here.
The process takes 2-4 hours active time, plus settling periods, and assumes advanced skills like string changes and bridge fitting. Results? Crisper highs, deeper lows, and effortless projection that elevates your gigs and recordings.
Estimated Time: 2-4 hours active work + 24 hours settling Difficulty: advanced
Play your viola across all positions and dynamics. Note issues like muddy lows, shrill highs, wolf tones, or poor projection. Use a tuner and recording app to quantify intonation and timbre.
Measure key specs: bridge height (16-18mm at center for violas), string action (3-5mm at fingerboard end), nut height, and soundpost position (centered under bridge, ~2-3mm from bridge foot). This baseline guides upgrades.
Success looks like: A clear diagnostic list, e.g., 'bridge too low, strings worn.'
💡 Tips:
⚠️ Warnings:
Loosen all pegs counterclockwise, then cut strings with wire cutters if stuck. Remove tailpiece, endpin, and chinrest. Clean pegbox, nut, and tailbutton with a soft cloth—no solvents.
Inspect for wear: cracks in bridge feet, shifted soundpost, or corroded hardware. This prevents carrying over flaws.
Success looks like: Viola bare from strings to tail, components laid out clean.
💡 Tips:
Thread new strings through tailpiece holes, install on bridge, then pegbox. Wind pegs clockwise (2-3 winds max), apply peg dope for smooth turning. Tune to standard viola pitch (C-G-D-A) gradually.
Choose synthetic or gut equivalents for pro warmth/power. Stretch strings by pulling gently and retuning over 30 mins.
Success looks like: Stable tuning, even tension, bright new response on open strings.
⚠️ Warnings:
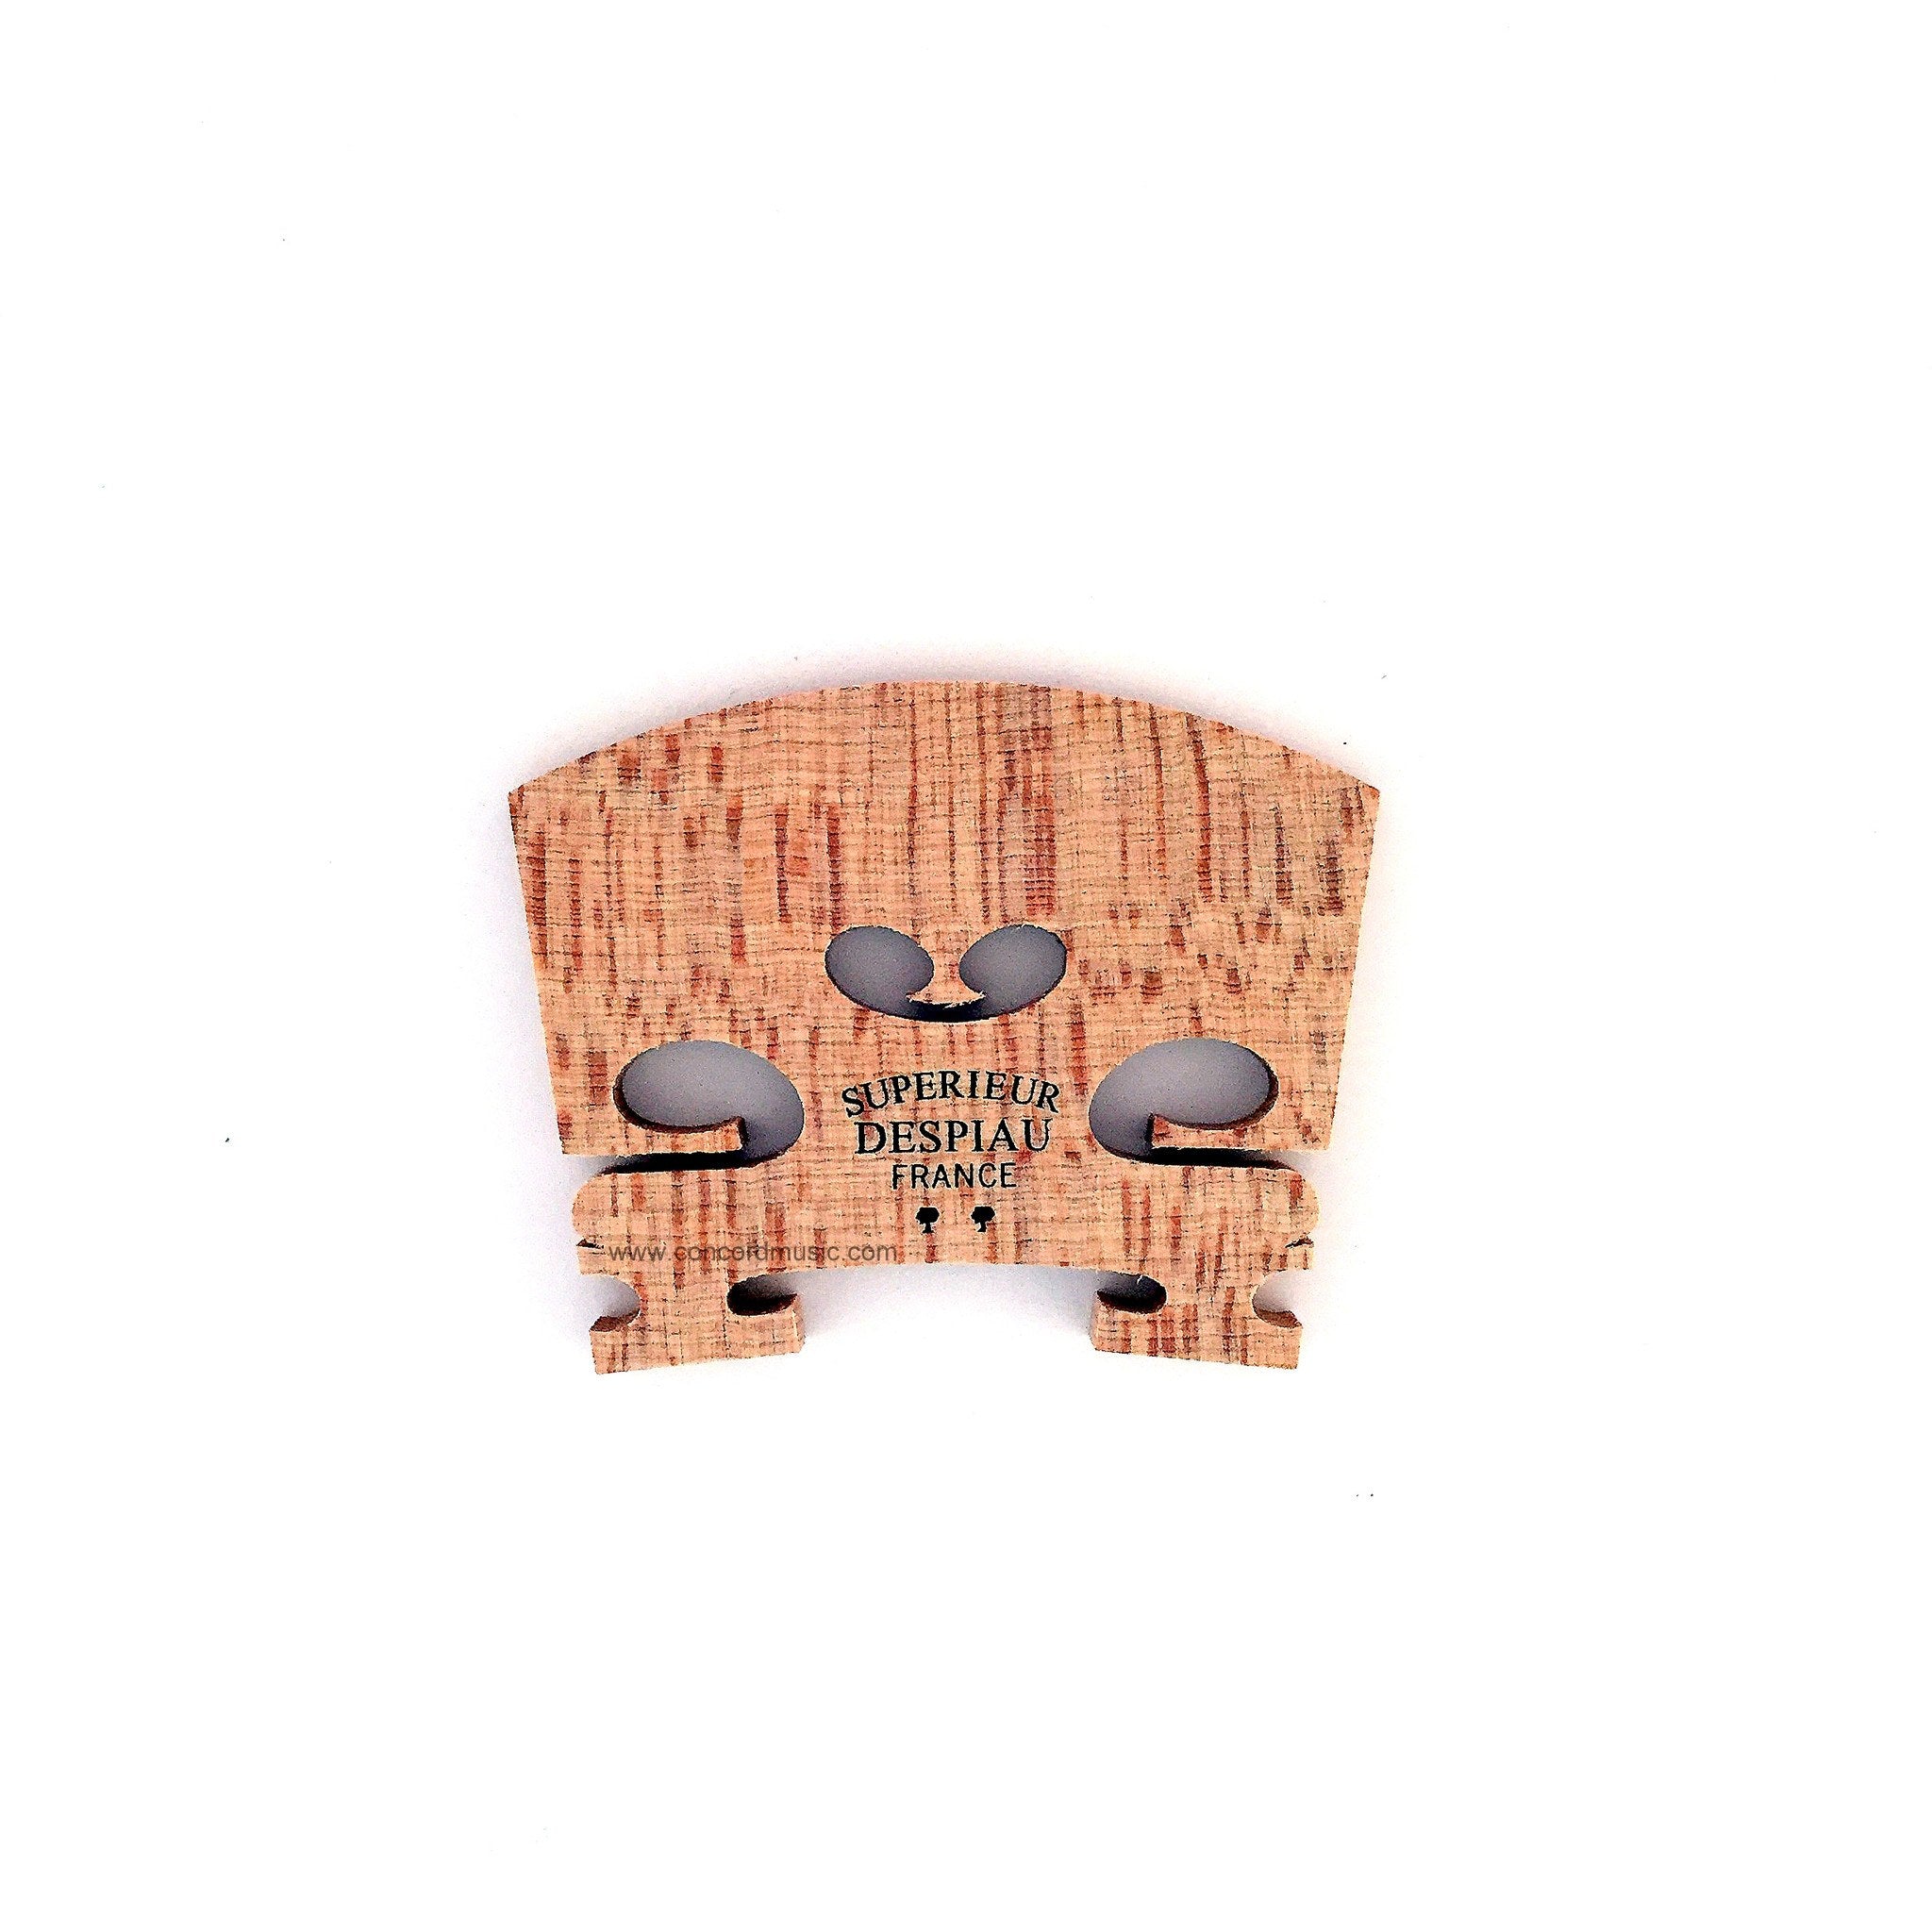
Select a pre-carved bridge matching your viola (e.g., 15.5-16.5" body). Place on soundboard over feet marks, align heart perpendicular to tailpiece. Trim height with knife/fitting block to 16-18mm center, feet flush.
Secure lightly—no glue needed. Test rock: should sway freely.
Success looks like: Bridge straight, strings clearing fingerboard by 3-4mm.
💡 Tips:
⚠️ Warnings:
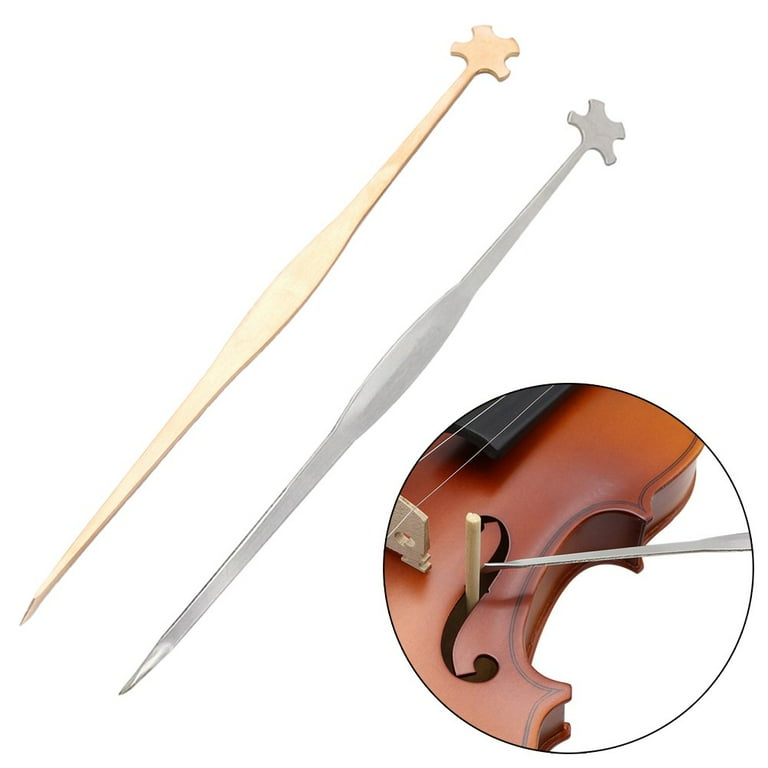
Insert soundpost setter through f-hole. Position post behind treble-side bridge foot, 2-3mm gap, height matching bridge inner edge. Tap lightly to fit snugly.
Play to test: closer for brilliance, farther for warmth. Fine-tune by 0.5mm increments.
Success looks like: Balanced tone—no wolf tones, even across strings.
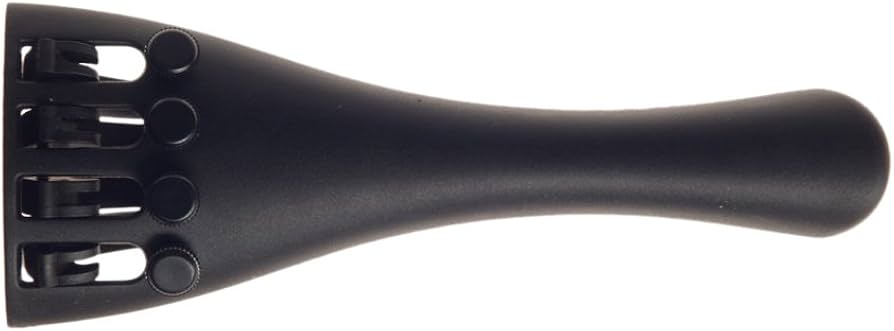
Install composite tailpiece with fine tuners. Replace tailgut with nylon for stability. Reinstall endpin (carbon fiber for better transmission).
Adjust tailpiece angle ~110 degrees from bridge for optimal break angle.
Success looks like: Smooth tuning, no buzzing.
💡 Tips:
Check nut slots (file if binding), action, and peg friction. Rosin bow lightly, play scales/arpeggios. Record and compare to baseline.
Let settle 24 hours, retune daily for a week.
Success looks like: Pro projection, nuanced timbre, effortless playability.
⚠️ Warnings:
Problem: Wolf tone after upgrade
Solution: Shift soundpost 1mm away from bridge; add wolf eliminator if persistent. Seek luthier if structural.
Problem: Buzzing strings
Solution: Check nut/bridge slots, tailpiece height. Tighten tailgut.
Problem: Uneven tone across strings
Solution: Realign bridge heart; swap to matched string set.
Problem: Bridge leaning
Solution: Ensure feet fully on soundboard; dry climate? Humidify.
Synthetic core with gold wrapping delivers brilliant projection and warmth ideal for pro upgrades.
Best for: Full set replacement for enhanced harmonics and stability.
Price Range: $80-$90
High-grade maple with precise carving improves sound transmission and sustain.
Best for: Direct swap for better tone focus during bridge upgrade.
Price Range: $40-$50
Lightweight composite reduces mass for quicker response and easy fine-tuning.
Best for: Tailpiece upgrade to minimize damping and add tuners.
Price Range: $30-$40
Precision hook design allows accurate placement without damage.
Best for: Essential for DIY soundpost adjustments.
Price Range: $10-$15
Budget-friendly pro alternative with warm, versatile tone for testing upgrades.
Best for: Entry-level string swap before premium investment.
Price Range: $45-$55
Full set replacement for enhanced harmonics and stability.
Pirastro Evah Pirazzi Gold Viola Strings Synthetic core with gold wrapping delivers brilliant projection and warmth ideal for pro upgrades.
Direct swap for better tone focus during bridge upgrade.
Despiau Superior #2 Viola Bridge High-grade maple with precise carving improves sound transmission and sustain.
Tailpiece upgrade to minimize damping and add tuners.
Wittner Composite Viola Tailpiece with Tuners Lightweight composite reduces mass for quicker response and easy fine-tuning.
Essential for DIY soundpost adjustments.
Viola Soundpost Setter Tool Precision hook design allows accurate placement without damage.

Entry-level string swap before premium investment.
Thomastik-Infeld Dominant Viola String Set Budget-friendly pro alternative with warm, versatile tone for testing upgrades.