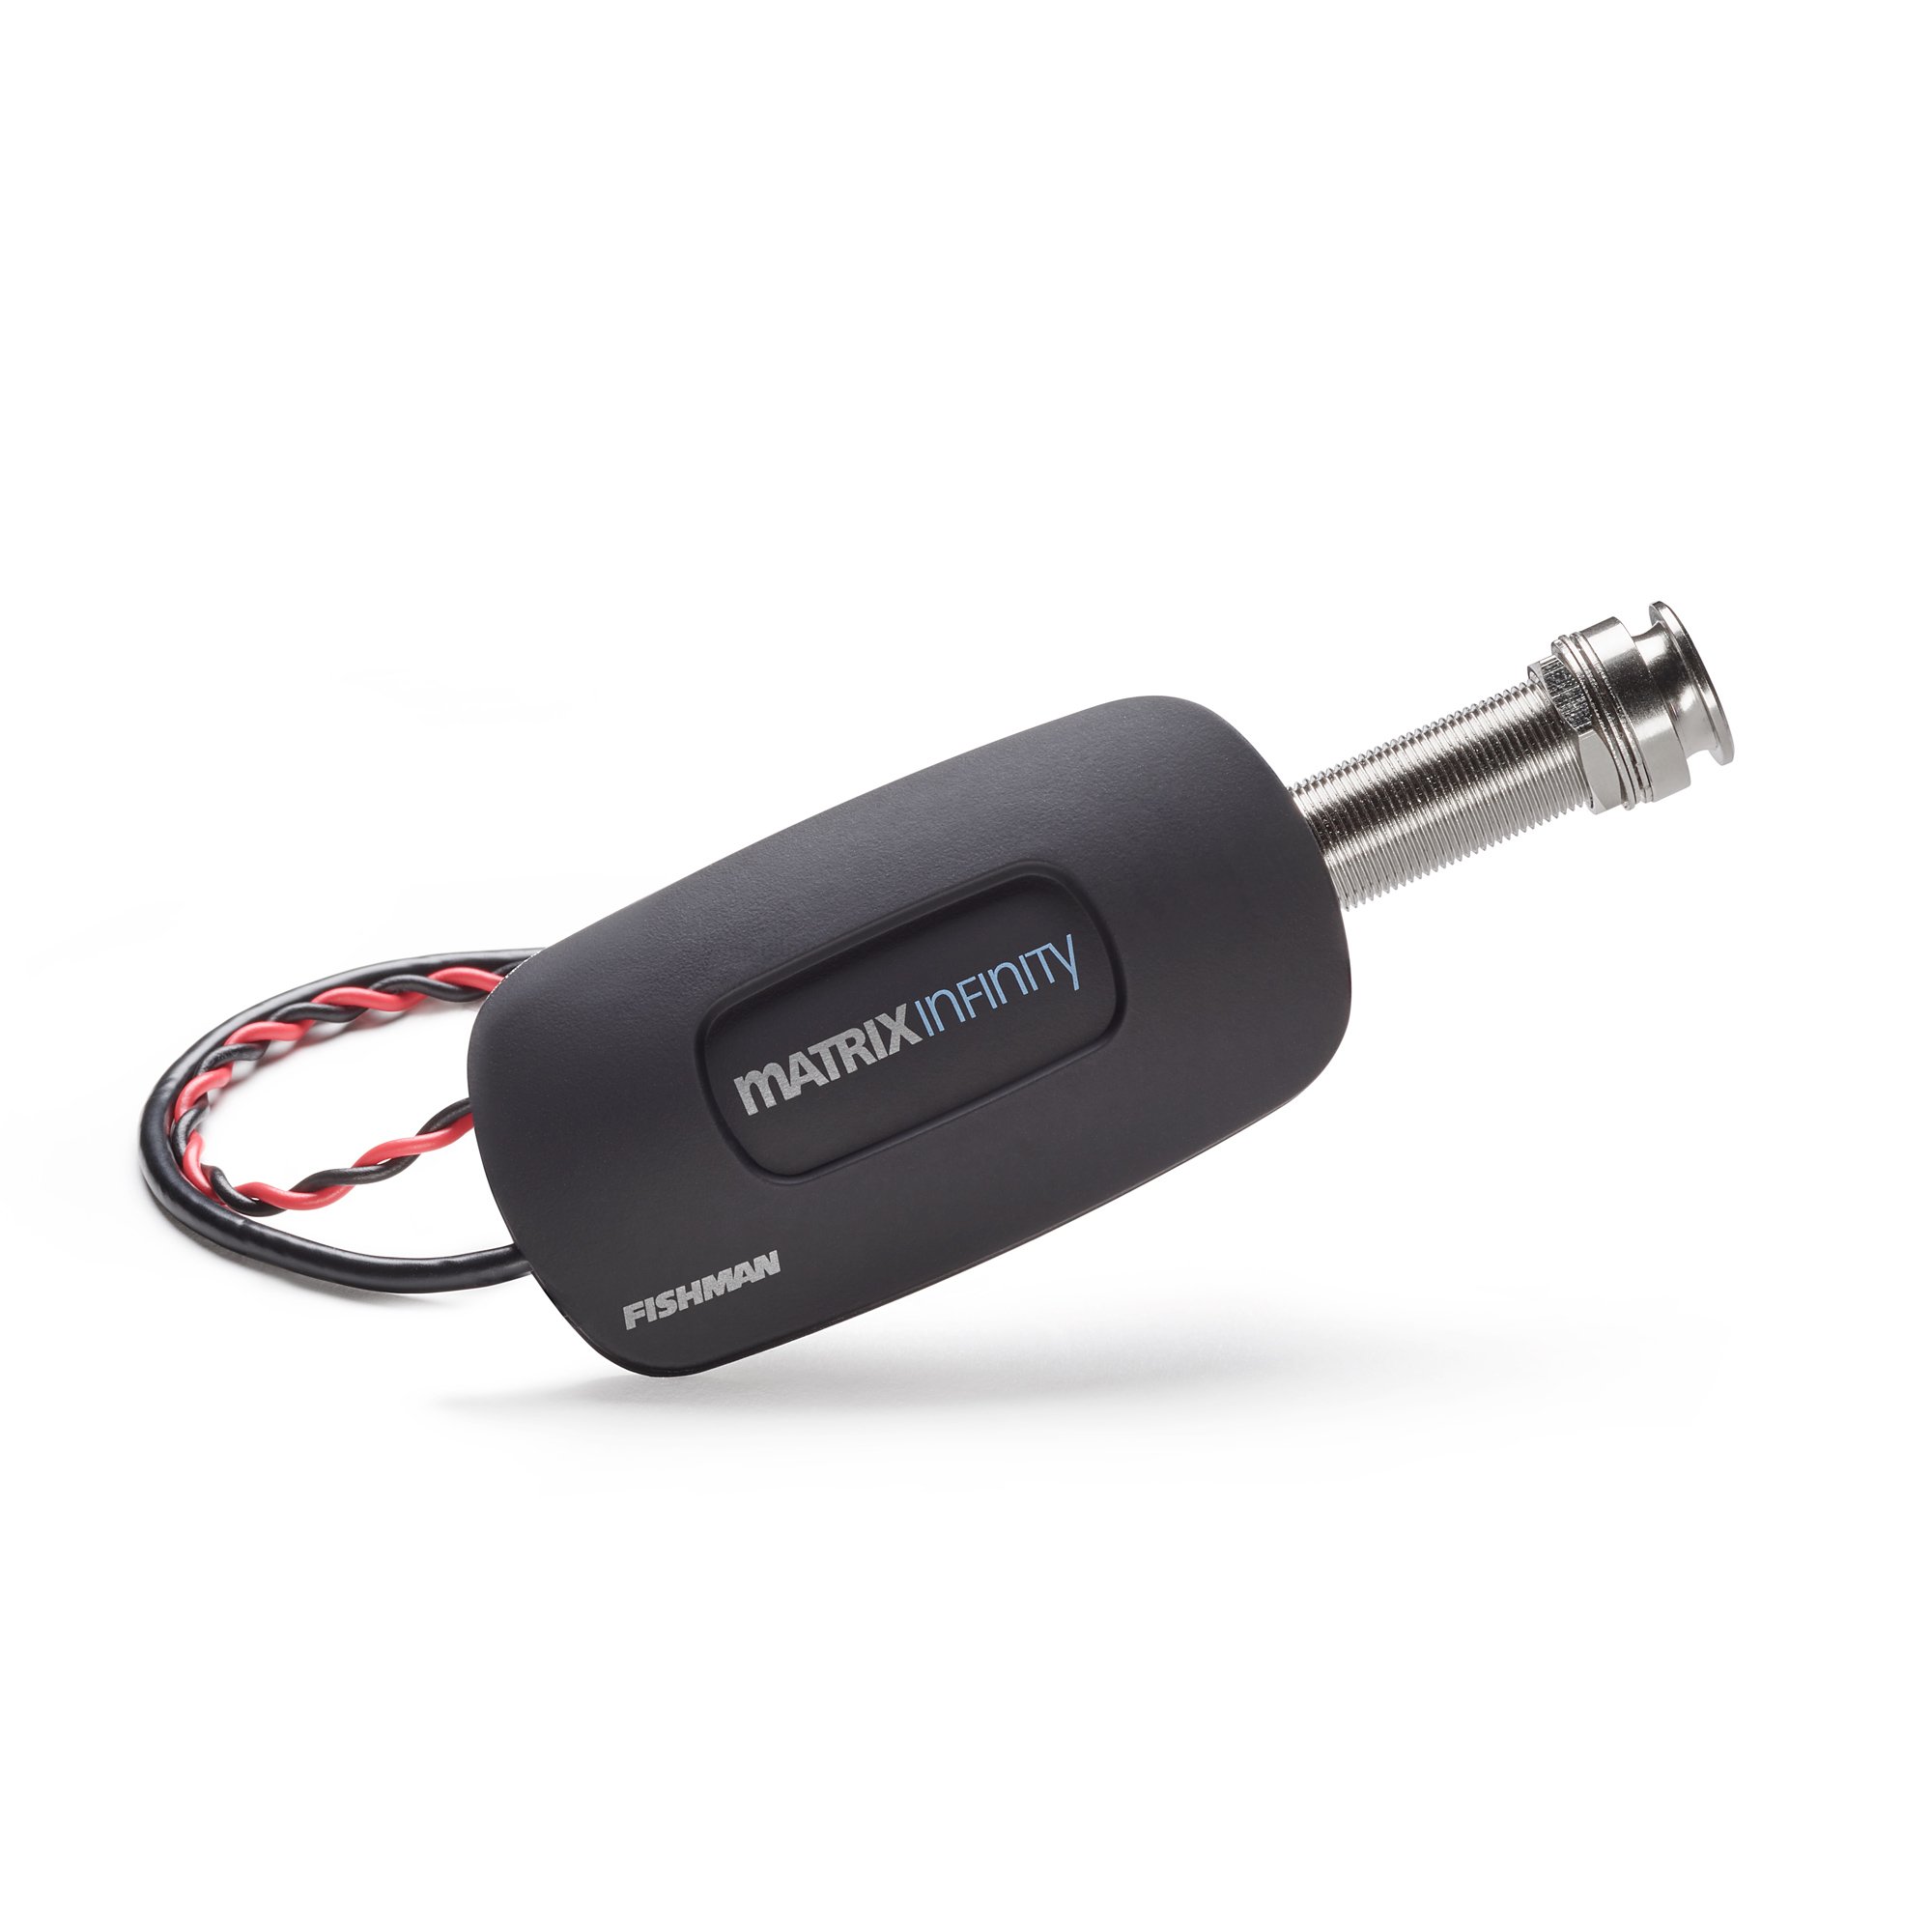
Fishman Matrix Infinity VT
Full stage upgrade on steel-string acoustics.
$250-$300
Fishman Matrix Infinity VT Pro-grade undersaddle system with natural tone and EQ for advanced installs.
Get the App
Better experience on mobile
Master advanced DIY installation of pro pickups to amplify your acoustic guitar feedback-free on stage.
Frustrated by mic feedback, poor stage volume, or inconsistent acoustic tone during live performances? Upgrading your acoustic guitar with pickups delivers direct, natural amplification without the hassle of external mics. This guide empowers advanced players and luthiers to install a professional undersaddle piezo system like Fishman or LR Baggs.
You'll learn everything from selecting the right system to soldering connections and final setup, achieving pro-level results at home. Expect a detailed, sequential process focusing on clean wiring, optimal tone, and minimal guitar modification.
This advanced tutorial assumes soldering experience and guitar setup knowledge. Total time: 3-5 hours, plus drying if glue used. Success means plug-and-play amplification with balanced EQ and no hum.
Estimated Time: 3-5 hours Difficulty: advanced
Research and select an undersaddle piezo system suited to your guitar. Undersaddle pickups capture string vibration through the bridge saddle for natural tone. Popular advanced options include active preamps with EQ for stage use.
Match the system to your guitar's saddle width (typically 1/8" or 3mm thick piezo strip). Measure your bridge pin spacing and saddle slot. Order a system with volume/tone controls and battery box.
Success: Kit arrives with pre-wired components, instructions, and fitting tools.
💡 Tips:
⚠️ Warnings:
Set up a well-lit, static-free bench with soft cloth to avoid scratches. Detune and loosen strings fully. Use masking tape on body and headstock edges.
Inspect guitar interior via soundhole for braces that might interfere. Humidify if below 45% RH to prevent cracks.
Success: Guitar stable, workspace organized, no dust or debris.
💡 Tips:
Clip old strings at ball ends. Pull bridge pins with pliers (wrap jaws in cloth). Gently pry saddle with plastic tool or knife—never metal to avoid gouges.
Clean saddle slot with compressed air and isopropyl alcohol. Note original saddle height/direction.
Success: Saddle and pins removed cleanly; slot dust-free.
⚠️ Warnings:
Most systems replace the strap button with a preamp-loaded endpin jack. Remove old button, test-fit new jack (drill slightly if needed using template).
Secure preamp inside guitar (usually foam tape near end block). Route jack wires through body hole.
Success: Jack fits flush, preamp mounted securely without rattles.
💡 Tips:
Trim piezo strip to saddle length +1mm overhang. Sand edges smooth. Test-fit in slot—should contact bridge plate fully.
Apply thin saddle glue (if required) or dry-fit. Slide into slot.
Success: Piezo sits flat, no air gaps for even response.
⚠️ Warnings:
Strip wires 1/4", tin tips with solder. Connect piezo to preamp leads per diagram (hot/ground). Solder bridge ground wire to tail block screw.
Use multimeter to check continuity—no shorts. Secure wires with zip ties away from strings.
Success: All joints shiny, cold, multimeter beeps on continuity.
💡 Tips:
⚠️ Warnings:
Carve or buy new bone/comp saddle to match piezo height (aim 2.5-3mm action). Install saddle, push pins flush.
Restring partially, tune to pitch, check action. Full tune-up.
Success: Strings seat properly, no buzz, saddle secure.
Plug into amp. Tap strings—expect quack-free natural tone. Adjust preamp EQ for venue (boost mids for cut).
Check battery life, hum (twist cable). Intonate if needed.
Success: Balanced output, no feedback at high volume.
💡 Tips:
Problem: Hum or noise
Solution: Check ground wire; use shielded cable; lift amp ground.
Problem: Piezo not fully seated; re-sand and reseat.
Solution: undefined
Problem: Preamp not powering
Solution: Verify 9V battery polarity; test continuity.
Problem: Jack loose
Solution: Add wood shims or epoxy; seek luthier.
Pro-grade undersaddle system with natural tone and EQ for advanced installs.
Best for: Full stage upgrade on steel-string acoustics.
Price Range: $250-$300
Compact active preamp with volume/tone; easy solderless options for pros.
Best for: Minimal invasive install on smaller body guitars.
Price Range: $180-$220
Budget-friendly passive transducer; pairs well with external preamps.
Best for: Quick soundhole or bridge plate add-on without saddle swap.
Price Range: $60-$80
Precise temp control for delicate guitar electronics.
Best for: All wiring steps to avoid cold joints.
Price Range: $30-$40
Full stage upgrade on steel-string acoustics.
Fishman Matrix Infinity VT Pro-grade undersaddle system with natural tone and EQ for advanced installs.
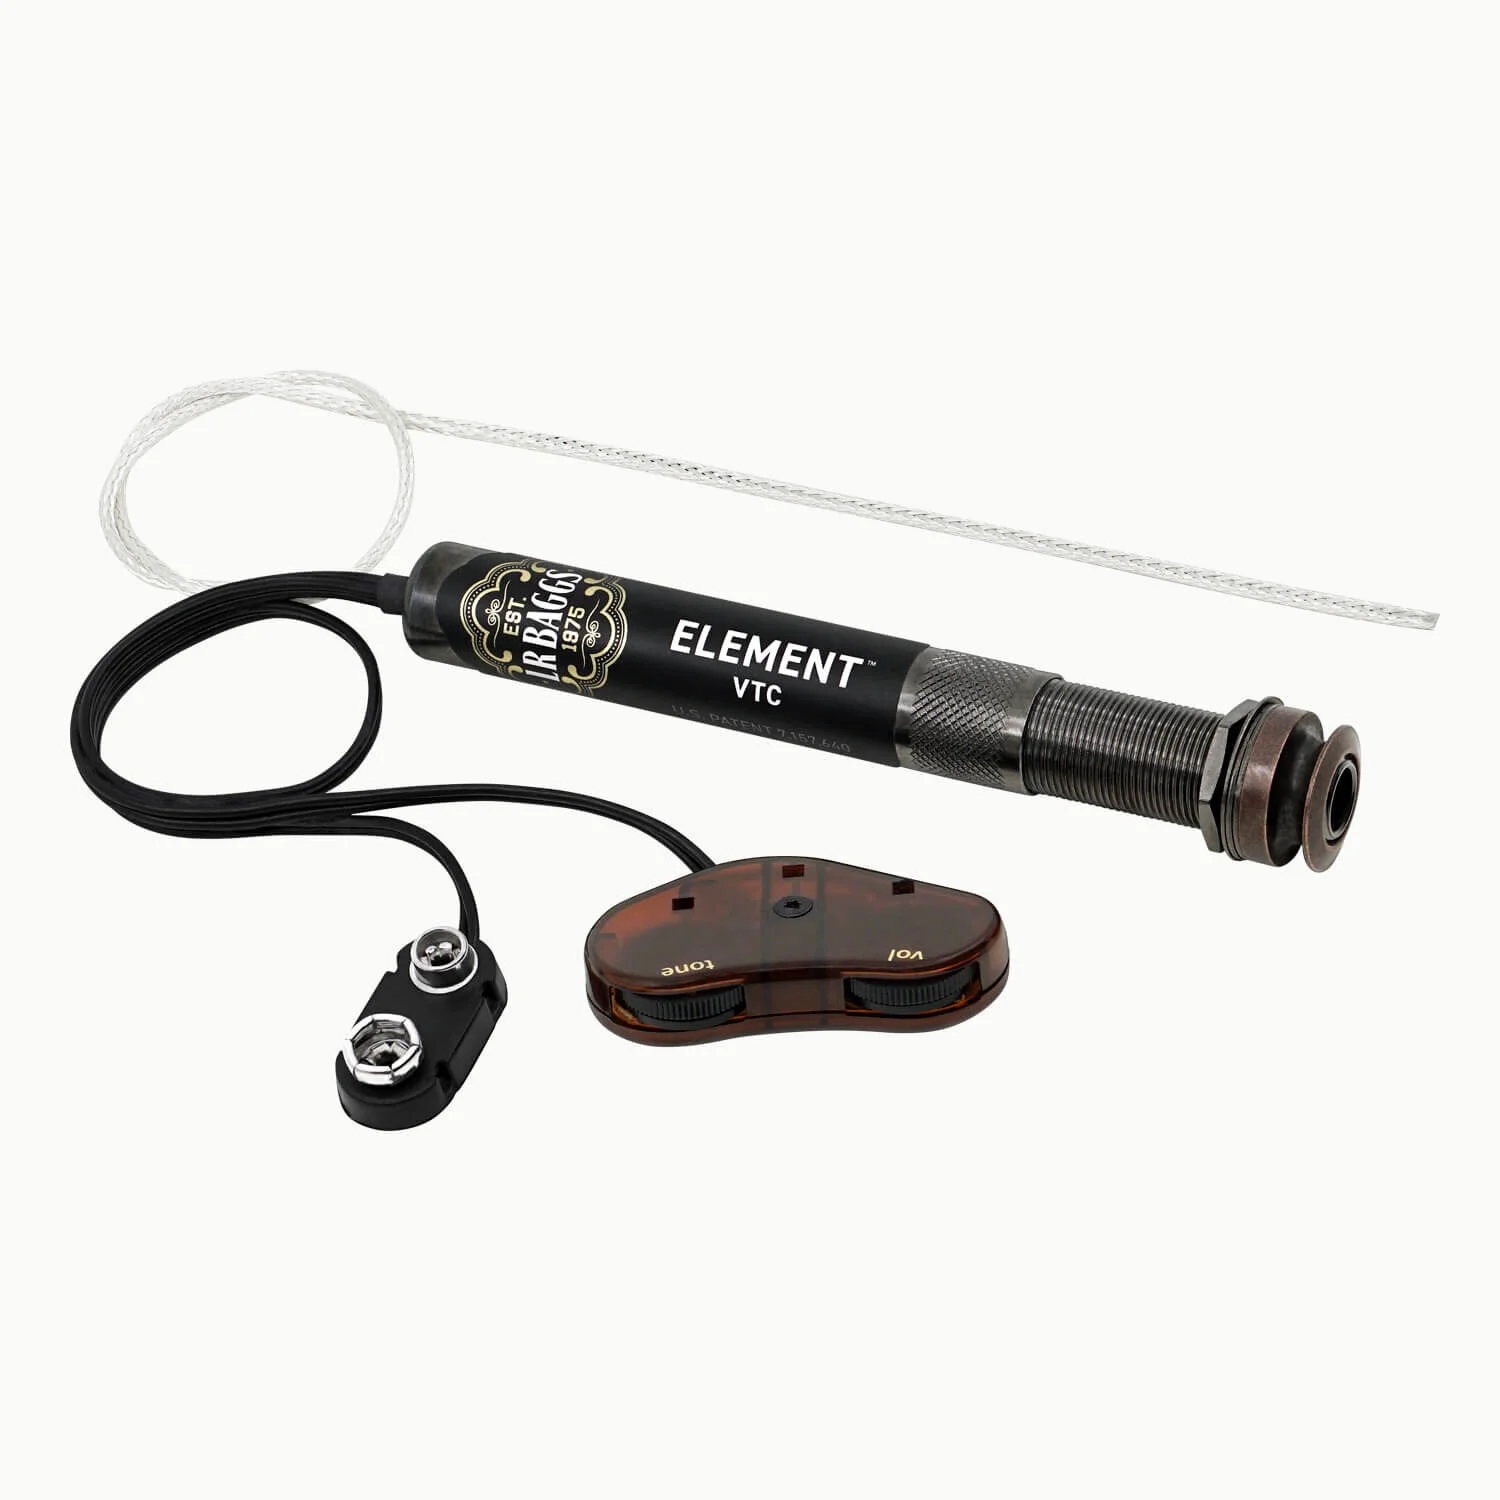
Minimal invasive install on smaller body guitars.
LR Baggs Element VTC Compact active preamp with volume/tone; easy solderless options for pros.

Quick soundhole or bridge plate add-on without saddle swap.
K&K Pure Mini Pickup Budget-friendly passive transducer; pairs well with external preamps.
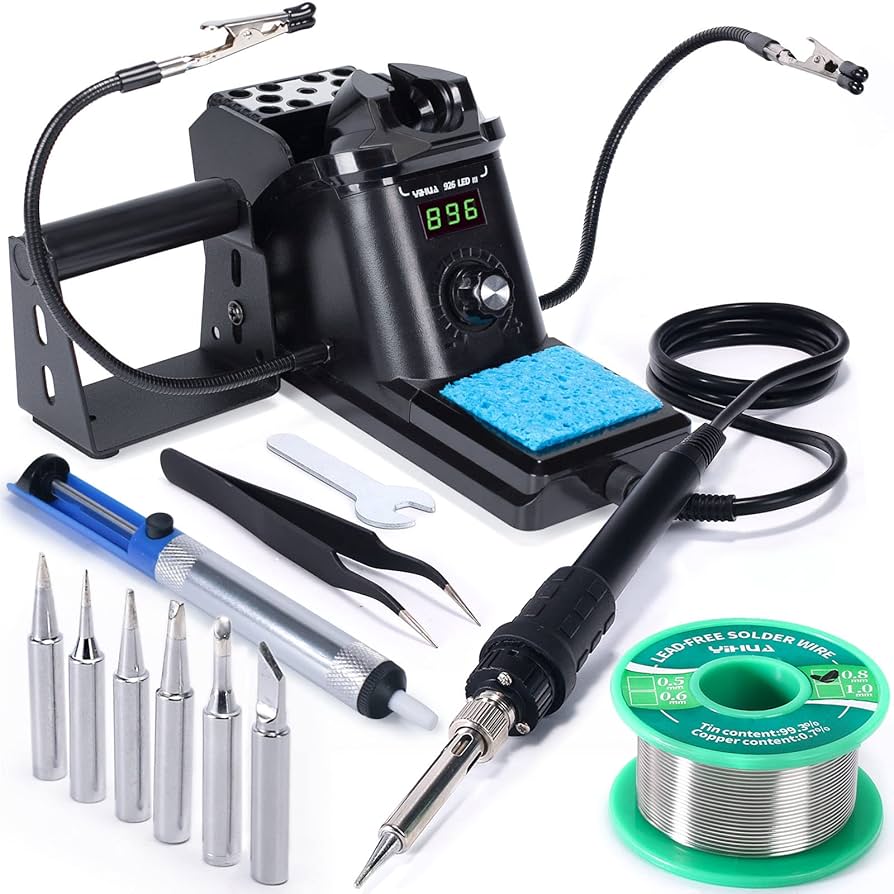
All wiring steps to avoid cold joints.
YIHUA 926 III Soldering Station Precise temp control for delicate guitar electronics.