AstroAI Digital Multimeter
Measure output during load for precise troubleshooting.
$14.99
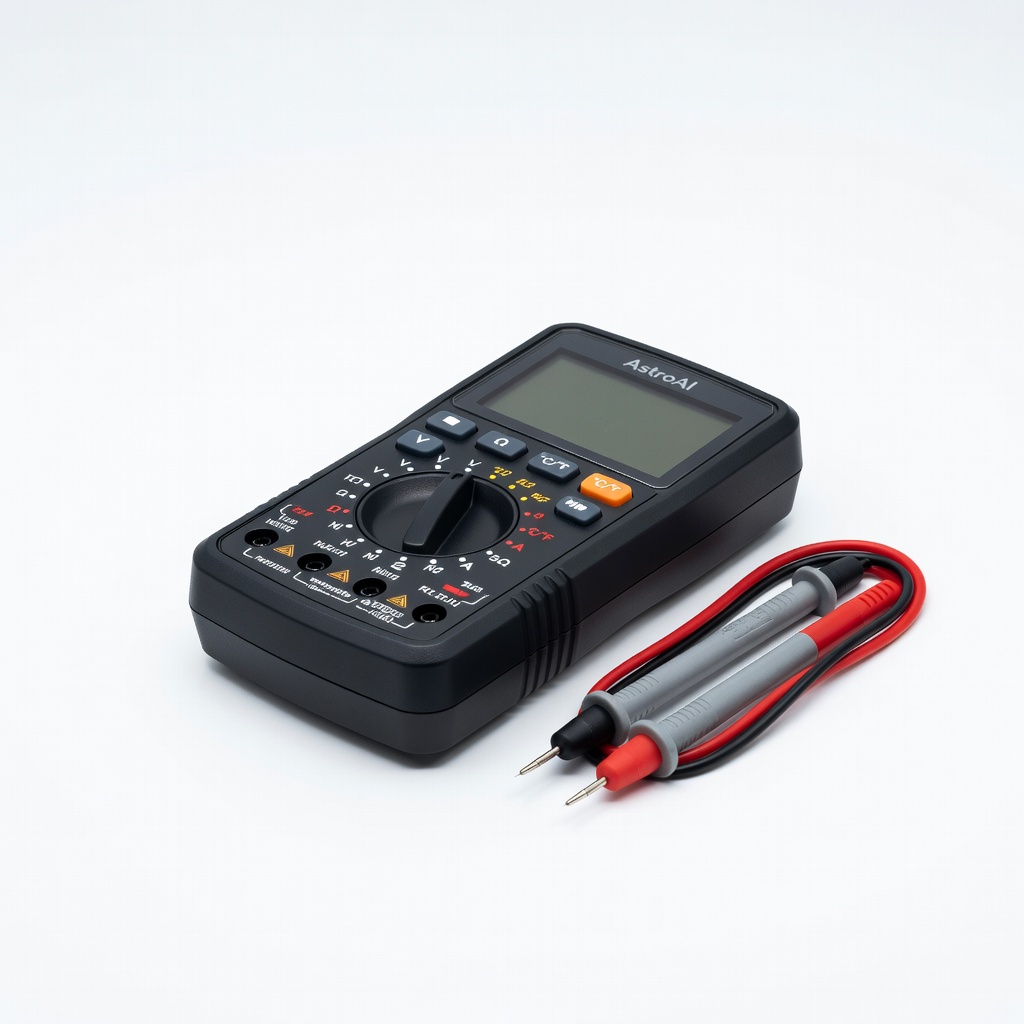
AstroAI Digital Multimeter Accurate DC voltage testing essential for diagnosing electrical faults causing heat.
Get the App
Better experience on mobile
Diagnose and resolve AC adapter overheating issues step-by-step to safely power your laptop without shutdowns or fire risks.
Is your laptop's AC adapter scorching hot, causing unexpected shutdowns or even melting smells? Overheating power bricks are a common issue that can damage your device, shorten adapter lifespan, or pose fire hazards. Ignoring it risks costly repairs or replacements, but most cases are fixable with basic troubleshooting.
In this guide, you'll learn how to safely inspect, test, and fix your laptop AC adapter. We'll cover visual checks, cleaning, electrical testing, and when to replace it. No advanced electronics knowledge needed—just intermediate DIY skills like using a multimeter.
Expect 20-30 minutes for the process, depending on issues found. Follow these steps in order for best results, prioritizing safety to avoid shocks or burns.
Estimated Time: 20-30 minutes Difficulty: intermediate
Unplug the AC adapter from the wall outlet and laptop immediately. Allow it to cool for at least 15-20 minutes. Touch it cautiously—if it's too hot to hold comfortably (over 140°F/60°C), this confirms overheating.
Why it matters: Hot components can cause burns or damage internals further. Success looks like a cool-to-touch adapter ready for inspection.
Image description: Close-up of a hand unplugging a black laptop AC adapter from a wall socket, with steam effect indicating heat.
💡 Tips:
⚠️ Warnings:
Examine the adapter brick, cable, and connectors for damage: look for bulging, discoloration, melted plastic, burn marks, frayed wires, or bent pins.
Why it matters: Physical damage often causes shorts leading to heat buildup. If you spot severe issues like cracks or exposed wires, stop and replace it—don't proceed. Success: No obvious damage, or minor issues noted for cleaning.
Take photos for warranty claims if applicable.
💡 Tips:
⚠️ Warnings:
Use compressed air to blow out dust from vents, fan (if present), and crevices. Hold the adapter upside down to let debris fall out. Wipe the exterior and connectors with isopropyl alcohol on a swab.
Why it matters: Dust buildup blocks airflow, trapping heat. Success: Adapter feels cleaner, vents are clear, no more gritty residue.
Let it dry fully before next steps.
💡 Tips:
⚠️ Warnings:
Inspect the DC output cable for kinks or frays by flexing it gently. Plug into laptop (unpowered) and wiggle connections—note if it sparks or heats unevenly.
Why it matters: Pinched cables increase resistance, generating heat. Success: Secure, flexible cable with no hot spots during wiggle test.
💡 Tips:
⚠️ Warnings:
Use an infrared thermometer to scan the adapter body, focusing on the center and output port, while unplugged. Note readings; under 100°F/38°C ambient is normal.
Why it matters: Quantifies the issue. Re-test after charging for 10 minutes later. Success: Temps below 140°F/60°C during light use.
💡 Tips:
⚠️ Warnings:
Set multimeter to DC voltage (20V range). Plug adapter into wall, connect probes to laptop's DC jack or adapter output (bare wires if safe). Expect rated voltage (e.g., 19V ±5%).
Why it matters: Wrong voltage causes overload/heat. Success: Stable reading matching label (e.g., 19.5V).
Markdown note: Discharge capacitors by holding power button on laptop first.
💡 Tips:
⚠️ Warnings:
Plug into laptop, run a demanding task (e.g., video export). Monitor temp and voltage drop (<10%). Use HWMonitor software for internal temps.
Why it matters: Overheating under load indicates failing components. Success: Stable voltage, temp <160°F/71°C max.
💡 Tips:
⚠️ Warnings:
If all tests pass but heat persists, improve ventilation (elevate adapter). Otherwise, replace with compatible unit matching wattage/voltage.
Why it matters: Faulty adapters fail suddenly. Success: Cool operation post-fix.
💡 Tips:
⚠️ Warnings:
Problem: Voltage reads 0V
Solution: Check wall outlet with lamp; replace if input fuse blown (visible inside some). Seek pro if internal.
Problem: Voltage fluctuates wildly
Solution: Faulty capacitors—replace adapter.
Problem: Heats only on specific laptop
Solution: Laptop draws too much power; use higher wattage adapter.
Problem: Adapter works but laptop shuts down
Solution: Insufficient wattage; upgrade.
Problem: Persistent heat post-clean
Solution: Age/failure—replace. Pro help if under warranty.
Accurate DC voltage testing essential for diagnosing electrical faults causing heat.
Best for: Measure output during load for precise troubleshooting.
Price Range: $14.99
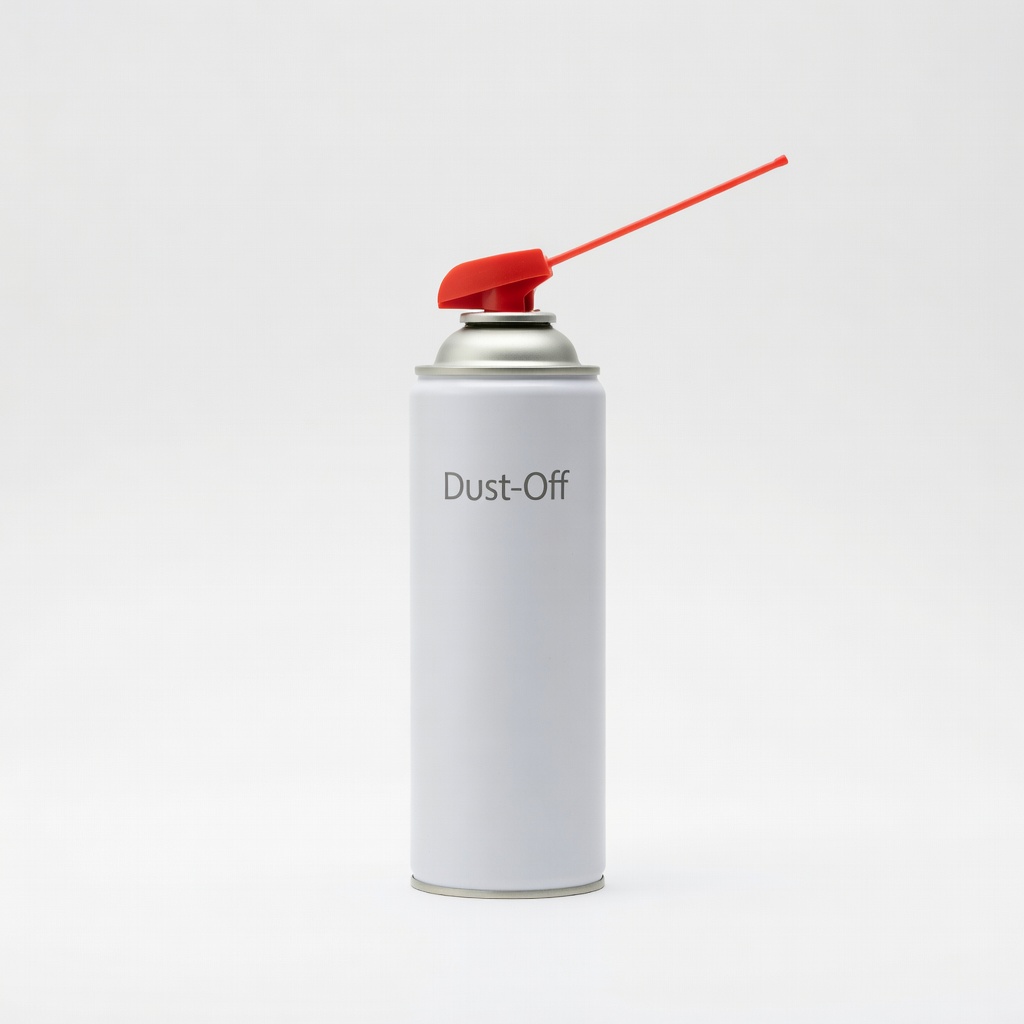
Safely removes dust without static risk, top cause of overheating.
Best for: Quick vent cleaning in Step 3.
Price Range: $9.99
Non-contact temp measurement spots hot spots accurately.
Best for: Monitor during tests without burns.
Price Range: $16.99
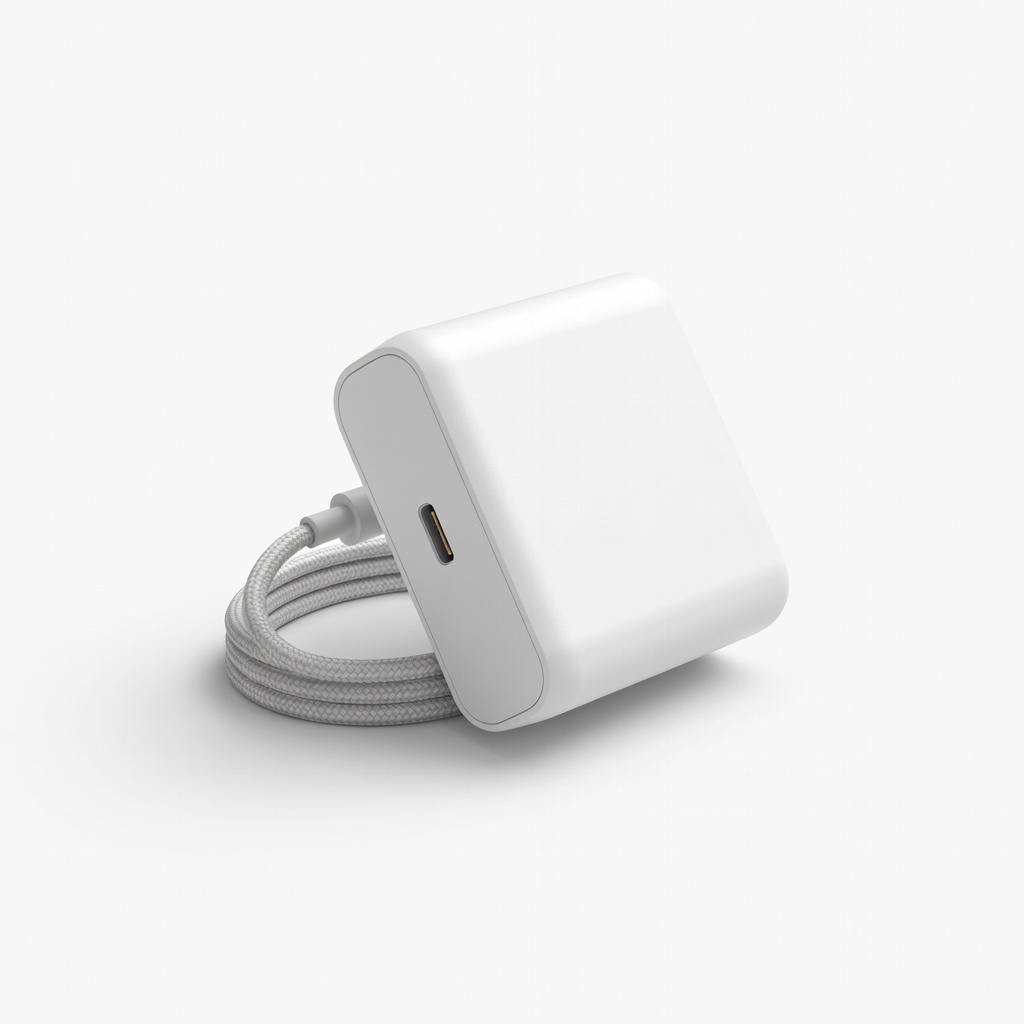
Reliable replacement with overheat protection; universal compatibility.
Best for: Upgrade if original fails tests.
Price Range: $19.99
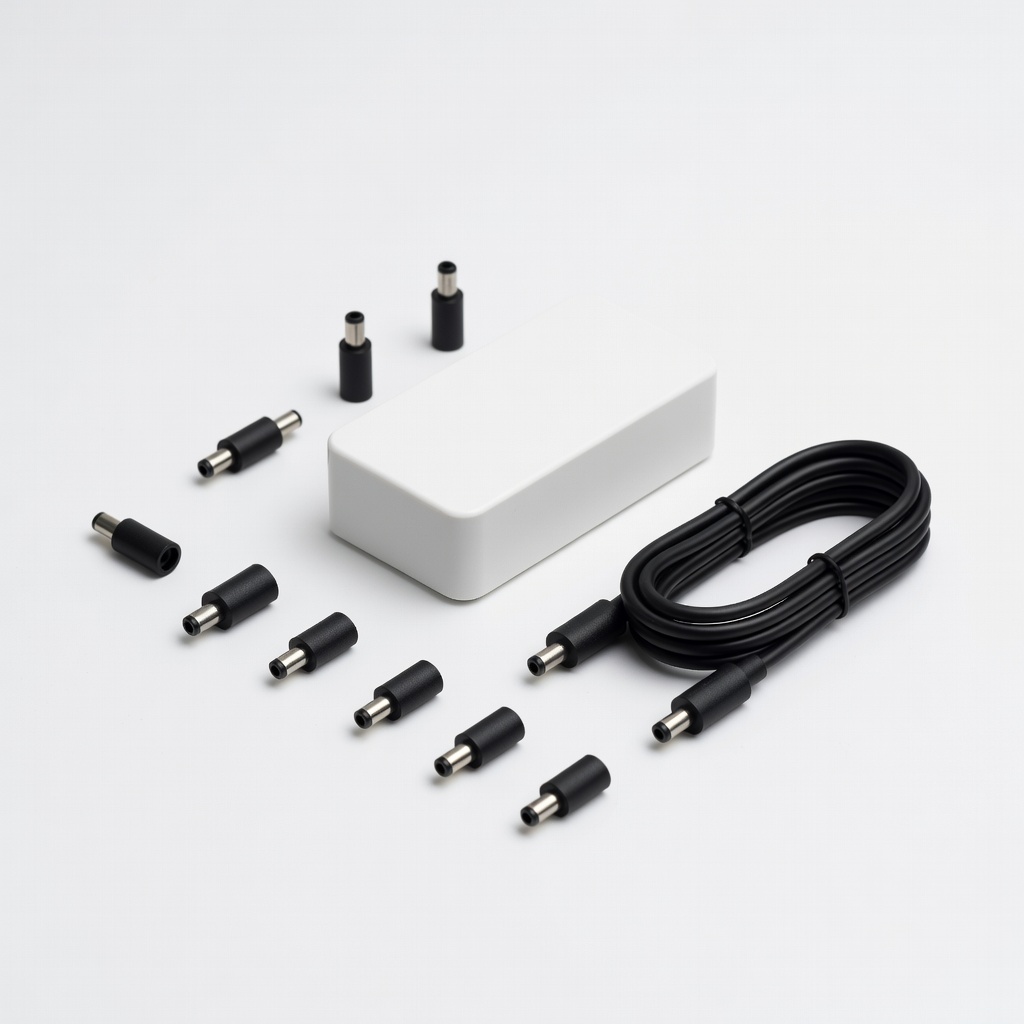
Versatile for multiple laptops with adjustable tips, prevents undersizing.
Best for: Replacement for various models.
Price Range: $24.99
Measure output during load for precise troubleshooting.
AstroAI Digital Multimeter Accurate DC voltage testing essential for diagnosing electrical faults causing heat.
Quick vent cleaning in Step 3.
Dust-Off Compressed Air Duster Safely removes dust without static risk, top cause of overheating.

Monitor during tests without burns.
Etekcity Infrared Thermometer Non-contact temp measurement spots hot spots accurately.
Upgrade if original fails tests.
Nekteck 65W USB-C Laptop Charger Reliable replacement with overheat protection; universal compatibility.
Replacement for various models.
Super Power Supply 90W Universal Laptop Charger Versatile for multiple laptops with adjustable tips, prevents undersizing.