Nothing is more frustrating than finishing a wash cycle only to find your clothes sitting in a tub of soapy water because your washing machine won't drain. This common issue can stem from simple clogs or more complex mechanical failures, leading to wet loads, potential mold growth, and extra utility costs if left unresolved. Fortunately, most drainage problems are fixable at home without calling a pricey repair service.
In this guide, you'll learn how to safely troubleshoot and fix a washing machine that's not draining, covering everything from basic checks to deeper inspections. We'll walk you through identifying the cause—whether it's a clogged hose, faulty pump, or something else—and provide actionable steps to resolve it. By the end, you'll have a fully functioning machine and tips to prevent future issues.
Expect this process to take 30-60 minutes, depending on the problem's severity. It's suited for intermediate DIYers comfortable with basic tools and appliance disassembly, but we'll include safety notes for peace of mind.
▸What You'll Need
- •Screwdriver set (Phillips and flathead)
- •Pliers or adjustable wrench
- •Bucket or shallow pan to catch water
- •Flashlight
- •Old towels or rags for cleanup
- •Optional: Multimeter for electrical testing
- •Optional: Washing machine cleaner tablets (like Affresh)
Estimated Time: 30-60 minutes
Difficulty: intermediate
▸Step-by-Step Instructions
Step 1: Unplug the Washing Machine and Ensure Safety
Before starting any troubleshooting, prioritize safety to avoid electrical shocks or injury. Unplug the washing machine from the wall outlet to disconnect power. If it's a gas model (rare for washers), ensure no gas lines are involved, but focus on electric models here.
Move the machine slightly away from the wall if needed for access to the back, but avoid tipping it fully as this can damage internal components. Place towels on the floor to catch any drips. This step matters because working on a powered appliance can lead to serious accidents, and success looks like a safely isolated machine ready for inspection.
Why it matters: Electricity and water don't mix, so this prevents hazards while allowing you to work confidently.
💡 Tips:
- •Label the plug with tape to remind yourself it's unplugged if you step away.
⚠️ Warnings:
- •Never work on a plugged-in appliance; if you're unsure, call a professional.
Step 2: Check the Drain Hose for Kinks or Blockages
Locate the drain hose at the back of the machine, where it connects to your home's drainage system (like a standpipe or sink). Inspect it for kinks, bends, or crimps that might restrict water flow—these are common if the hose was pinched during installation or moving.
Gently straighten any kinks and ensure the hose isn't inserted too far into the drain pipe (it should extend no more than 4-6 inches). Disconnect the hose from the drain if safe, and run water through it into a bucket to check for clogs. Success here means water flows freely without backups, indicating the hose isn't the culprit.
This quick check resolves many issues without tools, as poor hose positioning is a frequent oversight.
💡 Tips:
- •Use a flashlight to peer inside the hose for visible debris like lint or small objects.
⚠️ Warnings:
- •Avoid forcing the hose if it's stuck; use pliers gently to prevent damage.
Step 3: Inspect and Clean the Drain Filter
Most modern washing machines (especially front-loaders) have a accessible drain filter or pump trap at the bottom front. Refer to your model's manual (downloadable online if lost) to locate it—often behind a small panel.
Place a bucket underneath, then unscrew or pull out the filter. Expect a gush of water and debris like coins, lint, or hair. Rinse the filter under running water and reinstall it securely. Success is a clean filter with no remaining buildup, allowing proper drainage.
Cleaning this prevents recurring clogs and extends your machine's life; skip it, and minor issues become major.
💡 Tips:
- •Wear gloves—the water can be dirty or soapy.
⚠️ Warnings:
- •Not all top-loaders have accessible filters; check your manual to avoid unnecessary disassembly.
Step 4: Test the Drain Pump for Functionality
If the hose and filter are clear, the issue may be the drain pump. Access it via the back or bottom panel (remove screws with a screwdriver). Listen for unusual noises like humming or grinding when you plug in and run a drain cycle briefly.
Use a multimeter to check pump continuity if you're equipped—set to ohms and test the terminals (should read low resistance, around 5-20 ohms). If no continuity, the pump is faulty. Success means the pump activates without issues or you identify it as the problem for replacement.
Pumps fail from wear or overload; this step pinpoints mechanical faults.
💡 Tips:
- •Run a short spin cycle after checks to test drainage in action.
⚠️ Warnings:
- •If uncomfortable with electrical testing, stop and consult a pro to avoid voiding warranties.
Step 5: Examine the Home Drainage System
The problem might not be the machine—check your home's drain line. Pour water into the standpipe or sink where the hose connects to see if it backs up. Use a plunger on the drain if clogged.
Snake the line with a drain auger if accessible. Success is clear drainage from the home system, ruling out external blockages.
Home clogs from shared lines can mimic machine issues, so this verifies the full system.
💡 Tips:
- •Add a washing machine drain hose extension if the current setup is too low.
⚠️ Warnings:
- •Avoid chemical drain cleaners; they can damage appliance hoses.
Step 6: Run a Test Cycle and Reassemble
Reconnect all hoses and panels, ensuring tightness to prevent leaks. Plug in the machine and run an empty drain or spin cycle. Monitor for proper emptying and no error codes.
If it drains successfully, add a load to confirm. Success is a complete cycle with dry tub and no unusual sounds.
This verifies your fixes and catches overlooked issues.
💡 Tips:
- •Clean the machine monthly with a tablet to prevent future clogs.
⚠️ Warnings:
- •If leaks occur, shut off water supply immediately.
▸Pro Tips
- •Always consult your owner's manual for model-specific access points to save time.
- •Prevent clogs by using a mesh lint trap on the drain hose.
- •Run hot water through the drain monthly to flush minor buildups.
- •If your machine has a self-clean cycle, use it after troubleshooting.
- •Keep a small flashlight handy for dark interior spots.
- •Label hoses before disconnecting to ease reassembly.
- •Test with a small load first to avoid soaking a full one if issues persist.
▸Common Mistakes to Avoid
- •Forgetting to unplug the machine, risking electric shock—always double-check.
- •Overlooking the home drain, assuming it's the appliance—test both systems.
- •Forcing stuck filters or hoses, which can crack plastic parts—use gentle pressure.
- •Skipping filter cleaning regularly, leading to repeated issues—make it routine.
- •Ignoring error codes, missing simple resets—check the display first.
▸Troubleshooting
Problem: Machine shows error code (e.g., E21 on some models)
Solution: Look up the code in the manual; it often indicates a pump or hose issue—reset by unplugging for 5 minutes.
Problem: Water drains slowly but eventually empties
Solution: Clean the filter more thoroughly or check for partial hose kinks; consider a pump upgrade if recurring.
Problem: No drainage at all, with humming pump sound
Solution: Pump is likely seized—replace it; if unsure, call a technician to avoid further damage.
Problem: Leaks during troubleshooting
Solution: Tighten connections and check seals; dry area and test again—if persists, inspect for cracks.
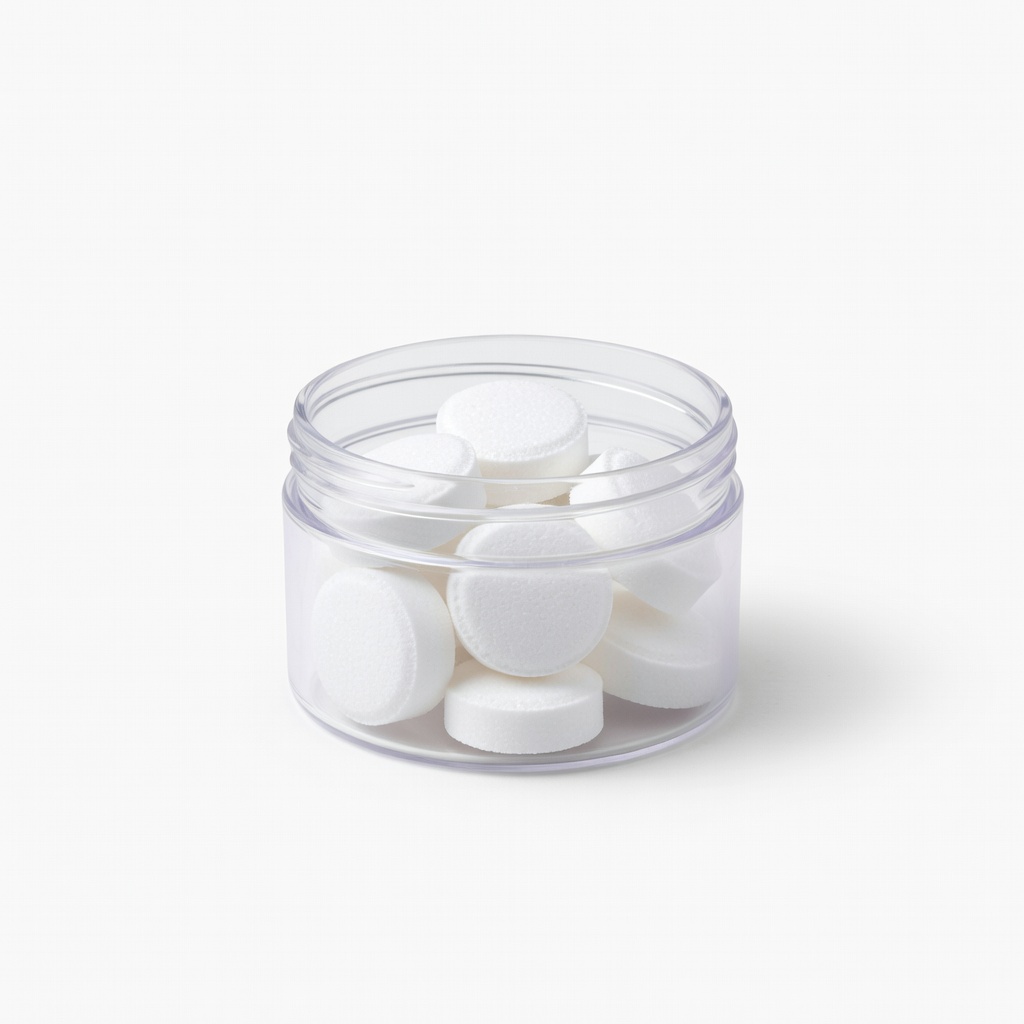
Affresh Washing Machine Cleaner Tablets
These tablets effectively dissolve buildup in filters and pumps, preventing drainage issues from residue.
Best for: Use monthly for maintenance after troubleshooting to keep drains clear.
Price Range: $15-20
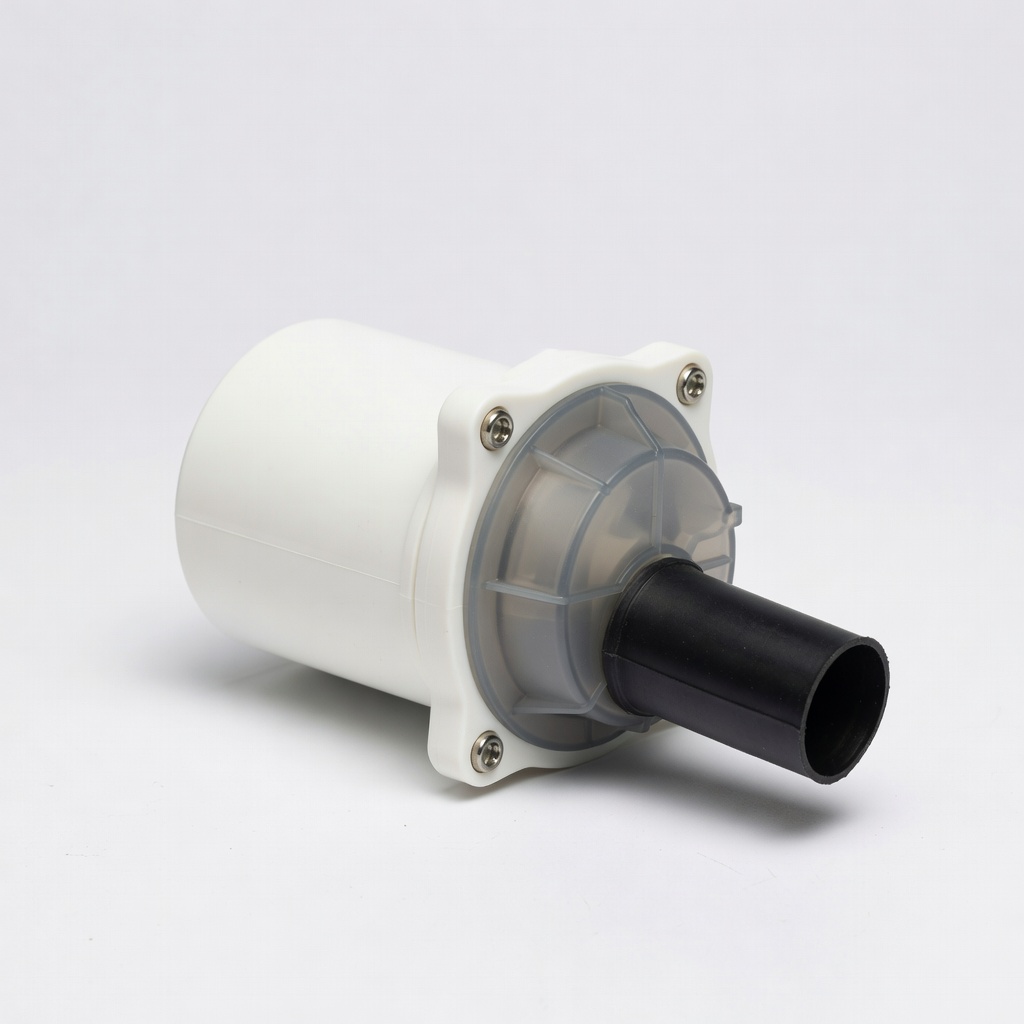
UPA Universal Washing Machine Drain Pump
A reliable replacement for faulty pumps in most brands, with easy installation and quiet operation.
Best for: Install if testing shows pump failure, compatible with Whirlpool, LG, etc.
Price Range: $25-35
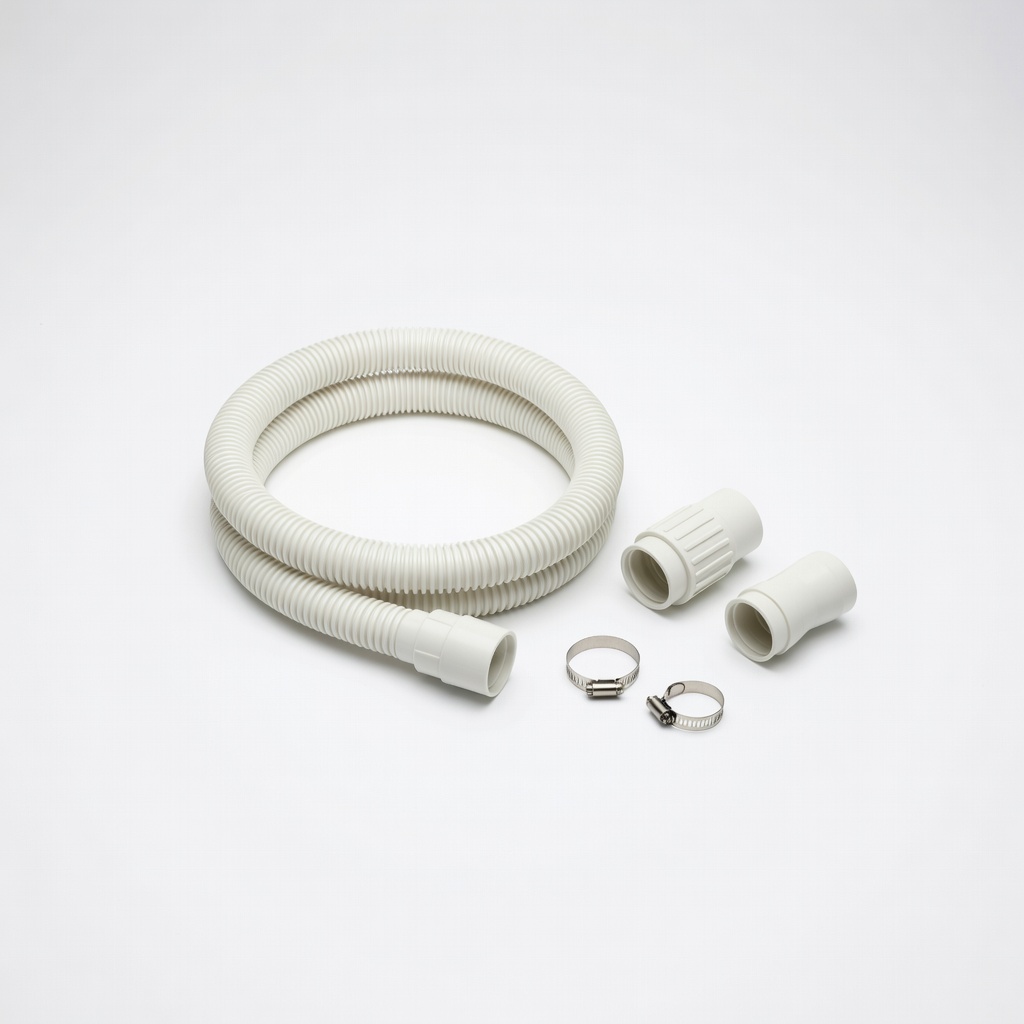
Camco Washing Machine Drain Hose Extension Kit
Extends and straightens hoses to prevent kinks, ensuring proper flow without home plumbing mods.
Best for: Ideal if your setup causes bends; quick fix for installation-related drains.
Price Range: $10-15
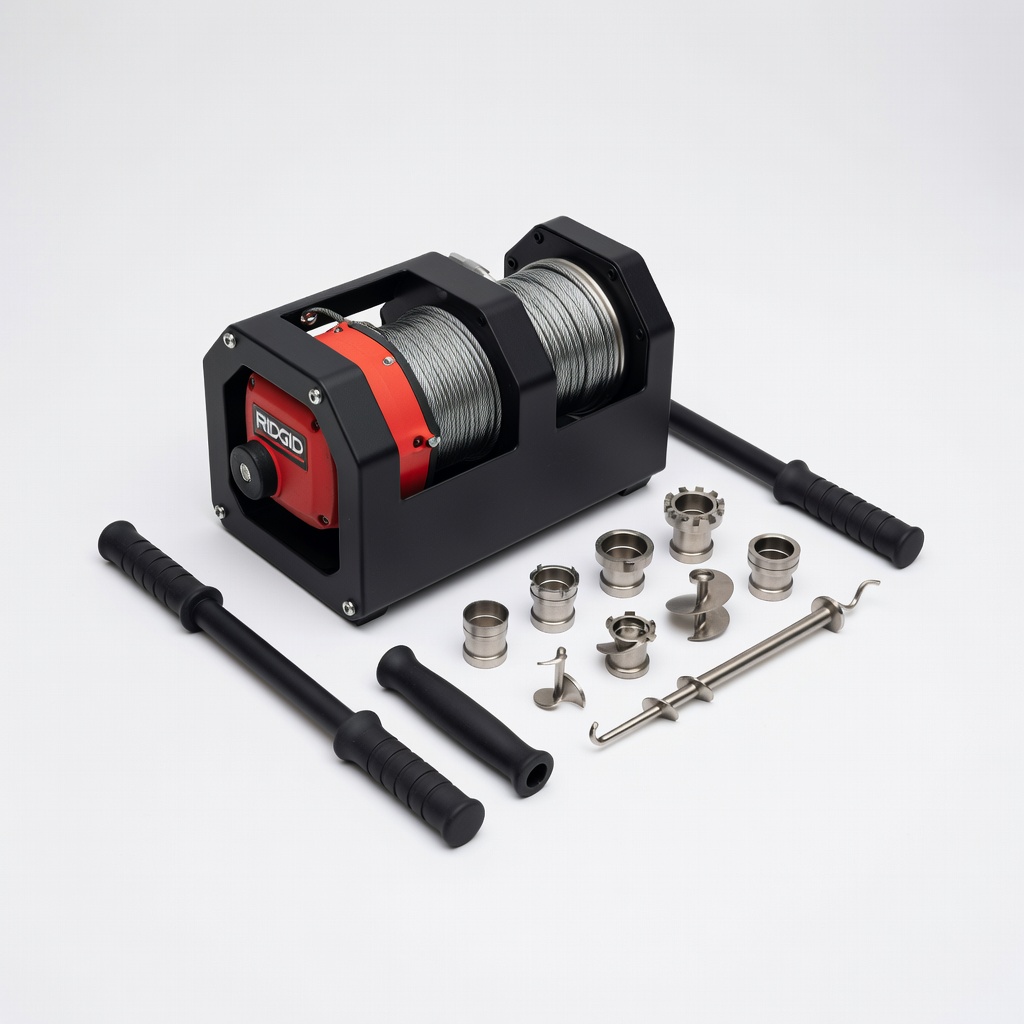
RIDGID Drain Cleaning Kit
Includes auger and tools for clearing home drain lines connected to the washer.
Best for: Use for stubborn external clogs that affect machine drainage.
Price Range: $20-30