Kitchen clutter can sneak up on you, especially with seasonal appliances like the Thanksgiving turkey fryer or summer ice cream maker gathering dust in cabinets or on counters. If you've ever struggled to find room for these bulky items during off-seasons, proper storage is the solution to reclaim your space and prevent damage from moisture, pests, or accidental bumps. Without it, appliances can rust, warp, or become breeding grounds for bacteria, leading to costly replacements.
In this guide, you'll learn a straightforward process to clean, protect, and store your seasonal kitchen appliances effectively. We'll cover everything from disassembly to labeling, ensuring they're ready for easy retrieval next year. As a beginner-friendly tutorial, expect clear instructions that take about 30-60 minutes per appliance—no advanced skills required, just basic household items and a bit of organization.
By the end, your kitchen will feel more spacious, and your appliances will last longer, saving you time and money on maintenance or new purchases.
▸What You'll Need
- •Cleaning supplies: Mild dish soap, soft cloths, and a soft brush (required for initial cleaning)
- •Protective materials: Bubble wrap, foam padding, or old towels (required to prevent scratches)
- •Storage containers: Sturdy plastic bins or original boxes with lids (required; optional vacuum-seal bags for smaller parts)
- •Labels and markers: Adhesive labels or masking tape (required for organization)
- •Optional: Silica gel packets or desiccant packs to absorb moisture
- •Optional: Appliance dolly or helper for heavy items like deep fryers
Estimated Time: 30-60 minutes per appliance, depending on size and complexity
Difficulty: beginner
▸Step-by-Step Instructions
Step 1: Identify and Gather Your Appliances
Start by making a list of seasonal kitchen appliances that won't be used for months, such as a pressure cooker for holiday meals or a waffle maker for brunch season. Pull them out from their current spots in your kitchen or garage to assess their condition. This step helps you prioritize and ensures nothing gets forgotten in a corner.
Why it matters: Seasonal items often get overlooked, leading to accidental damage or forgotten maintenance. Expect to spend 5-10 minutes surveying; you'll end up with a clear inventory, like 'turkey fryer, electric griddle, and popsicle maker,' ready for the next steps.
Tip: Take photos of each appliance in its assembled state for reference when unpacking next season.
💡 Tips:
- •Sort appliances by size—heavy ones first to avoid straining yourself later.
⚠️ Warnings:
- •Don't store anything that's still dirty or damaged; address issues now to prevent worsening.
Step 2: Clean Thoroughly
Unplug the appliance and wipe down all surfaces with a mild soap solution using a soft cloth or sponge. For removable parts like blades or baskets, wash them in warm soapy water, rinse well, and dry completely with a towel. Pay special attention to crevices where food residue hides, using a soft brush if needed.
This step is crucial because leftover grease or crumbs can attract pests or cause corrosion during storage. You'll know it's done when everything is spotless and fully dry—no moisture means no mold. Allow 10-15 minutes for air drying if necessary.
Pro Insight: For electrical components, avoid submerging in water; just wipe gently to protect wiring.
💡 Tips:
- •Use a vinegar-water mix for stubborn stains—it's natural and effective on stainless steel parts.
⚠️ Warnings:
- •Never use abrasive cleaners like steel wool, as they can scratch surfaces and void warranties.
Step 3: Disassemble the Appliance
Refer to the user manual or your earlier photos to take apart non-permanent components, such as detaching the lid from a slow cooker or removing attachments from a stand mixer. Place small parts like cords or accessories in a separate, labeled bag.
Disassembly saves space and makes cleaning easier, reducing the risk of parts getting lost or damaged. Expect a compact pile of pieces; if it's a simple appliance, this might take just 5 minutes. For complex ones, double-check the manual to avoid forcing parts.
Why it matters: Packed tightly, reassembled items can shift and break delicate mechanisms over time.
💡 Tips:
- •Wrap cords loosely around the base with twist ties to prevent tangles.
⚠️ Warnings:
- •If unsure about disassembly, skip it—better safe than risking damage to motors or seals.
Step 4: Protect Fragile Parts
Wrap individual components in bubble wrap, foam, or soft cloths to cushion against impacts. For sharp edges like blender blades, use original sheaths or extra padding. Insert silica packets inside hollow areas to combat humidity.
Protection prevents dents, chips, or rust, especially in varying storage conditions. You'll see each part snugly wrapped, ready for packing— this step ensures longevity, potentially adding years to your appliance's life.
Real-World Note: In humid climates, extra desiccants are a game-changer for electronics.
💡 Tips:
- •Reuse packaging from new purchases, like foam inserts, for a zero-cost option.
⚠️ Warnings:
- •Avoid over-tight wrapping, which can cause pressure damage; leave some give.
Step 5: Choose and Prepare Storage Containers
Select airtight plastic bins or the original boxes that fit your disassembled items snugly—stackable ones are ideal for garage shelves. Line the bottom with a soft layer like foam or towels for extra shock absorption.
The right container keeps out dust, pests, and moisture, maintaining your appliance's condition. Success looks like items fitting without excess space that could allow shifting. Measure your space first to avoid oversized bins cluttering your storage area.
Why it matters: Poor containers lead to crushed parts or infestation; proper ones make retrieval effortless.
💡 Tips:
- •Opt for clear bins so you can see contents without opening.
⚠️ Warnings:
- •Steer clear of cardboard boxes in damp areas—they absorb moisture and weaken quickly.
Step 6: Pack and Seal
Place the protected appliance parts into the container, filling any gaps with soft fillers like packing paper to prevent movement. Close the lid securely and seal with tape if needed for long-term storage.
Secure packing ensures nothing rattles during seasonal shifts or moves. You'll feel the container's stability when shaken gently—no noise means success. This step ties everything together for worry-free storage.
Insight: For vertical storage, position heavier bases at the bottom to maintain balance.
💡 Tips:
- •Group related small parts in zip-top bags inside the main container for quick access.
⚠️ Warnings:
- •Don't overload bins; distribute weight evenly to avoid toppling stacks.
Step 7: Label and Store
Affix clear labels to the outside with contents, storage date, and reassembly notes (e.g., 'Summer Blender - Store in Cool, Dry Place - Unpack May 2025'). Place in a cool, dry, accessible spot like a pantry shelf or climate-controlled garage.
Labeling saves time next season and tracks usage. Expect organized storage that looks tidy and professional. Ideal spots avoid extreme temperatures (below 80°F) to prevent plastic warping or lubricant drying out.
Final Why: This makes your system sustainable, turning storage into a seasonal ritual.
💡 Tips:
- •Use a permanent marker for labels that won't smudge over time.
⚠️ Warnings:
- •Avoid attics or basements prone to temperature swings or flooding.
▸Pro Tips
- •Store appliances upright when possible to mimic their natural position and reduce stress on components.
- •Inventory your storage annually to rotate out unused items—donate what you haven't used in two seasons.
- •For corded appliances, use Velcro straps instead of knots for easy uncoiling next year.
- •In small kitchens, consider under-sink or wall-mounted racks for lighter seasonal tools.
- •Add a scent absorber like baking soda packets to prevent musty odors in long-term storage.
- •Test appliances briefly after unpacking to catch any storage-related issues early.
- •Batch-process multiple appliances in one session to make it less overwhelming.
▸Common Mistakes to Avoid
- •Storing wet or unclean appliances, which leads to mold and rust—always dry thoroughly first.
- •Using inadequate padding, causing scratches during transport—wrap each part individually.
- •Forgetting labels, resulting in confusion when unpacking—include dates and contents every time.
- •Storing in hot or humid spots, degrading plastics and electronics—choose climate-controlled areas.
- •Overpacking containers, leading to crushed items—leave room for secure fitting without force.
▸Troubleshooting
Problem: Appliance smells musty when unpacked
Solution: Air it out in a well-ventilated area for 24 hours and wipe with a vinegar solution; add more desiccants next time.
Problem: Parts are damaged from shifting
Solution: Use additional fillers like crumpled paper; check and repack if needed, ensuring no loose space.
Problem: Pests have gotten inside
Solution: Inspect and clean the storage area; use pest-proof bins with tight seals and consider natural repellents like cedar blocks.
Problem: Hard to find stored items
Solution: Create a digital inventory list or app note with photos and locations; relabel for clarity.
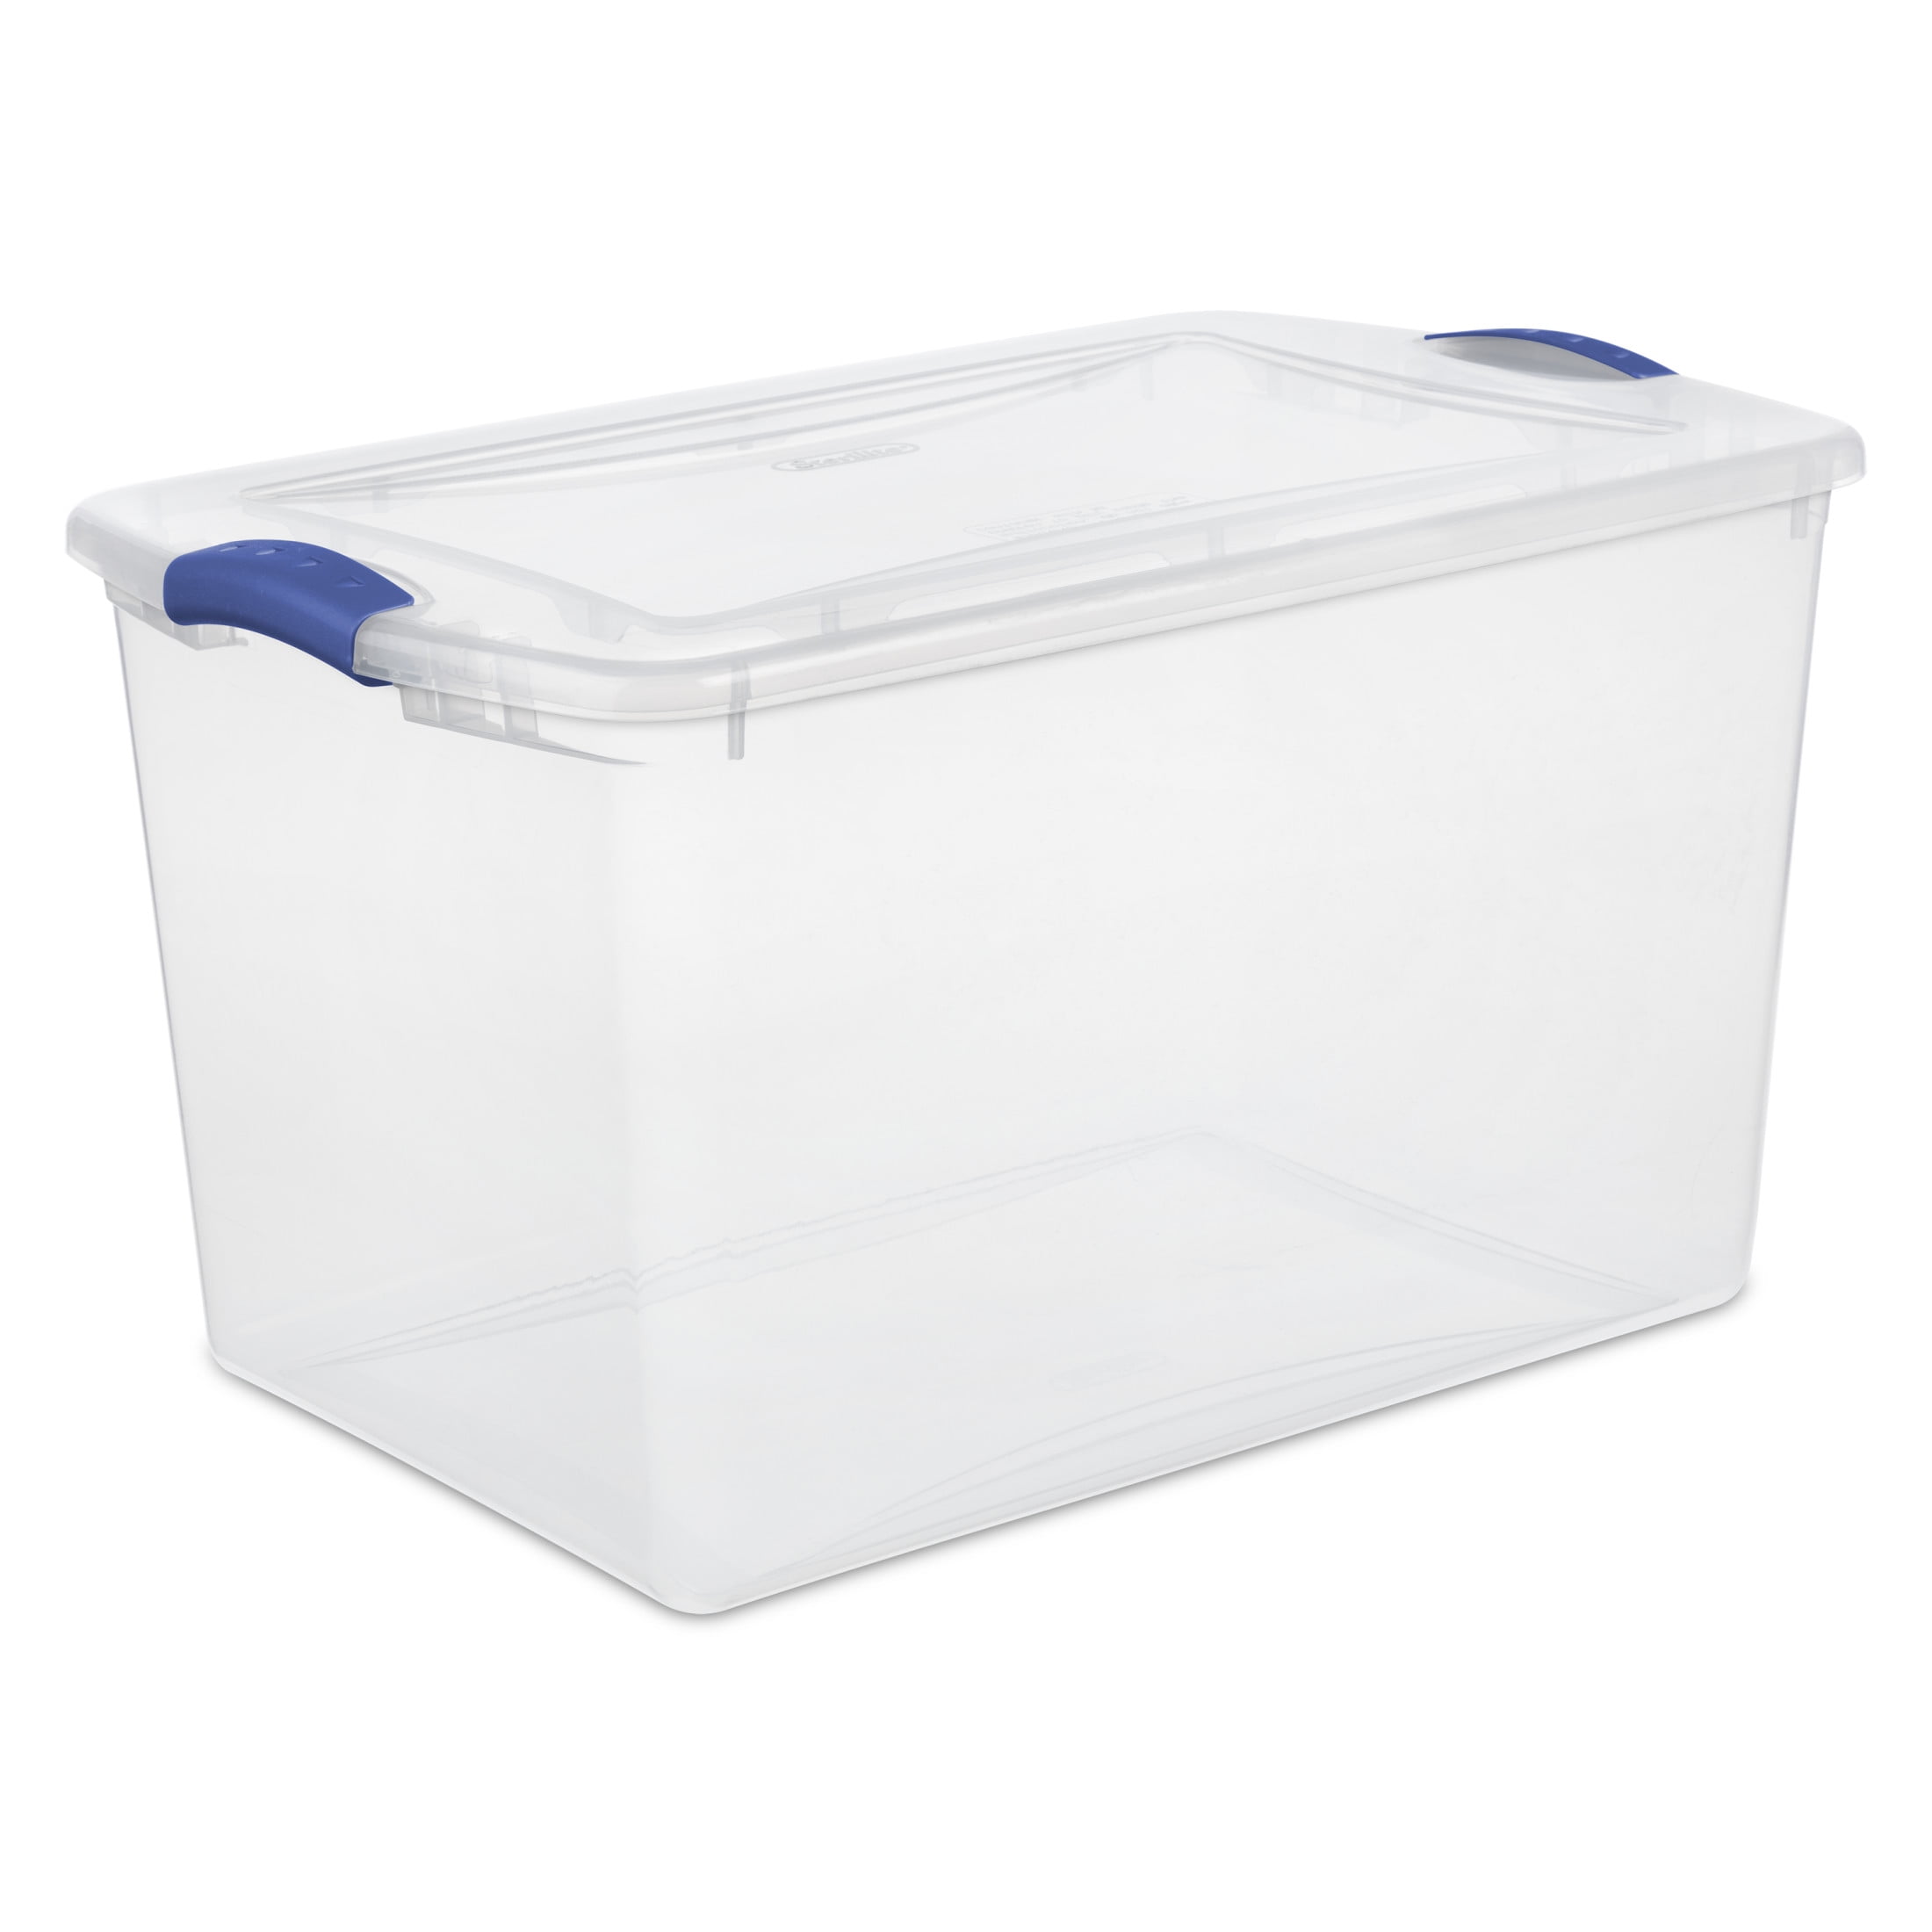
Sterilite 66-Quart ClearView Latch Box
Durable, stackable design with secure latches keeps dust and pests out while allowing visibility of contents.
Best for: Ideal for medium-sized appliances like blenders or griddles; great for garage or closet storage.
Price Range: $15-20
Amazon Basics Vacuum Compression Storage Bags
Compresses bulky items like cords and attachments to save up to 80% space without damaging materials.
Best for: Perfect for small parts or seasonal accessories when space is tight in apartments.
Price Range: $10-15 for a 5-pack
undefined
Effectively pulls moisture from enclosed spaces, preventing rust on metal parts during humid seasons.
Best for: Tuck into bins for fryers or mixers stored in basements or garages.
Price Range: $5-10
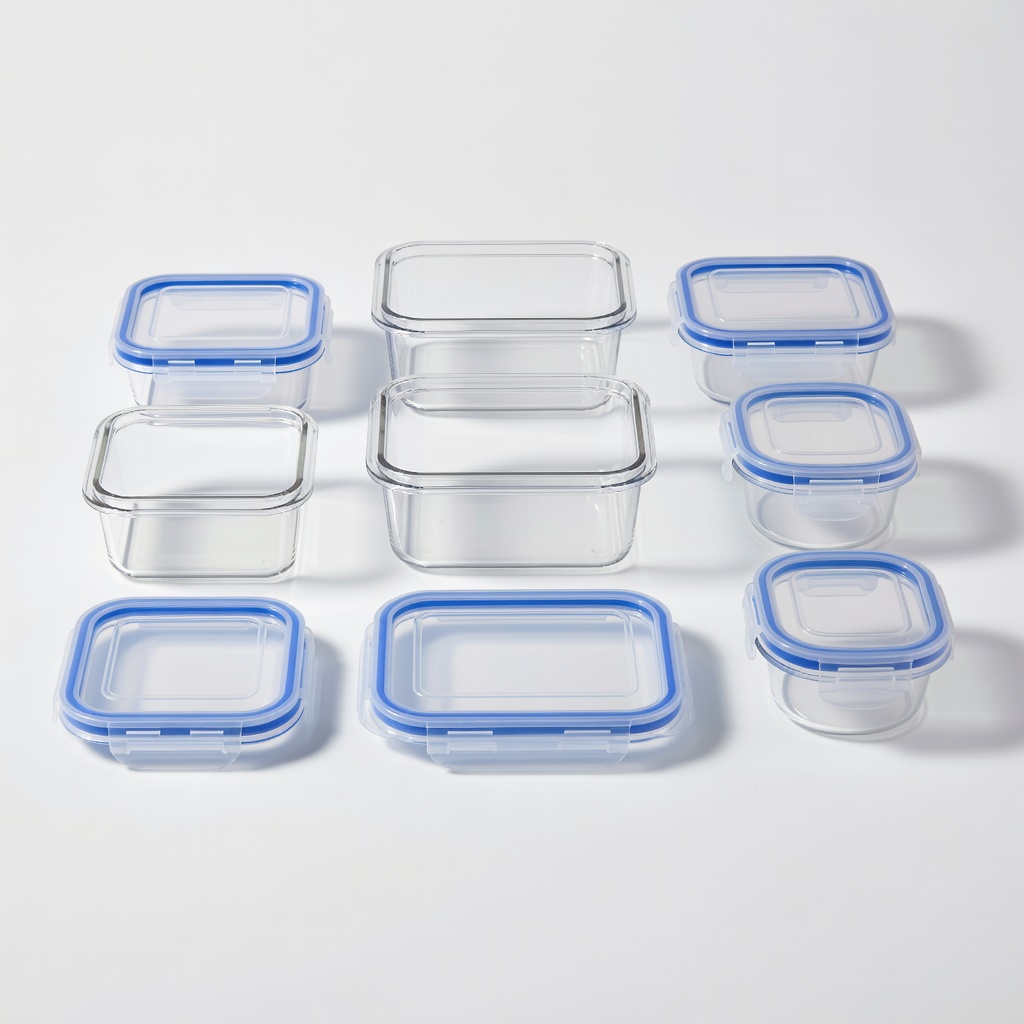
Rubbermaid Brilliance Food Storage Containers (for parts)
Airtight, BPA-free containers organize small accessories without taking extra space.
Best for: Store blades, lids, or cords separately inside the main appliance bin.
Price Range: $12-18 for a set
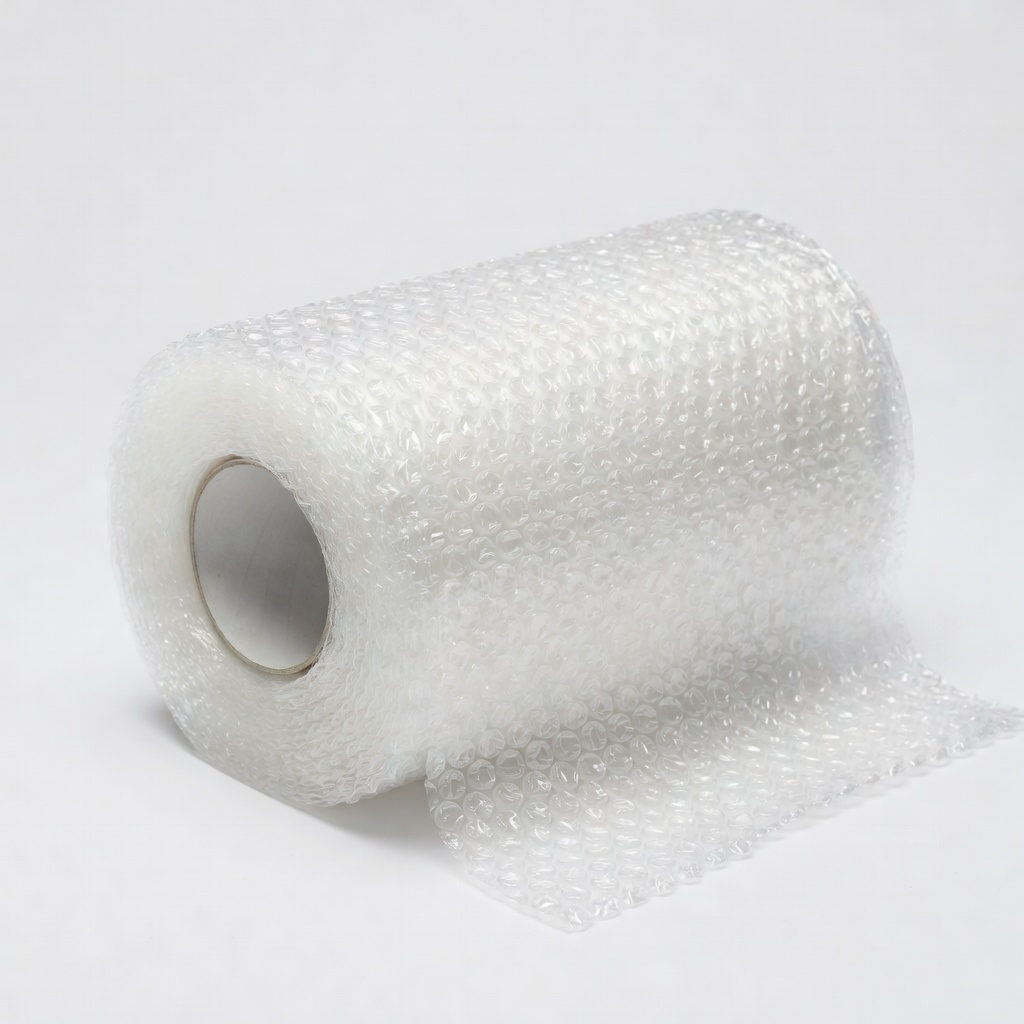
Uline Bubble Cushioning Wrap
Provides superior shock absorption for fragile components, better than household alternatives.
Best for: Wrap high-value items like glass pitchers or electronic bases before binning.
Price Range: $20-30 per roll