Dull tools make every cut frustrating, waste time, and ruin your projects—whether you're a woodworker, mechanic, or DIYer. Sharp edges slice cleanly, improve safety, and extend tool life. This guide teaches you how to sharpen hand tools like chisels, plane blades, and gouges using abrasive finishing products, from coarse grinding to mirror-polish honing.
You'll learn freehand techniques suitable for intermediate users, progressing through grit levels for a professional burr-free edge. No fancy machines needed—just abrasives, patience, and practice. Expect 30-60 minutes per tool, depending on dullness.
By the end, your tools will shave paper effortlessly, and you'll know how to maintain them for years of peak performance.
▸What You'll Need
- •Safety gear: gloves, eye protection, dust mask
- •Dull tool to sharpen (e.g., chisel, plane iron, or knife blade)
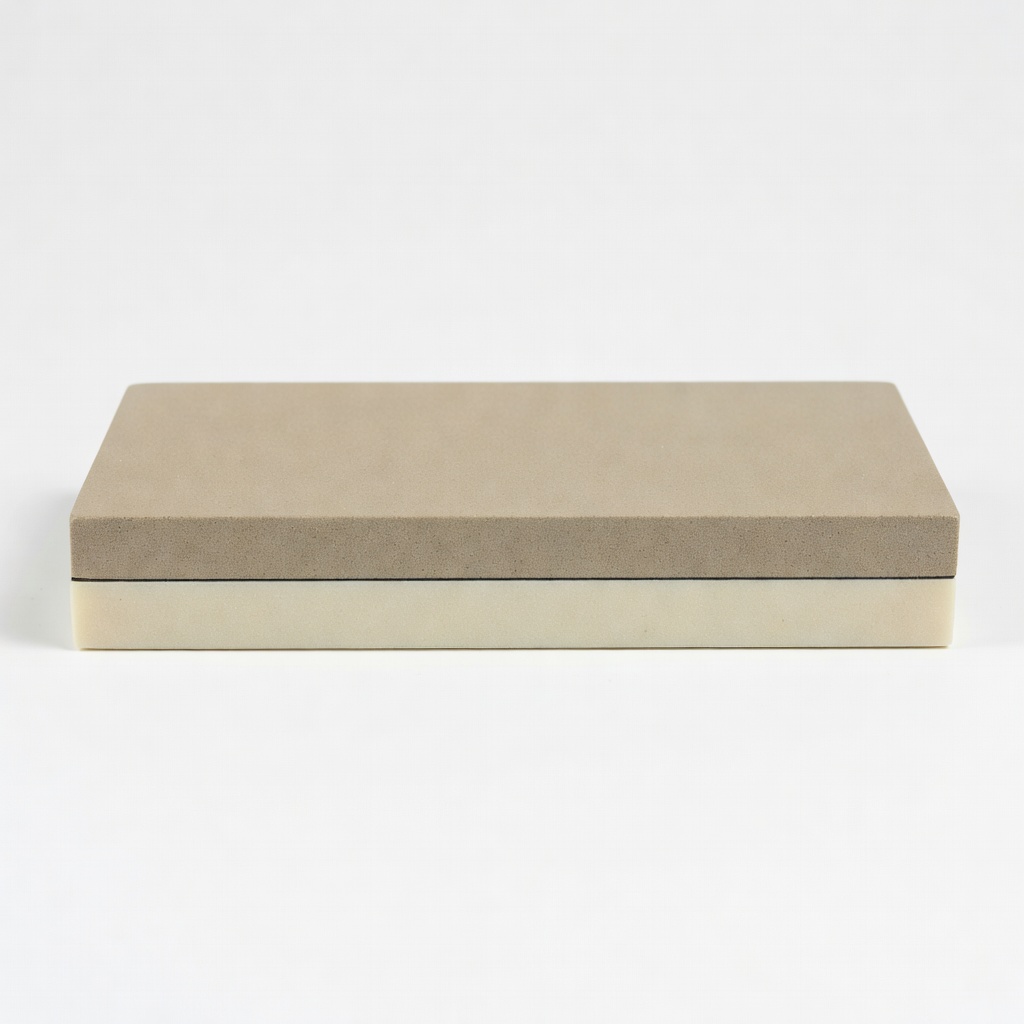
- •Abrasive stones or plates: coarse (200-400 grit), medium (800-1200 grit), fine (3000+ grit)
- •Lubricant: honing oil, water (for waterstones), or WD-40
- •Leather strop and polishing compound (optional but recommended)
- •Flattening stone or sandpaper for truing stones (if using stones)
- •Stable workbench or vise to secure tool/stone
- •Angle guide or marker for consistent bevel (optional)
Estimated Time: 30-60 minutes per tool
Difficulty: intermediate
▸Step-by-Step Instructions
Step 1: Prepare Your Workspace and Safety Gear
Set up a clean, stable workbench with good lighting. Clamp your sharpening stone or plate securely to prevent slipping—use a vise or non-slip mat. Wear safety glasses, gloves, and a dust mask to protect against metal particles and dust.
Why it matters: A safe, organized space prevents accidents and ensures consistent pressure. Expect a dust-free area ready for focused work.
Lay out all abrasives in grit order (coarse to fine) for smooth progression.
💡 Tips:
- •Work in a well-ventilated area to avoid inhaling fine particles.
- •Keep a damp rag nearby for quick cleanups.
⚠️ Warnings:
- •Never sharpen without eye protection—flying chips can cause injury.
Step 2: Inspect and Clean the Tool
Examine the edge for chips, nicks, or uneven bevels. Clean the blade with soap and water or alcohol to remove rust, pitch, or debris. Dry thoroughly.
Mark the bevel with a sharpie to visualize contact during sharpening. Success looks like: A clean, dry blade with visible bevel outline, no contaminants.
This step reveals damage needing repair and ensures abrasives work efficiently.
💡 Tips:
- •Use a magnifying glass for micro-chips on fine tools.
⚠️ Warnings:
- •Avoid soaking carbon steel tools to prevent rust.
Step 3: Secure Tool and Set Bevel Angle
Clamp the tool if using a belt sander for initial grinding, or hold freehand. Typical angles: 25° for chisels/planes, 20° for knives. Use an angle guide or protractor to match existing bevel.
Why: Consistent angle creates a strong, sharp edge. Practice on scrap wood to feel the angle.
Expect the Sharpie mark to guide even abrasion.
💡 Tips:
- •For freehand, rest your wrist on the bench for stability.
⚠️ Warnings:
- •Overheating metal (bluish tint) softens steel—cool frequently in water.
Step 4: Coarse Sharpening (Remove Metal)
Apply lubricant to stone. Using 200-400 grit abrasive, push the bevel flat on the stone (10-15 strokes per side). Use circular or figure-8 motions to avoid grooves.
Feel for a slight burr (wire edge) along the apex—lift and feel with fingernail. Success: Sharpie gone, uniform bevel, small burr forming.
Alternate sides evenly to prevent twisting.
💡 Tips:
- •Light pressure—let abrasive do the work.
- •Count strokes to maintain symmetry.
⚠️ Warnings:
- •Don't dig in; uneven pressure creates waves.
Step 5: Medium Honing (Refine Edge)
Switch to 800-1200 grit. Repeat process with lighter pressure (5-10 strokes/side). Remove coarse scratches and enlarge burr.
Progress check: Edge smoother, burr more pronounced and consistent.
This transitions from grinding to honing, balancing durability and sharpness.
💡 Tips:
- •Flatten stone periodically with 220-grit sandpaper on glass.
Step 6: Fine Polishing (Mirror Edge)
Use 3000+ grit or finest abrasive. 5 strokes/side max. Burr should be thin and even.
Polish until scratches vanish, revealing shiny bevel. Success: Mirror-like surface, edge shaves arm hair cleanly.
Wipe clean between grits.
💡 Tips:
- •Waterstones excel here—keep surface wet.
⚠️ Warnings:
- •Over-polishing weakens edge; stop at hair-shaving sharp.
Step 7: Strop to Remove Burr
Apply compound to leather strop. Pull tool backward (edge trailing) 10-20 times per side at same angle.
Final check: Burr gone, edge pops thumb pad or slices paper effortlessly.
Stropping aligns micro-teeth for ultimate keenness.
💡 Tips:
- •Tension strop taut like a drum.
Step 8: Test and Maintain
Test on paper, wood endgrain, or thumbnail. Hone lightly every use; full sharpen monthly.
Clean tools, store dry. Done right: Effortless cuts, no dragging.
💡 Tips:
- •Daily strop prevents full sharpening.
▸Pro Tips
- •Always progress coarse-to-fine; skipping grits leaves scratches.
- •Use consistent light pressure—10 oz feels right.
- •Finger-test burr every few strokes for feedback.
- •Diamond plates stay flat longer than stones.
- •Practice on cheap knives first to build muscle memory.
- •Cool blades in water between passes on dry abrasives.
- •Mark bevel each session for perfect angle matching.
▸Common Mistakes to Avoid
- •Inconsistent angle: Causes rounded or weak edges—use guide initially.
- •Too much pressure: Digs grooves or heats steel—go lighter.
- •Ignoring burr: Leaves dull hook—always strop it off.
- •Not flattening stone: Creates wavy edges—check regularly.
- •Skipping cleaning: Contaminants embed in abrasives, ruining them.
▸Troubleshooting
Problem: No burr forming
Solution: Increase pressure or strokes on coarser grit; ensure flat contact.
Problem: Edge chipping
Solution: Repair nick first with even coarser grit; reduce angle slightly.
Problem: Stone glazing (shiny, no cut)
Solution: Flatten stone or switch lubricant; use figure-8 motion.
Problem: Edge not holding keenness
Solution: Check steel quality or over-sharpened micro-bevel; strop more.
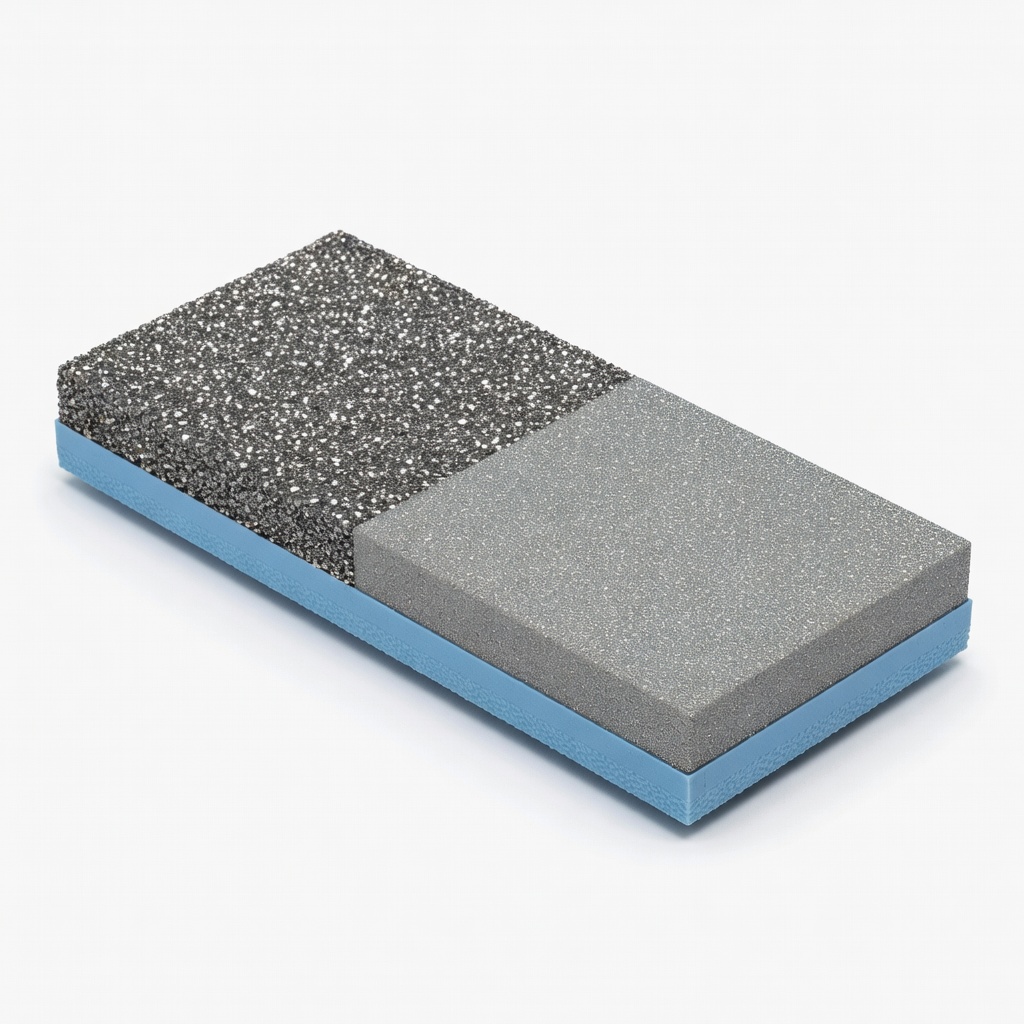
DMT W8CXNB 8-Inch DuoSharp Bench Stone (Coarse/X-Coarse & Fine/X-Fine)
Diamond abrasives cut fast, stay flat, and handle any steel without dish-out.
Best for: All-around for coarse to fine sharpening; ideal for intermediate freehand users.
Price Range: $65-$75
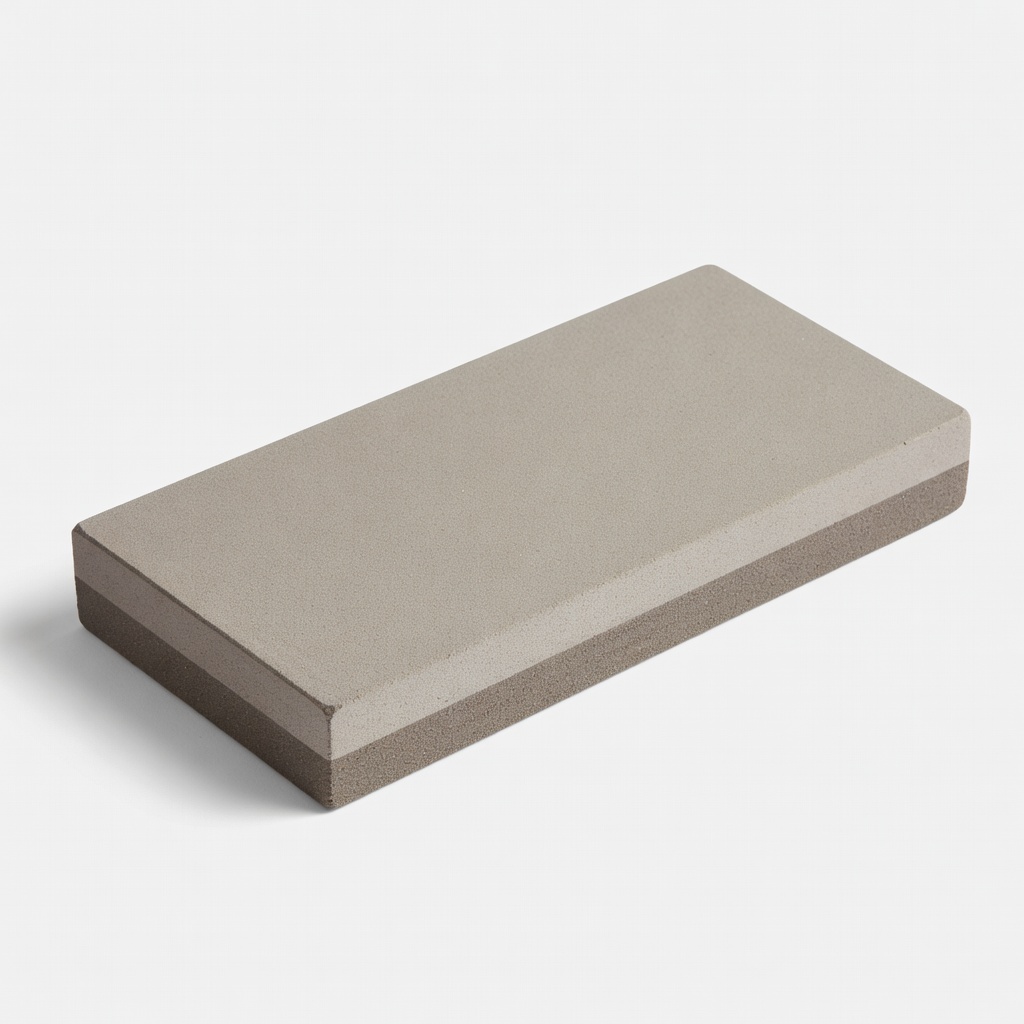
Norton India Oilstone 6 x 2-Inch (Fine/Coarse)
Affordable, time-tested for smooth honing; oil keeps it clean.
Best for: Medium to fine stages on carbon tools; budget-friendly starter.
Price Range: $15-$25
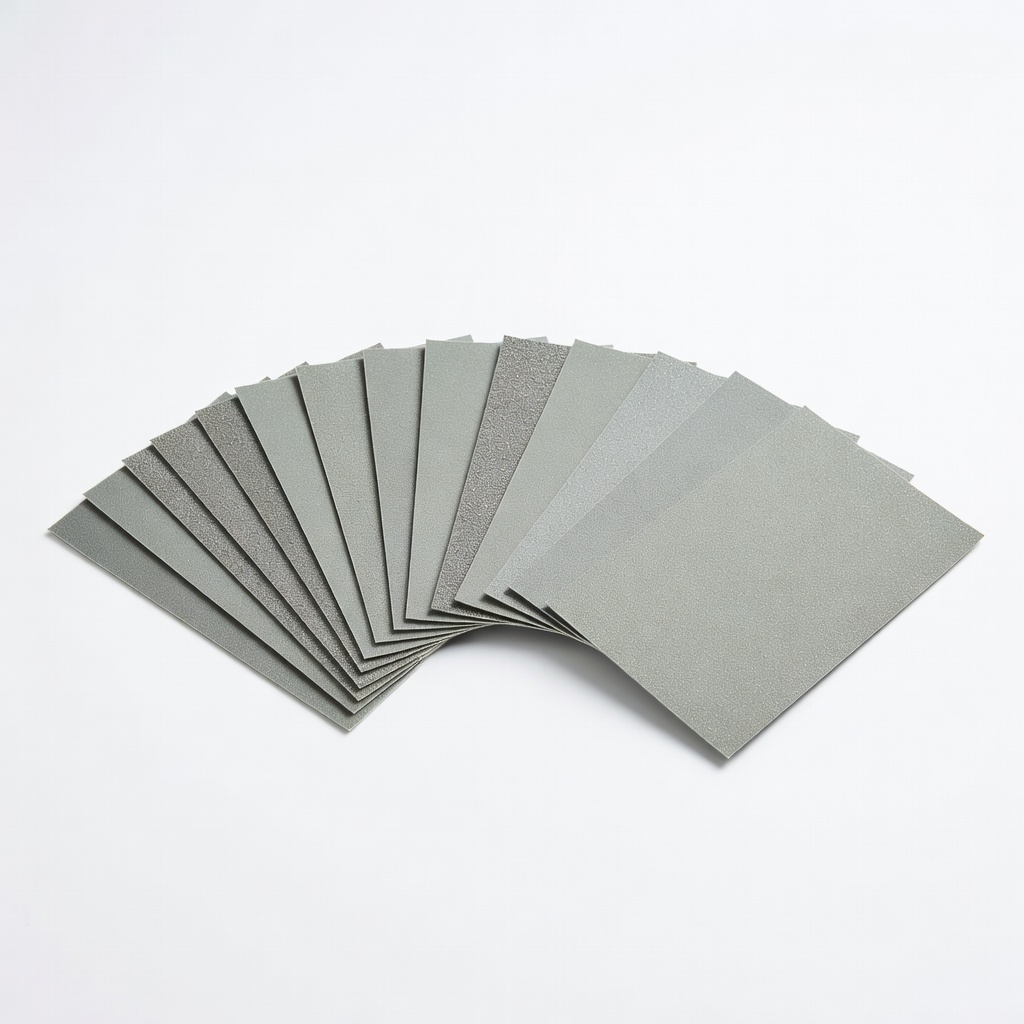
3M Wetordry Sandpaper Assortment (400-2000 grit)
Versatile, cheap sheets for glass/flat lapping or quick touch-ups.
Best for: Flattening stones or sandpaper boards for precise control.
Price Range: $10-$15
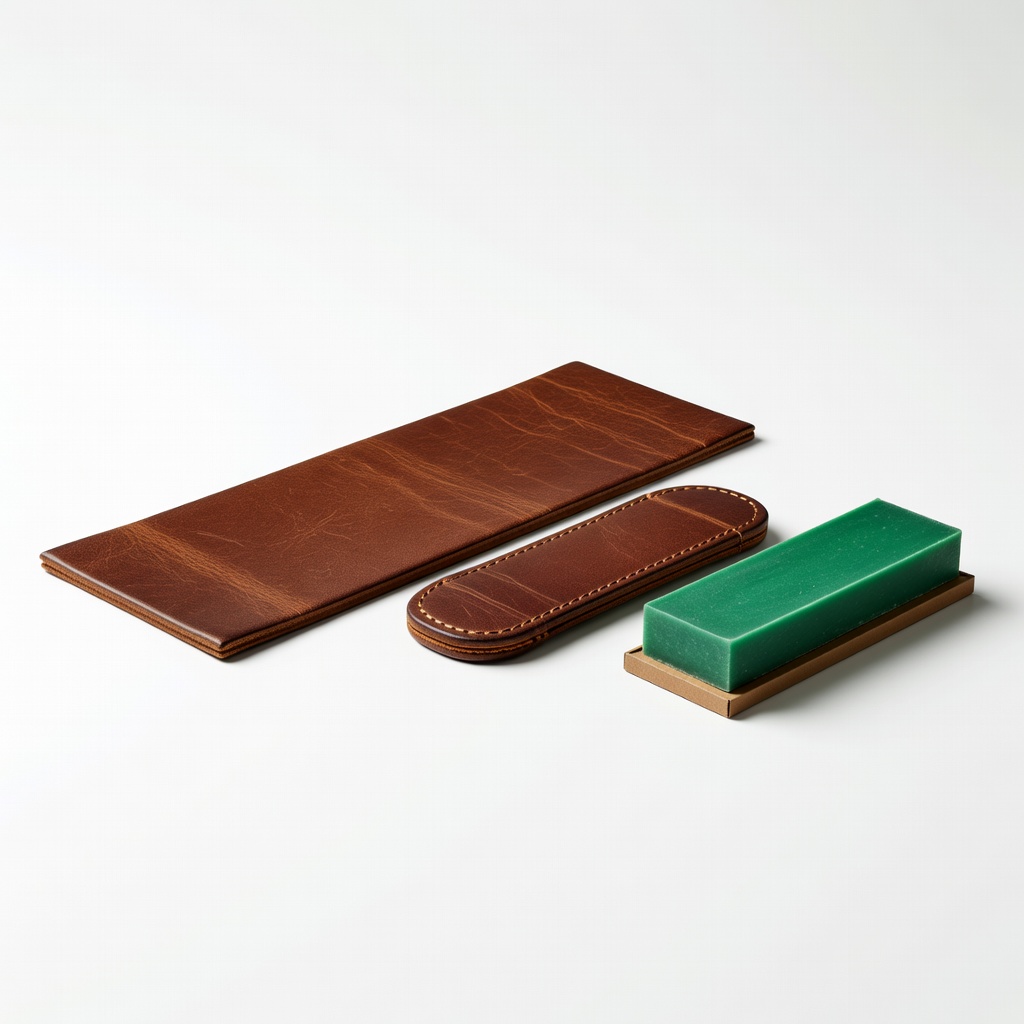
Poly-Tool Premium Leather Strop Kit with Green Compound
Double-sided leather with pre-loaded compound for perfect final polish.
Best for: Burr removal and maintenance after every session.
Price Range: $20-$30
King KW65 1000/6000 Grit Combination Waterstone
Fast-cutting Japanese stone for mirror finishes; self-flattens somewhat.
Best for: Fine polishing on water-lubricated setups for woodworking tools.
Price Range: $40-$50