The 3DO Interactive Multiplayer was a powerhouse 32-bit console from 1993, boasting FMV-heavy games and innovative controllers, but original hardware is rare and expensive today. Emulation revives these gems on modern PCs, but setup requires BIOS files, precise configurations, and tweaks for optimal performance—challenges that trip up even experienced retro gamers.
In this advanced guide, you'll learn to install, configure, and optimize top 3DO emulators like 4DO and RetroArch, from BIOS dumping to controller mapping. Expect flawless gameplay with enhancements like shaders and save states.
The process takes 45-60 minutes for first-timers, assuming you have ROMs and BIOS ready. Difficulty is advanced due to file management and platform-specific tweaks.
▸What You'll Need
- •Modern PC (Windows 10+, Linux, or macOS; 4GB RAM minimum, Intel i5 or equivalent)
- •3DO BIOS files (dumped from your own FZ-1/FZ-10 console: fzrom.bin, fzrom10.bin, etc.—required)
- •3DO game ROMs (.iso, .bin/.cue, or .chd format; legally dumped from your discs)
- •Emulator software: 4DO (Windows primary) or RetroArch (multiplatform)
- •USB gamepad/controller (recommended for authentic feel)
- •Optional: CHDMan tool for compressing ROMs
Estimated Time: 45-60 minutes
Difficulty: advanced
▸Step-by-Step Instructions
Step 1: Choose Your Emulator
Select between 4DO (fastest, Windows-focused, great for pure 3DO) or RetroArch (multiplatform, shader support, playlist integration). 4DO excels in speed and accuracy for advanced users; RetroArch offers playlists and netplay.
Download 4DO from 4do.net (latest v1.4.5) or RetroArch from retroarch.com. Verify SHA-256 hashes for security.
Success: Emulator ZIP/exe ready in Downloads.
💡 Tips:
- •RetroArch if you emulate multiple systems; 4DO for simplicity.
Step 2: Install the Emulator
For 4DO: Extract ZIP to a folder like C:\Emulators\4DO. Run 4DO.exe—no install needed.
For RetroArch: Run installer, choose core download directory. Launch, go Online Updater > Core Downloader > search '4DO' core (or Mednafen for Linux).
Create a dedicated 3DO folder structure: EmuFolder/BIOS, EmuFolder/ROMs/3DO.
Success: Emulator launches to main menu without crashes.
⚠️ Warnings:
- •Avoid antivirus false positives—add exceptions.
Step 3: Prepare 3DO BIOS Files
3DO emulation requires BIOS (region-specific: US-J 1.00-1.05). Use your own FZ-1 console with a modchip/dumper or legal sources.
Place files (fzrom.bin ~512KB, fzrom10.bin, panafz10.bin) in emulator's BIOS folder. For RetroArch: System/3do.
Verify with HLE checkers or emulator scan.
Success: Emulator detects BIOS (check Settings > BIOS menu).
💡 Tips:
- •Use MAME's 3DO set for verification hashes.
⚠️ Warnings:
- •Never download BIOS—illegal; dump your own.
Step 4: Acquire and Prepare ROMs
Dump your 3DO CDs to .ISO/.BIN+CUE using ImgBurn (Windows) or cdrdao (Linux). Convert large ISOs to CHD for space savings: chdman createcd -i game.iso -o game.chd.
Place in ROMs/3DO folder. Supported: .iso, .cue+bin, .chd.
Success: ROM files organized, CHD compression halves size (e.g., 700MB ISO to 400MB CHD).
Step 5: Configure BIOS and Paths
4DO: Options > BIOS Files > browse to fzrom.bin (select matching region). Scan ROMs via File > Scan.
RetroArch: Settings > Directory > set System/BIOS to your folder. Load Core > 4DO > Load Content.
Why: Mismatched BIOS causes black screens.
Success: BIOS list populates; ROM scan shows games.
Step 6: Map Controls and Input
3DO used digital pads/lightguns. 4DO: Input > Map keyboard/gamepad (A=B, C=X, etc.). Enable analog if supported.
RetroArch: Input > Port 1 Controls > bind buttons (match 3DO layout: Pad with 6 face buttons). Use XInput for Xbox pads.
Test in-game. Add lightgun support via mouse for games like Mad Dog McCree.
Success: Responsive controls, no input lag.
💡 Tips:
- •Save input preset for 3DO.
Step 7: Load and Test a Game
File > Open ROM > select game.chd/iso. Boot—expect FMV intro, full speed 60FPS.
Enable VSync, integer scaling for crisp pixels.
Success: Game runs smoothly, save states work (F5/F8).
Step 8: Optimize Video and Audio
4DO: Video > Renderer Direct3D11, filters bilinear. Audio > XA off if crackling.
RetroArch: Video > Shader > CRT shaders for retro look; Audio > 100% sync.
Advanced: Overclock CPU in core options for tough titles like Killing Time.
Success: No audio stutter, sharp visuals at 1080p+.
💡 Tips:
- •Use Vulkan driver on AMD GPUs.
▸Pro Tips
- •Compress ROMs to CHD—saves 40-60% space without quality loss.
- •Use RetroArch playlists for quick game access.
- •Enable frame skip for low-end PCs during FMV scenes.
- •Map 3DO's unique 'L' shoulder to mouse wheel for menus.
- •Backup emulator configs before tweaks.
- •Test ROM integrity with ClrMamePro.
- •Pair with bezel overlays in RetroArch for authentic cabinet look.
▸Common Mistakes to Avoid
- •Using wrong BIOS version—causes crashes; match console region.
- •Uncompressed ISOs overload storage; convert to CHD first.
- •Ignoring core updates—fixes game-specific bugs like Need for Speed audio.
- •Default controls mismatch 3DO layout, frustrating gameplay.
- •Running on weak hardware; minimum iGPU like Intel UHD 630 needed.
▸Troubleshooting
Problem: Black screen on boot
Solution: Verify BIOS path/files; redump if corrupted. Try different BIOS revisions.
Problem: No audio or crackling
Solution: Disable XA emulation; switch audio driver (WASAPI > DirectSound).
Problem: Slow performance/FMV stutter
Solution: Enable threaded rendering, frame skip; use Vulkan/D3D11.
Problem: Controller not detected
Solution: Use XInput wrappers like x360ce; restart emulator.
Problem: ROM not recognized
Solution: Convert to .chd or ensure .cue points to .bin correctly.
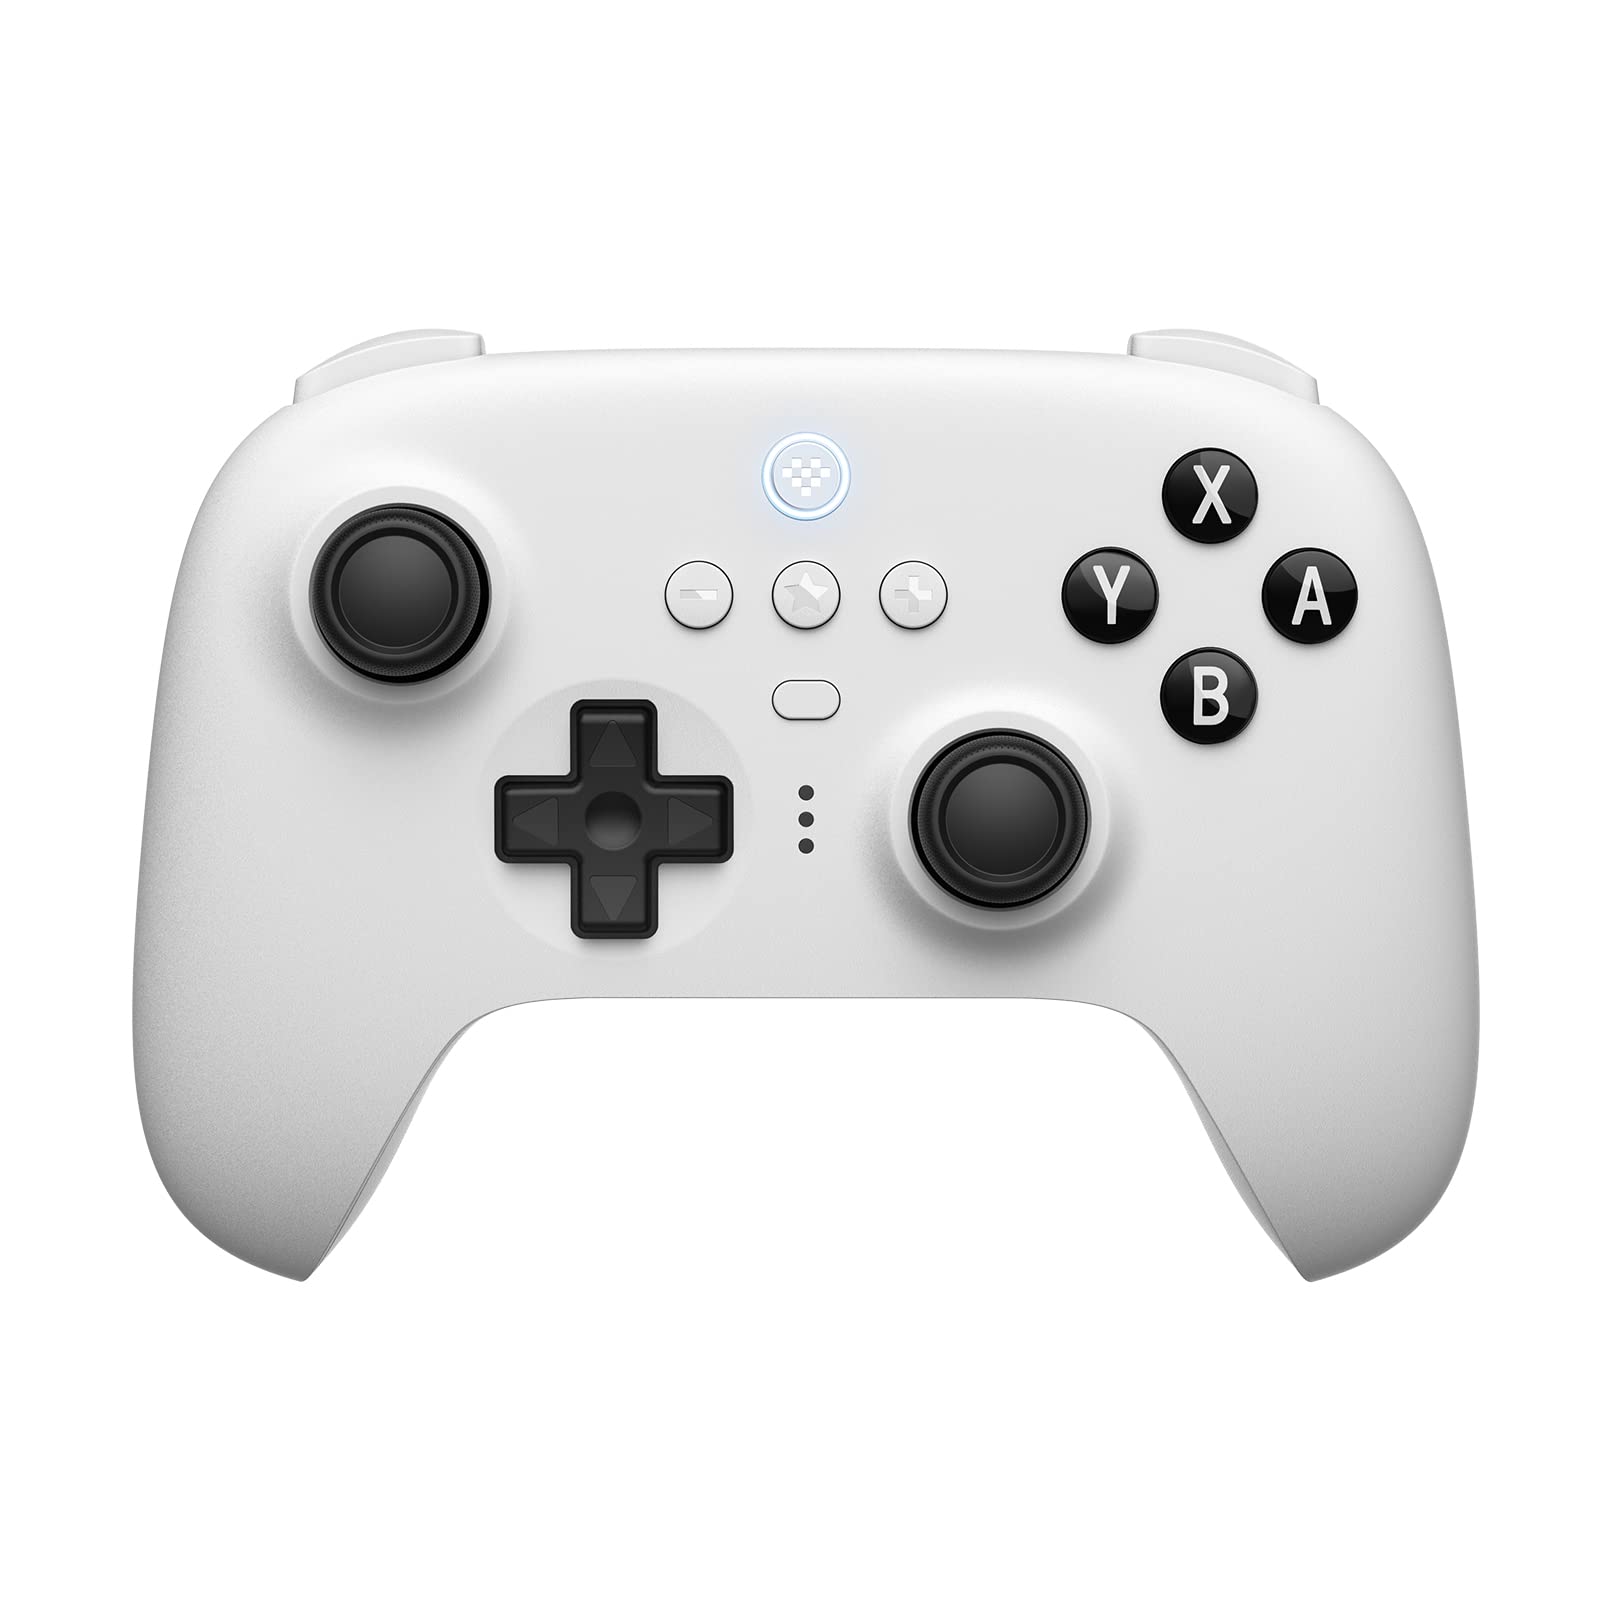
8BitDo Ultimate Bluetooth Controller
Excellent 3DO emulation compatibility with hall-effect sticks, low latency, and customizable buttons matching 3DO's 6-face layout.
Best for: Wireless pad for couch gaming during long sessions like Syndicate Wars.
Price Range: $50-$70
Sony DualSense Wireless Controller
Native XInput support in emulators, haptic feedback enhances FMV games; gyro for lightgun emulation.
Best for: Precision control for shooters like Corpse Killer.
Price Range: $60-$70
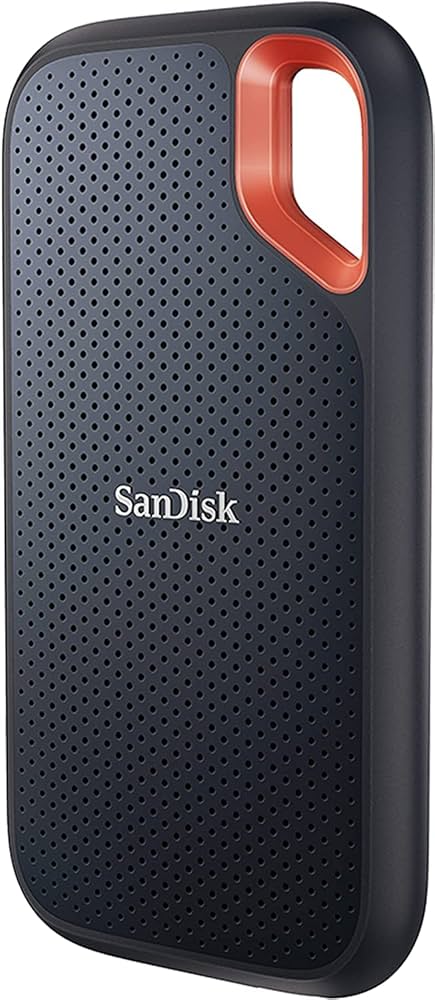
SanDisk 1TB Extreme Portable SSD
Lightning-fast reads for large CHD ROM libraries; rugged for portable emulation rigs.
Best for: Store 100+ 3DO games without slowdowns.
Price Range: $90-$110
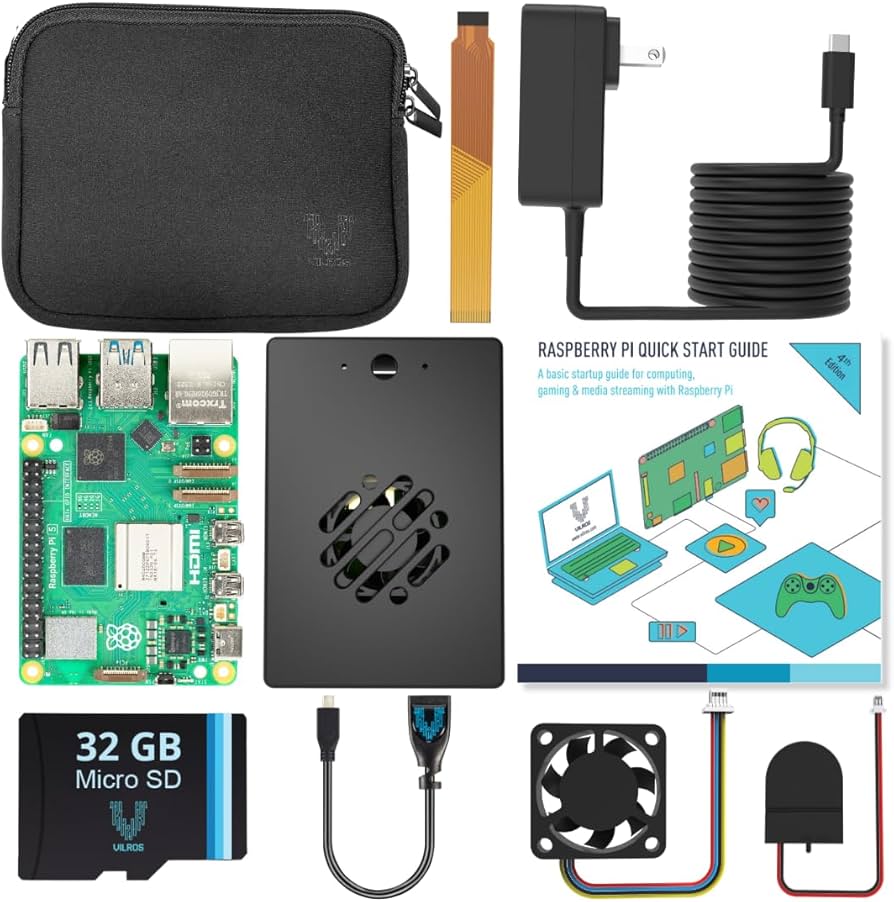
Raspberry Pi 5 8GB Starter Kit
Powerful for RetroArch 3DO emulation on low-power setup; HDMI for TV play.
Best for: Dedicated 3DO console alternative.
Price Range: $100-$150