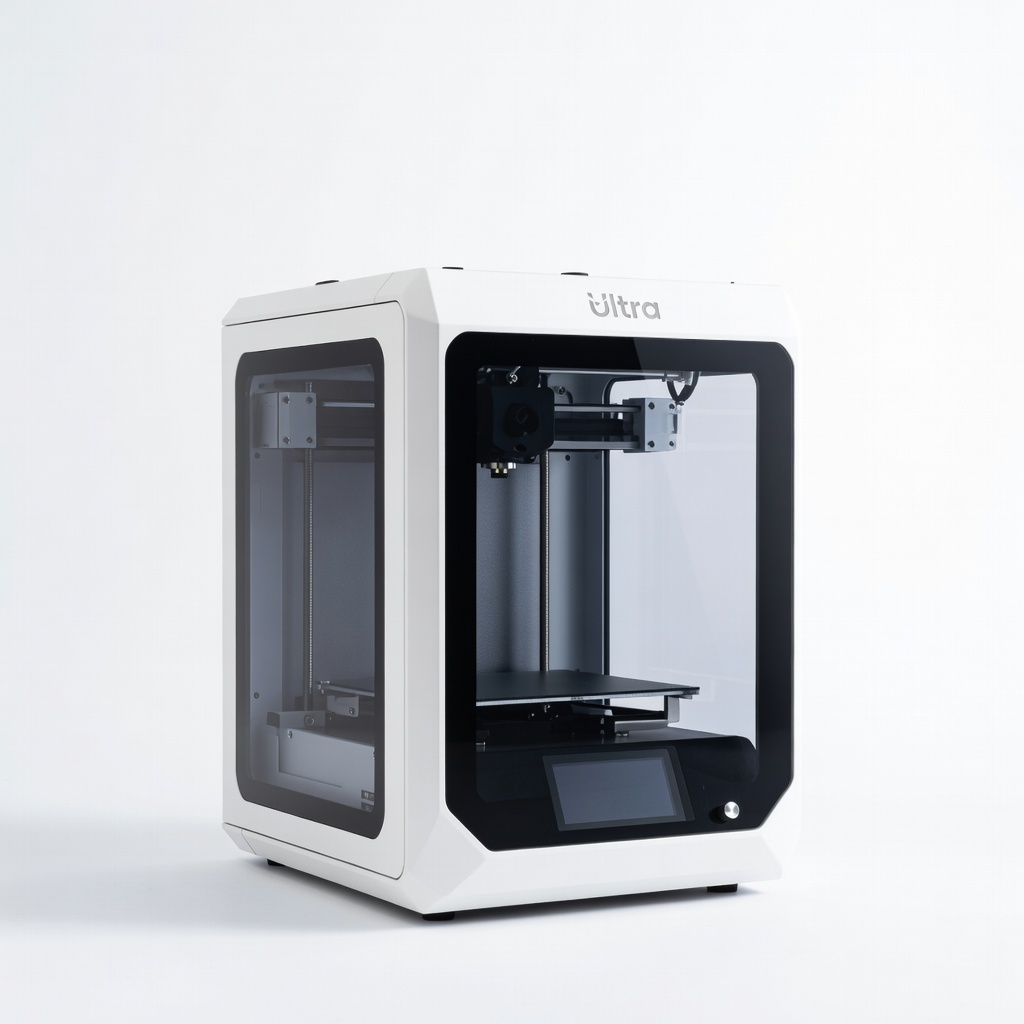
Creality Ender 3 V3 SE
Entry-professional structural prototypes under 200mm.
$200-$250
Creality Ender 3 V3 SE Affordable FDM with auto-leveling and Klipper for fast prototyping iterations.
Get the App
Better experience on mobile
Master configuring FDM, SLA, or SLS systems for rapid, high-fidelity prototypes in under 6 hours.
In product development, rapid prototyping is crucial, but many advanced engineers struggle with suboptimal AM setups leading to failed prints, material waste, and delays. Additive manufacturing (AM) enables iterative design testing at speed, but improper setup can cost weeks. This guide equips you with a professional workflow to launch your prototyping pipeline.
You'll learn to select the right AM technology, assemble and calibrate hardware, integrate software, and produce your first functional prototype. Expect a structured process covering FDM (most accessible), SLA (high detail), and SLS (functional parts), tailored for advanced users familiar with CAD.
Total setup takes 4-6 hours, depending on printer assembly. Difficulty is advanced, assuming CAD proficiency and basic electronics knowledge. By the end, you'll have a repeatable prototyping station yielding parts with <0.1mm tolerances.
Estimated Time: 4-6 hours Difficulty: advanced
Evaluate your prototype requirements: resolution, material properties, batch size, and budget. FDM suits structural parts (0.1-0.3mm layers), SLA for fine details (<0.05mm), SLS for durable nylon prototypes.
Create a decision matrix: e.g., FDM for cost-effective iterations, SLA for jewelry/medical. Research specs like build volume (200x200x200mm min) and throughput. Why? Mismatched tech causes redesigns.
Success: Documented choice with justifications.
💡 Tips:
⚠️ Warnings:
Purchase a reliable printer, filament/resin matched to application (e.g., PETG for toughness). Include peripherals like auto-leveling beds.
Unbox and inventory parts. Why? Quality hardware reduces calibration time by 50%.
Success: All components present, powered on without errors.
💡 Tips:
Dedicate a stable, level surface (vibration-free table). Install HEPA filtration for FDM fumes, UV enclosure for SLA. Ground power, add fire suppression.
Why? Safety prevents hazards; stability ensures layer adhesion.
Success: Workspace certified safe, ambient temp 20-25°C.
💡 Tips:
⚠️ Warnings:
Follow manufacturer manual for frame, rails, hotend assembly. Tighten belts to 110Hz tension. Connect to PC via USB/Ethernet.
Firmware flash if needed (e.g., Marlin/Klipper). Why? Precise assembly minimizes artifacts.
Success: Homing axes without crashes, LCD responsive.
💡 Tips:
Download Cura/PrusaSlicer, add printer profile. Calibrate extruder steps/mm via e-steps test.
Set defaults: 0.2mm layer height, 50mm/s speed, 210°C nozzle for PLA. Why? Slicing dictates print quality.
Success: G-code generated for test cube.
💡 Tips:
Level bed (manual/mesh), set Z-offset (-0.05mm paper test). PID tune hotend/bed for stable temps.
Run flow calibration (100-105%). Why? Poor calibration causes 80% of failures.
Success: Uniform first layer, no elephant's foot.
💡 Tips:
⚠️ Warnings:
Design/import XYZ 20mm calibration cube in CAD. Slice, transfer via SD/USB. Start print.
Monitor adhesion, bridging. Why? Validates full stack.
Success: Dimensionally accurate cube (±0.1mm).
💡 Tips:
Remove part (cool down), clean (IPA for resin), cure if SLA. Measure tolerances, test function.
Iterate slicing if needed. Why? Raw prints rarely meet specs.
Success: Functional prototype ready for assembly/testing.
💡 Tips:
Problem: Layer shifts
Solution: Check belt tension, reduce acceleration in slicer, ensure stable table.
Problem: Poor bed adhesion
Solution: Clean with IPA, increase bed temp 5°C, add glue stick.
Problem: Stringing/oozing
Solution: Retraction 0.5-1mm at 40mm/s, lower print temp 5°C.
Problem: SLA failed print
Solution: Verify resin vat level, shake cartridge, recalibrate laser.
Problem: Underextrusion
Solution: Clean nozzle, increase flow 5%, check filament diameter.
Affordable FDM with auto-leveling and Klipper for fast prototyping iterations.
Best for: Entry-professional structural prototypes under 200mm.
Price Range: $200-$250
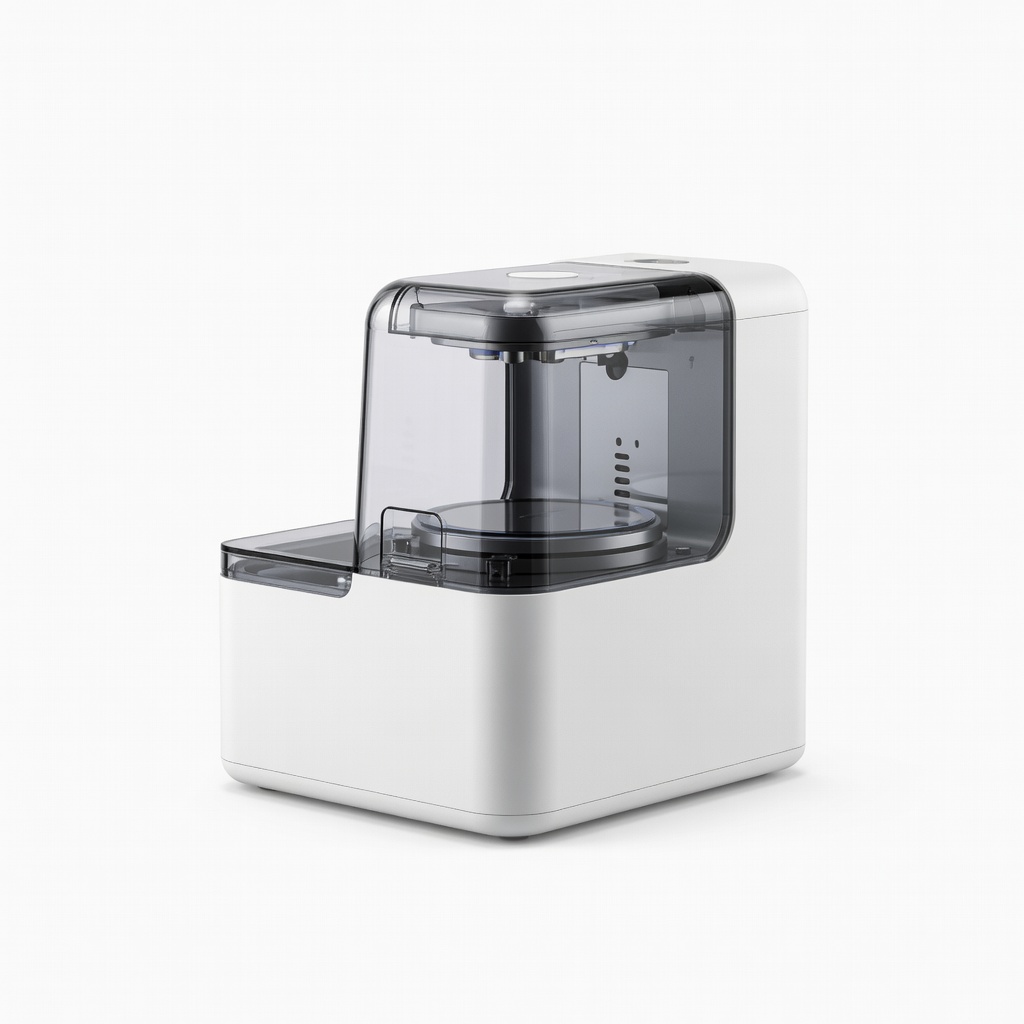
9K resolution SLA for ultra-detailed prototypes with minimal post-processing.
Best for: High-fidelity models like dental or miniatures.
Price Range: $280-$320
Enclosed CoreXY with AMS for multi-material prototyping in production speeds.
Best for: Batch functional prototypes with soluble supports.
Price Range: $600-$700
Reliable, low-warp PLA for consistent first-layer success.
Best for: General prototyping; easy to print.
Price Range: $25-$30
Essential for SLA post-processing to achieve smooth, strong parts.
Best for: Resin workflows; automates cleaning/curing.
Price Range: $80-$100
Entry-professional structural prototypes under 200mm.
Creality Ender 3 V3 SE Affordable FDM with auto-leveling and Klipper for fast prototyping iterations.
High-fidelity models like dental or miniatures.
ELEGOO Mars 4 Ultra 9K resolution SLA for ultra-detailed prototypes with minimal post-processing.
Batch functional prototypes with soluble supports.
Bambu Lab P1S Enclosed CoreXY with AMS for multi-material prototyping in production speeds.

General prototyping; easy to print.
HATCHBOX PLA 1.75mm Filament 1KG Reliable, low-warp PLA for consistent first-layer success.
Resin workflows; automates cleaning/curing.
Anycubic Wash & Cure Station 3.0 Essential for SLA post-processing to achieve smooth, strong parts.