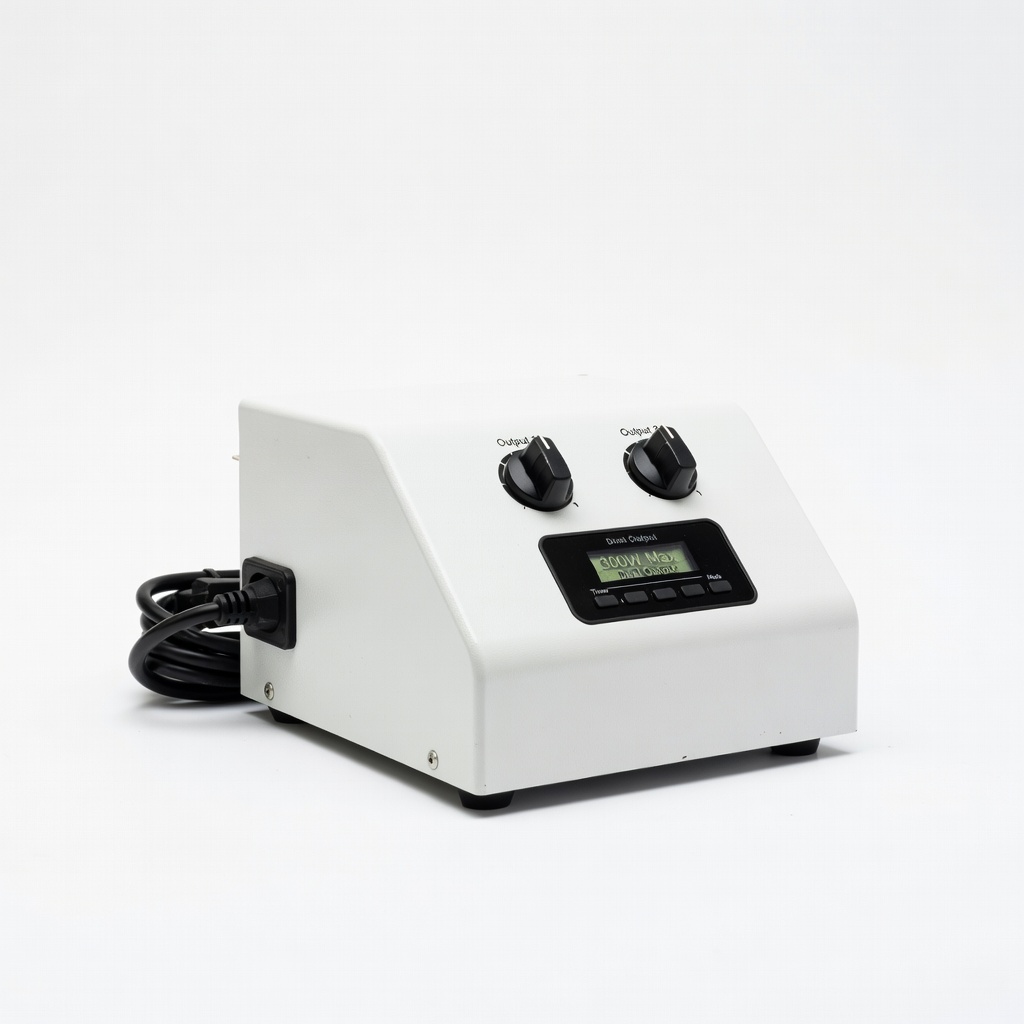
Malibu ML3000W 300-Watt Dual Output Transformer
Powers up to 8-10 accent lights on medium patios.
$70-$90
Malibu ML3000W 300-Watt Dual Output Transformer Reliable weatherproof power source with timer/photocell for automatic dusk-to-dawn operation.
Get the App
Better experience on mobile
Learn to install professional accent lighting on your patio to create ambiance, highlight features, and boost safety in just a few hours.
Imagine transforming your patio from a plain outdoor space into a magical evening retreat where plants glow, features pop, and gatherings come alive. Poor or no lighting leaves patios underused after dark, but accent lighting solves that by spotlighting architectural elements, trees, and seating areas. It's an intermediate DIY project that adds value to your home without hiring pros.
In this guide, you'll learn a complete step-by-step process to design, wire, and install low-voltage LED accent lights safely and effectively. We'll cover planning, wiring best practices, and testing for flawless results. Expect 3-5 hours total, depending on patio size (ideal for 200-500 sq ft patios), with basic electrical knowledge required.
By the end, your patio will have customizable, energy-efficient lighting that enhances mood and usability year-round.
Estimated Time: 3-5 hours Difficulty: intermediate
Start by sketching your patio on paper or using a free app like Landscape Design. Identify focal points: trees, statues, walls, or seating. Accent lighting works best uplighting vertical features (e.g., trees from base) or downlighting paths/surfaces.
Aim for 4-8 lights spaced 6-10 ft apart for even coverage. Mark positions with flags or chalk during daylight. This prevents uneven lighting or overload on the transformer.
What success looks like: A balanced design with no dark spots, calculated total wattage under transformer's capacity (e.g., 400W transformer for 300W lights).
💡 Tips:
⚠️ Warnings:
Lay out all tools and products. Inspect wires for damage and lights for IP65+ weatherproof rating. Calculate wire runs: measure distances from transformer to farthest light, adding 10% buffer.
Choose low-voltage (12V) systems for safety—no permits needed in most areas.
Success: Everything organized, wattage total verified (e.g., 8x4W lights = 32W).
💡 Tips:
Mount the transformer near an outdoor GFCI outlet (within 20 ft). Secure to a post or wall at 3-4 ft height, away from water. Plug in but don't power on yet.
Why? Central location minimizes voltage drop. Use included bracket.
Success: Firmly mounted, cord routed safely.
⚠️ Warnings:
From transformer, dig shallow trenches (4-6 inches) to light positions. Lay 12/2 wire, avoiding sharp bends. Staple above ground or bury.
Strip 1/2 inch insulation at ends later. This distributes power efficiently.
Success: Wire in place, no kinks, ends capped.
💡 Tips:
Insert spikes into soil at marked spots, angling heads toward features (e.g., 45° up for trees). Adjust height so bulbs are 6-12 inches from ground.
Secure with stakes; test angle manually.
Success: Lights aimed correctly, stable.
⚠️ Warnings:
Strip wire ends, match positive/negative (often marked). Twist into waterproof connectors, seal with silicone. Daisy-chain: transformer to first light, then to next.
Max 100 ft run per leg to avoid dimming.
Success: All connections tight and waterproofed.
💡 Tips:
Attach main wires to transformer's terminals. Power on, check voltage (11-13V at ends with tester). Cycle lights for 5 mins.
Adjust angles as needed.
Success: All lights bright, even glow.
⚠️ Warnings:
Backfill trenches, cover with soil/mulch. Program timer if included. Clean up.
Enjoy dusk test for ambiance.
Success: Seamless, professional install.
💡 Tips:
Problem: Lights flicker or dim
Solution: Check voltage drop; shorten runs or upgrade wire/transformer. Tighten connections.
Problem: No power to lights
Solution: Verify transformer output with tester; check GFCI trip. Inspect fuses.
Problem: One light out
Solution: Replace bulb/connector; test continuity. Daisy-chain issue common.
Problem: Water in connections
Solution: Re-seal with silicone; use gel-filled connectors. Seek electrician if buried deep.
Reliable weatherproof power source with timer/photocell for automatic dusk-to-dawn operation.
Best for: Powers up to 8-10 accent lights on medium patios.
Price Range: $70-$90
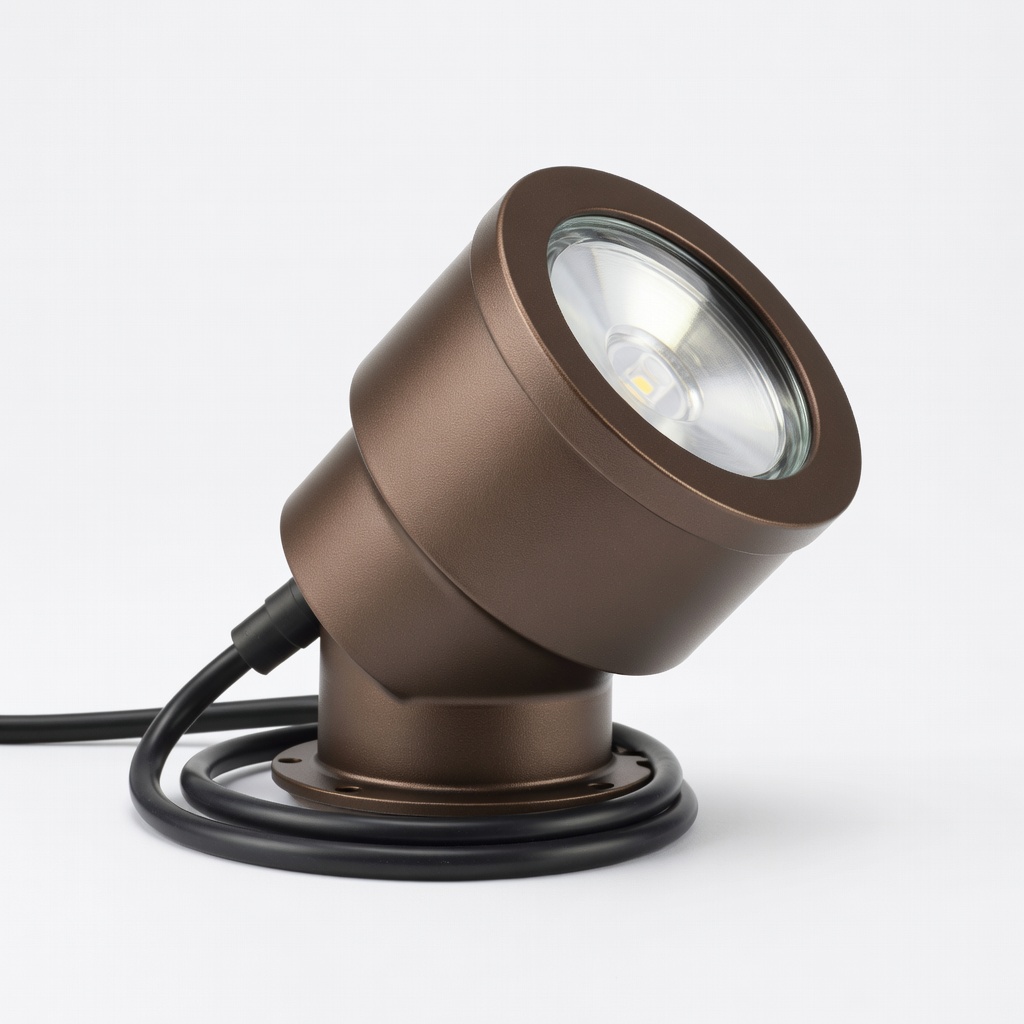
Durable brass/LED construction with adjustable focus for precise accenting.
Best for: Uplighting trees or walls; buy 4-6 pack.
Price Range: $50-$65 each
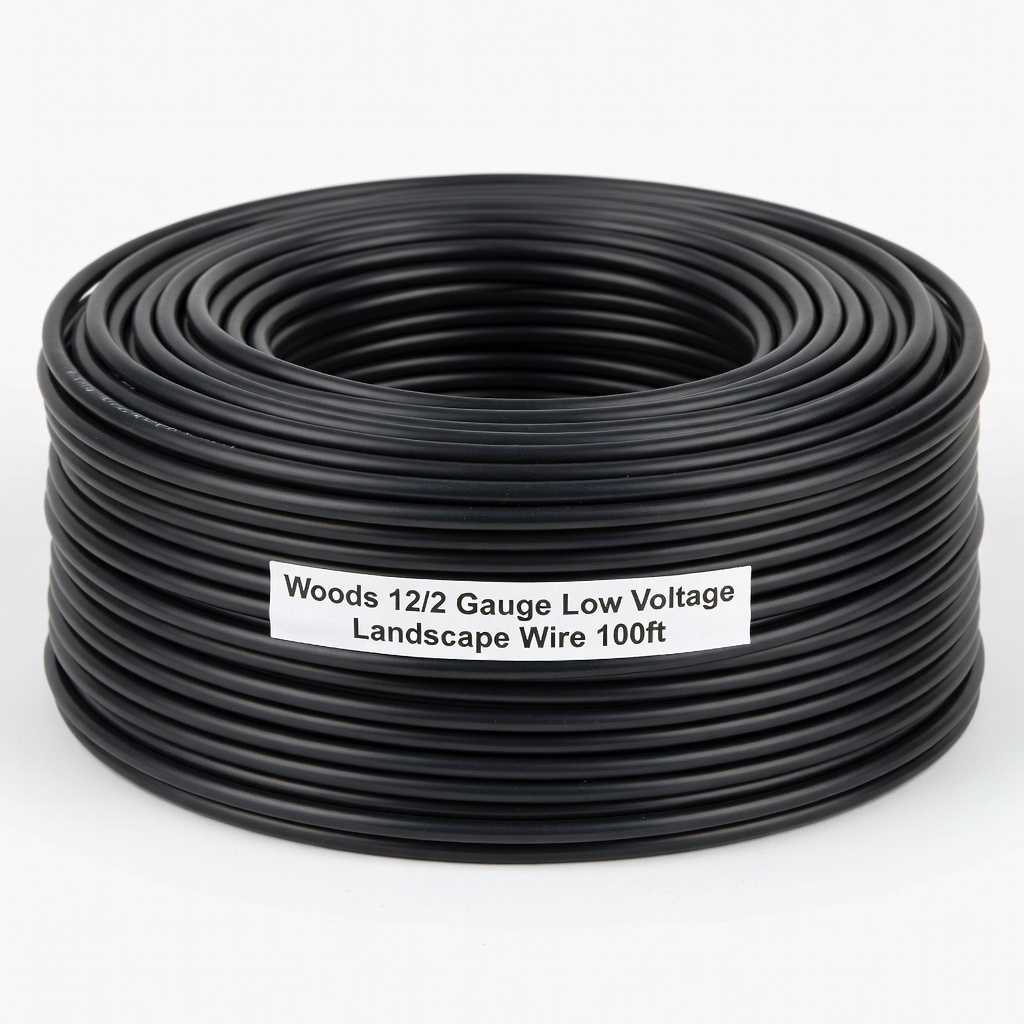
Direct-bury rated, UV-resistant for long outdoor runs without signal loss.
Best for: Main cable from transformer to lights.
Price Range: $25-$35
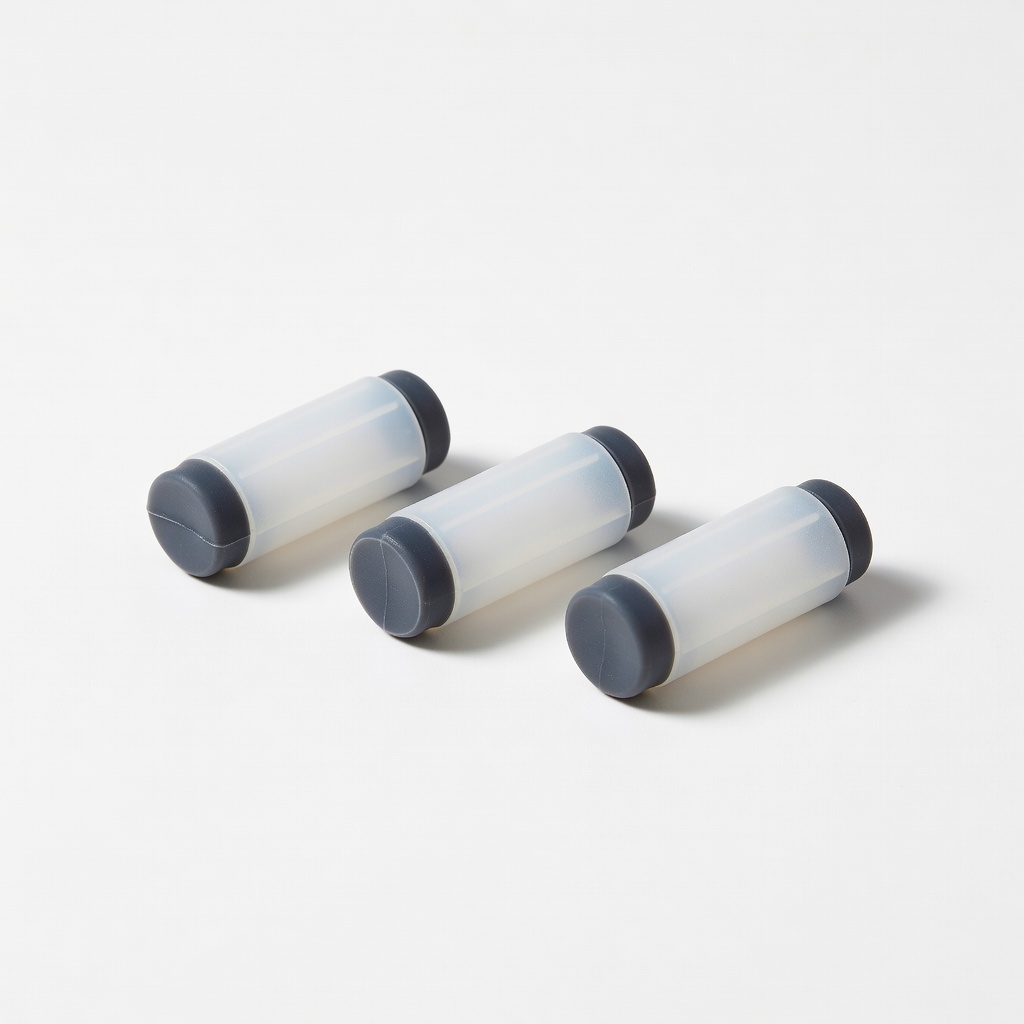
Gel-filled for permanent moisture seal, essential for low-voltage reliability.
Best for: All light and splice connections.
Price Range: $15-$20
Premium cast brass for high-end look, energy-efficient.
Best for: Architectural features; pro-grade durability.
Price Range: $120-$150
Powers up to 8-10 accent lights on medium patios.
Malibu ML3000W 300-Watt Dual Output Transformer Reliable weatherproof power source with timer/photocell for automatic dusk-to-dawn operation.

Uplighting trees or walls; buy 4-6 pack.
VOLT 12V LED Landscape Spotlight (SPIKE-3) Durable brass/LED construction with adjustable focus for precise accenting.
Main cable from transformer to lights.
Woods 12/2 Gauge Low Voltage Landscape Wire 100ft Direct-bury rated, UV-resistant for long outdoor runs without signal loss.
All light and splice connections.
Gamma Ray 3-Pack Waterproof Wire Connectors Gel-filled for permanent moisture seal, essential for low-voltage reliability.
Architectural features; pro-grade durability.
Kichler 15852AZT 12V LED Uplight Premium cast brass for high-end look, energy-efficient.