Imagine peering through your telescope and seeing the rings of Saturn or the moons of Jupiter with stunning clarity—planetary viewing can turn a starry night into an unforgettable adventure. However, many intermediate astronomers struggle with initial setups that lead to blurry or misaligned views, missing out on these cosmic wonders. This guide addresses that pain point by walking you through a reliable setup process tailored for planetary observation.
In this tutorial, you'll learn the essential steps to assemble, align, and optimize your telescope for planets, focusing on high-magnification details rather than wide-field stargazing. We'll cover everything from basic assembly to fine-tuning, assuming you have some familiarity with telescopes but need practical guidance. By the end, you'll be ready to spot planetary features like cloud bands and craters.
Expect the process to take 30-45 minutes on a clear night, with intermediate difficulty involving some mechanical adjustments. No advanced tools are needed, but patience with alignment is key for sharp results.
▸What You'll Need
- •Telescope (refractor or reflector suitable for planets, e.g., 80-130mm aperture)
- •Equatorial or alt-azimuth mount with tripod (required for stability)
- •Eyepieces: At least two (low-power 20-25mm for finding, high-power 6-10mm for viewing planets)
- •Finder scope (required for initial targeting)
- •Optional: Collimation tools (like a laser collimator for reflectors), star chart app (e.g., SkySafari), and red flashlight for night vision
Estimated Time: 30-45 minutes
Difficulty: intermediate
▸Step-by-Step Instructions
Step 1: Unpack and Inspect Your Telescope
Begin by carefully unpacking your telescope kit in a well-lit area. Lay out all components: the optical tube, mount, tripod legs, eyepieces, finder scope, and any accessories. Check for damage or missing parts by comparing against the manufacturer's inventory list—most kits include a diagram.
Why this matters: A complete, undamaged setup ensures stability and clear optics from the start. Inspect the mirrors or lenses for smudges; gently clean with a microfiber cloth if needed, avoiding household cleaners that could scratch surfaces.
Success looks like: All parts accounted for, optics sparkling clean, ready for assembly without surprises.
💡 Tips:
- •Work on a soft surface like a blanket to prevent scratches.
- •Read the manual briefly now for model-specific notes.
⚠️ Warnings:
- •Don't force any connections—refer to the manual if pieces don't fit easily.
Step 2: Assemble the Tripod and Mount
Extend the tripod legs to a comfortable height (about eye level when seated) and lock them securely. Attach the mount head to the tripod's central bracket, tightening the mounting screw firmly but not overtightened.
For an equatorial mount (ideal for planets to track Earth's rotation), ensure the polar axis is facing north. This setup matters because a wobbly base ruins steady views, especially at high magnifications where vibrations amplify.
What to expect: The mount should feel solid, with smooth adjustments in altitude and azimuth. Test by gently nudging—no excessive play.
💡 Tips:
- •Use a spirit level app on your phone to ensure the tripod is even.
- •For alt-azimuth mounts, simplicity is key if you're new to tracking.
⚠️ Warnings:
- •Avoid sandy or uneven ground; it can cause instability during viewing.
Step 3: Attach the Optical Tube to the Mount
Secure the telescope tube to the mount's dovetail bar using the provided clamps or rings. For reflectors, ensure the tube is balanced by sliding it until the weight is evenly distributed— the tube shouldn't tip forward or backward when loosened.
This step is crucial for smooth tracking; an unbalanced tube strains the mount and causes jerky movements during planetary follows. Success: The telescope holds position when you release it, with easy panning.
💡 Tips:
- •Add counterweights if your model includes them for heavier setups.
⚠️ Warnings:
- •Over-tightening clamps can bend the tube—snug is enough.
Step 4: Install and Align the Finder Scope
Mount the finder scope parallel to the main telescope tube using its brackets. Insert a low-power eyepiece into the main scope and point at a distant daytime object (like a building 100+ yards away). Adjust the finder's screws until the object's center aligns in both the finder and main view.
Alignment ensures you can quickly locate planets without frustration. Why it matters: Misaligned finders lead to endless searching in the dark sky. Expect: The views overlap perfectly after tweaks.
💡 Tips:
- •Do this during the day for easier adjustments.
- •Use a distant tree or pole for a clear target.
⚠️ Warnings:
- •Don't use the sun as a target—permanent eye damage risk.
Step 5: Collimate the Optics (For Reflectors)
If using a reflector, check collimation by pointing at a bright star at night and using a defocused view to see if the reflections form concentric circles. Adjust the secondary mirror screws until aligned, then the primary.
This optimizes light path for sharp planetary details like Jupiter's bands. Skip for refractors, which rarely need it. Success: Stars appear as tight points, not donuts.
💡 Tips:
- •A laser collimator tool speeds this up for intermediates.
- •Practice on the moon first for defocus testing.
⚠️ Warnings:
- •Only adjust if necessary—over-collimating can worsen views.
Step 6: Perform Polar Alignment
For equatorial mounts, level the tripod and point the polar axis north (use a compass or app). Adjust the altitude to your latitude, then fine-tune by centering Polaris (North Star) using the mount's slow-motion controls.
This compensates for Earth's rotation, keeping planets in view effortlessly. It matters for long sessions without constant nudging. Expect: Polaris steady in the alignment scope.
💡 Tips:
- •Apps like Polar Finder aid latitude settings.
- •Alt-azimuth users can skip but may need manual tracking.
⚠️ Warnings:
- •Poor alignment causes field rotation, blurring details over time.
Step 7: Locate and Center a Planet
Wait for dark skies, then use a star app to find a planet like Jupiter. Use the finder scope to center it, then switch to the main eyepiece. Start with low power to frame it, then increase magnification.
This transitions setup to viewing; success is seeing the planet as a crisp disk. Why: Planets move predictably, so timing with apps ensures quick finds.
💡 Tips:
- •Jupiter and Venus are brightest starters.
- •Red light preserves night vision.
⚠️ Warnings:
- •Light pollution hides faint details—choose dark sites.
Step 8: Fine-Tune for Optimal Viewing
Rack focus slowly until the planet sharpens, adjusting for atmospheric seeing (turbulence). Track by nudging the mount to keep it centered.
Final step for clarity; expect details like Saturn's rings emerging. This matters for immersion in planetary features.
💡 Tips:
- •View when planets are high to minimize air distortion.
- •Take breaks to rest eyes.
⚠️ Warnings:
- •Rushing focus causes blur—patience yields better results.
▸Pro Tips
- •Choose nights with steady seeing (low turbulence) by checking weather apps for astronomy forecasts.
- •Balance the tube precisely to prevent mount wear over multiple uses.
- •Use a dew shield on humid nights to prevent lens fogging.
- •Start with brighter planets to build confidence before fainter ones like Mars.
- •Invest in a driven mount for hands-free tracking during extended views.
- •Clean eyepieces with compressed air before each session to avoid dust specks.
- •Record your settings (focus, alignment) for quicker future setups.
▸Common Mistakes to Avoid
- •Skipping finder alignment, leading to hours of fruitless searching—always daytime align.
- •Poor tripod leveling, causing wobbles at high power—use a level every time.
- •Over-magnifying too soon, resulting in dim, shaky views—start low and build up.
- •Ignoring collimation on reflectors, producing fuzzy planets—check monthly.
- •Setting up in light-polluted areas, washing out details—scout dark sites in advance.
▸Troubleshooting
Problem: Blurry or distorted planetary image
Solution: Refocus carefully and check collimation; wait for better seeing if turbulence is high. Clean optics if dusty.
Problem: Telescope won't track smoothly
Solution: Rebalance the tube and ensure polar alignment; lubricate gears if stiff per manual.
Problem: Can't find the planet
Solution: Realign finder scope and use a planetarium app for exact position; try a brighter target first.
Problem: Vibrations during viewing
Solution: Tighten all locks and move to firmer ground; avoid touching the tube while observing.
Celestron AstroMaster 130EQ Telescope
This reflector offers excellent planetary detail with its 130mm aperture and equatorial mount, perfect for intermediate users tracking Jupiter and Saturn.
Best for: Ideal for backyard setups focusing on high-contrast planetary views without breaking the bank.
Price Range: $250-$300
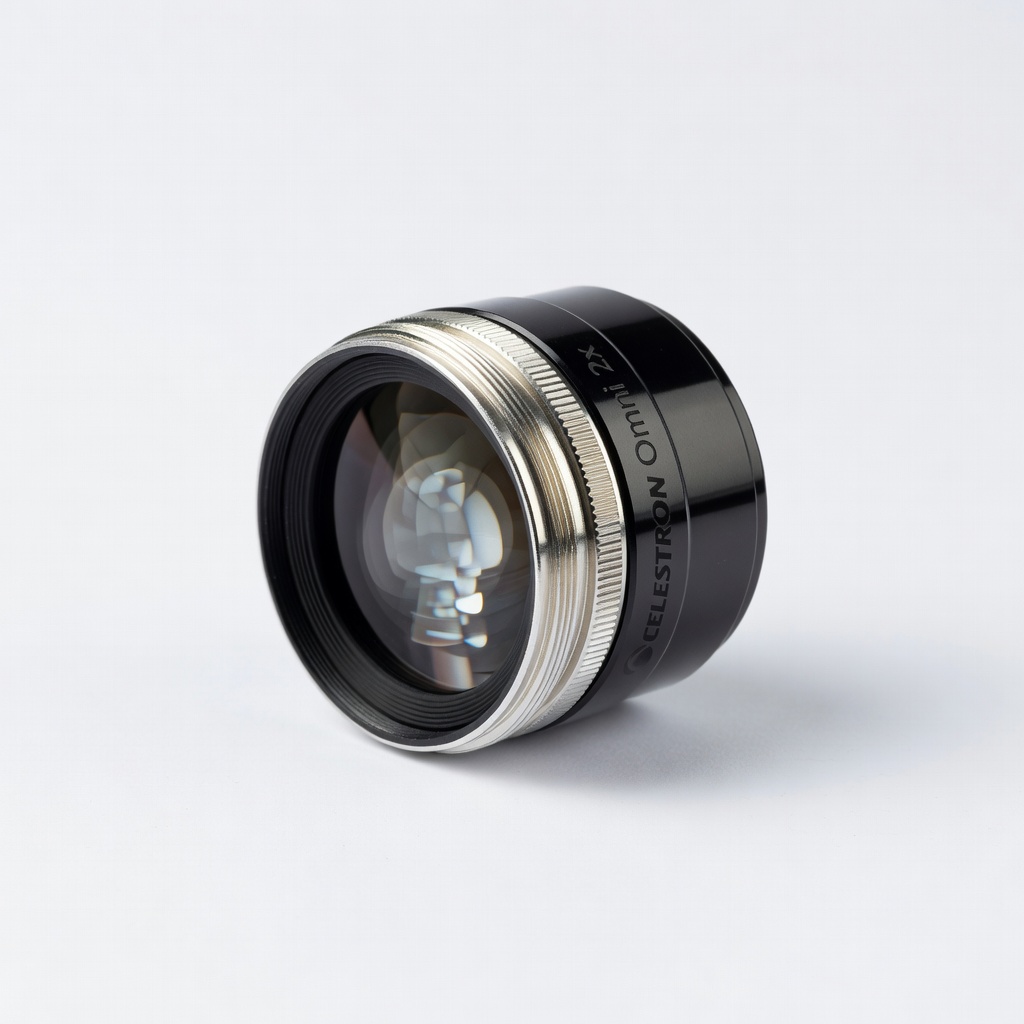
Celestron Omni 2x Barlow Lens
Doubles magnification of your eyepieces for sharper planetary close-ups, enhancing detail without buying extra high-power pieces.
Best for: Use with existing eyepieces during sessions to zoom in on features like Saturn's rings.
Price Range: $20-$30
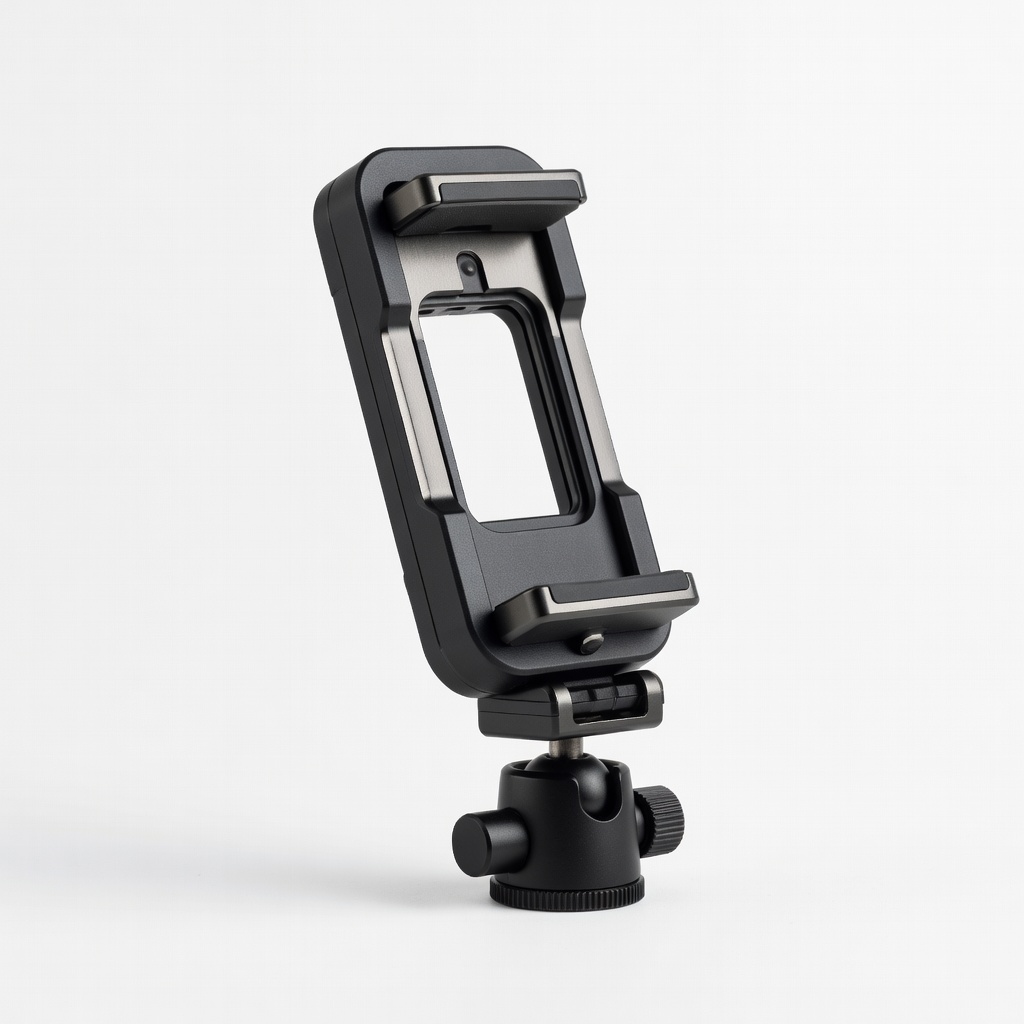
Orion SteadyPix Pro Smartphone Adapter
Allows stable astrophotography of planets via your phone, capturing what you see for sharing or records.
Best for: Attach to eyepiece for quick snaps of planetary disks on clear nights.
Price Range: $40-$50
iOptron SkyGuider Pro Camera Tracker
Upgrades manual tracking for longer, vibration-free planetary observation, especially useful for intermediates advancing to imaging.
Best for: Mount your telescope on it for precise following during extended views.
Price Range: $400-$500
Celestron PowerTank Lithium
Provides portable power for motorized mounts, ensuring uninterrupted tracking without draining batteries.
Best for: Essential for remote dark-sky sites where outlets aren't available.
Price Range: $150-$200