As a guitarist, you've poured hours into perfecting your acoustic riffs and melodies, but capturing that sound at home can feel overwhelming. Many beginners struggle with muddy recordings or technical glitches that drown out their passion. The good news? Setting up a home recording studio doesn't require a massive budget or pro-level skills—it's achievable with the right steps and affordable gear.
In this guide, you'll learn how to create a dedicated space for recording your acoustic guitar, from selecting essential equipment to optimizing your room's acoustics and making your first test recording. We'll cover everything in simple, sequential steps tailored for beginners, so you can focus on your music rather than the tech. By the end, you'll have a functional studio that lets you record clean, vibrant tracks ready for sharing or mixing.
Expect to spend 2-4 hours on the initial setup, depending on your space and gear availability. It's beginner-level work—no prior audio engineering knowledge needed—but patience with connections and testing will pay off.
▸What You'll Need
- •Acoustic guitar (your own or a beginner model like Yamaha FG800)
- •Computer or laptop (Windows/Mac with at least 8GB RAM)
- •Digital Audio Workstation (DAW) software—free options like GarageBand (Mac) or Reaper (all platforms)
- •USB audio interface (e.g., for connecting mic to computer)
- •Condenser microphone suitable for acoustics (e.g., cardioid pattern for focused pickup)
- •XLR cable and microphone stand
- •Closed-back headphones for monitoring
- •Basic acoustic treatment (foam panels or blankets)
- •Optional: Pop filter to reduce plosives, guitar stand for positioning
Estimated Time: 2-4 hours for full setup and testing
Difficulty: beginner
▸Step-by-Step Instructions
Step 1: Choose and Prepare Your Recording Space
Start by selecting a quiet room in your home where you can minimize external noise and echoes. For acoustic guitar, a small bedroom or living room corner works well—avoid large, empty spaces that cause reverb. Clear the area of clutter to create a focused zone, and position your guitar stand near a power outlet for easy access.
Why this matters: A good space foundation ensures cleaner recordings from the start, reducing the need for heavy post-production fixes. Expect a semi-soundproofed nook about 10x10 feet; it doesn't need to be perfect, but quieter is better.
Hang heavy curtains or blankets on walls if you don't have foam panels yet—this absorbs sound reflections immediately.
💡 Tips:
- •Test the space by clapping; if you hear a long echo, add more soft furnishings like rugs.
- •Face a corner to leverage natural diffusion for guitar tones.
⚠️ Warnings:
- •Avoid recording near HVAC vents or windows—traffic or AC hum can ruin takes.
Step 2: Gather and Install Your DAW Software
Download and install a beginner-friendly DAW on your computer. Reaper is free and versatile for all OS, or use GarageBand if you're on Mac—both handle multi-track recording easily. Launch the software, create a new project, and set your sample rate to 44.1kHz (standard for music) and bit depth to 24-bit for quality without overwhelming your system.
This step is crucial because the DAW is your recording hub—it captures, edits, and mixes your guitar audio. Success looks like a blank project window with armed tracks ready for input; you'll hear a metronome if enabled.
Follow the software's quick-start tutorial (usually 10-15 minutes) to familiarize yourself with basic recording buttons.
💡 Tips:
- •Reaper's trial is unlimited; download from reaper.fm.
- •Enable ASIO drivers on Windows for low-latency playback.
⚠️ Warnings:
- •Don't skip updating your audio drivers—outdated ones cause crashes.
Step 3: Connect Your Audio Interface
Plug your USB audio interface into your computer—it acts as the bridge between your mic and DAW, converting analog guitar/mic signals to digital. Install any included drivers from the manufacturer's site (e.g., Focusrite for Scarlett models), then connect via USB. In your DAW, select the interface as your input/output device under preferences.
Why it matters: Without this, your recordings will sound poor due to built-in computer mics. Expect plug-and-play recognition; test by speaking into the mic and seeing levels move in the DAW.
Power on the interface and set gain knobs low to avoid clipping.
💡 Tips:
- •Use a powered USB hub if your computer has limited ports.
- •Phantom power (+48V) is often needed for condenser mics—switch it on if required.
⚠️ Warnings:
- •Overheating interfaces? Ensure good airflow; cheap ones can fail under load.
Step 4: Set Up Your Microphone and Guitar Positioning
Mount your condenser mic on a stand, positioning it 6-12 inches from your guitar's soundhole at a 45-degree angle to capture both body resonance and string clarity. Use an XLR cable to connect the mic to the interface's input. For acoustic guitar, avoid pointing directly at the soundhole to prevent boomy lows.
This setup captures the natural tone you're after—success is seeing steady input levels (green/yellow in DAW) when you play. Why? Proper placement minimizes handling noise and balances frequencies.
Clip on a pop filter if plosives are an issue, though less common for guitar-only recording.
💡 Tips:
- •Experiment: Move the mic toward the neck for brighter tones.
- •Use a shock mount to reduce vibrations from floor contact.
⚠️ Warnings:
- •Don't blast volume during setup—phantom power can damage speakers if feedback loops.
Step 5: Add Basic Acoustic Treatment
Place foam panels or thick blankets on reflective surfaces like walls behind you and the mic to dampen echoes. For beginners, start with four 12x12-inch panels at ear height. Test by recording a short strum—if it sounds less 'roomy,' you're on track.
Acoustics matter for acoustic guitar's nuanced tones; untreated rooms add unwanted reverb. Expect subtle improvements, not perfection—budget treatment cuts 50% of issues.
Position your guitar between absorptive materials to focus the sound.
💡 Tips:
- •DIY with towels in a pinch; upgrade to pro panels later.
- •Bass traps in corners help low-end mud.
⚠️ Warnings:
- •Over-treating deadens the room—balance absorption with some live sound.
Step 6: Monitor with Headphones and Test Record
Plug closed-back headphones into the interface's headphone jack for zero-latency monitoring. Arm a track in your DAW, hit record, and play a simple chord progression on your guitar. Playback immediately to check for clarity, balance, and noise.
This verifies your full chain works—success is hearing your guitar cleanly without computer fan noise or distortion. Why? It catches issues early, saving editing time.
Adjust mic gain until peaks hit -6dB; arm another track for overdubs if needed.
💡 Tips:
- •Use direct monitoring on the interface to hear yourself in real-time.
- •Record in a quiet time of day for best results.
⚠️ Warnings:
- •High latency? Lower buffer size in DAW settings (e.g., 128 samples).
Step 7: Fine-Tune and Save Your Setup
Export a test file as WAV for quality preservation, then tweak DAW settings like auto-input monitoring. Label your project and organize files in a dedicated folder. If everything sounds good, your studio is ready for full sessions.
Finalizing ensures repeatability—expect pro-sounding demos that motivate more recording. This step solidifies your workflow.
Backup your DAW presets for quick future setups.
💡 Tips:
- •Set up templates in your DAW for guitar-only projects.
- •Cloud sync files to avoid data loss.
⚠️ Warnings:
- •Forgetting to disarm tracks can cause accidental overdubs.
▸Pro Tips
- •Start small: Focus on mono recordings before stereo for simpler mixing.
- •Use free plugins like EQ to gently boost guitar highs post-recording.
- •Record at consistent volumes to ease level matching in multi-tracks.
- •Keep your guitar in tune with a clip-on tuner during sessions.
- •Invest in cable organizers to prevent connection hassles mid-session.
- •Practice silent strumming first to check mic pickup without noise.
- •Batch-record multiple takes in one go to save setup time.
▸Common Mistakes to Avoid
- •Placing the mic too close to the soundhole, causing boomy bass—keep 6+ inches away for balance.
- •Ignoring room noise like fans or pets, leading to unusable takes—record in off-hours.
- •Using open-back headphones, which bleed sound and cause feedback—stick to closed-back.
- •Skipping driver updates for the interface, resulting in crackly audio—always check manufacturer's site.
- •Overloading gain, clipping signals—monitor levels and keep under 0dB.
▸Troubleshooting
Problem: No audio input in DAW
Solution: Check if the interface is selected as input device; verify phantom power for condenser mics and cable connections.
Problem: High latency or delay when monitoring
Solution: Reduce buffer size in DAW audio settings (e.g., to 64-128 samples); close background apps eating CPU.
Problem: Recordings sound echoey or muffled
Solution: Add more absorption like blankets; reposition mic away from walls and test with a clap.
Problem: Computer crashes during recording
Solution: Ensure at least 8GB RAM free; use a dedicated audio-optimized DAW like Reaper over resource-heavy ones.
Problem: When to seek pro help: Persistent hardware failures like interface not powering on—contact manufacturer support or visit a music store.
Solution: undefined
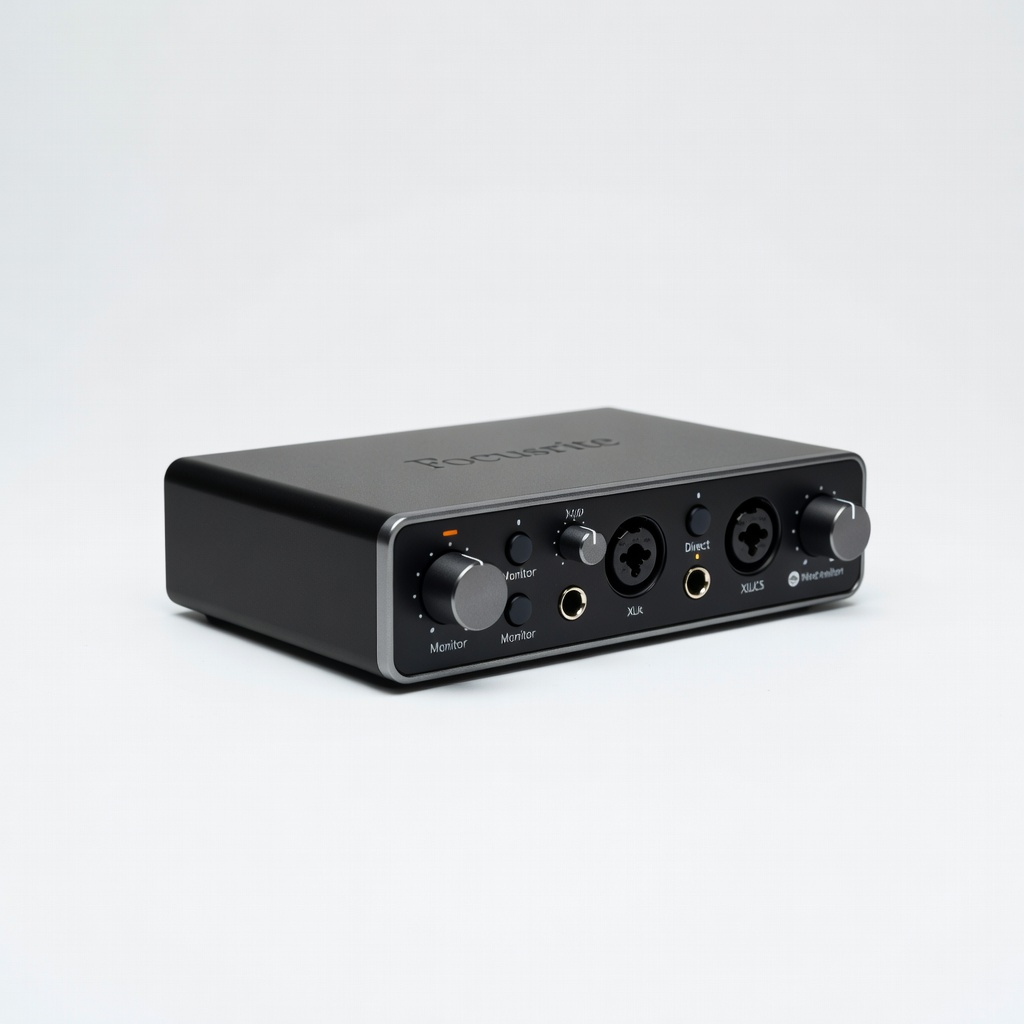
Focusrite Scarlett Solo Audio Interface
This compact USB interface is perfect for beginners, offering clean preamps and easy plug-and-play setup for mic and guitar recording.
Best for: Connect your condenser mic directly; ideal for solo acoustic sessions with low noise and phantom power.
Price Range: $119.99
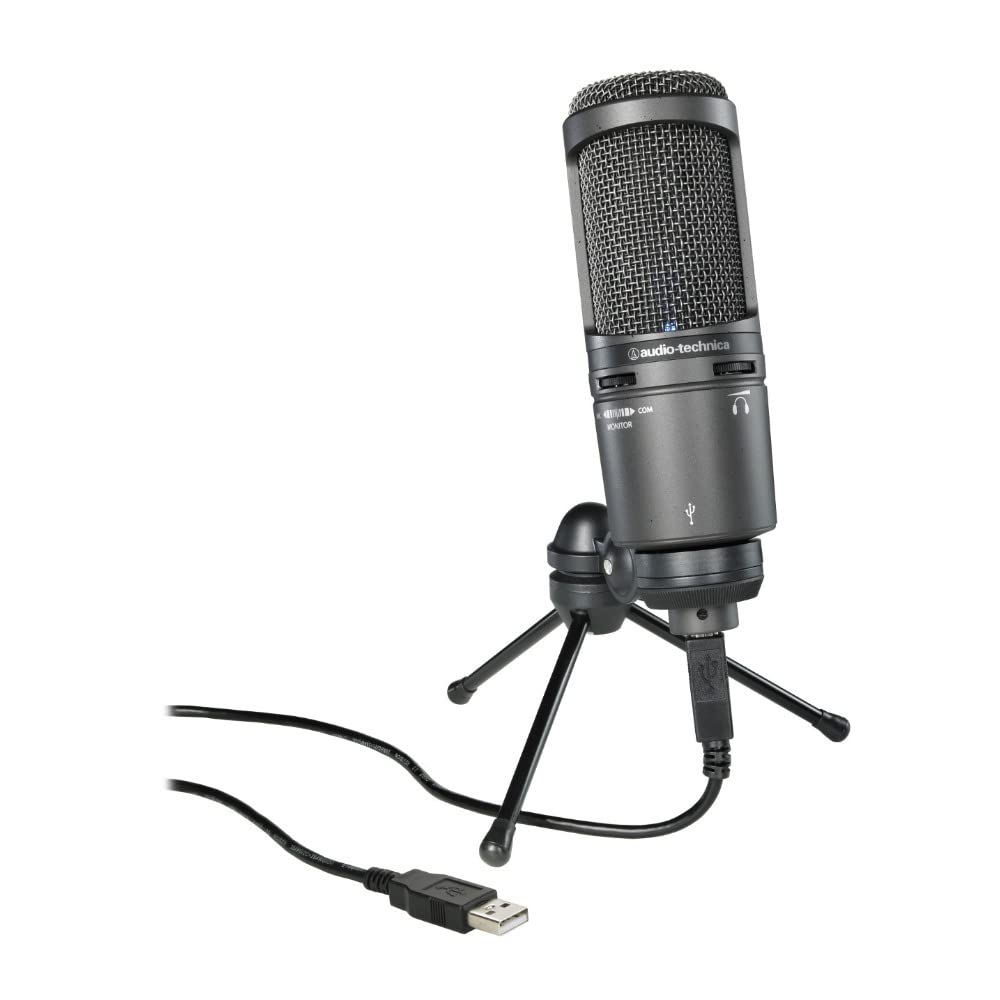
Audio-Technica AT2020 Cardioid Condenser Microphone
Excellent for capturing the warm, detailed tones of acoustic guitars with its wide frequency response and low self-noise.
Best for: Position near the guitar soundhole for natural recordings; great for home studios on a budget.
Price Range: $99.00
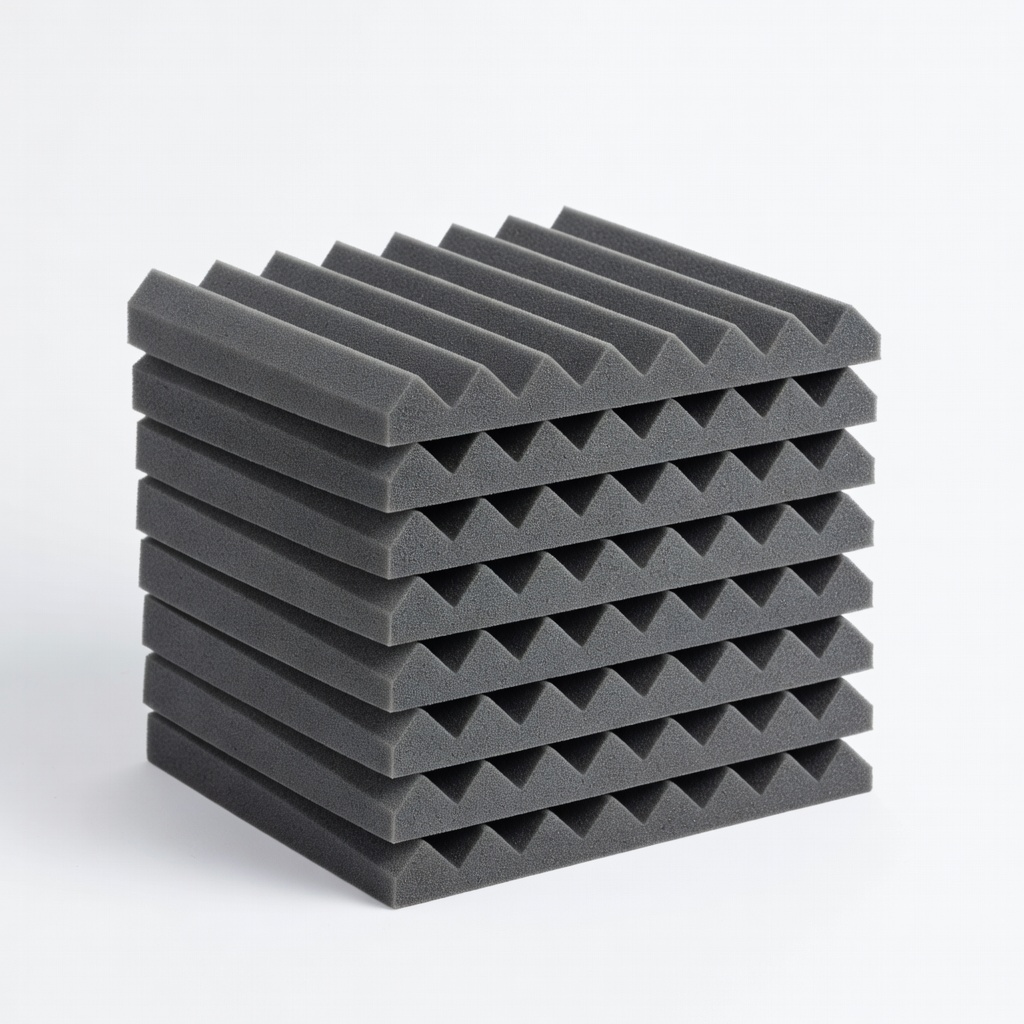
Auralex Studiofoam Wedges Acoustic Panels (12-pack)
These affordable foam panels effectively reduce room reflections, improving clarity for acoustic guitar recordings without deadening the space.
Best for: Mount on walls behind the mic and player; start with 4-6 panels for basic treatment.
Price Range: $99.99
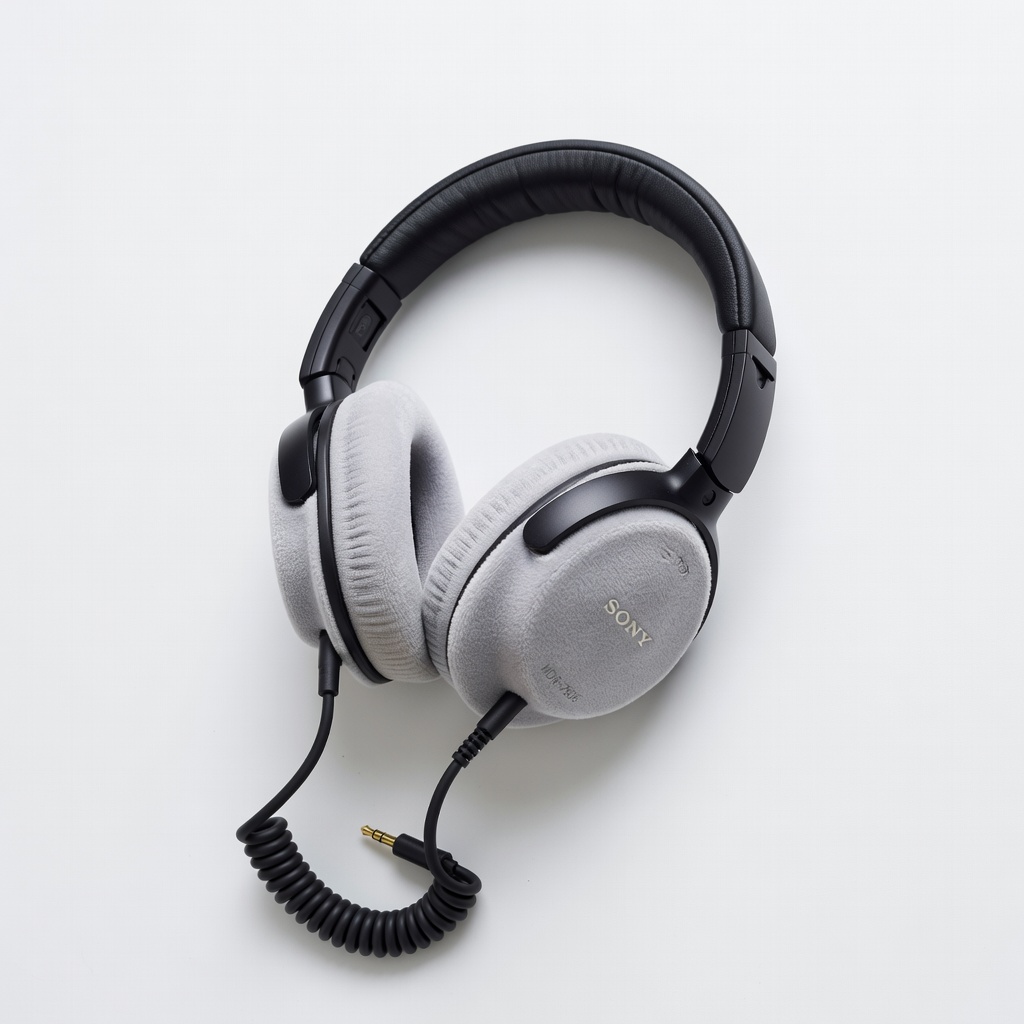
Sony MDR-7506 Closed-Back Headphones
Professional monitoring headphones with accurate sound reproduction, essential for hearing your guitar recordings without external interference.
Best for: Use during tracking and playback to catch nuances in real-time; durable for daily home use.
Price Range: $129.00
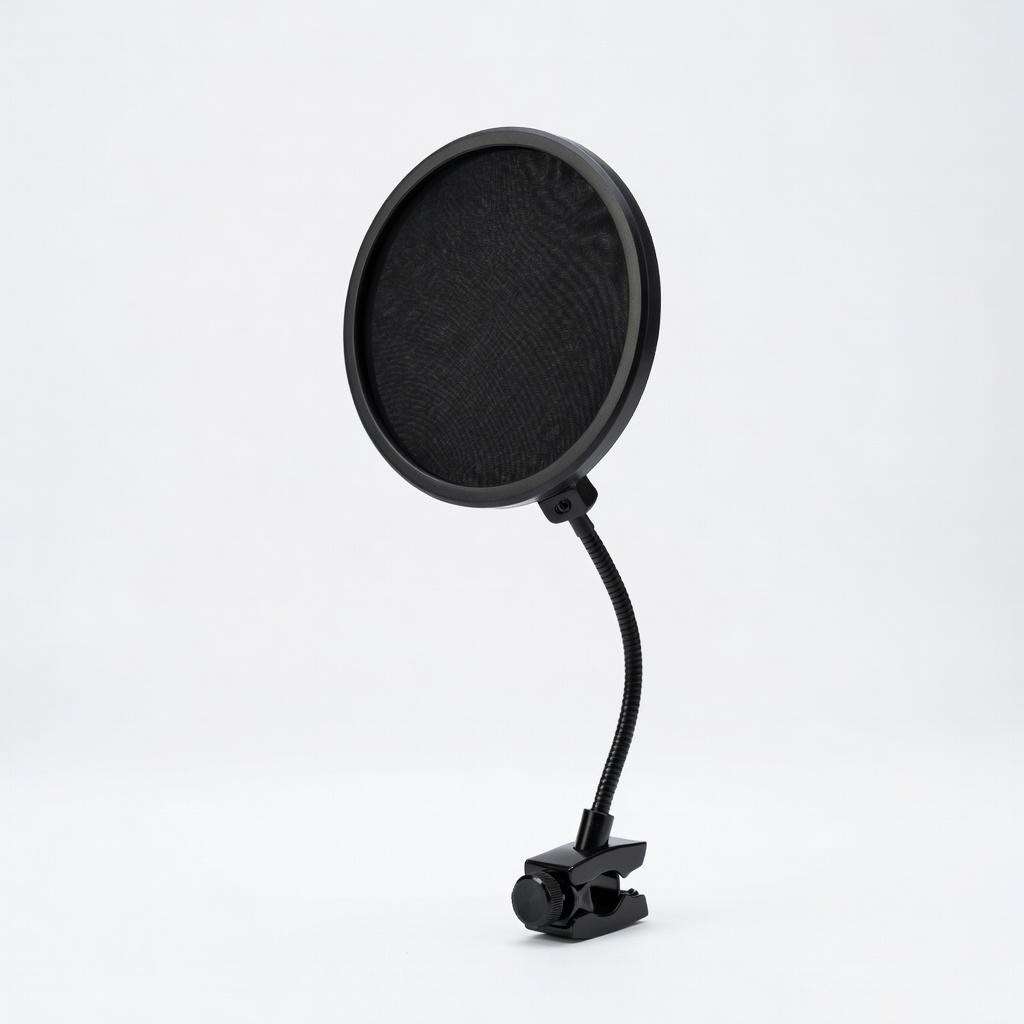
Neewer Microphone Pop Filter
Reduces plosives and wind noise that can sneak into guitar-vocal hybrids, ensuring cleaner overall tracks.
Best for: Clip onto your mic stand for any setup involving singing along with guitar.
Price Range: $8.99