Setting up a fishing reel can feel overwhelming for beginners, especially when you're eager to hit the water but end up with a bird's nest of tangled line. Many new anglers struggle with this initial step, leading to wasted time and missed catches. But don't worry—proper setup is simpler than it seems and will set you up for success on your first outing.
In this guide, you'll learn how to attach a spinning reel (the most beginner-friendly type) to a rod, spool your line correctly, and test everything to ensure smooth operation. We'll cover each step with clear instructions, so even if you've never handled fishing gear before, you'll be ready to cast in no time. The whole process takes about 20-30 minutes and requires only basic tools—no advanced skills needed.
By the end, you'll have a fully rigged reel that's balanced, tangle-free, and optimized for catching fish, giving you the confidence to focus on the fun of fishing rather than fighting your equipment.
▸What You'll Need
- •Spinning fishing reel (beginner model, size 2500-3000 for versatility)
- •Compatible fishing rod (6-7 foot medium-light action spinning rod)
- •Monofilament or braided fishing line (8-12 lb test, 150-200 yards)
- •Wire cutters or fishing pliers (for cutting line)
- •Rod holder or table surface (to secure the rod during setup)
- •Optional: Line conditioner spray (to reduce friction and tangles)
Estimated Time: 20-30 minutes
Difficulty: beginner
▸Step-by-Step Instructions
Step 1: Choose and Prepare Your Reel and Rod
Start by selecting a beginner-friendly spinning reel and a matching rod. Spinning reels are ideal for novices because they're easy to use and less prone to backlash. Ensure your reel size matches the rod's line and lure weight ratings—check the rod's handle for guides like '8-17 lb line.'
Lay out your rod on a flat surface and remove any protective packaging from the reel. Inspect the reel for damage: the bail (the wire arm) should move freely, and the handle should turn smoothly without grinding. This step matters because mismatched gear can lead to poor performance or breakage mid-cast.
What success looks like: Your rod and reel are clean, undamaged, and ready for assembly. Expect this to take 2-3 minutes as you're just prepping.
💡 Tips:
- •Opt for a combo kit (rod + reel) if buying new to ensure compatibility.
- •Read the reel's manual for model-specific tips.
⚠️ Warnings:
- •Avoid baitcasting reels for now—they're more advanced and tangle-prone for beginners.
Step 2: Attach the Reel to the Rod
Locate the reel's foot (the metal base) and the rod's reel seat (the cylindrical grip with locking rings). Slide the reel's foot into the seat, aligning it so the handle faces the correct side—right-handed anglers typically have the handle on the left for comfort.
Tighten the reel seat's drag nut or locking rings clockwise to secure it firmly. It should feel snug but not overly tight to avoid damaging the rod. Why this matters: A loose attachment can cause the reel to wobble, leading to inaccurate casts and fatigue during use.
Success indicator: Gently shake the rod—the reel shouldn't move. This takes about 5 minutes and feels straightforward once aligned.
💡 Tips:
- •If the seat has two rings, tighten the bottom one first for stability.
- •For left-handed users, rotate the handle to the right side if adjustable.
⚠️ Warnings:
- •Don't overtighten; it can crack the rod blank.
Step 3: Prepare and Cut Your Fishing Line
Cut a length of line from the spool. Pull out about 2-3 feet of line from your filler spool (the large spool of line). Use wire cutters or pliers to cut it cleanly at a 90-degree angle—this prevents fraying.
Why prepare line this way? Freshly cut ends tie more securely and reduce slippage. Thread the line through the first rod guide (the metal loop at the tip) from the bottom up, then continue through each successive guide toward the reel. Expect some fiddling with the guides, but it gets easier.
Success: Line runs smoothly through all guides without snags. This quick step (2 minutes) sets up the foundation for spooling.
💡 Tips:
- •Wear gloves if using braided line to avoid hand cuts from its sharpness.
⚠️ Warnings:
- •Never cut line with your teeth—it's unsafe and dulls the edge.
Step 4: Spool the Line onto the Reel
Open the bail on your reel by flipping the wire arm up. Tie the line end to the reel's spool using an arbor knot: wrap the line around the spool, tie an overhand knot, then pull tight and trim excess. This knot secures the line without slipping.
Close the bail and hold the rod at a 45-degree angle. Use your free hand to guide the line from the filler spool (place it on a pencil or rod holder to unwind smoothly). Turn the reel handle to spool the line on, keeping tension by pinching the line lightly—aim for 1/8 inch below the spool lip to prevent overfilling.
Why tension matters: Loose spooling causes loops and tangles during casts. Fill until about 1/4 inch from the edge. Success: Line winds evenly and tightly; no bulges. This core step takes 10-15 minutes but is meditative once started.
💡 Tips:
- •Have a helper hold the filler spool or use a line spooling station for even winding.
- •Apply line conditioner if available to make it slicker.
⚠️ Warnings:
- •Don't overfill—the line expands when wet and can jam the bail.
Step 5: Tie the Line to Your First Lure or Hook
With spooling complete, cut the line end and tie on a basic lure or hook using a clinch knot: Pass the line through the eye, wrap it 5-6 times around itself, thread back through the loop, and pull tight. Trim excess close to the knot.
This connects your setup to tackle. For beginners, start with a simple bobber and worm hook. It matters for secure connections that hold fish without breaking.
Success: Knot is snug and slides freely if needed. Takes 2 minutes; test by tugging gently.
💡 Tips:
- •Practice the clinch knot on scrap line first.
- •Use a knot-tying app for visuals if unsure.
⚠️ Warnings:
- •Wet the knot before tightening to reduce friction and prevent weakening.
Step 6: Adjust the Drag and Test the Setup
Set the drag. The drag knob (star wheel) controls line release under pressure. Turn it to release line easily by hand, then tighten until it holds about 1/3 of your line's test strength—test by pulling line off the reel.
Why adjust? Proper drag prevents line breaks on big fish. Now test: Close the bail, hold the rod, and practice casting motions over grass (no hook). Reel in smoothly without bird's nests.
Success: Line feeds evenly, drag slips correctly under pull, and no tangles. Full test: 5 minutes of casting practice confirms readiness.
💡 Tips:
- •Start with loose drag and tighten as you gain experience.
- •Cast into open water only after grass tests.
⚠️ Warnings:
- •Test drag with a scale if possible; too tight snaps line on strikes.
▸Pro Tips
- •Always spool line in the same direction as the reel's rotation to avoid twists.
- •Keep your filler spool at eye level while spooling for even tension.
- •Use monofilament for beginners—it's forgiving and stretches to absorb shocks.
- •Label your reel with purchase date to track when to replace line (every season).
- •Practice setup at home before trips to build muscle memory.
- •Invest in polarized sunglasses to see line better during tests.
- •For saltwater, rinse gear with fresh water after setup to prevent corrosion.
▸Common Mistakes to Avoid
- •Overfilling the spool: Leads to tangles; avoid by leaving 1/8-inch gap.
- •Incorrect reel orientation: Handle on wrong side causes awkward casting; check handedness before attaching.
- •Skipping tension while spooling: Creates loose loops; always pinch and guide the line.
- •Using weak knots: Line slips off; practice ties until secure.
- •Ignoring drag adjustment: Results in lost fish; test it every setup.
▸Troubleshooting
Problem: Line keeps tangling during spooling
Solution: Ensure the filler spool unwinds from the bottom (underhand) and maintain steady tension. If persistent, the line may be twisted—cut and re-spool a section.
Problem: Reel doesn't turn smoothly
Solution: Check for debris in the gears; clean with a soft cloth. If gritty, apply reel oil sparingly. For new reels, it may need breaking in—use gently first.
Problem: Drag too loose or tight
Solution: Re-adjust the star drag while pulling line steadily. Aim for slippage at 25-33% of line strength. If it sticks, the reel may need professional servicing.
Problem: Bird's nests on test casts
Solution: Bail is likely opening too soon; close it fully and use thumb pressure on the spool during casts. Re-spool if line is uneven.
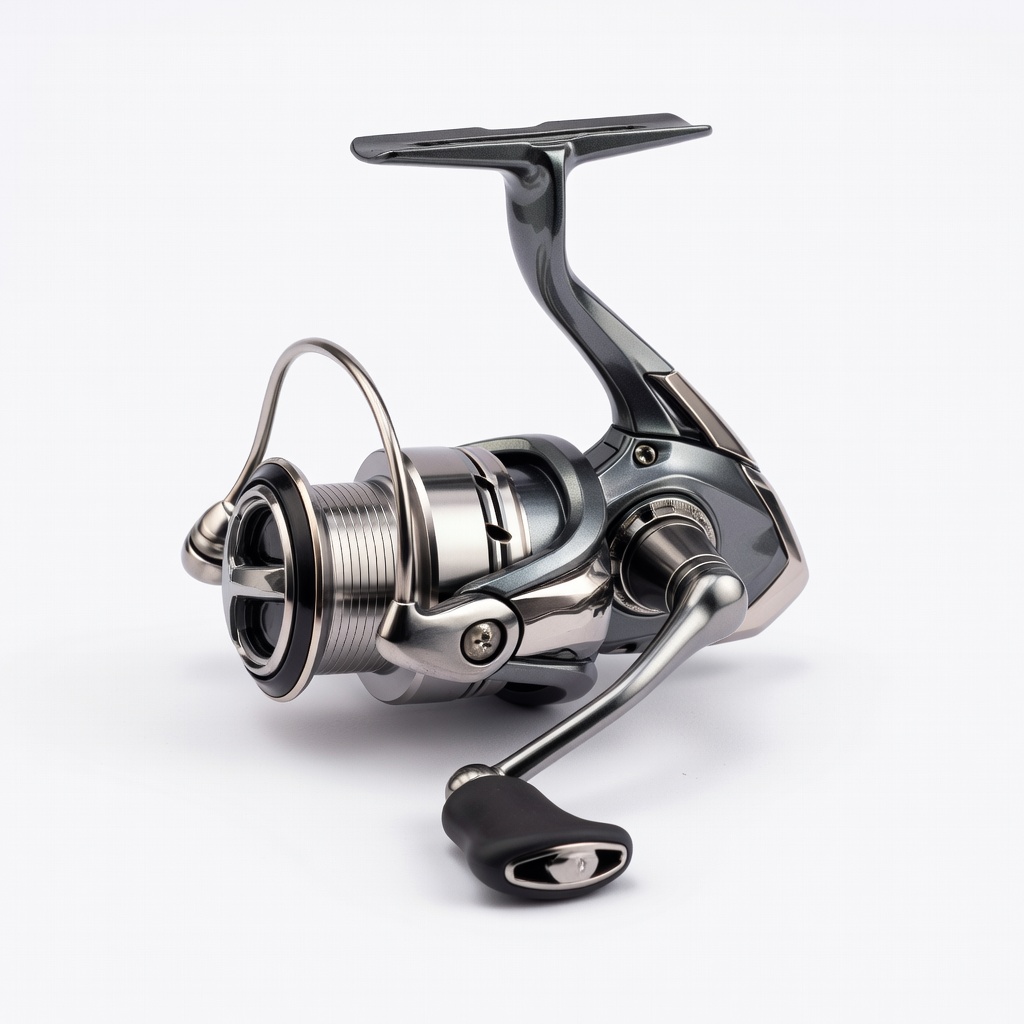
Shimano Sienna FG Spinning Reel
This reliable, affordable reel is perfect for beginners with smooth gearing and easy bail operation, reducing setup frustration.
Best for: Ideal for freshwater fishing with light lures; pairs well with 6-7 ft rods for versatile casting.
Price Range: $25-$35
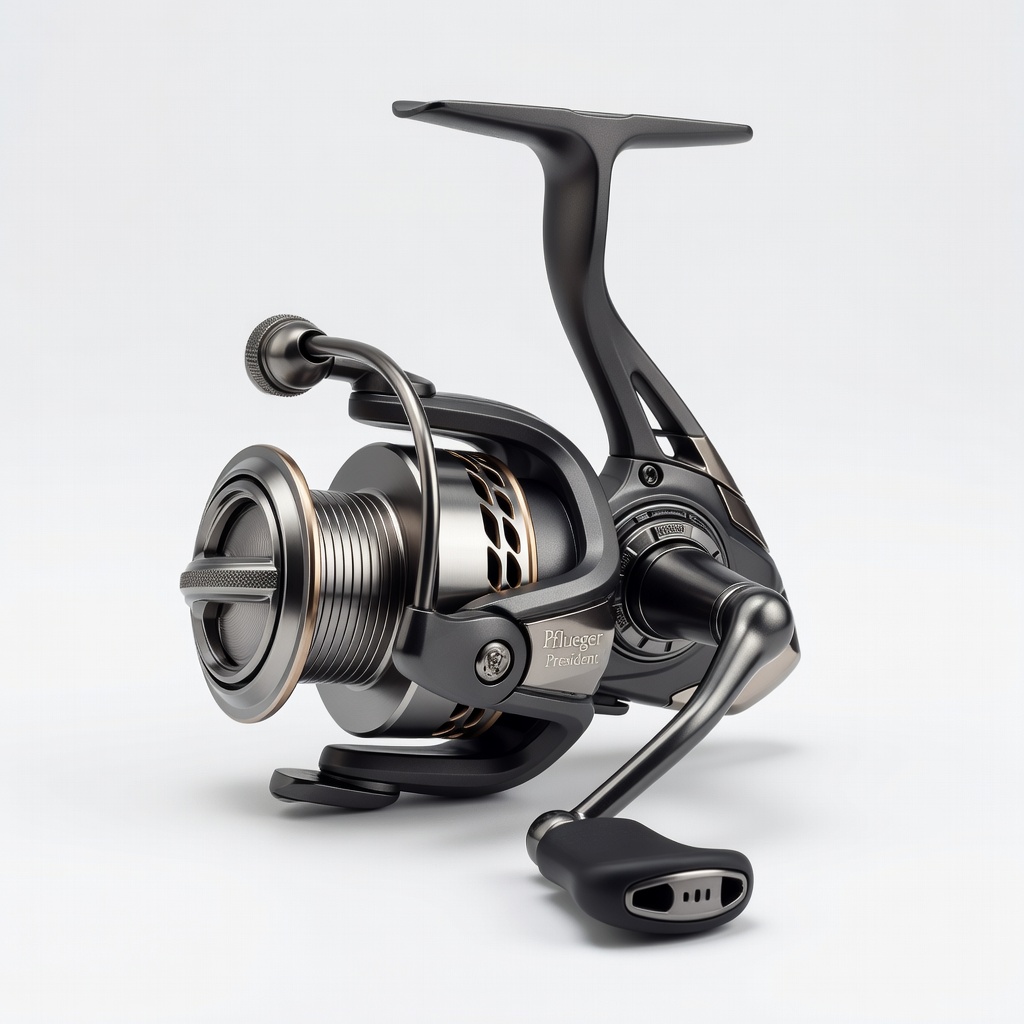
Pflueger President Spinning Reel
Features a sealed drag system for consistent performance and braid-ready spool, making line setup easier and more durable.
Best for: Great for both mono and braided lines in ponds or rivers; handles 8-12 lb test without backlash.
Price Range: $50-$70
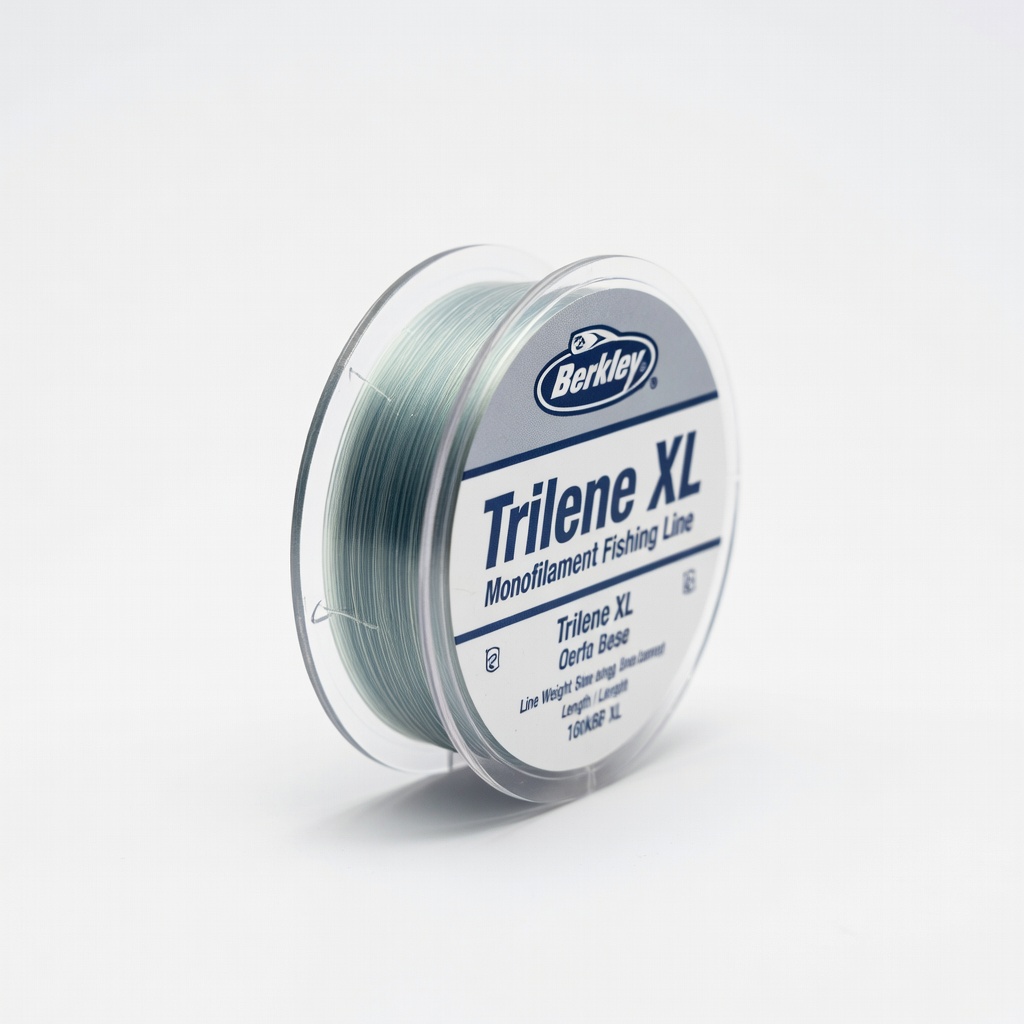
Berkley Trilene XL Monofilament Fishing Line
Smooth-casting and knot-strong, this line is beginner-favorite for its low memory, preventing twists during spooling.
Best for: Use for initial setups on spinning reels; 8-10 lb test for panfish and bass.
Price Range: $5-$10 for 300 yards
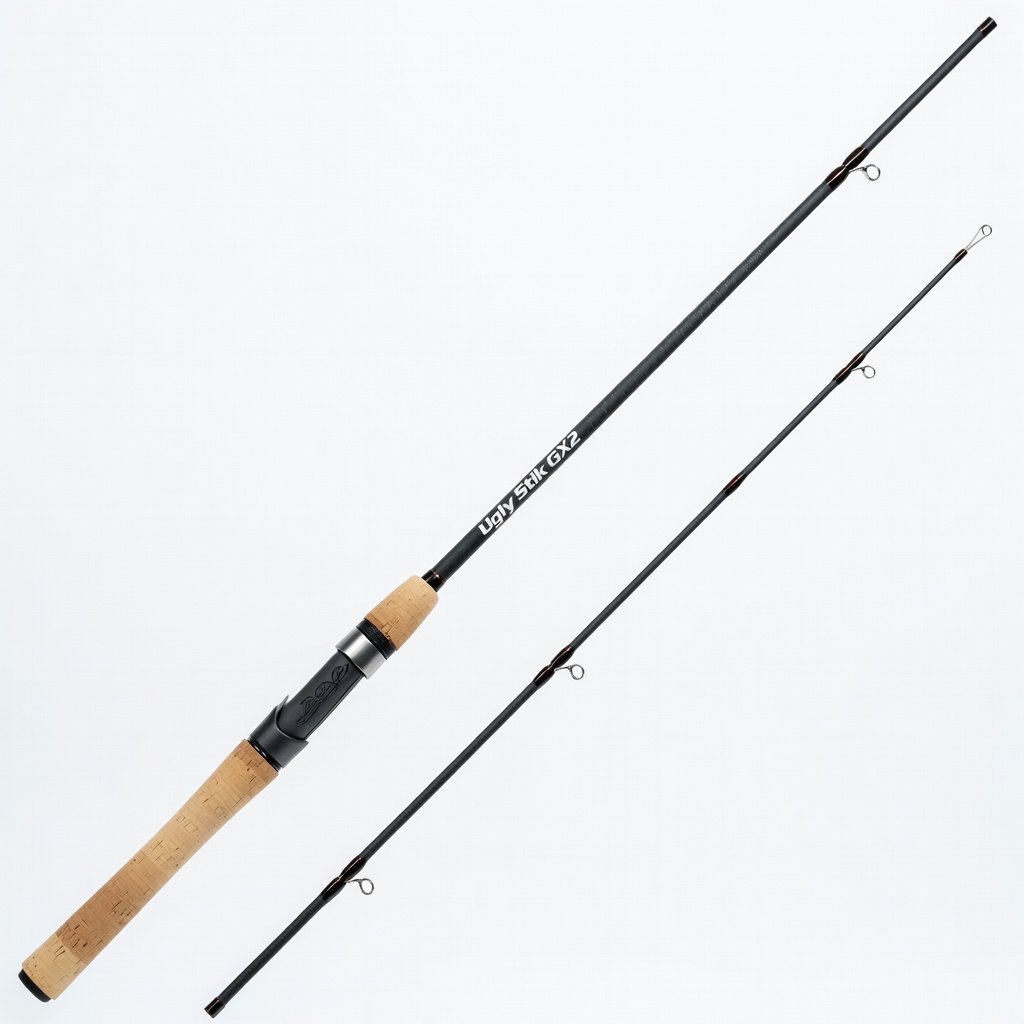
Ugly Stik GX2 Spinning Rod
Durable one-piece graphite/fiberglass construction that's forgiving for new users, ensuring stable reel attachment.
Best for: Pair with beginner reels for all-around fishing; 6'6" medium action for easy handling.
Price Range: $40-$50
Rapala Fisherman's Pliers
Spring-loaded jaws make cutting and knot-tying precise, speeding up line prep without hand strain.
Best for: Essential for trimming line ends cleanly during setup and on the water.
Price Range: $15-$20