Slipping area rugs on hardwood floors are a common household hazard, leading to trips, falls, and frustrating rearrangements. Whether you have a cozy living room runner or a large dining area rug, unsecured rugs can bunch up underfoot, pose risks to pets and kids, and even scratch your beautiful hardwood. The good news? Securing them is a simple DIY task that enhances safety and maintains your decor's polished look.
In this guide, you'll learn proven techniques like using non-slip pads and tape to anchor your rugs firmly. We'll cover everything from preparation to testing, so you can achieve a stable setup in under an hour. No advanced tools or skills required—just follow these steps for long-lasting results that protect your floors and family.
Expect a straightforward process that's ideal for beginners, taking about 30-45 minutes depending on rug size. By the end, your rugs will stay put, giving you peace of mind and a more inviting space.
▸What You'll Need
- •Non-slip rug pad (felt or rubber, cut-to-fit for your rug size; required for primary method)
- •Double-sided carpet tape or rug grip tape (optional, for edges or small rugs)
- •Utility knife or scissors (for cutting pad or tape)
- •Measuring tape (to ensure proper fit)
- •Vacuum or broom (for cleaning)
- •Furniture sliders or grippers (optional, if moving heavy furniture)
Estimated Time: 30-45 minutes
Difficulty: beginner
▸Step-by-Step Instructions
Step 1: Assess Your Rug and Floor
Before starting, evaluate the size, material, and condition of your area rug and the hardwood floor beneath it. Measure the rug's dimensions to determine how much rug pad or tape you'll need—add 1-2 inches around the edges for full coverage. Check for any damage on the floor, like scratches or uneven spots, as these can affect adhesion.
This step matters because proper sizing ensures even support and prevents bubbling or shifting. Expect to spend 5 minutes here; success looks like accurate measurements noted down and a clear workspace.
Tip: If your rug is antique or delicate, opt for a soft felt pad to avoid residue buildup.
💡 Tips:
- •Sketch a quick diagram of your room layout to visualize placement.
⚠️ Warnings:
- •Avoid securing rugs over recently waxed floors, as it can reduce grip.
Step 2: Clean the Surfaces Thoroughly
Remove the rug from the floor and vacuum both the underside of the rug and the hardwood surface to eliminate dust, dirt, and debris. Use a damp cloth with mild soap for the floor if needed, then dry completely—moisture can weaken adhesives.
Cleaning is crucial for maximum grip; particles create slippery barriers. You'll know it's done when surfaces are spotless and dry, taking about 10 minutes. This prevents long-term issues like trapped dirt damaging your wood.
For hardwood, avoid harsh chemicals that could strip finish.
💡 Tips:
- •Use a soft-bristle brush attachment on your vacuum for the rug's backing.
⚠️ Warnings:
- •Don't use steam cleaners, as they can warp hardwood.
Step 3: Choose and Prepare Your Securing Method
Decide on your approach: non-slip rug pads are best for most rugs (breathable and protective), while tape works for temporary fixes or lightweight rugs. If using a pad, unroll it and let it flatten for 10-15 minutes. For tape, cut strips to fit the rug's perimeter.
Selecting the right method ensures compatibility—pads protect floors from scratches, unlike some tapes. Success here means materials ready and matched to your needs, preventing future adjustments.
Pro Insight: Pads are reusable and easier for beginners than permanent adhesives.
💡 Tips:
- •Test a small tape piece on your floor's edge to check for residue.
⚠️ Warnings:
- •Skip silicone sprays; they can make floors slicker over time.
Step 4: Cut the Rug Pad to Size
Lay the rug pad on the floor in the rug's intended spot and trace the rug's outline with a marker, adding extra for overlap. Use a utility knife to cut along the lines on a protected surface—go slow for straight edges.
Precise cutting prevents overhangs that could cause tripping. Expect clean cuts without fraying; this takes 5-10 minutes and ensures full, even coverage under the rug.
Why it matters: Ill-fitting pads shift easily, defeating the purpose.
💡 Tips:
- •Cut on a cardboard surface to avoid scratching your work area.
⚠️ Warnings:
- •Don't force cuts on thick pads; use sharp blades to prevent tearing.
Step 5: Apply the Rug Pad Under the Rug
Position the cut pad on the clean floor, ensuring it's centered and flat with no wrinkles. Gently place the rug on top, starting from one corner and smoothing it out as you go to align edges perfectly.
This secures the base layer, distributing weight evenly for stability. Success is a smooth, bubble-free setup—walk across to check for movement before finalizing.
Pads grip via friction, protecting hardwood from wear while keeping rugs in place.
💡 Tips:
- •Enlist a helper for large rugs to avoid misalignment.
⚠️ Warnings:
- •Avoid dragging the rug; lift it to prevent floor scratches.
Step 6: Secure Edges with Tape if Needed
For high-traffic areas or thin rugs, apply double-sided tape strips along the edges or in a grid pattern under the rug. Press firmly for 30 seconds per strip to activate adhesion.
Tape adds extra hold where pads might not suffice, like on glossy finishes. Expect no visible tape after placement; test by tugging gently—no slipping means it's secure.
Use sparingly to avoid floor damage upon removal.
💡 Tips:
- •Apply tape in a zigzag for better distribution on uneven rugs.
⚠️ Warnings:
- •Choose low-residue tape to prevent sticky floors later.
Step 7: Position Furniture and Test Stability
Arrange furniture legs over rug edges to weigh it down naturally. Walk, pivot, and slide furniture lightly to test for slippage—adjust pad or tape as needed.
Furniture anchors provide passive security; a stable rug that doesn't bunch is your goal. This final check, about 5 minutes, confirms safety and prevents accidents.
Real-World Note: Re-test after a week, as settling can reveal minor shifts.
💡 Tips:
- •Use grippers under furniture legs for extra hold without marks.
⚠️ Warnings:
- •Don't overload one spot; distribute weight evenly.
▸Pro Tips
- •Opt for natural rubber pads if you have allergies; they're hypoallergenic and eco-friendly.
- •For patterned rugs, align the pad so it doesn't show if the rug shifts slightly.
- •Vacuum under the rug monthly to maintain grip—dust buildup reduces effectiveness.
- •In humid rooms, choose moisture-resistant pads to prevent mold.
- •Save time by buying pre-cut pads for standard sizes like 8x10 feet.
- •Layer thin pads for ultra-plush rugs to avoid compressing the backing.
- •Use a hairdryer on low heat to soften tape for easier application in cold weather.
▸Common Mistakes to Avoid
- •Skipping cleaning: Dirt trapped under the rug reduces adhesion and causes premature wear—always vacuum first.
- •Using the wrong pad type: Felt for low-pile rugs, rubber for high-traffic; mismatch leads to slipping—match to your rug's needs.
- •Over-tightening tape: Pulling too hard can stretch the rug or damage fibers—apply gently and let it set.
- •Ignoring room traffic: Securing lightly in busy areas fails quickly—reinforce high-use spots with extra tape.
- •Not testing after setup: Rugs may shift initially—walk on it immediately to catch issues.
▸Troubleshooting
Problem: Rug still slips after securing
Solution: Add more tape in high-movement areas or switch to a thicker pad; ensure surfaces were fully dry before application. If persistent, check for floor wax residue and clean with vinegar solution.
Problem: Pad bunches or wrinkles
Solution: Smooth it out from the center outward while placing the rug; use a heavy book to weigh it down for 24 hours. Trim excess if it's oversized.
Problem: Tape leaves residue on hardwood
Solution: Use rubbing alcohol on a soft cloth to gently remove; for prevention, choose branded low-tack tape. Seek pro cleaning if damage occurs.
Problem: Rug edges curl up
Solution: Place heavy furniture along edges or add edge tape; for persistent curl, steam the rug lightly to relax fibers before securing.
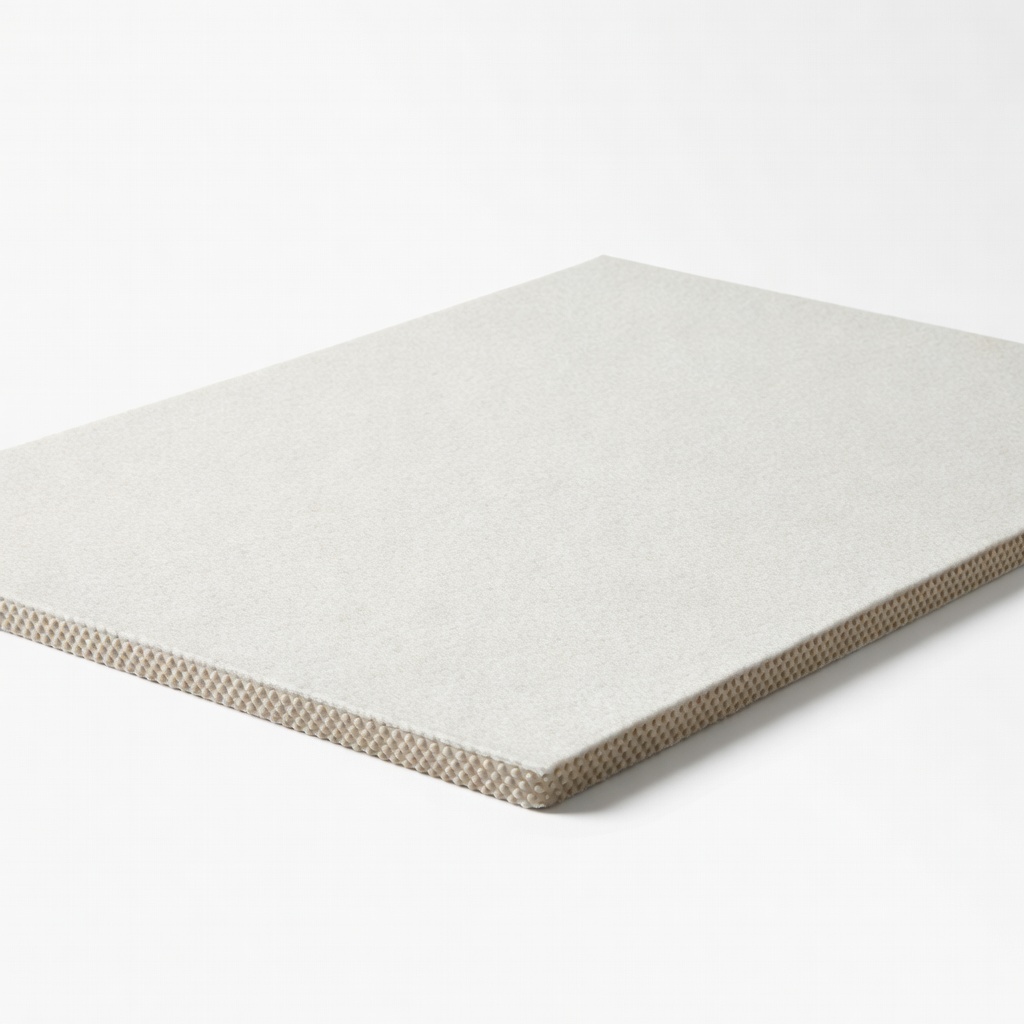
Mohawk Home Non-Slip Rug Pad
This felt-backed pad provides excellent grip without damaging hardwood, breathable to prevent moisture buildup.
Best for: Ideal for medium to large area rugs in living rooms; cut-to-fit for custom sizing.
Price Range: $20-50 (depending on size)
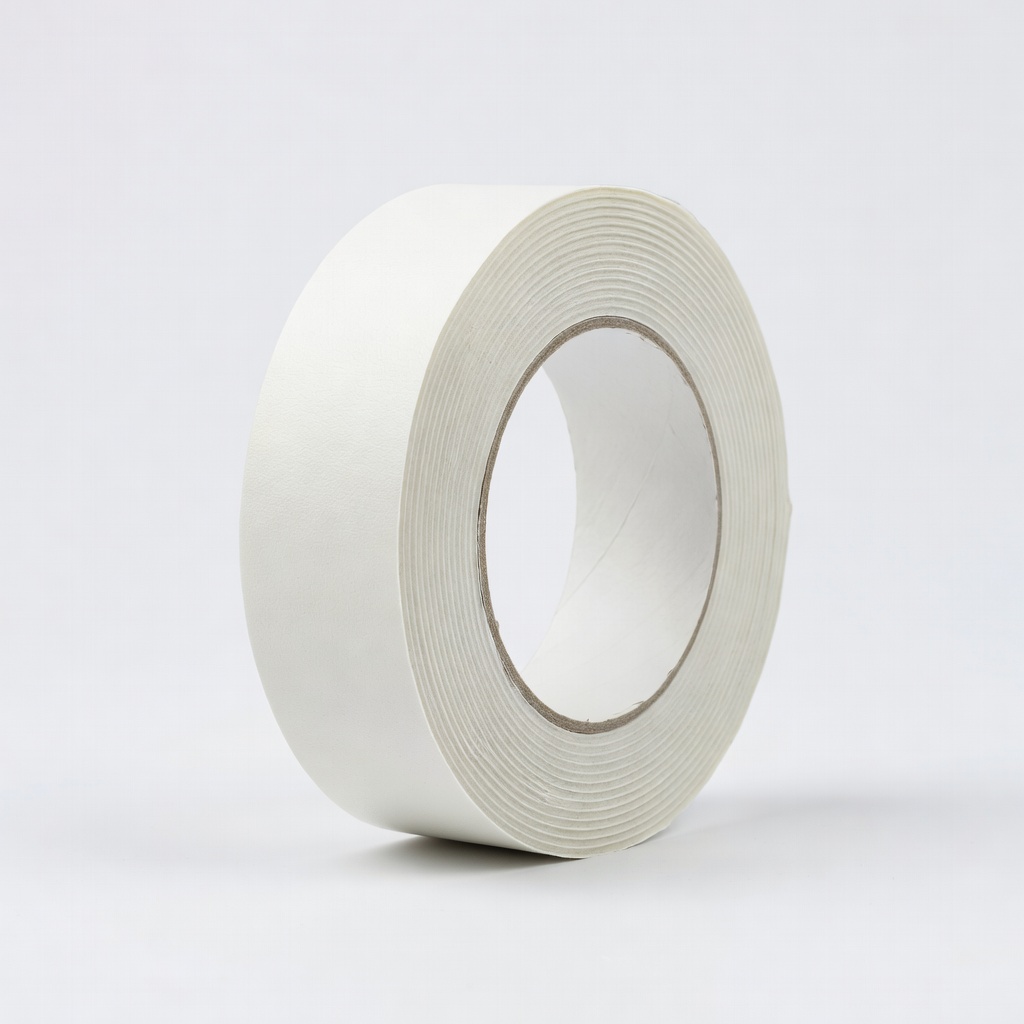
RugGrip Double-Sided Carpet Tape
Strong yet removable adhesive secures edges without residue, perfect for temporary or lightweight rugs.
Best for: High-traffic hallways or runners where pads alone aren't enough.
Price Range: $10-15 per roll
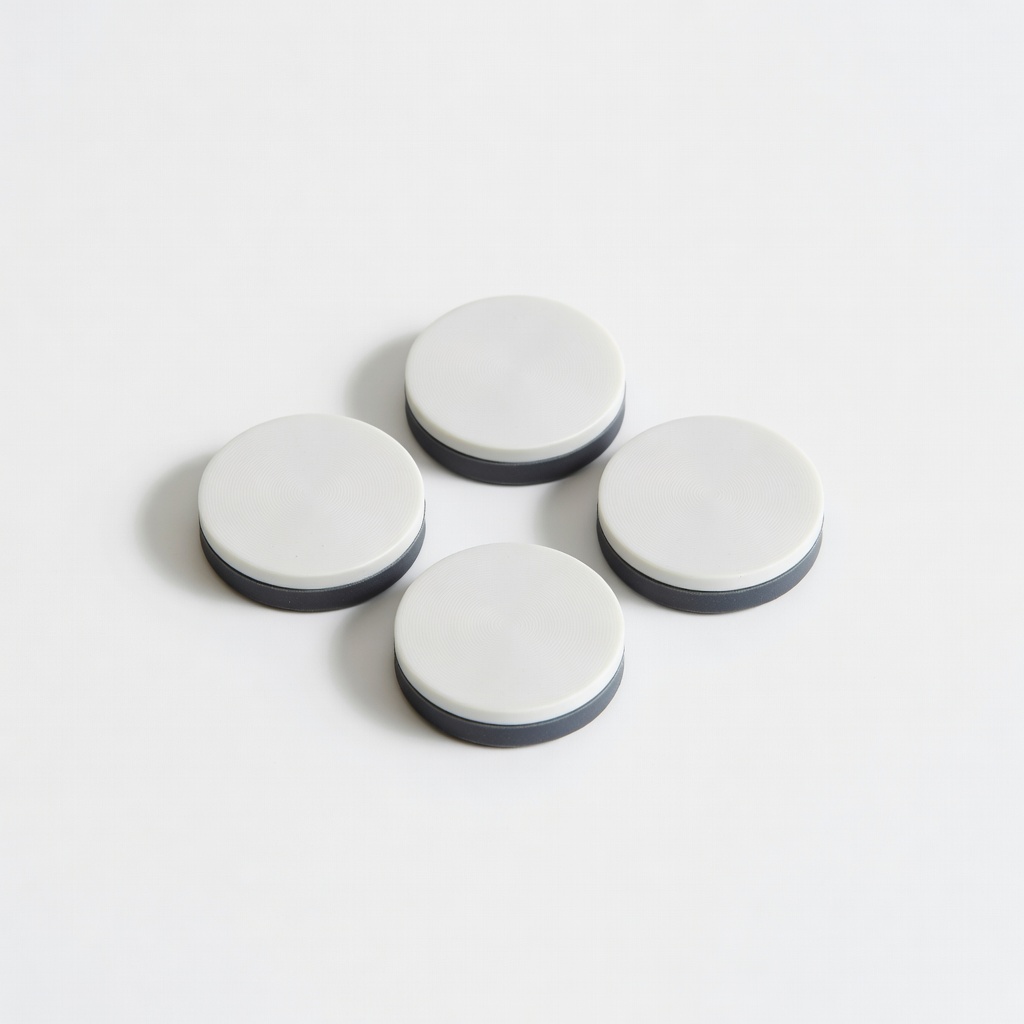
Slip STOP Furniture Grippers
These prevent furniture from sliding on rugs, adding stability without tools.
Best for: When repositioning chairs or tables over secured rugs; great for dining areas.
Price Range: $8-12 for a set of 8
Amazon Basics Rubber Rug Pad
Affordable, durable option with superior traction for glossy hardwoods; non-slip on both sides.
Best for: Budget-friendly choice for beginners with multiple rugs.
Price Range: $15-30
3M Scotch Removable Double-Sided Tape
Reliable brand with clean removal, avoiding floor damage common in cheap tapes.
Best for: Small rugs or quick fixes in rentals where permanence isn't desired.
Price Range: $5-10