Antique clocks are more than just functional items; they're heirlooms that tell stories of craftsmanship from bygone eras. However, dust, wear, and time can leave them silent and stalled, frustrating collectors who want to enjoy their tick without paying steep professional fees. Restoring them at home not only reignites their mechanical heart but also deepens your appreciation for horology.
In this guide, you'll learn a comprehensive, step-by-step process tailored for advanced enthusiasts with some mechanical experience. We'll cover disassembly, cleaning, repair, lubrication, and reassembly, focusing on safety and precision to avoid damaging delicate components. By the end, your clock will run smoothly, potentially increasing its value.
Expect this project to be rewarding but demanding—it's not for beginners. With patience and the right tools, you can achieve museum-quality results over several sessions.
▸What You'll Need
- •Precision screwdriver set (required for disassembly)
- •Clock cleaning solution, like naphtha or specialized clock cleaner (required)
- •High-quality clock oil, such as synthetic Moebius 8030 (required for lubrication)
- •Ultrasonic cleaner or soft brushes and pegwood (optional but recommended for thorough cleaning)
- •Tweezers and rodico for handling small parts (required)
- •Magnifying loupe or headset (required for detailed work)
- •Replacement parts like mainsprings or jewels if needed (optional, source from clock suppliers)
- •Soft cloth and compressed air (required for final polishing)
Estimated Time: 10-20 hours over several days
Difficulty: advanced
▸Step-by-Step Instructions
Step 1: Assess the Clock's Condition
Begin by thoroughly examining your antique clock to identify issues like rust, broken gears, or seized mechanisms. Remove the clock from its case if possible, and note the type—whether it's a mantel, wall, or grandfather clock—as restoration varies slightly. Use a magnifying loupe to inspect pivots, springs, and escapements for wear.
This step is crucial because it informs your approach and prevents surprises during disassembly. Document everything with photos from multiple angles; success here looks like a clear list of problems and a decision on whether full restoration is feasible or if professional help is needed.
Expect to spend 30-60 minutes here, building confidence in the project's scope.
💡 Tips:
- •Take timestamped photos for reference during reassembly.
- •Check online forums like NAWCC for model-specific issues.
⚠️ Warnings:
- •Avoid forcing any parts; if it's overly damaged, consult an expert to prevent irreversible harm.
Step 2: Disassemble the Movement
Carefully take apart the clock's movement using precision screwdrivers and tweezers. Start with the dial and hands, then remove bridges and plates systematically, labeling or photographing each step. Place small parts in a divided tray to avoid loss.
Disassembly matters because it allows access for cleaning and repair without risking damage to the whole unit. Success is evident when all components are separated cleanly, with no bent pins or stripped screws—your workspace should be organized and dust-free.
This can take 2-4 hours; work in good lighting to spot fine details.
💡 Tips:
- •Use a movement holder to secure the plate while unscrewing.
- •Number parts with non-permanent marker for easy reassembly.
⚠️ Warnings:
- •Never use pliers on delicate brass; opt for proper tools to avoid scratches.
Step 3: Clean the Components
Soak non-ferrous parts (like brass wheels) in clock cleaning solution for 10-15 minutes, then rinse and dry. For intricate pieces, use an ultrasonic cleaner if available, followed by pegwood to remove stubborn dirt from pivots. Avoid soaking mainsprings or painted dials.
Cleaning restores smooth operation by eliminating grime that causes friction and inaccuracy. At this stage, parts should gleam without residue, spinning freely when tested by hand— a sign of successful decontamination.
Allocate 3-5 hours, allowing drying time overnight for best results.
💡 Tips:
- •Rinse with isopropyl alcohol for quick evaporation.
- •Buff with a soft cloth for a polished finish.
⚠️ Warnings:
- •Steer clear of water-based cleaners; they can cause corrosion on metal parts.
Step 4: Repair Damaged Parts
Inspect for bent pivots, worn bushings, or fatigued mainsprings. Straighten minor bends with pliers, replace jewels if cracked, and burnish pivots for smoothness. For advanced repairs like repivoting, use specialized tools or source parts.
Repairs ensure longevity and accuracy; without them, the clock won't keep time reliably. Success means all parts function as intended—gears mesh without binding, and the spring winds evenly.
This step might take 2-4 hours, depending on damage extent.
💡 Tips:
- •Test-fit parts dry before full repair to verify compatibility.
- •Consult repair manuals for your clock's era-specific techniques.
⚠️ Warnings:
- •If the mainspring is fractured, don't attempt DIY replacement—risk of injury from stored energy.
Step 5: Lubricate the Movement
Apply tiny drops of clock oil to pivots, escapement, and pallet jewels using an oiler. Use grease sparingly on the mainspring arbor. Ensure even distribution without excess, which can attract dust.
Proper lubrication reduces friction for quiet, accurate running. After this, manually advance the gears; they should move with minimal resistance, indicating optimal oiling.
Spend 1-2 hours here, working methodically.
💡 Tips:
- •Use a watchmaker's oiler for precision drops.
- •Re-oil every 3-5 years post-restoration for maintenance.
⚠️ Warnings:
- •Over-oiling leads to gumming; less is more with synthetics.
Step 6: Reassemble the Clock
Reverse the disassembly process: install plates, bridges, and gears in order, securing with screws. Align the escapement precisely and fit the hands last. Test the winding mechanism as you go.
Reassembly integrates all cleaned and repaired elements into a cohesive unit. Success is a fully assembled movement that ticks steadily when powered.
This takes 2-3 hours; patience prevents misalignment.
💡 Tips:
- •Use rodico to pick up and place tiny screws accurately.
- •Check for binding at each assembly stage.
⚠️ Warnings:
- •Torque screws evenly to avoid warping plates.
Step 7: Test and Regulate
Wind the clock and observe its run over 24 hours, noting accuracy against a reference timepiece. Adjust the beat rate or regulator if needed for synchronization.
Testing confirms the restoration's effectiveness; the clock should keep time within seconds per day. Fine-tune iteratively for precision.
Allow 1-2 days for observation.
💡 Tips:
- •Hang the clock vertically if it's a wall model for accurate testing.
- •Record timings at intervals for data-driven adjustments.
⚠️ Warnings:
- •If it stops frequently, recheck for overlooked debris.
▸Pro Tips
- •Work in a static-free environment to protect sensitive electronics in modern-antique hybrids.
- •Invest in a parts tray with magnetic dividers for foolproof organization.
- •Practice on a inexpensive donor clock to hone skills before tackling valuables.
- •Use mineral spirits for initial degreasing, but switch to specialized cleaners for finals.
- •Store restored clocks away from direct sunlight to prevent case fading.
- •Join online communities like the National Association of Watch and Clock Collectors for advice.
- •After reassembly, run the clock for a week before final casing to catch issues early.
▸Common Mistakes to Avoid
- •Rushing disassembly, leading to lost or damaged parts—always document thoroughly to avoid this.
- •Using household oils instead of clock-specific lubricants, which gum up over time—stick to synthetics for longevity.
- •Ignoring case restoration, making the clock look mismatched—clean and polish the exterior too for cohesive results.
- •Over-tightening screws, warping delicate plates—use finger-tight plus a quarter turn max.
- •Skipping regulation, resulting in inaccurate time—always test extensively post-restoration.
▸Troubleshooting
Problem: Clock runs fast or slow
Solution: Adjust the regulator arm slightly or check escapement alignment; if persistent, re-lubricate pivots.
Problem: Mechanism binds or stops
Solution: Disassemble and clean for hidden debris; inspect gears for misalignment and realign as needed.
Problem: Hands won't move freely
Solution: Ensure cannon pinion is properly seated; if bent, gently straighten or replace.
Problem: Case won't close properly
Solution: Check for swollen wood or bent hinges; sand lightly or seek a woodworker for repairs.
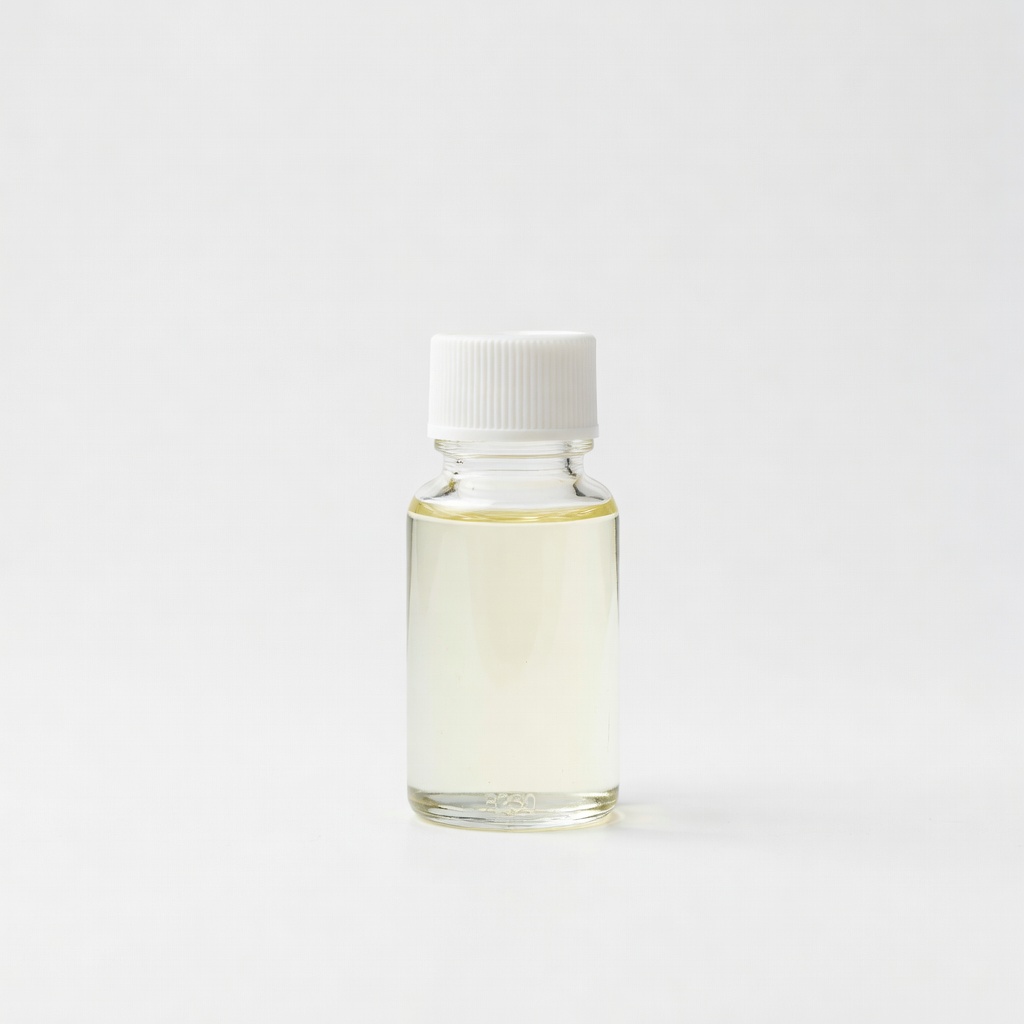
Moebius 8030 Synthetic Clock Oil
This high-quality, non-gumming oil is essential for precise lubrication of pivots and escapements, ensuring smooth, long-lasting operation.
Best for: Apply during reassembly to all bearing surfaces in the movement.
Price Range: $14.99
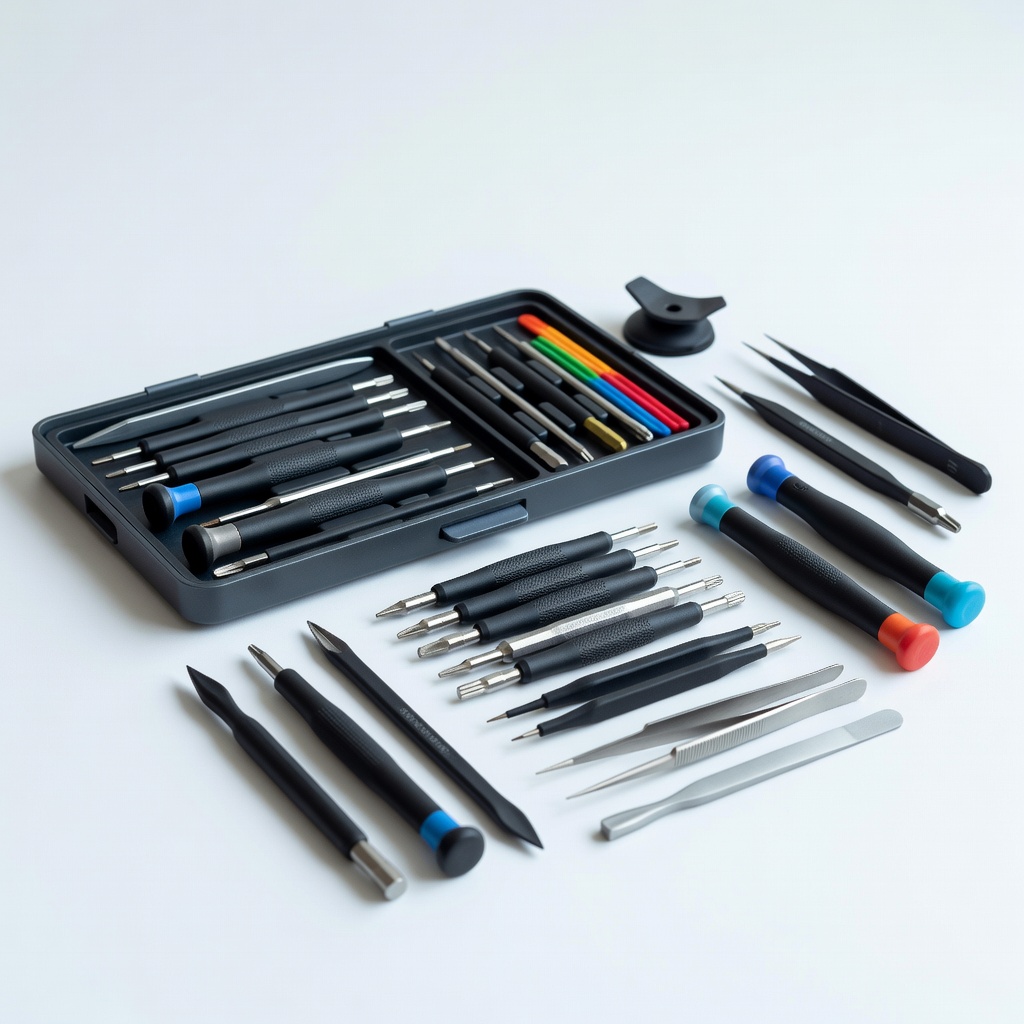
iFixit Pro Tech Toolkit
Features precision drivers and tweezers ideal for delicate clock disassembly without stripping screws.
Best for: Use for removing and reinstalling tiny brass screws in the movement.
Price Range: $29.99-$49.99
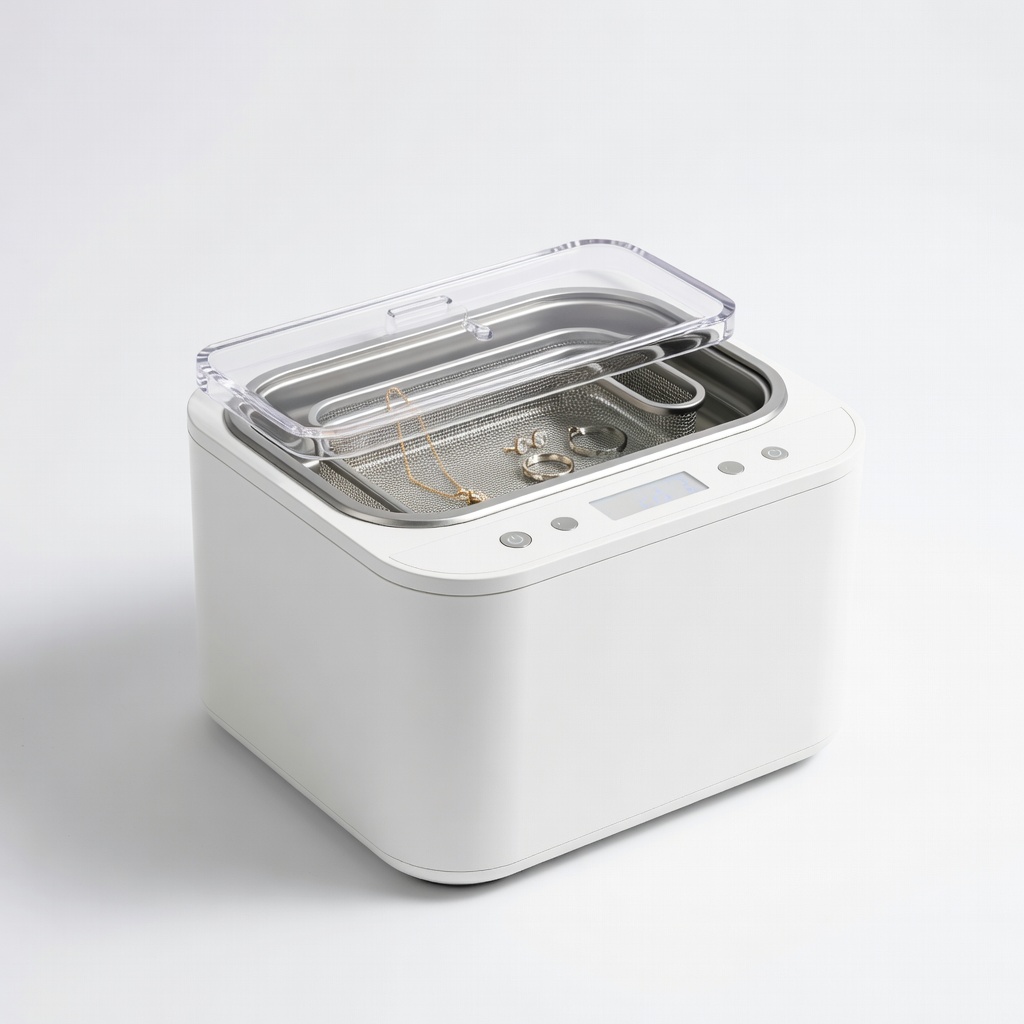
Magnasonic Professional Ultrasonic Jewelry Cleaner
Effectively cleans intricate clock parts without manual scrubbing, removing decades of grime safely.
Best for: Soak and clean brass wheels and plates in the solution for 5-10 minutes.
Price Range: $49.99
Bergeon Pegwood Sticks
Soft wooden sticks perfect for polishing pivots and removing debris without scratching metal.
Best for: After cleaning, use graded sizes to hone pivot holes and surfaces.
Price Range: $8.99
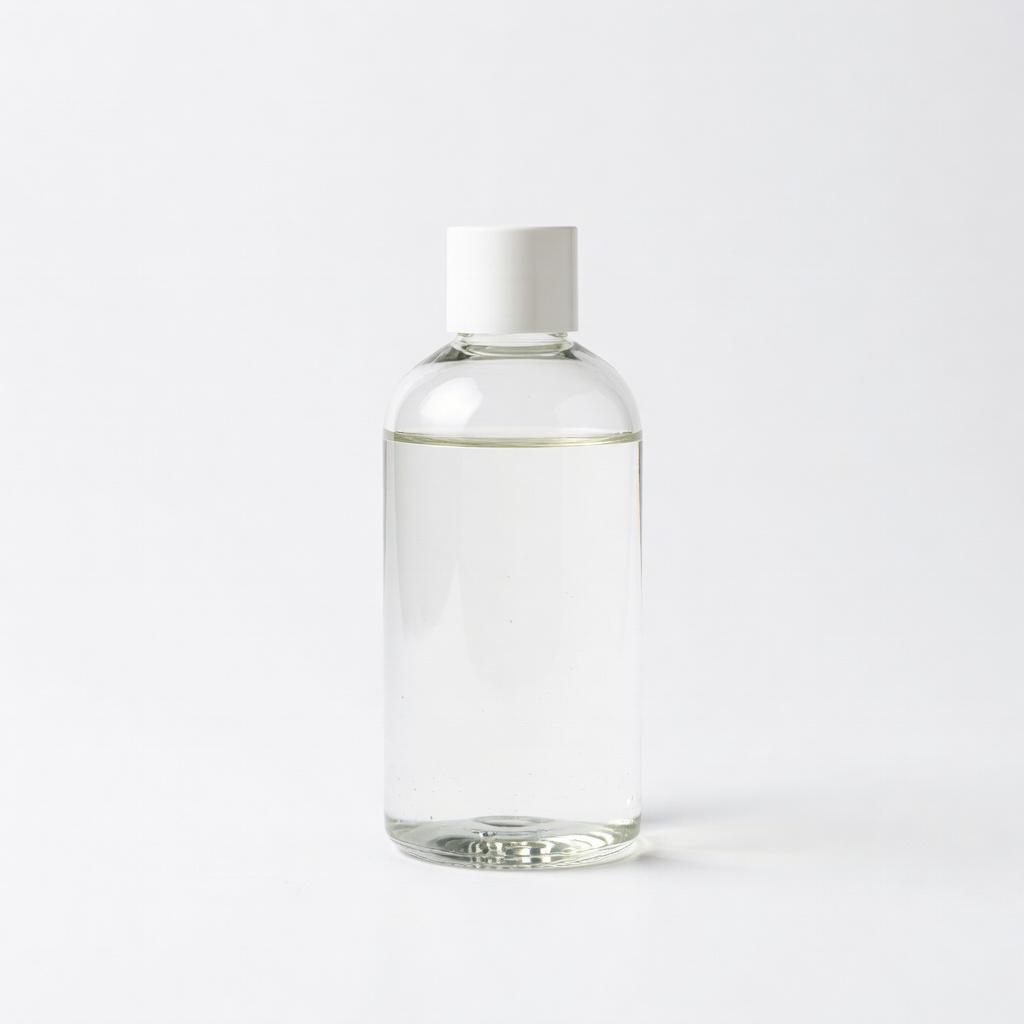
L&R Clock Cleaning Solution
Specialized formula safe for antique metals, dissolving oils and dirt without residue.
Best for: Soak non-magnetic parts briefly before rinsing for thorough decontamination.
Price Range: $19.99