A kitchen faucet endures constant use—turning, pulling, and spraying—which makes it one of the most likely fixtures to wear out, leak, or simply become outdated. Replacing it might sound like a job for a professional, but with the right guidance and a few basic tools, you can do it yourself and save on labor costs.
This step-by-step guide walks you through the entire process from shutting off the water supply to testing your new faucet for leaks. You'll learn what tools to gather, how to remove the old faucet safely, and the proper way to connect the new one. Expect to spend 1–2 hours total, and you'll end up with a fresh look and a properly functioning fixture.
We've broken the job into 9 clear stages so you can complete each step with confidence. Along the way, you'll find tips to avoid common mistakes, troubleshooting advice, and product recommendations to make the job easier. Let's get started.
▸What You'll Need
- •New kitchen faucet (with mounting hardware and gasket)
- •Deck plate or escutcheon (if needed to cover extra holes)
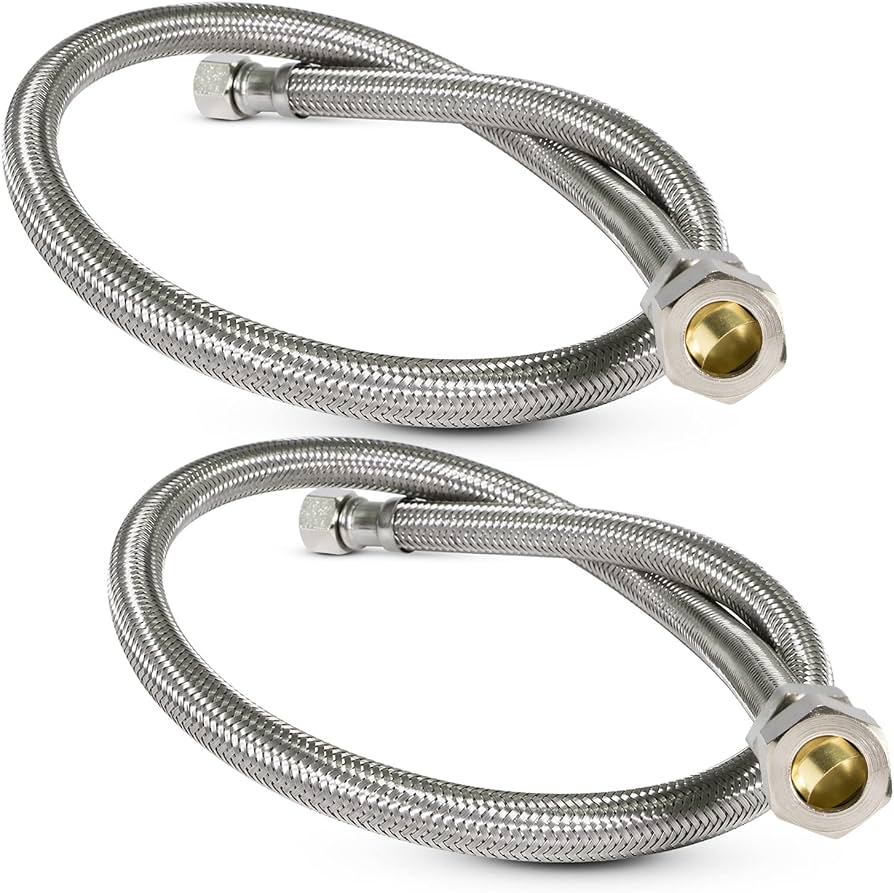
- •Flexible supply lines (if not included with faucet)
- •Adjustable wrench (2
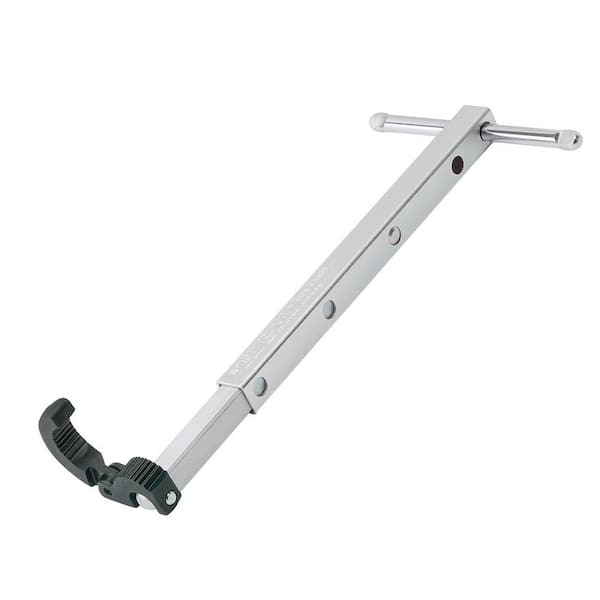
- •Basin wrench (essential for reaching mounting nuts)
- •Plumber's tape (PTFE tape)
- •Plumber's putty or silicone caulk (optional, for watertight base)
- •Bucket and old towels
- •Flathead and Phillips screwdrivers
- •Flashlight (for under-sink visibility)
- •Safety goggles
Estimated Time: 1–2 hours
Difficulty: beginner
▸Step-by-Step Instructions
Step 1: Shut Off the Water Supply
Locate the shut-off valves under the sink. On most homes, there are two valves—one for hot water (usually on the left) and one for cold (usually on the right). Turn each valve clockwise until fully closed. If you don't have local shut-off valves, you'll need to turn off the main water supply to your home.
Once the valves are closed, open the faucet handles for a few seconds to release any remaining water pressure. Leave the faucet open while you work so air can enter the line and allow water to drain.
💡 Tips:
- •Label the hot and cold valves with tape so you reconnect the supply lines correctly.
- •If a valve is stiff, grip it with pliers but be gentle to avoid breaking the stem.
⚠️ Warnings:
- •Never start removing the faucet without verifying the water is shut off—turn the handle to confirm no water comes out.
Step 2: Disconnect the Supply Lines and Drain the Faucet
Place a bucket and towels under the supply line connections. Use an adjustable wrench to disconnect the supply lines from the faucet tailpieces. Some supply lines are attached directly to the shut-off valves; others connect to the faucet first. If your faucet has a sprayer, disconnect its hose as well.
After the lines are disconnected, allow any remaining water to drain into the bucket. If you're replacing the faucet completely, you can also disconnect the supply lines from the shut-off valve side to get them out of the way. Keep the bucket close because residual water can be more than you expect.
💡 Tips:
- •Take a photo of the existing setup before removing anything—it's a lifesaver during reassembly.
- •Remove the supply lines completely and map which nut goes where.
⚠️ Warnings:
- •There will still be water in the lines behind the valve—the bucket catches it and prevents a mess.
Step 3: Remove the Old Faucet
Look under the sink to see how the faucet is held in place. Most faucets have mounting nuts that thread onto the shanks from below. A basin wrench is specifically designed to reach these awkward nuts—place its jaws around the nut and turn the handle counterclockwise. If the faucet has a base plate (escutcheon), remove its screws as well.
Once all fasteners are loosened, lift the faucet out from above. If it won't budge, gently rock it side to side while a helper pushes up from below. For stubborn nuts, apply a penetrating oil like WD-40 and wait a few minutes.
💡 Tips:
- •If the faucet seems stuck, check for a hidden set screw at the side or rear of the faucet base.
- •Use an old flathead screwdriver to pry up a tight base—place a cloth underneath to avoid scratches.
⚠️ Warnings:
- •Don't force the faucet—you can damage the sink deck. Work slowly and reassess.
Step 4: Clean and Inspect the Sink Surface
With the old faucet gone, you'll likely see old plumber's putty, silicone, or mineral deposits left inside the mounting holes and around the sink deck. Use a putty knife or a plastic scraper to remove all residue. Then wipe the area with a clean damp cloth.
Inspect the sink for cracks, rust, or damage that might have been hidden under the old faucet. If the sink is stained, clean it with a non-abrasive cleanser. Also check the mounting holes—if your new faucet has a different configuration (one vs. three holes), you'll need a deck plate to cover the unused holes.
💡 Tips:
- •Use fine steel wool or a plastic scrubber for stubborn residue, but check that it won't scratch your sink finish.
- •Thoroughly dry the area before setting the new faucet to ensure a good seal.
⚠️ Warnings:
- •Avoid harsh chemicals or abrasive pads that can damage the sink's protective coating.
Step 5: Prepare and Pre-Assemble the New Faucet
Unbox the new faucet and verify all parts are present—the body, handles, sprayer, mounting nuts, and gaskets. Most faucets come with a rubber gasket that sits underneath the base. Press it onto the faucet or place it directly on the sink deck, whichever the instructions specify.
If your faucet's supply lines are not pre-attached, screw them onto the tailpieces now. Apply two or three wraps of plumber's tape to the male threads of each connection before attaching the nuts. If the faucet uses quick-connect fittings, skip the tape and follow the manufacturer's instructions. Also, check whether a deck plate is required; if so, slide it over the tailpieces before placing the faucet.
💡 Tips:
- •Always read the manufacturer's installation manual—it may have specific tips for your model.
- •Hand-tighten all connections in this step to avoid cross-threading.
⚠️ Warnings:
- •Don't overtighten plastic or quick-connect fittings—snug is enough to create a seal.
Step 6: Install the New Faucet
Feed the supply lines and mounting bolts through the appropriate holes in the sink deck from above. If you're using plumber's putty, roll a thin snake and place it under the base—this creates a watertight seal. Once the faucet is seated, press down firmly to set the gasket or putty.
Reach underneath and hand-thread the mounting nuts or clips onto the threaded shanks. Tighten them alternately in a star pattern using a basin wrench. If your faucet uses a retaining plate or a C-clip, install it according to the instructions.
💡 Tips:
- •Align the faucet so the handles face forward (or at the desired angle) before fully tightening the mounting nuts.
- •If you're using plumber's putty, apply a thin bead around the base hole—just enough to fill the gap.
⚠️ Warnings:
- •Tighten evenly; over-tightening on one side can crack the sink or deform the gasket.
Step 7: Connect the Supply Lines
Locate the shut-off valves under the sink. Connect the supply lines to the corresponding hot and cold valves. Most flexible supply lines have a 3/8-inch compression fitting that hand-tightens onto the valve thread. After hand-tightening, use an adjustable wrench to give an additional quarter turn. If you attached supply lines to the faucet tailpieces earlier, now connect the other ends to the valves.
Double-check that you've matched hot to hot (usually left) and cold to cold (right). If the lines are too long, loop them neatly; too short, consider extension lines.
💡 Tips:
- •Look inside the nut before connecting—rubber washers should be present and seated correctly.
- •Hold the valve body with one wrench while tightening the nut with the other to avoid twisting the pipe.
⚠️ Warnings:
- •Cross-threading the nut is a common mistake—start by hand to ensure the threads align.
Step 8: Turn On the Water and Check for Leaks
Open both shut-off valves slowly—first cold, then hot. You may hear air escaping as the lines pressurize. Immediately inspect all connections: where the supply lines meet the valves, where they meet the faucet, the base of the faucet, and any sprayer connection. Use a dry paper towel to dab around each joint; any moisture indicates a leak.
If you find a leak, tighten the connection slightly. If the leak persists, you may need to disconnect and reseat the washer or apply more plumber's tape. Keep the water on for a few minutes and check again after 10–15 minutes.
💡 Tips:
- •Place a dry towel under the sink while you test—it will show any drips clearly.
- •Turn the water on slowly to avoid a sudden surge that dislodges fittings.
⚠️ Warnings:
- •Don't leave the house or go to bed until you're confident there are no leaks—even a small drip can damage cabinets.
Step 9: Flush and Test the Faucet
With the water on, run both hot and cold water for a minute or two to flush out any debris that may have entered the lines during installation. If the water looks milky or sputters, it's just trapped air—allow it to run until clear.
Test the faucet's full range of functions, including the sprayer and any pull-down features. Confirm the water pressure is normal and the handles turn smoothly. Finish by wiping down the faucet and the surrounding sink area.
💡 Tips:
- •Check under the sink again while the water is running to make sure no connections have loosened.
- •If you used plumber's putty, wipe away any excess that seeps out with a damp cloth.
⚠️ Warnings:
- •Don't remove the aerator or flow restrictor—it's meant to regulate pressure and minimize splashing.
▸Pro Tips
- •Invest in a quality basin wrench—it’s the difference between a 15-minute removal and a frustrating hour.
- •Take photos of the under-sink plumbing before you disconnect anything; they’re invaluable during reassembly.
- •Replace the shut-off valves while you have access if they’re old or show signs of corrosion—it’s a cheap upgrade.
- •Clean the sink deck thoroughly before installation to ensure a watertight seal and a clean final look.
- •Wrap plumber’s tape in the direction of the threads so it doesn’t unravel when you screw on the nut.
- •Keep a bucket and towels under the area before opening any connections—water will come out eventually.
- •If your faucet is heavy, ask a helper to support it from below while you tighten the mounting nuts.
- •Always test for leaks with a dry paper towel immediately after turning on the water, and again after 15 minutes.
▸Common Mistakes to Avoid
- •Forgetting to shut off the water supply—this causes a flood and possible water damage. Always double-check.
- •Skipping the basin wrench—regular pliers often can't reach the nuts and can strip them.
- •Overtightening connections—cracks can form in the fittings or the sink deck. Tighten just until snug.
- •Cross-threading the supply lines—this creates a permanent leak and ruins the nut. Always start by hand.
- •Reusing old, corroded supply lines—they may leak and compromise your new faucet. Replace them for reliability.
▸Troubleshooting
Problem: Faucet leaks from the base during use.
Solution: Shut off water, remove the faucet, and reinstall with a fresh gasket or a new bead of plumber's putty. Make sure the base sits flat on the sink deck.
Problem: Water won't shut off at the shut-off valve.
Solution: Turn off the main water supply. The valve is likely worn or corroded and needs to be replaced.
Problem: Supply line is too short to reach the valve.
Solution: Purchase a longer braided supply line. Extension lines are also available, but ideally route a single line to avoid extra connections.
Problem: Sprayer won't retract back into the faucet head.
Solution: Check the sprayer hose for kinks or a misaligned retraction weight. Adjust the weight on the hose to ensure it pulls smoothly.
Problem: Water pressure is noticeably low.
Solution: Remove the aerator and clean out debris. Also make sure the shut-off valves are fully open.
RIDGID Model 570 Basin Wrench
Reaching mounting nuts under the sink is nearly impossible with a standard wrench. This basin wrench has a long handle and a swivel head that grabs the nut from an awkward angle.
Best for: When removing the old faucet and tightening the new one's mounting nuts.
Price Range: $25–$35
Delta Faucet Braided Stainless Steel Supply Lines
These corrosion-resistant supply lines are flexible and durable, making them ideal for connecting your new faucet to existing shut-off valves.
Best for: Whenever you replace a faucet, it's a safe bet to replace the supply lines as well.
Price Range: $10–$25
Oatey Plumber's Putty
Plumber's putty helps create a watertight seal around the base of the faucet and other sink fixtures. It's easy to mold and stays pliable.
Best for: Applying around the faucet base before mounting to prevent leaks from splashed water.
Price Range: $5–$10
Pro-Dope PTFE Thread Seal Tape
Thread seal tape provides an extra layer of protection against leaks on threaded fittings. It's cheap and easy to use.
Best for: Wrapping the threads of faucet tailpieces and pipe connections before attaching nuts.
Price Range: $4–$8
Crescent Adjustable Wrench
An adjustable wrench is a plumbing essential for tightening and loosening nuts of various sizes. This model has a comfortable grip and jaw capacity suitable for supply lines.
Best for: Connecting supply lines to the shut-off valve and for general tightening throughout the installation.
Price Range: $15–$25