Nothing disrupts your day like a hearing aid that suddenly goes dead mid-conversation. If your device uses 3V batteries (common in some models like certain BTE or ITC styles with lithium cells), learning to replace them yourself saves time, money, and frustration over audiologist visits for a simple task.
In this beginner-friendly guide, you'll learn every step with clear photos and tips to do it right the first time. The process is straightforward: open, remove, insert, close, and test. No special tools needed beyond basics.
Expect to spend just 3-5 minutes per aid. It's safe if you follow precautions, and you'll restore full hearing clarity instantly.
▸What You'll Need
- •Fresh 3V hearing aid batteries (check your model: e.g., 379, SR521SW, or CR1025 equivalents)
- •Clean, dry microfiber cloth
- •Magnifying glass or phone magnifier app (optional but recommended for small batteries)
- •Hearing aid manual (for battery size confirmation)
- •Well-lit workspace
Estimated Time: 3-5 minutes per hearing aid
Difficulty: beginner
▸Step-by-Step Instructions
Step 1: Gather Materials and Prepare Workspace
Clear a flat, well-lit surface free of dust or moisture. Lay out your new 3V battery, cloth, and magnifying glass. Why? A clean area prevents debris from entering the compartment, which could cause shorts or malfunctions.
Confirm your battery size from the manual or old battery (e.g., marked '379' or '3V'). Expect a tabbed or tabless lithium coin cell.
Tip: Work over a white towel to spot dropped tiny batteries easily.
💡 Tips:
- •Keep hands dry—moisture deactivates zinc-air types, but lithium 3V are more forgiving.
⚠️ Warnings:
- •Avoid carpeted areas; static can damage electronics.
Step 2: Turn Off the Hearing Aid
Slide the power switch to 'off' or remove the battery if no switch. Hold for 10 seconds to discharge any residual power.
This prevents accidental activation or shorts during replacement. You'll hear no hum or see no lights if successful.
Success looks like: Device completely silent and inactive.
⚠️ Warnings:
- •Skipping this can drain the new battery prematurely.
Step 3: Locate and Open Battery Door
Find the small round or rectangular door on the bottom or side (check manual). Use your fingernail or a soft tool to gently slide or flip it open.
Doors vary: slide-out for BTE, flip for ITC. Expect slight resistance but no force.
Why it matters: Proper opening avoids breaking the fragile plastic latch.
💡 Tips:
- •Use thumbnail at the notch for leverage.
⚠️ Warnings:
- •Never use metal tools—risk of scratches or shorts.
Step 4: Remove Old Battery
Grasp the old battery by edges or tab with fingers or cloth. Pull straight out—no twisting.
Inspect for corrosion (white powder); wipe with dry cloth if needed. Dispose of properly (not in trash—recycle at pharmacy).
Expect: Smooth removal; battery may stick slightly from oxidation.
💡 Tips:
- •If stuck, gently tap aid on cloth-covered palm.
⚠️ Warnings:
- •Don't touch contacts with fingers—oils reduce life.
Step 5: Insert New 3V Battery
Check polarity: positive (+) side up (usually stamped). Slide or place into compartment smoothly.
3V lithium cells like 379 have one flat side shiny (+). Ensure it seats flush—no gaps.
Success: Battery sits level, contacts touch.
💡 Tips:
- •Use magnifier to confirm + side.
⚠️ Warnings:
- •Wrong polarity = no power or damage.
Step 6: Close Battery Door Securely
Align and snap/shut the door firmly until it clicks. Tug gently to confirm it doesn't pop open.
Why: Loose door causes intermittent power loss.
Test for flush fit.
⚠️ Warnings:
- •Force can crack plastic—gentle pressure only.
Step 7: Activate and Test
Wait 1-2 minutes for lithium battery to stabilize (no tab to pull like zinc-air). Turn on power switch.
Place in ear or use test whistle; volume should rise, sound clear.
Success: Full function restored.
💡 Tips:
- •Cup hand over mic to test feedback whistle.
⚠️ Warnings:
- •If no power, recheck insertion.
▸Pro Tips
- •Buy batteries in bulk for freshness—check pack date.
- •Store spares in original foil tabbed packs away from humidity.
- •Mark calendar for replacement every 3-6 months.
- •Clean compartment weekly with dry brush for longevity.
- •Use battery tester for spares to avoid duds.
- •Practice on one aid first if new to process.
- •Keep spares in pill organizer by size.
▸Common Mistakes to Avoid
- •Inserting battery upside down—check + side every time.
- •Using wrong size (e.g., 1.4V zinc-air in 3V slot)—verify model specs.
- •Forgetting to power off—drains new battery fast.
- •Dropping tiny battery—use towel and magnet if needed.
- •Closing door loosely—leads to popping out.
▸Troubleshooting
Problem: Hearing aid won't turn on after replacement
Solution: Double-check polarity and door closure. Wait 2 mins. Try new battery. Clean contacts.
Problem: Intermittent power or static
Solution: Reseat battery. Wipe corrosion. Ensure no debris in door.
Problem: Door won't close or latch broken
Solution: Gently realign. If damaged, see audiologist for repair.
Problem: Battery drains too fast
Solution: Confirm fresh stock. Power off when not using. Check for moisture.
Energizer 379/379BP Hearing Aid Batteries (10 Pack)
Reliable lithium 3V cells with long shelf life, perfect match for many hearing aid models.
Best for: Standard replacement for 379-size compartments in ITC/BTE aids.
Price Range: $5-8
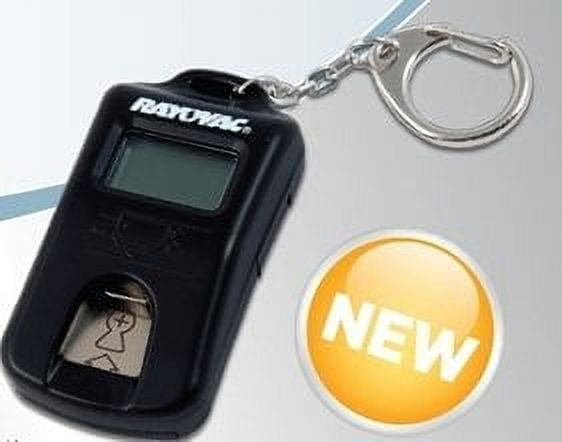
Rayovac RW379 Hearing Aid Battery Tester
Pocket-sized tester verifies battery power instantly, preventing dud installs.
Best for: Test new and spare batteries before insertion.
Price Range: $10-15
Sony LED Micro Magnifier Lighted Magnifying Glass
Bright LED illuminates tiny compartments for precise handling.
Best for: Beginners struggling with small parts in low light.
Price Range: $12-18
Maxell SR521SW 379 Batteries (30 Pack)
Budget bulk option with consistent voltage for frequent users.
Best for: High-volume replacement to keep costs low.
Price Range: $15-20