Waking up on the hard floor because your air mattress has deflated overnight is frustrating, especially during camping trips or guest stays. Leaks are common due to punctures from sharp objects, wear over time, or manufacturing defects, but you don't need to buy a new mattress. With a simple patch kit, you can fix it yourself.
In this guide, you'll learn how to locate leaks, prepare the surface, apply a durable patch, and test the repair. The process is straightforward, requiring no special skills or tools beyond household items. Expect to spend 20-30 minutes total, with most time waiting for the patch to set.
By the end, your air mattress will hold air like new, extending its life and saving you $50-200 on replacements. Let's get started!
▸What You'll Need
- •Air mattress patch kit (includes adhesive patches and instructions)
- •Dish soap and water (mixed into soapy solution)
- •Rubbing alcohol or isopropyl alcohol (for cleaning)
- •Scissors or utility knife
- •Talcum powder or baby powder (optional, for dusting)
- •Electric air pump or manual pump (to inflate/deflate)
- •Clean cloth or paper towels
- •Marker or chalk (optional, to mark leak)
Estimated Time: 20-30 minutes
Difficulty: beginner
▸Step-by-Step Instructions
Step 1: Inflate the Mattress Fully
Start by fully inflating your air mattress using an electric or manual pump until it's firm. This makes leaks easier to detect by amplifying the hissing sound and visible bubbles.
Listen closely around seams, valves, and the entire surface for escaping air. Run your hand over the mattress to feel for air streams. Why it matters: Partial inflation hides small leaks.
Success looks like: Mattress holds shape for 5-10 minutes without noticeable deflation.
💡 Tips:
- •Work in a quiet room to hear hisses better.
- •Inflate more than usual for sensitivity.
⚠️ Warnings:
- •Avoid over-inflating to prevent bursting.
Step 2: Locate the Leak with Soapy Water
Mix dish soap with water in a spray bottle or bowl. Spray or dab the soapy solution generously over suspected areas, especially seams and punctures.
Watch for bubbles forming where air escapes—these indicate the leak. Mark the spot with a marker. This method is reliable for pinholes too small to hear.
Success looks like: Bubbles steadily rising from a specific pinpoint.
💡 Tips:
- •Use a sponge for even application on large areas.
⚠️ Warnings:
- •Don't skip this; guessing wastes patches.
Step 3: Deflate and Clean the Area
Fully deflate the mattress by opening the valve. Wipe the leak area with rubbing alcohol on a cloth to remove dirt, soap residue, and oils. Let it dry completely (2-3 minutes).
Cleaning ensures strong adhesion; contaminants cause 90% of failed patches. Roughen the surface lightly with fine sandpaper if the kit recommends.
Success looks like: Dry, clean, slightly textured surface ready for patching.
💡 Tips:
- •Alcohol evaporates fast—no rinsing needed.
⚠️ Warnings:
- •Never apply patch to wet or dirty surfaces.
Step 4: Cut the Patch to Size
From your patch kit, select a vinyl or PVC patch larger than the leak (at least 1 inch bigger on all sides). Cut it precisely with scissors for a clean fit.
Round the corners to prevent peeling. Test-fit without adhesive first.
Success looks like: Patch overlaps leak by 0.5-1 inch evenly.
💡 Tips:
- •Cut slightly oversized; you can trim later.
Step 5: Apply Adhesive and Patch
Follow kit instructions: Apply glue evenly to both the mattress and patch (or use self-adhesive). Wait 2-5 minutes until tacky, then press patch firmly over leak, smoothing from center outward.
Use a roller or heavy object to apply even pressure. This bonds the layers permanently.
Success looks like: Patch flat, no bubbles or wrinkles.
⚠️ Warnings:
- •Don't rush drying time—weak bond results.
Step 6: Let the Patch Cure
Allow 4-24 hours curing time (check kit). Avoid inflating during this period. Dust with talcum powder to prevent sticking.
Curing lets adhesive vulcanize for waterproof seal.
Success looks like: Patch firm and non-tacky to touch.
💡 Tips:
- •Overnight cure is ideal for best results.
Step 7: Test the Repair
Inflate fully and check for leaks using soapy water again. Leave inflated overnight.
If it holds, you're done! Multiple leaks? Repeat process.
Success looks like: No bubbles, no deflation after 24 hours.
⚠️ Warnings:
▸Pro Tips
- •Store mattress rolled valve-up to avoid stress on patches.
- •For large tears, overlap two patches.
- •Use hairdryer on low heat to speed glue tackiness (test first).
- •Prevent future leaks with a mattress topper.
- •Keep extra patches handy for camping.
- •Apply pressure with books for 30 mins post-application.
- •Mark patches with date for tracking wear.
▸Common Mistakes to Avoid
- •Applying patch to unclean surface: Causes peeling; always alcohol-clean.
- •Patch too small: Leak spreads; overlap by 1 inch.
- •Testing too soon: Weak bond fails; wait full cure time.
- •Ignoring seams: Most leaks here; check thoroughly.
- •Over-inflating during test: Bursts weak repairs.
▸Troubleshooting
Problem: Patch not sticking
Solution: Re-clean with alcohol, roughen surface, ensure full cure. Use fresh glue if needed.
Problem: Leak reappears
Solution: Leak elsewhere or poor adhesion; relocate with soap test, apply larger patch.
Problem: Multiple small leaks
Solution: Patch each individually; consider full replacement if over 5 leaks.
Problem: Valve leak
Solution: Tighten valve or use valve-specific patch; replace valve if damaged.
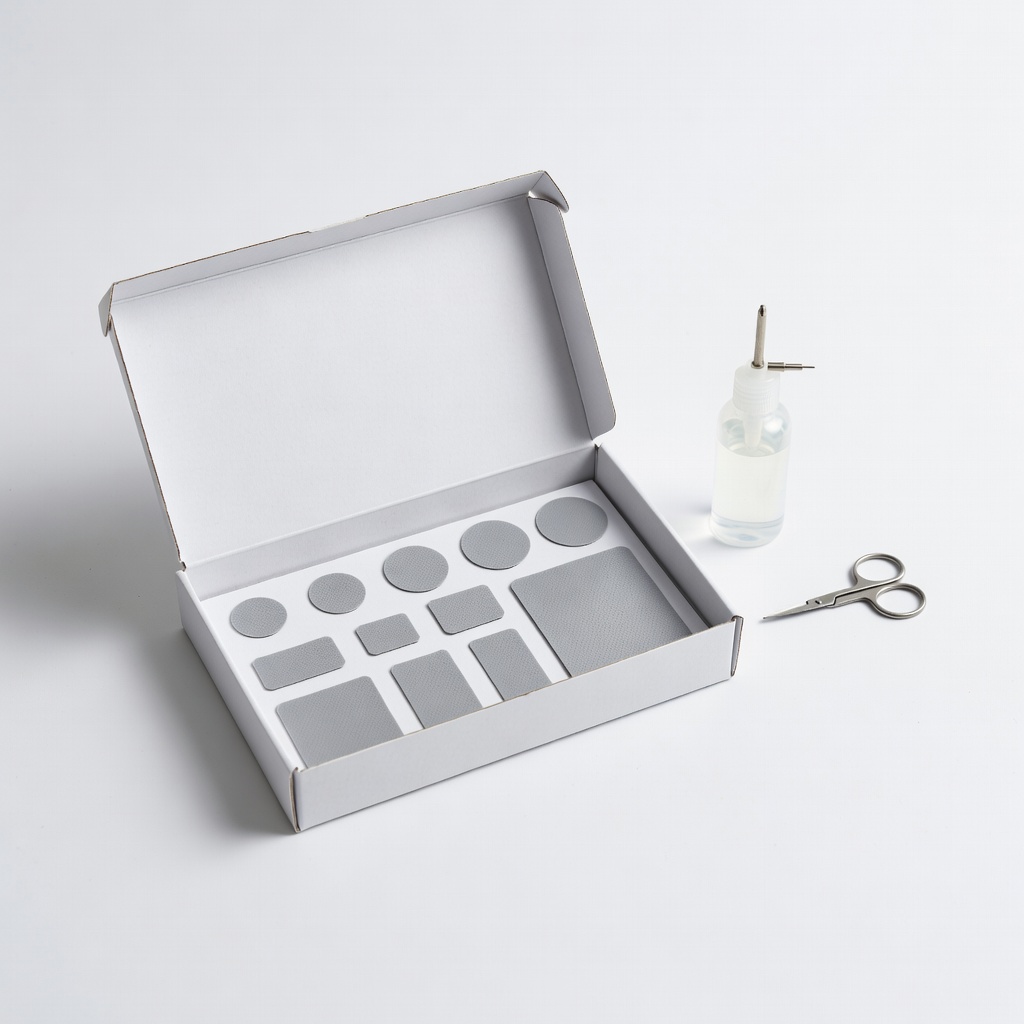
Sleep On Air Mattress Patch Kit (11 Patches)
Large, durable PVC patches with strong adhesive perfect for air mattresses; includes multiple sizes.
Best for: Ideal for home or camping repairs on vinyl/PVC mattresses.
Price Range: $9.99
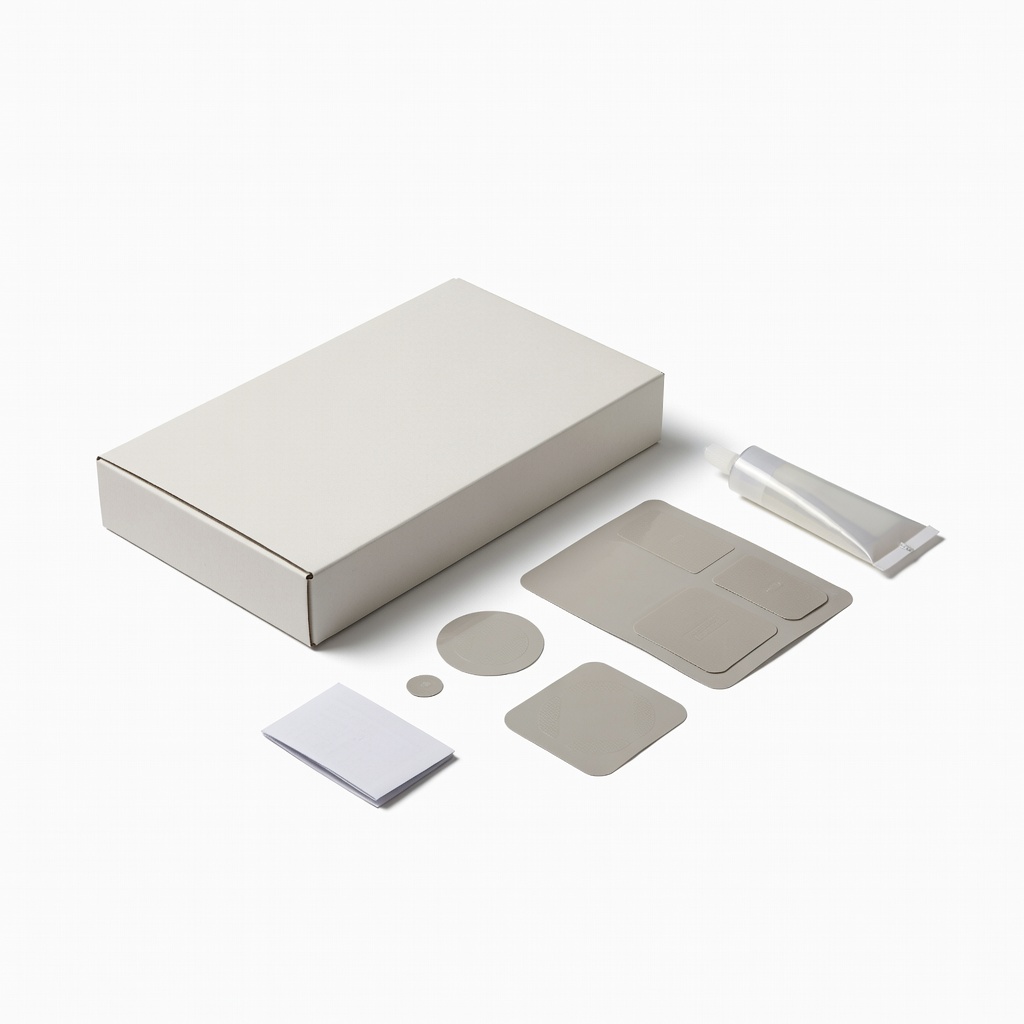
Coleman Airbed Patch Kit
Pre-cut patches designed for Coleman and similar airbeds; quick and reliable adhesion.
Best for: Budget-friendly for small punctures during outdoor use.
Price Range: $4.99
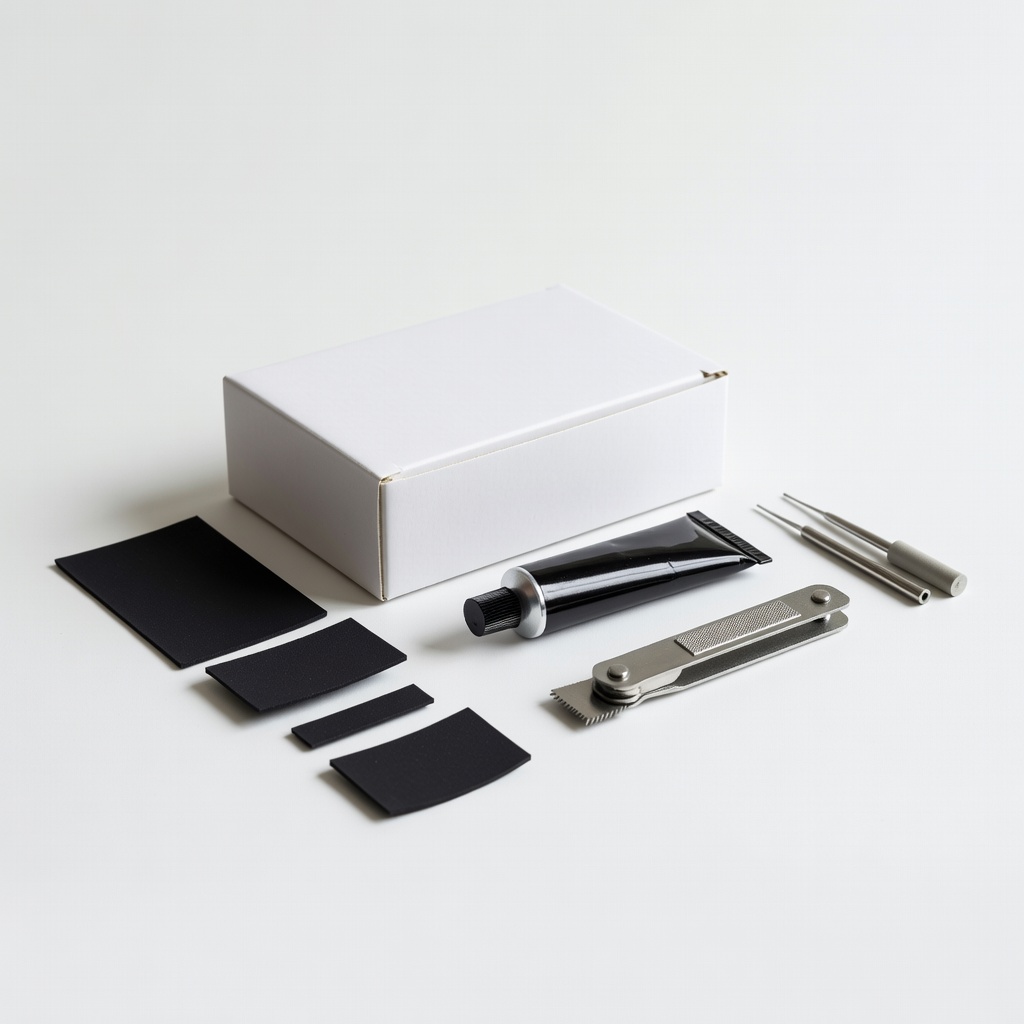
Tire Patch Kit by Slime (Universal)
Heavy-duty rubber patches work on air mattresses; string plugs for pinholes.
Best for: For tough tears or when specific kits unavailable.
Price Range: $12.99
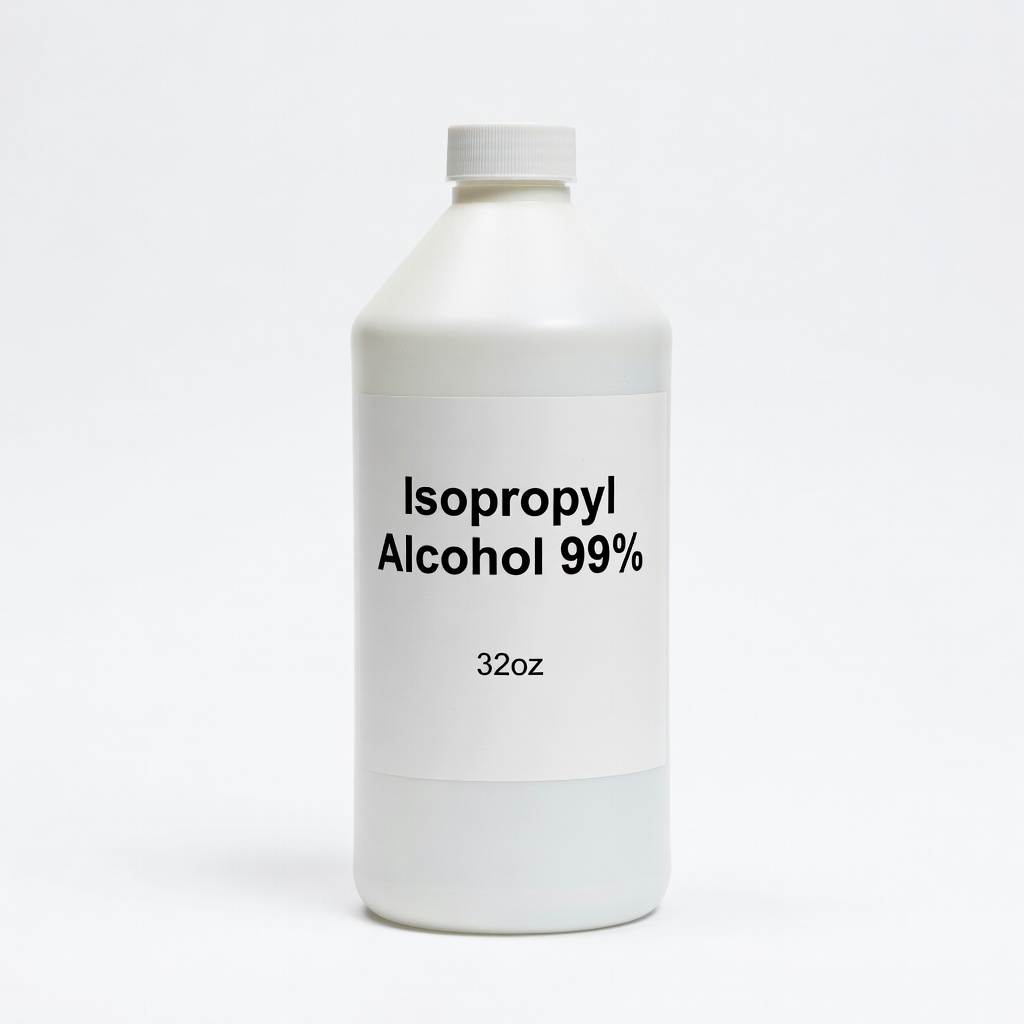
Isopropyl Alcohol 99% (32oz)
Essential cleaner for perfect adhesion; evaporates residue-free.
Best for: Prep step for every repair.
Price Range: $8.99