Nothing frustrates drivers or HVAC techs more than a weak-blowing AC in the heat of summer. Low refrigerant levels are often the culprit, but simply topping off without proper recovery can lead to contamination, compressor failure, and EPA violations. This guide equips advanced technicians with the precise method to use a recovery machine for compliant, efficient refills.
You'll master recovering residual refrigerant, deep vacuuming moisture, leak-testing, and precision-charging new R-134a (or compatible) to factory specs. Expect automotive or residential systems to take 1-2 hours, depending on size and contamination levels. No shortcuts—proper execution restores 100% cooling capacity and extends system life.
This advanced tutorial assumes familiarity with EPA 608 certification, manifold gauges, and basic refrigeration principles. Follow every step meticulously for safety and compliance.
▸What You'll Need
- •AC Recovery Machine (e.g., twin-cylinder model rated for R-134a/R-410A)
- •Manifold Gauge Set (with hoses rated for 800 PSI)
- •High-Vacuum Pump (5-8 CFM, double-stage)
- •Digital Refrigerant Scale (0.1 oz accuracy)
- •New Refrigerant (R-134a for automotive; match system specs)
- •Micron Vacuum Gauge (optional but recommended for leak detection)
- •PPE: Safety goggles, nitrile gloves, long sleeves
- •Vehicle/AC System Underhood Sticker for charge weight
- •Thread sealant tape or OEM fittings
Estimated Time: 1-2 hours (30-45 min recovery/evacuation, 20-30 min charging, 15 min testing)
Difficulty: advanced
▸Step-by-Step Instructions
Step 1: Prepare Workspace and Safety Gear
Clear a well-ventilated area away from flames or sparks—refrigerant is flammable post-recovery. Don PPE: goggles, gloves, and protective clothing to shield against refrigerant burns or frostbite.
Review the vehicle's service manual or HVAC specs for exact refrigerant capacity (typically 12-32 oz for cars). Verify EPA certification and ensure recovery machine tank is empty/weighed. Success looks like: A clean, organized bench with all tools laid out and system pressure at ambient (0 PSI).
Attach low-loss fittings to hoses to minimize refrigerant escape.
💡 Tips:
- •Label all hoses (high/blue, low/red) to avoid mix-ups.
- •Pre-chill recovery tank if ambient >90°F for efficiency.
⚠️ Warnings:
- •Never vent refrigerant—federal fines up to $50K apply.
Step 2: Locate and Connect Service Ports
Identify high-pressure (smaller, near condenser) and low-pressure (larger, near accumulator/evaporator) ports. Wipe fittings clean and attach manifold gauges: blue hose to low side, red to high side. Purge hoses of air by cracking open briefly.
Connect recovery machine inlet hose to the manifold center port (yellow hose). Ensure all valves closed. Success looks like: Gauges reading equalized static pressure (e.g., 70-100 PSI at 80°F for R-134a).
Power on machine briefly to confirm no leaks.
💡 Tips:
- •Use 90° adapters for tight engine bays.
⚠️ Warnings:
- •Wrong port connection spikes pressures—double-check colors.
Step 3: Recover Existing Refrigerant
Open high-side manifold valve first, then low-side. Start recovery machine per manual (push-pull or vapor mode for contaminated systems). Monitor tank weight—stop at 80% capacity. Rotate ports if flow slows.
Expect 5-20 minutes; machine will auto-shutoff or show vacuum. Close valves, disconnect. Success looks like: System at 0-5 PSI, tank heavier by recovered amount (log for disposal).
This removes oils/contaminants—skipping causes new charge failure.
💡 Tips:
- •Vapor recovery for small systems; liquid for faster large ones.
⚠️ Warnings:
- •Overfill tank risks rupture—monitor continuously.
Step 4: Evacuate the System
Switch to vacuum pump: Connect yellow hose to pump inlet. Open both manifold valves fully. Run pump 30-45 minutes to 500 microns or lower (use micron gauge).
Perform triple evacuation: Break vacuum with dry nitrogen to 0 PSI, repeat vacuum 3x to pull deepest moisture. Success looks like: Steady hold at 250-500 microns for 10 minutes—no rise indicates leak-free.
This dehydrates, preventing acid/corrosion.
💡 Tips:
- •15-min holds between cycles confirm vacuum integrity.
⚠️ Warnings:
- •Single evac skips moisture—compressor fails in weeks.
Step 5: Leak Test and Prep for Charge
Isolate system: Close manifold valves, shut off pump. Monitor microns for 15-30 min. If rise >1000, hunt leaks with UV dye/electronic detector.
Pressure test with nitrogen to 150 PSI if needed, hold 30 min. Success looks like: Zero pressure loss, ready for refrigerant.
Fix leaks now—post-charge harder.
💡 Tips:
- •Nitrogen from regulator at 20-30 PSI/min rise.
⚠️ Warnings:
- •Ignore leaks? New charge escapes in days.
Step 6: Weigh and Charge New Refrigerant
Place scale under refrigerant source, tare to zero. Connect can/inverter to yellow hose. Engine OFF: Open low-side valve, add vapor slowly to 70-80% spec weight.
Start engine, AC max, set scale. Add liquid via low-side (throttle if needed) to exact weight. Success looks like: Scale at spec (e.g., 24 oz), vents 40-50°F, amps normal.
Monitor high-side <250 PSI.
💡 Tips:
- •Ambient chart for pressures: +30 PSI low-side baseline.
⚠️ Warnings:
- •Overcharge blows seals—exact weight only.
Step 7: Performance Test and Final Checks
Run AC 10-15 min: Check sight glass clear, pressures stabilize (low 25-45 PSI, high 200-300 PSI at 2000 RPM). Measure vent temps >20°F delta.
Leak-check connections with soap bubbles. Success looks like: Cold air (38-45°F vents), no unusual noises.
Log data for records.
💡 Tips:
- •Fan speed max, doors open for airflow.
⚠️ Warnings:
- •Hot vents? Recheck charge or restrictions.
Step 8: Disconnect, Dispose, and Document
Close valves, engine off. Disconnect high-side first, cap ports. Evacuate hoses. Send recovered refrigerant to certified recycler.
Success looks like: Clean, capped system, service sticker updated with date/amount.
EPA requires records 3+ years.
💡 Tips:
- •Bleed manifold to recover residual.
⚠️ Warnings:
- •Loose caps invite dirt/moisture ingress.
▸Pro Tips
- •Use app-based pressure charts for real-time ambient adjustments.
- •Inline filter-driers during charge prevent debris.
- •Recover in liquid mode for 2x speed on large systems.
- •Pre-weigh cans minus container for accuracy.
- •Nitrogen purge hoses pre-job saves refrigerant.
- •Dual scales for oil if PAG/ester specified.
- •Record before/after pressures for diagnostics.
▸Common Mistakes to Avoid
- •Skipping triple evac: Leaves moisture, causes freeze-ups—always 3 cycles.
- •Charging without scales: Guessing leads to over/undercharge—use 0.1oz precision.
- •Ignoring static pressure: Wrong refrigerant type assumed—match to temp chart.
- •Not leak-testing vacuum: False passes lead to callbacks—hold 30 min.
- •High-side charging: Liquid slugging destroys compressor—low-side only.
▸Troubleshooting
Problem: Vacuum won't hold below 1000 microns
Solution: Leak—use electronic sniffer or UV dye. Tighten fittings, replace schrader cores.
Problem: Recovery machine runs but no suction
Solution: Clogged inlet filter or low oil—clean/check per manual.
Problem: Low vent temps post-charge
Solution: Undersized orifice or weak compressor—verify specs, amp draw.
Problem: High pressures during charge
Solution: Overcharge or blockage—recover and restart.
Problem: Frost on low-side line
Solution: Restriction—check expansion valve, drier.
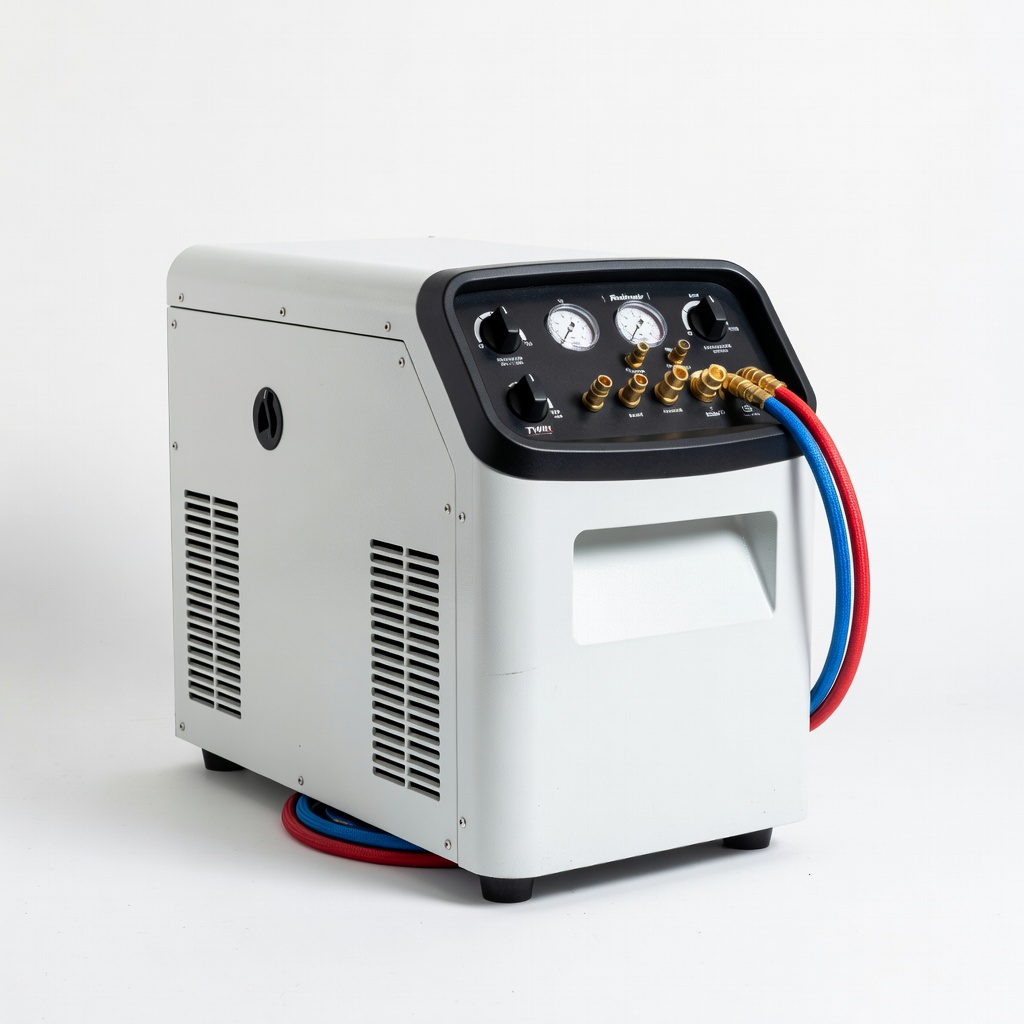
Robinair RG3 Twin Refrigerant Recovery Machine
Compact, fast vapor/liquid recovery for R-134a/R-410A; oil-less design reduces maintenance.
Best for: Ideal for automotive shops handling 10-50 lb systems daily.
Price Range: $350-$400
Yellow Jacket 93560 Manifold Gauge Set
Large gauges, 800 PSI hoses, accurate for high-pressure diagnostics.
Best for: Precision pressure reads during recovery and charge.
Price Range: $120-$150
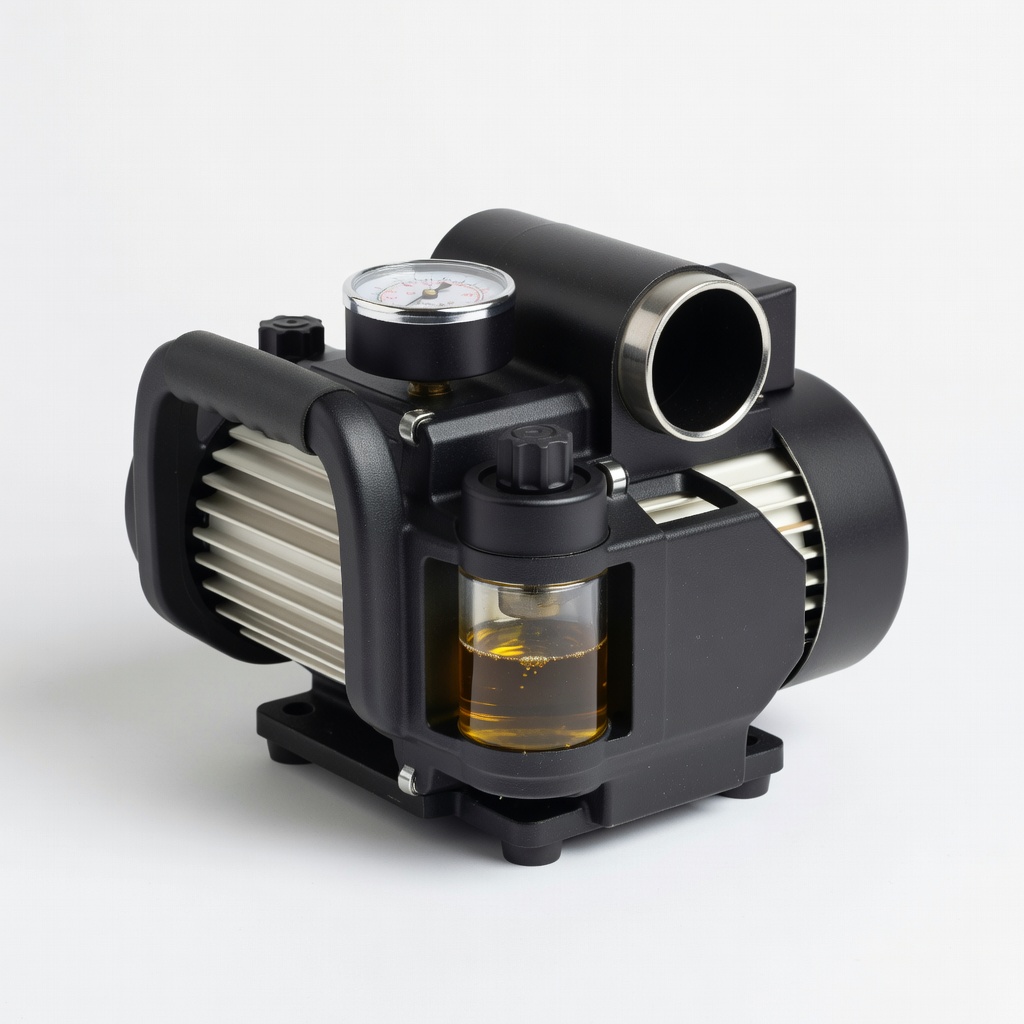
Mastercool 90066-A 6 CFM Vacuum Pump
Double-stage for deep 15-micron vacuum; durable for pro use.
Best for: Evacuation step to remove all moisture/air.
Price Range: $150-$180
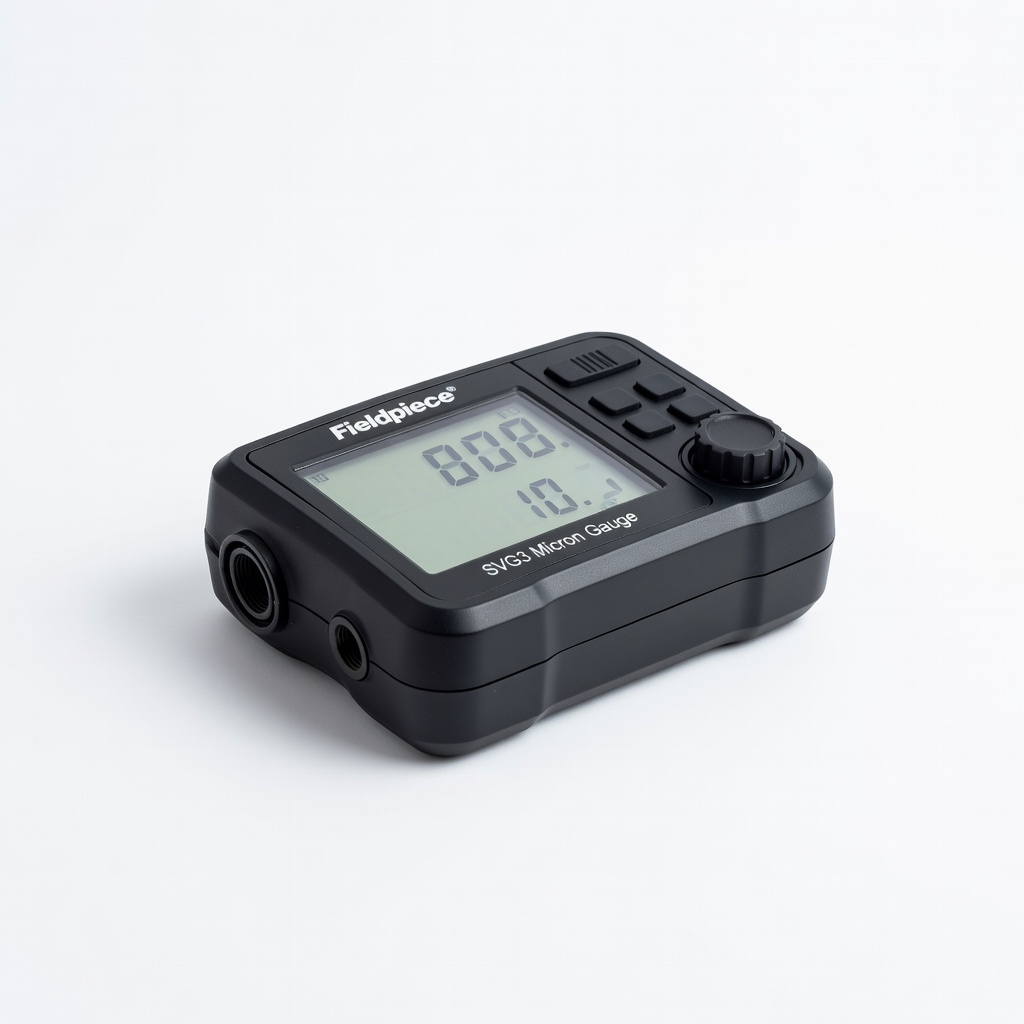
Fieldpiece SVG3 Micron Gauge
Digital accuracy for leak tests; Bluetooth logging.
Best for: Confirm evacuation holds for compliance.
Price Range: $180-$200
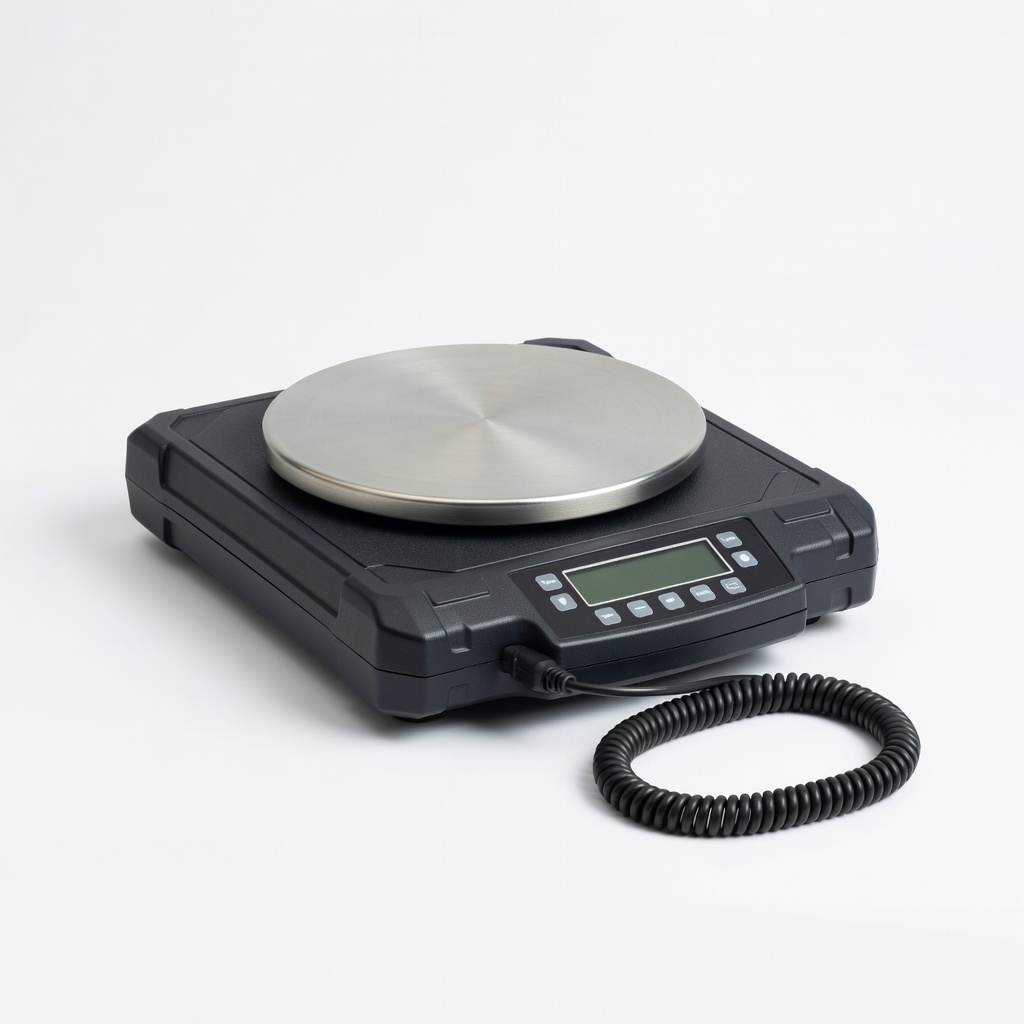
Navtek NTE270 Digital Refrigerant Scale
0.06 oz resolution, remote platform for cans.
Best for: Exact charging to OEM specs.
Price Range: $250-$300