Starting a vegetable garden can feel overwhelming, but it's one of the most rewarding hobbies you can take up. Imagine stepping outside to pick fresh tomatoes, crisp lettuce, or fragrant herbs for dinner. Not only is homegrown produce tastier and healthier, but gardening also saves money and reduces stress. This guide will walk you through everything you need: from choosing the right location and preparing soil to planting seeds and caring for your young plants. No prior experience required—just a willingness to get your hands dirty. Expect to spend a couple of hours on initial setup and a few minutes daily thereafter. By the end of this growing season, you'll be harvesting your own vegetables.
▸What You'll Need
- •A sunny spot (at least 6-8 hours of direct sunlight daily)
- •Garden bed or containers (raised bed, ground plot, or large pots)
- •High-quality vegetable garden soil or potting mix
- •Compost or organic fertilizer
- •Vegetable seeds or starter plants (choose easy crops like tomatoes, peppers, lettuce, carrots, beans)
- •Garden trowel or small shovel
- •Garden gloves
- •Watering can or hose with a gentle spray nozzle
- •Plant markers (optional)
- •Garden rake or hoe (optional)
- •Mulch (straw or wood chips, optional)
Estimated Time: 2-3 hours for initial setup (site prep, planting) plus 15-30 minutes daily for maintenance
Difficulty: beginner
▸Step-by-Step Instructions
Step 1: Choose the Right Location
Most vegetables need full sun—at least 6-8 hours of direct sunlight each day. Observe your yard throughout the day to find the sunniest spot. Avoid areas with large tree roots or where water pools after rain. If you have limited space, consider a south-facing balcony or patio for container gardening. Wind exposure can dry out plants, so a slightly sheltered spot is ideal.
💡 Tips:
- •Use a sun calculator app or simply observe your yard on a sunny day to track sunlight hours.
- •If you only have partial sun, choose leafy greens like spinach and lettuce, which tolerate some shade.
⚠️ Warnings:
- •Avoid areas near black walnut trees; they release a chemical that is toxic to many vegetables.
Step 2: Prepare the Soil
Healthy soil is the foundation of a productive garden. Start by removing any grass, weeds, or rocks from your chosen area. If planting in the ground, dig down about 8-12 inches and loosen the soil with a garden fork or tiller. Mix in 2-3 inches of compost or well-rotted manure to enrich the soil with nutrients and improve drainage. For raised beds or containers, use a high-quality vegetable potting mix rather than garden soil, which compacts in pots.
💡 Tips:
- •Get a soil test kit from a garden center to check pH and nutrient levels; most vegetables prefer pH 6.0-7.0.
- •If your soil is heavy clay, consider building a raised bed instead of amending the ground.
⚠️ Warnings:
- •Never use fresh manure; it can burn plant roots. Use only well-composted manure.
Step 3: Decide on Garden Layout
Plan your garden layout based on the space and the vegetables you want to grow. Group plants with similar water and sunlight needs together. Tall plants like corn or pole beans should go on the north side so they don't shade shorter crops. Popular layouts include traditional rows, square foot gardening (dividing the bed into 1-foot squares), or intensive planting in raised beds. Leave enough space between rows for you to walk and harvest.
💡 Tips:
- •For beginners, a 4x4 foot raised bed can grow a surprising amount of food—try one tomato, four peppers, and a few lettuce plants.
- •Use plant markers to label rows so you remember what you planted.
⚠️ Warnings:
- •Don't overcrowd plants; follow seed packet spacing recommendations to ensure good air circulation.
Step 4: Select and Purchase Seeds or Seedlings
Choose vegetables that are easy to grow in your climate and that you enjoy eating. Beginner-friendly options include tomatoes, peppers, zucchini, green beans, lettuce, radishes, carrots, and herbs like basil and mint. You can start many of these from seeds directly in the garden, or buy young seedlings (transplants) from a nursery to get a head start. Read seed packets for days to maturity and plant hardiness zone information.
💡 Tips:
- •Check your USDA hardiness zone to know your average first and last frost dates; plant accordingly.
- •For a continuous harvest, succession-plant crops like lettuce and beans every two weeks.
⚠️ Warnings:
- •Avoid starting seeds indoors if you don't have adequate light; leggy seedlings fail to thrive.
Step 5: Plant Your Seeds or Seedlings
Follow the instructions on seed packets for planting depth and spacing. As a general rule, plant seeds at a depth about twice their diameter. For seedlings, dig a hole slightly larger than the root ball, place the transplant, and gently firm the soil around it. Water thoroughly after planting. If starting seeds directly outdoors, wait until after the last frost date and the soil has warmed. For smaller seeds like lettuce, you can scatter them on the surface and lightly rake them in.
💡 Tips:
- •Soak large seeds like beans and peas overnight before planting to speed germination.
- •Use a soil thermometer to check if the ground is warm enough—most vegetables need at least 60°F (15°C).
⚠️ Warnings:
- •Don't plant too deep: seeds may not germinate if buried too deep. A general rule is ¼ inch for small seeds, 1 inch for beans.
Step 6: Water Properly
Consistent watering is critical, especially in the first few weeks after planting. Most vegetables need about 1 inch of water per week, more during hot dry spells. Water deeply at the base of plants (avoid wetting leaves to reduce disease) in the morning to allow foliage to dry during the day. Use a watering can with a rose attachment or a soaker hose for gentle, even watering. Check soil moisture by sticking your finger two inches into the soil; if dry, it's time to water.
💡 Tips:
- •Mulch around plants with straw, wood chips, or grass clippings to retain moisture and suppress weeds.
- •In containers, water more frequently because pots dry out faster. Check daily.
⚠️ Warnings:
- •Overwatering is just as harmful as underwatering; soggy soil can cause root rot.
Step 7: Fertilize and Mulch
Vegetables are heavy feeders and benefit from regular fertilization. Apply a balanced organic vegetable fertilizer (like 5-5-5 or fish emulsion) according to package instructions, usually every 3-4 weeks. Alternatively, side-dress with compost halfway through the growing season. After the soil is moist, apply a 2-3 inch layer of organic mulch around plants, leaving a small gap around the stem. Mulch conserves moisture, moderates soil temperature, and reduces weed growth.
💡 Tips:
- •Slow-release granular fertilizers are easier for beginners; mix into the soil at planting time.
- •Liquid fertilizers like seaweed extract give a quick nutrient boost during active growth.
⚠️ Warnings:
- •Avoid over-fertilizing, especially with high-nitrogen fertilizers; you'll get lush leaves but few fruits.
Step 8: Manage Pests and Weeds
Regularly inspect your plants for signs of pests (holes in leaves, discoloration, insects). Many pests can be controlled by hand-picking or spraying with a strong stream of water. For organic control, use neem oil or insecticidal soap. Keep weeds in check by pulling them when small; they compete with vegetables for water and nutrients. Mulching reduces weeds but some will still appear. A few minutes of weeding each day prevents a major takeover.
💡 Tips:
- •Encourage beneficial insects (ladybugs, lacewings) by planting flowers like marigolds or dill nearby.
- •Use floating row covers (lightweight fabric) to protect young plants from flying pests.
⚠️ Warnings:
- •Avoid broad-spectrum pesticides that kill pollinators and beneficial insects. Stick to organic options and targeted treatments.
Step 9: Provide Support (if needed)
Some vegetables, like tomatoes, pole beans, cucumbers, and peas, benefit from trellises, cages, or stakes. Install supports early to avoid disturbing roots later. For tomatoes, use sturdy cages or stake and tie the main stem loosely with soft garden twine. Climbing vines can be trained onto a trellis or netting. Supporting these plants improves air circulation, reduces disease, and makes harvesting easier.
💡 Tips:
- •Buy heavy-duty tomato cages; flimsy ones often collapse under the weight of fruit.
- •For beans, make a simple teepee with bamboo poles tied at the top.
⚠️ Warnings:
- •Don't wait too long to add supports; large plants can be damaged by driving stakes through the root zone.
Step 10: Harvest Your Vegetables
Harvesting is the most exciting part! Pick vegetables at their peak ripeness for best flavor. Tomatoes when fully colored and slightly soft to the touch; peppers when they reach desired size; lettuce by cutting outer leaves or the whole head; beans when pods are firm and crisp; carrots when they reach 1/2 inch in diameter. Use clean garden shears or a knife to cut stems to avoid damaging the plant. Regular harvesting often encourages more production.
💡 Tips:
- •Harvest in the morning when vegetables are crisp and full of moisture.
- •Keep a basket or bucket nearby for collecting your bounty.
⚠️ Warnings:
- •Don't let overripe fruit rot on the plant; it can attract pests and disease.
▸Pro Tips
- •Start small: a 3x6 foot bed is plenty for a beginner. You can always expand next year.
- •Keep a garden journal to track what you planted, when, and what worked or didn't.
- •Grow vegetables you love to eat; it's more motivating and you'll use the harvest.
- •Use vertical space: grow climbers up trellises to maximize yield in small areas.
- •Water deeply and less frequently to encourage deep root growth.
- •Rotate crops each year to prevent soil depletion and disease buildup.
- •Plant quick-growing crops like radishes and lettuce between slower ones like tomatoes.
▸Common Mistakes to Avoid
- •Planting too early in the season before the last frost. Wait until soil warms up.
- •Overwatering or watering overhead, which can cause fungal diseases. Water at the base.
- •Ignoring soil quality. Poor soil leads to weak plants. Invest in compost and soil amendments.
- •Planting too many plants too close together. Follow spacing guidelines.
- •Not hardening off seedlings (gradually exposing indoor-started plants to outdoor conditions).
▸Troubleshooting
Problem: Seeds don't germinate after two weeks.
Solution: Check soil temperature; may be too cold. Replant after soil warms, or start indoors. Ensure seeds are fresh and planted at correct depth.
Problem: Leaves turning yellow.
Solution: Possible overwatering, underwatering, or nitrogen deficiency. Check soil moisture and adjust watering. Apply a balanced fertilizer.
Problem: Tomatoes have blossom-end rot (dark sunken spots on bottom).
Solution: Caused by calcium deficiency or inconsistent watering. Water consistently and add calcium supplement (bone meal or crushed eggshells) to soil.
Problem: Holes in leaves from pests.
Solution: Identify the pest: slugs, caterpillars, or beetles. Hand-pick at night, use diatomaceous earth for slugs, or apply neem oil for insects.
Problem: Plants are tall and spindly (leggy).
Solution: Not enough sunlight. Move to sunnier spot or prune surrounding plants. For seedlings indoors, provide grow lights placed close to plants.
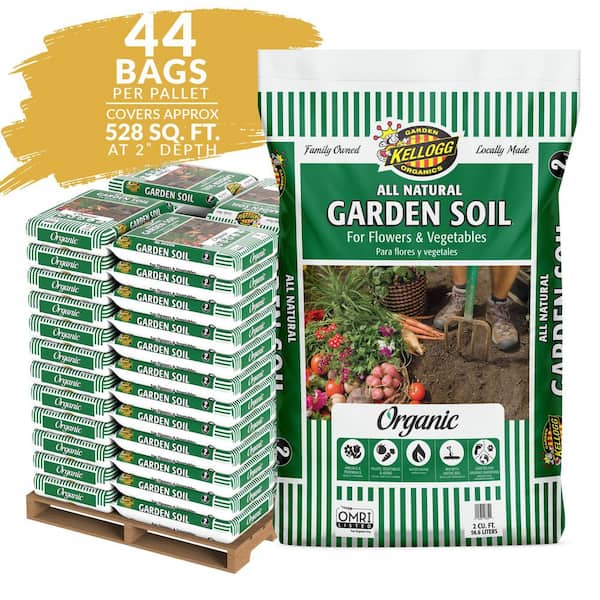
Organic Vegetable Garden Soil
High-quality soil mix ensures proper drainage and nutrients, critical for a thriving garden.
Best for: Use to fill raised beds or containers instead of heavy garden soil.
Price Range: $15-$25 per 1.5 cubic feet bag
Sturdy Tomato Cages
Prevents tomato plants from collapsing under fruit weight and improves air circulation.
Best for: Place over tomato plants when transplanting; supports growth throughout season.
Price Range: $10-$20 each
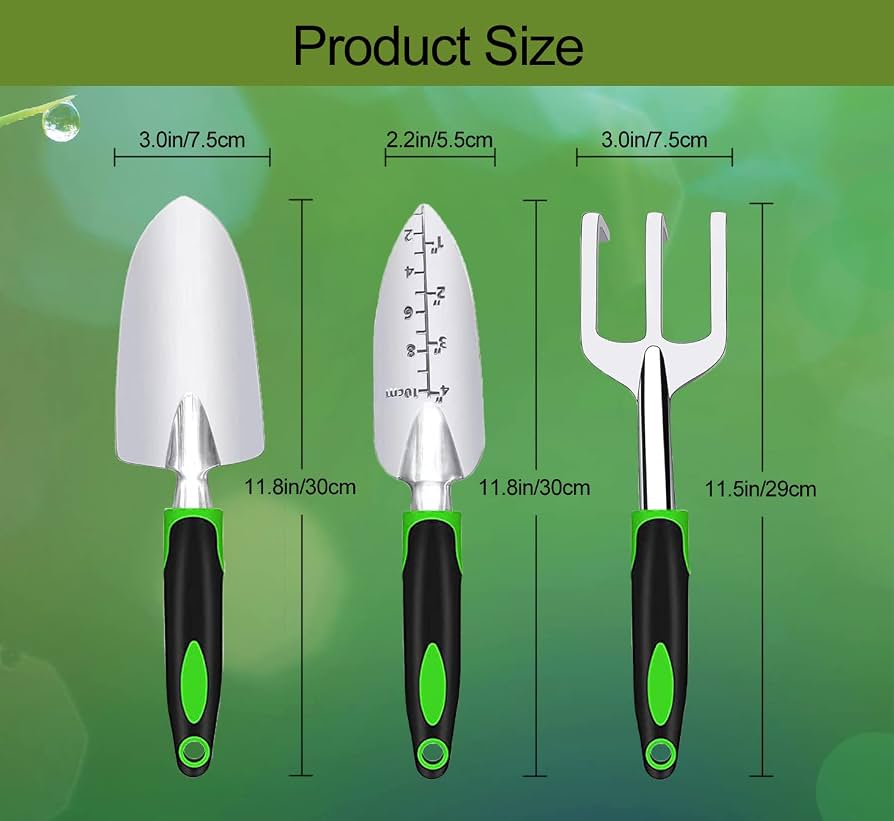
Garden Trowel Set
Essential for digging holes and transplanting; a set with ergonomic handles reduces hand fatigue.
Best for: Use for planting seeds, seedlings, and weeding.
Price Range: $12-$25 for set
Soaker Hose
Delivers water directly to the root zone, reducing waste and preventing leaf diseases.
Best for: Lay along rows or beds and connect to a timer for automated watering.
Price Range: $15-$30 per 50-foot length
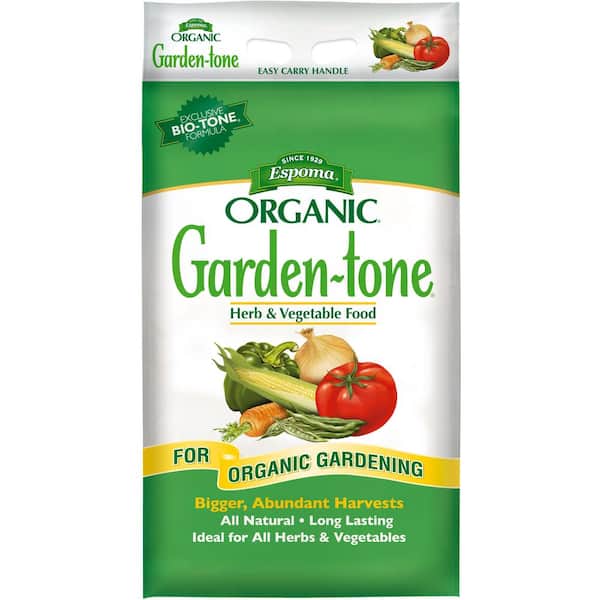
Organic Vegetable Fertilizer
Slow-release organic formula provides balanced nutrients without burning plants.
Best for: Mix into soil at planting and side-dress every 4-6 weeks.
Price Range: $15-$25 per 4 lb bag