Capturing the stars with a DSLR camera can transform a simple night out into a portfolio of cosmic wonders, but many intermediate photographers struggle with blurry shots or washed-out skies due to improper settings and light pollution. Whether you're chasing the Milky Way or creating star trails, this guide will equip you with the knowledge to succeed without needing expensive gear.
In this tutorial, you'll learn everything from scouting dark-sky locations to dialing in perfect camera settings and basic post-processing. By the end, you'll have the skills to produce sharp, vibrant astrophotography images that rival professional results. The process involves planning, setup, shooting, and editing—ideal for intermediate users familiar with manual mode.
Expect to spend 2-3 hours on location for your first attempt, with a moderate learning curve. No prior astrophotography experience is required, but basic DSLR handling is assumed.
▸What You'll Need
- •DSLR camera (full-frame preferred for better low-light performance; e.g., Canon EOS 6D or Nikon D750)
- •Sturdy tripod (required for stability during long exposures)
- •Wide-angle lens (14-24mm focal length, f/2.8 or wider aperture; required for capturing expansive skies)
- •Remote shutter release or intervalometer (optional but highly recommended to avoid camera shake)
- •Extra batteries and memory cards (required for extended shoots)
- •Red headlamp or flashlight (optional for preserving night vision)
- •Smartphone app for light pollution maps (e.g., Dark Sky Finder; optional for location scouting)
Estimated Time: 2-3 hours for planning, setup, and shooting; additional 30-60 minutes for editing
Difficulty: intermediate
▸Step-by-Step Instructions
Step 1: Scout a Dark Location
Start by finding a spot with minimal light pollution to ensure stars are visible and prominent in your photos. Use apps like Dark Sky Finder or the International Dark-Sky Association website to locate Bortle Scale 1-4 areas, away from cities.
Why it matters: Light pollution washes out stars, making your images dull. Plan for clear weather—check forecasts for moon phases, as a new moon provides the darkest skies. Drive or hike to your site an hour before shooting to acclimate.
Success looks like arriving at a location where you can see the Milky Way with the naked eye, confirming low light interference.
💡 Tips:
- •Visit during summer for longer nights and warmer conditions.
- •Bookmark sites like national parks for repeat visits.
⚠️ Warnings:
- •Avoid private property; get permissions if needed to prevent legal issues.
Step 2: Set Up Your Tripod and Camera
Mount your DSLR securely on the tripod, extending legs fully for stability on uneven ground. Attach your wide-angle lens and level the camera using the built-in bubble level or app.
Why it matters: Any wobble during long exposures (15-30 seconds) will blur stars into trails unintentionally. Face north or south depending on your target—Milky Way is best in the southern sky during summer.
Success looks like a rock-solid setup where the camera doesn't shift when you tap the tripod.
💡 Tips:
- •Use a tripod with a ball head for easy panning.
- •Weigh down the tripod with a bag for extra stability in wind.
⚠️ Warnings:
- •Don't overtighten knobs, as it can introduce vibrations.
Step 3: Configure Manual Mode Settings
Switch to manual (M) mode on your DSLR. Set ISO to 1600-3200 for low-light sensitivity, aperture to f/2.8 or widest, and shutter speed to 15-25 seconds (use the '500 Rule': 500 divided by focal length to avoid star trails).
Why it matters: These settings balance exposure for bright stars without overexposing the sky. Disable image stabilization if using a tripod, and shoot in RAW for more editing flexibility.
Success looks like a test shot showing pinpoint stars against a dark sky, not streaks or noise.
💡 Tips:
- •Start with ISO 1600 and adjust up if too dark.
- •Enable long exposure noise reduction in camera menu.
⚠️ Warnings:
- •High ISO introduces noise; don't exceed 6400 unless your camera handles it well.
Step 4: Focus on Infinity
In live view, zoom in on a bright star and manually focus by rotating the lens ring until the star is sharp. If no stars are visible yet, focus on a distant light during twilight.
Why it matters: Autofocus fails in the dark, leading to soft images. Infinity focus (the ∞ mark) is a rough guide but often inaccurate for wide lenses—manual tweaking is key.
Success looks like a zoomed-in live view where the star appears as a crisp point, not a blob.
💡 Tips:
- •Tape the focus ring once set to prevent accidental shifts.
- •Use a loupe magnifier for precise focusing on the LCD.
⚠️ Warnings:
- •Cold temperatures can stiffen focus rings; warm the lens if needed.
Step 5: Compose and Frame Your Shot
Include foreground elements like trees or rocks to add interest—rule of thirds places the horizon low for more sky. Use live view to compose, as the viewfinder may be hard to see in the dark.
Why it matters: Pure sky shots can look empty; composition tells a story. Check for unwanted lights like distant cars.
Success looks like a balanced frame on your LCD with stars filling the upper two-thirds.
💡 Tips:
- •Shoot vertical for star trails or horizontal for landscapes.
- •Bracket exposures (±1 stop) for HDR blending later.
⚠️ Warnings:
- •Avoid shooting near roads to minimize car light streaks.
Step 6: Take the Exposure with Remote Trigger
Use your remote shutter to start the exposure—press once for bulb mode if needed, or set the timer. Take 5-10 test shots, reviewing histograms for proper exposure (sky not too bright or black).
Why it matters: Touching the camera causes shake; remote ensures sharpness. For star trails, stack multiple 30-second exposures.
Success looks like clear, noise-free images with visible constellations on review.
💡 Tips:
- •Mirror lock-up reduces internal vibrations.
- •Shoot in bursts for stacking in software.
⚠️ Warnings:
- •Battery drain is fast; swap if voltage drops.
Step 7: Basic Post-Processing
Transfer RAW files to your computer and open in Lightroom or Photoshop. Adjust exposure, reduce noise, boost contrast, and enhance stars with clarity tools. For trails, use StarStaX to stack images.
Why it matters: Raw shots often look flat; editing reveals the drama. Calibrate white balance to 3500-4000K for natural sky tones.
Success looks like a vibrant, detailed final image ready for sharing, with reduced noise and popped colors.
💡 Tips:
- •Use presets for astrophotography to speed up workflow.
- •Save as TIFF for further edits.
⚠️ Warnings:
- •Over-sharpening creates artifacts; zoom in to check.
▸Pro Tips
- •Dress in layers—nights get cold quickly, and you'll be stationary.
- •Practice the 500 Rule religiously to keep stars sharp.
- •Use a dew heater strap on your lens to prevent fogging in humid areas.
- •Shoot during astronomical twilight for subtle blue skies in foreground.
- •Experiment with light painting foregrounds with a red flashlight for added depth.
- •Backup images immediately to avoid losing data from cold-induced card failures.
- •Join local astronomy clubs for prime spot tips and group safety.
▸Common Mistakes to Avoid
- •Ignoring light pollution: Leads to faint stars; avoid by using apps to scout properly.
- •Incorrect focus: Results in blurry skies; always manual focus on a star.
- •Too short exposures: Stars appear dim; extend to 20+ seconds per the 500 Rule.
- •Forgetting to disable stabilization: Causes micro-blur on tripod; turn it off.
- •Over-editing noise: Introduces grain; use gentle reduction tools instead.
▸Troubleshooting
Problem: Blurry star trails instead of points
Solution: Shorten shutter speed using the 500 Rule or check tripod stability; refocus manually.
Problem: Excessive noise in images
Solution: Lower ISO to 800-1600 and enable in-camera noise reduction; edit with software like Lightroom's denoise tool.
Problem: Lens fogging up
Solution: Use a lens warmer or defogging spray; store gear in a warm bag between shots.
Problem: Battery dies quickly
Solution: Keep spares in inner pockets to warm them; use an external power bank if your DSLR supports it.
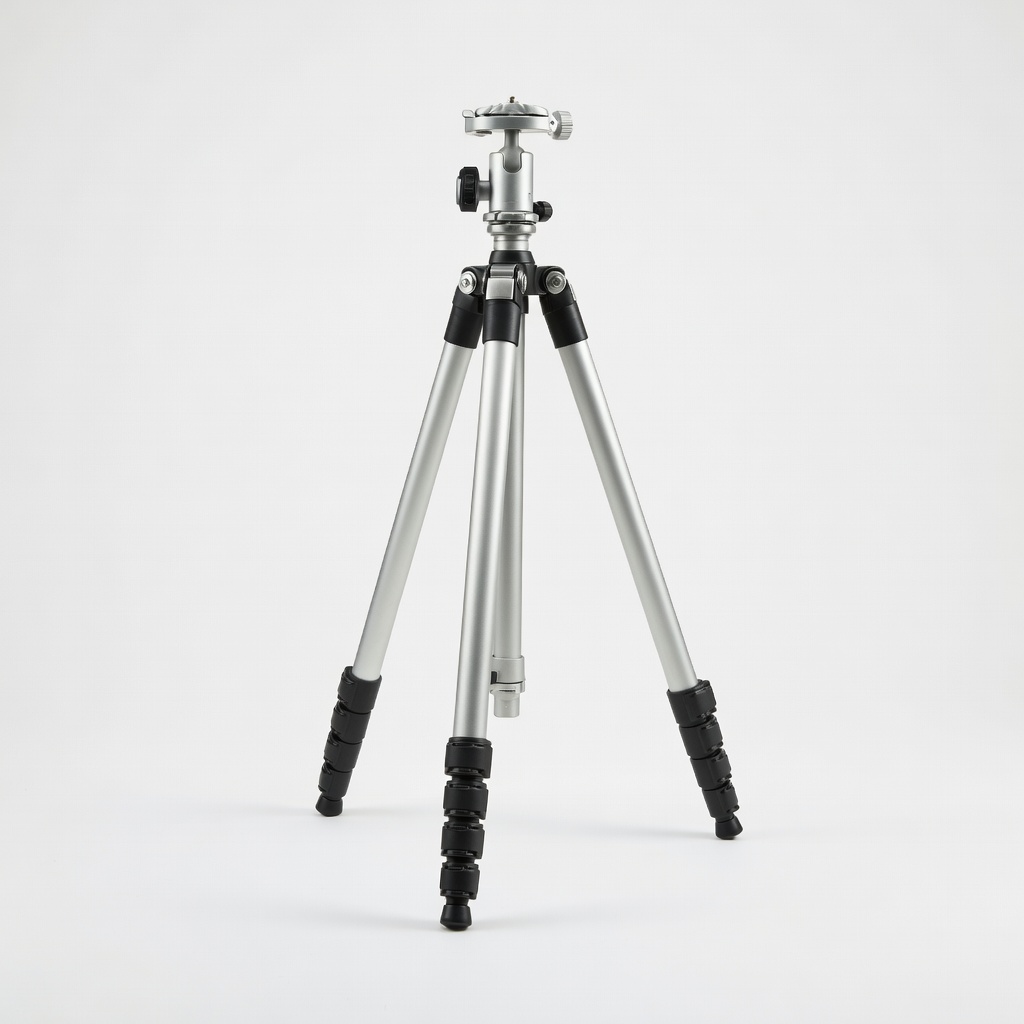
Manfrotto MT055XPRO3 Aluminum Tripod
Provides exceptional stability for long exposures, with adjustable legs and a weight hook for windy conditions—essential for sharp astrophotography.
Best for: Ideal for mounting your DSLR during 20-30 second shots in remote locations.
Price Range: $250-$300
Sigma 14mm f/1.8 DG HSM Art Lens
Ultra-wide aperture captures more light and stars with minimal distortion, perfect for intermediate users upgrading from kit lenses.
Best for: Use for Milky Way panoramas where a fast, wide lens is crucial for low-light performance.
Price Range: $1,400-$1,600
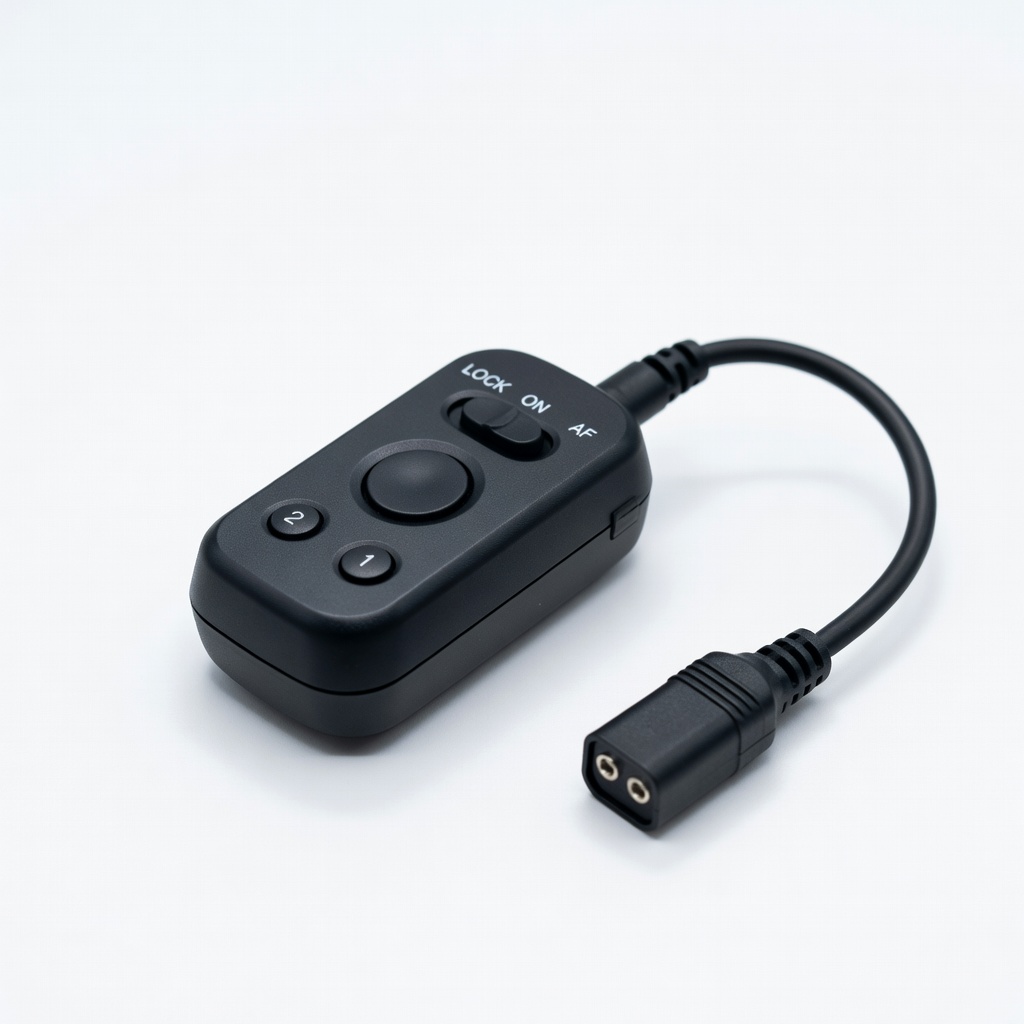
Canon RS-80N3 Remote Switch
Wired remote eliminates camera shake from pressing the shutter, compatible with most Canon DSLRs for precise control.
Best for: Trigger long exposures without touching the camera, especially in bulb mode for star trails.
Price Range: $40-$50
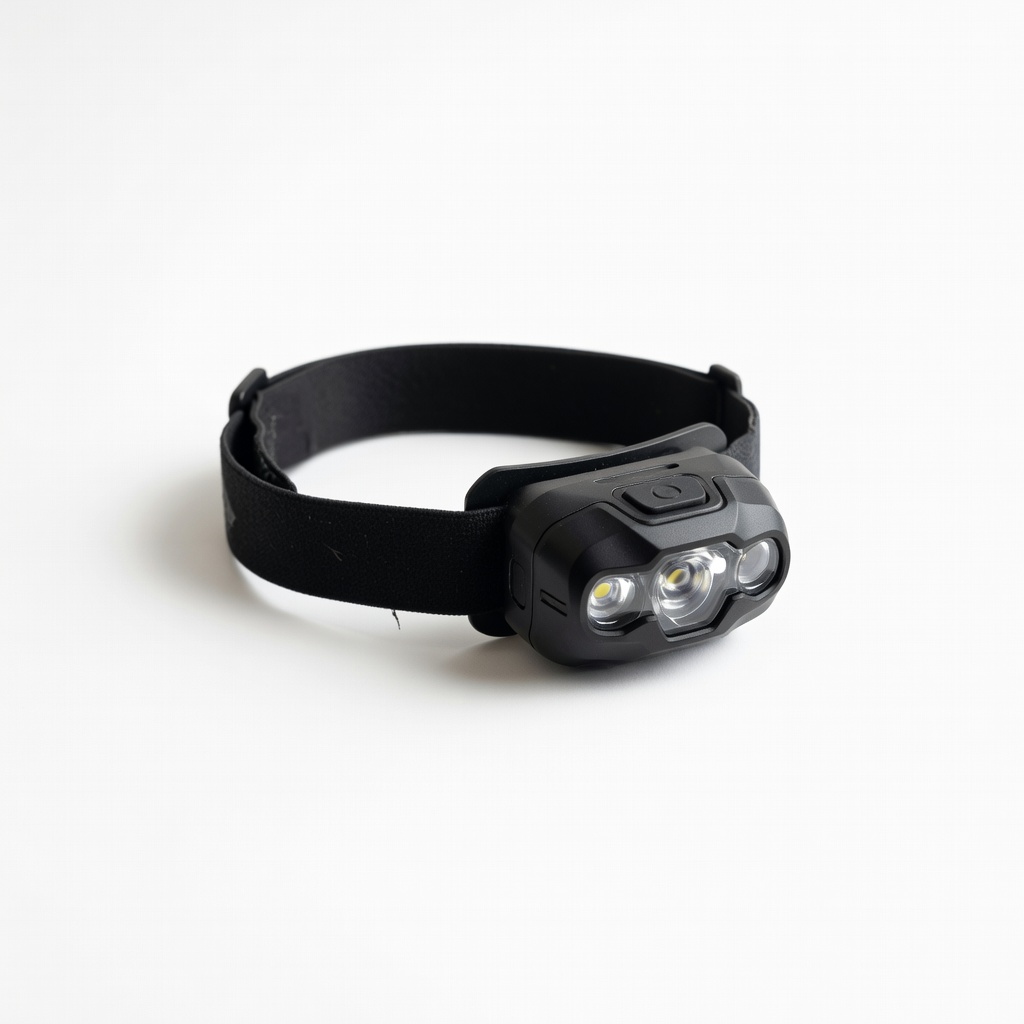
Black Diamond Spot 400 Headlamp
Red light mode preserves night vision while providing enough illumination for setup; lightweight and waterproof for outdoor use.
Best for: Navigate and adjust gear without ruining your dark-adapted eyes during shoots.
Price Range: $35-$45
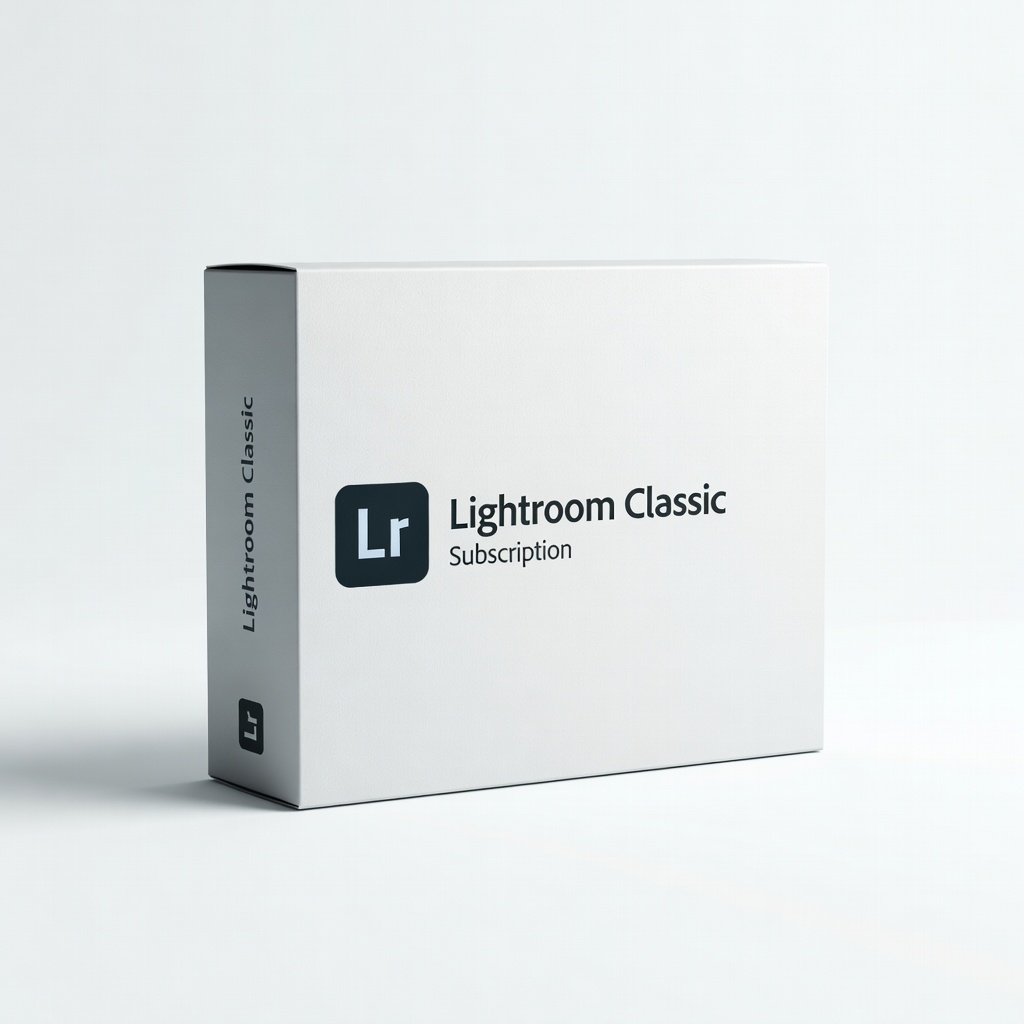
Adobe Lightroom Classic (Subscription)
Powerful RAW editing with astrophotography-specific tools like noise reduction and star enhancement, streamlining post-processing.
Best for: Edit batches of night sky images to boost contrast and reduce noise efficiently.
Price Range: $10/month