Traveling with an acoustic guitar can be nerve-wracking. Airlines have strict size and weight limits, and your instrument is vulnerable to bumps, pressure changes, and temperature swings. But with proper preparation, you can significantly reduce the risk of damage. In this guide, we'll walk you through every step—from loosening strings and selecting the right case to navigating TSA and gate-check procedures. Expect to spend about 30–45 minutes packing your guitar, and by the end, you'll have the confidence to fly with your prized instrument safely.
▸What You'll Need
- •Hard shell guitar case (properly sized for your guitar)
- •Soft cloths or microfiber towels
- •Bubble wrap or foam padding sheets
- •String winder (optional but helpful)
- •Travel humidifier (recommended for long flights)
- •Luggage tag with contact information
- •TSA-approved lock (optional)
- •Backpack or carry-on for essentials
Estimated Time: 30–45 minutes
Difficulty: intermediate
▸Step-by-Step Instructions
Step 1: Loosen the strings
Before packing, loosen each string by about one full turn (a half-step drop). This reduces tension on the neck and bridge, preventing warping or cracking during pressure changes. Use a string winder to speed up the process. Do not completely unwind—keep slight tension so the bridge doesn't detach.
💡 Tips:
- •Loosen in a crisscross pattern (e.g., low E, high E, A, B, etc.) to keep neck balanced.
- •If you have a vintage guitar with a non-adjustable truss rod, loosen strings even more.
⚠️ Warnings:
- •Never fully detune—the bridge is held by string tension and can come unglued.
Step 2: Choose the right case
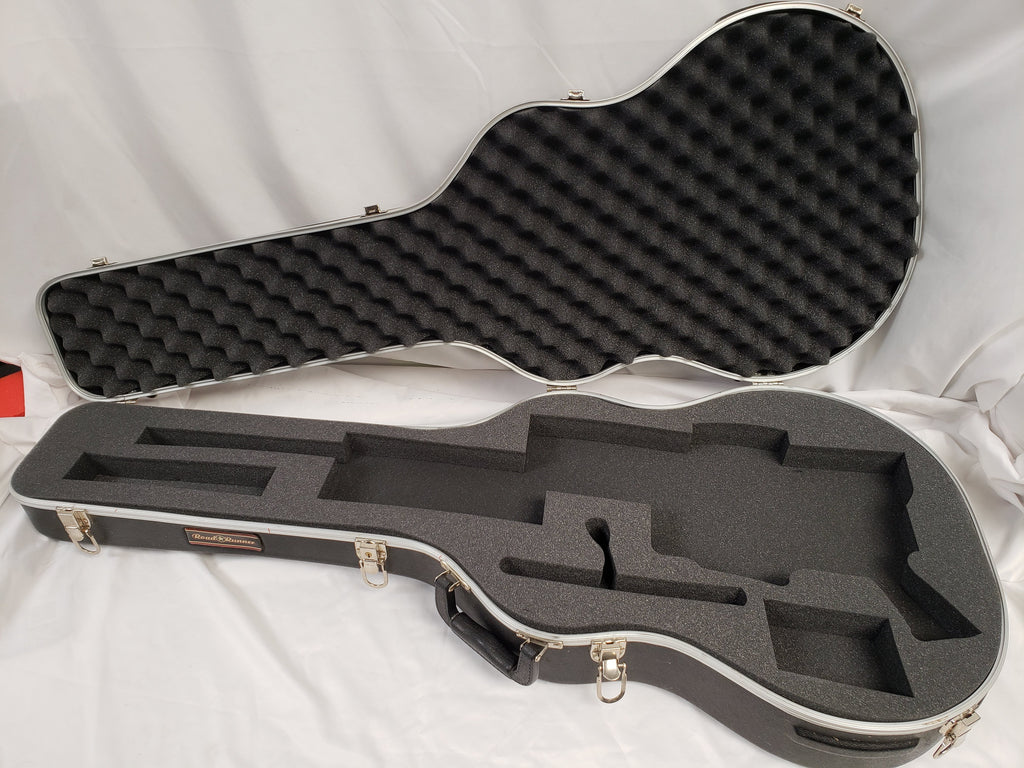
A hard shell case is non-negotiable for air travel. Soft gig bags offer minimal protection against dropping or crushing. Ensure the case fits your guitar snugly—too large and the guitar can shift; too small and it can be compressed. A flight-ready case with a plush interior and rigid foam is ideal. If you don't own one, consider renting or buying before your trip.
💡 Tips:
- •Check airline size restrictions for carry-on: most require dimensions under 22”x14”x9”. Many dreadnoughts exceed this, so plan to gate check.
- •Avoid vintage or cardboard cases—they aren't strong enough.
⚠️ Warnings:
- •Never check your guitar in a gig bag, even if packed tightly—it will almost certainly be damaged.
Step 3: Pad the headstock and neck
The headstock is the most vulnerable part—it protrudes and can snap if the case is dropped. Place a folded cloth or small piece of foam under the headstock to lift it slightly and prevent it from banging against the case walls. Also wrap the neck with a soft cloth, especially around the nut and tuning pegs. Secure the neck in the case’s neck rest and ensure it doesn't move when you gently shake the case.
💡 Tips:
- •Use a rolled-up sock or a specialized headstock support pillow.
- •If your case has a built-in headstock support, ensure it’s properly positioned.
⚠️ Warnings:
- •Don't over-pad—too much material can put pressure on the neck and cause warping.
Step 4: Support the guitar body
The body needs to be immobilized. Place foam padding or bubble wrap around the treble and bass sides, and especially at the lower bout where the guitar is widest. The guitar should not shift when the case is tilted. Pay extra attention to the bridge area—it's a stress point. Use soft cloths to cushion the top and back as well.
💡 Tips:
- •Cut foam to shape for a custom fit—many hardware stores sell dense foam sheets.
- •Avoid newspaper or packing peanuts, as they can leave marks and don't absorb shock well.
⚠️ Warnings:
- •Do not put heavy objects like books or clothes inside the case against the guitar—they can crack the top.
Step 5: Fill empty spaces in the case
Any space that isn't filled can allow the guitar to move. Use additional foam, bubble wrap, or soft clothing to fill the gaps around the headstock, heel, and lower bout. The goal is to have zero movement when you close the case and shake it. For storage compartments in the case, use them for small items like a tuner or humidifier, but don't let them press against the guitar.
💡 Tips:
- •Old t-shirts or towels work well and don't cost extra.
- •Place a cloth between the strings and the case lid to prevent string contact with the interior.
⚠️ Warnings:
- •Don’t overfill—the case should close without force. If it bulges, remove some padding.
Step 6: Add humidity control (optional but recommended)
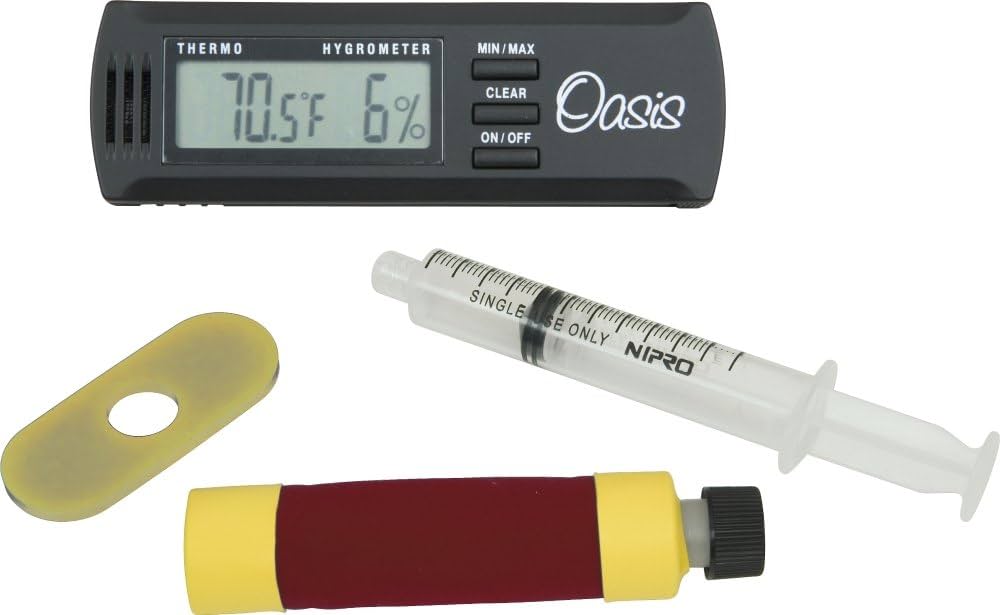
Airplane cabins have very low humidity, which can cause the wood to crack. Use a travel humidifier (like an Oasis OH-1) placed in the soundhole or case compartment. Ensure it's properly hydrated before the flight. For long layovers or extended trips, a humidity control pack (like Boveda) can help maintain stable moisture levels.
💡 Tips:
- •Activate the humidifier a few hours before packing so it’s already releasing moisture.
- •If you forget, you can place a damp sponge in a plastic bag with holes—but be careful of direct water contact.
⚠️ Warnings:
- •Do not use a guitar humidifier that leaks—water damage is worse than dry air.
Step 7: Secure the case and identify it
Close the case and engage all latches. If your case has locks, consider using a TSA-approved lock so agents can open it without breaking it if needed. Attach a sturdy luggage tag with your name, phone number, email, and flight information. Also write “FRAGILE – MUSICAL INSTRUMENT” on both sides of the case using a permanent marker or a sticker. Use a colored ribbon or strap to make your case easy to spot on the baggage claim.
💡 Tips:
- •Take a photo of the packed case showing the guitar inside and the exterior—useful for insurance claims.
- •Add an AirTag or similar tracker inside the case for piece of mind.
⚠️ Warnings:
- •If you use a non-TSA lock, they may cut it open to inspect—better to leave it unlocked or use a TSA lock.
Step 8: Prepare for TSA and boarding
Before arriving at the airport, check your airline’s policy on musical instruments. Most allow guitars as carry-on if they fit in the overhead bin—but many acoustic guitars are too large. Gate checking is the safest option: you hand the guitar to the crew at the gate, and it's stored in a special compartment and returned at the jetway. Remove any loose items from the case (like picks or strings) and carry them in your personal item. Have your boarding pass and ID ready when you approach the gate.
💡 Tips:
- •Arrive early to allow time for gate checking—some airlines require you to do it at the check-in counter.
- •If you’re forced to check at the counter, ask for a “fragile” sticker and ensure the case is placed on top of other luggage.
⚠️ Warnings:
- •Never put your guitar in the cargo hold without proper packing—it will be tossed with heavy suitcases.
Step 9: At the airport: pass through security
When going through TSA, you may be asked to take the guitar out of the case for X-ray. For acoustic guitars, they can X-ray the case with the guitar inside—but be prepared to comply. If you prefer, you can request a hand inspection to avoid potential mishandling. Keep calm and polite. Remember that TSA agents see instruments every day, but you can explain your concerns if needed.
💡 Tips:
- •Use a TSA-approved lock so agents can open the case if necessary without damaging it.
- •Place the case on the belt gently and watch it go through the scanner—ask for a hand inspection if you're worried about the X-ray.
⚠️ Warnings:
- •X-ray scanners are safe for solid wood guitars—no damage from radiation.
Step 10: Upon arrival: inspect and re-string
As soon as you receive your guitar, inspect the case for damage. Open it carefully and check for any cracks, dents, or structural issues. If everything looks good, re-tune the strings to pitch—the wood will have settled. Let the guitar acclimate to the room temperature for about 30 minutes before playing. If you notice any damage, document it and file a claim with the airline immediately.
💡 Tips:
- •Carry a small clip-on tuner to check tuning quickly.
- •If the neck seems bowed, don't panic—give it 24 hours to stabilize before adjusting the truss rod.
⚠️ Warnings:
- •Never force the strings back to full tension if the guitar feels off—have a luthier inspect it first.
▸Pro Tips
- •Use a flight-rated case from brands like SKB or Gator—they meet airline requirements and are tough.
- •Print your itinerary and tape it inside the case in case the external tag gets lost.
- •If you have a valuable vintage guitar, consider purchasing a specific musical instrument insurance policy.
- •Pack a small repair kit (extra strings, wire cutters, a small screwdriver) in your checked luggage.
- •Always loosen strings by at least a half step—more for extended travel (full step is fine).
- •Use a soft, padded backpack as your personal item so you can carry your case and still have hands free.
- •Research your airline’s policy on “cabins for instruments” – some airlines allow you to buy a seat for your guitar.
- •Travel during off-peak hours to reduce the chance of forced checked luggage.
▸Common Mistakes to Avoid
- •Not loosening strings: This is the top cause of neck damage during flights.
- •Using a soft gig bag: Even padded gig bags offer little protection against crushing or dropping.
- •Overpacking the case: Too much padding can put pressure on the top and cause cracks.
- •Forgetting humidity control: Dry cabin air can cause wood to crack, especially in solid top guitars.
- •Not labeling the case: Without a tag, your case may be lost or not returned to you if gate-checked.
▸Troubleshooting
Problem: TSA opens the case and doesn't repack correctly.
Solution: Before your flight, ask TSA to allow a hand inspection so they don't open the case. If they do open it, repack it immediately before closing the case. Bring extra padding supplies in your carry-on.
Problem: Guitar neck is bowed after arrival.
Solution: Let the guitar acclimate for 24-48 hours. If it doesn't straighten, check the humidity and adjust the truss rod slowly. If unsure, take it to a professional.
Problem: Case shows damage but guitar seems fine.
Solution: Document the damage with photos. The case may have absorbed the impact. Still inspect the guitar thoroughly and file a claim with the airline if the case is damaged.
Problem: Guitar won't fit in overhead bin.
Solution: Gate check it. Ask the gate agent for a tag and leave the case at the jetway. Most airlines will bring it back to the jetway upon arrival.
Gator GC-ACOUSTIC Deluxe Acoustic Guitar Case
This hardshell case is lightweight yet extremely durable, with a plush interior and padded neck rest. It fits most dreadnought and grand auditorium guitars and is affordable.
Best for: For traveling acoustic guitarists who need reliable protection without breaking the bank.
Price Range: $100–$200
Roadie Foam Guitar Case Padding Kit
This kit includes pre-cut foam pieces specifically designed to fill gaps in guitar cases. It's reusable and easy to customize.
Best for: For filling empty space in a hardshell case to prevent movement during air travel.
Price Range: $15–$25
Oasis OH-1 Guitar Humidifier
A compact, leak-resistant humidifier that fits in the soundhole. It maintains proper humidity levels for solid wood guitars during dry flights.
Best for: For keeping your acoustic guitar hydrated in low-humidity airplane cabins.
Price Range: $10–$20
Master Lock TSA Accepted Luggage Lock
This combination lock allows TSA agents to open it with a master key without damaging the lock or your case.
Best for: For securing your guitar case while still allowing TSA to inspect it if needed.
Price Range: $8–$15
Ernie Ball Aluminum String Winder
A fast and comfortable string winder that makes loosening and tightening strings a breeze. It includes a built-in peg puller.
Best for: For quickly loosening strings before packing and re-tightening upon arrival.
Price Range: $5–$10