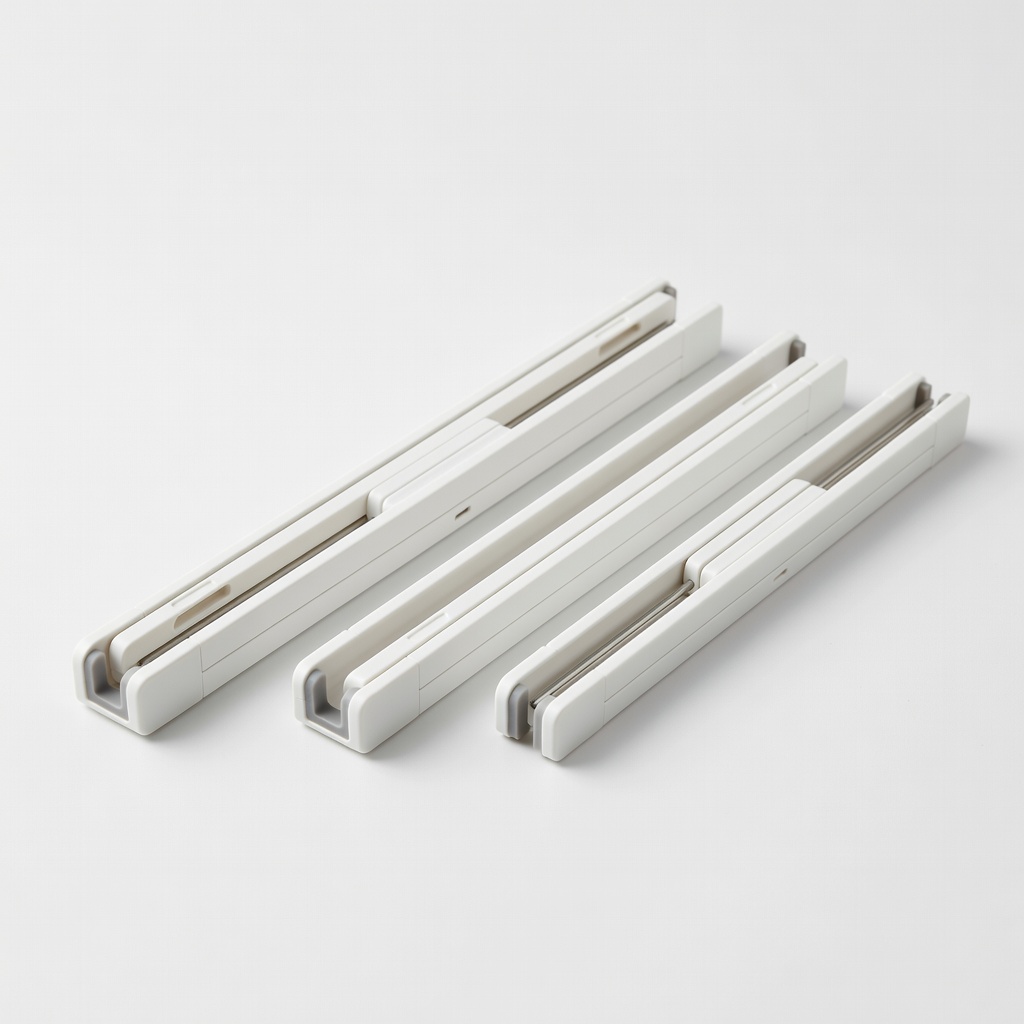
mDesign Adjustable Drawer Dividers (Set of 4)
Ideal for separating tools, ribbons, and cords in standard craft drawers.
$14.99
mDesign Adjustable Drawer Dividers (Set of 4) Customizable length fits any drawer size perfectly, keeping sections stable.
Get the App
Better experience on mobile
Transform cluttered craft drawers into an efficient, easy-access system for all your accessories and supplies in under 2 hours.
Tired of digging through tangled beads, scattered stamps, and misplaced tools every time you craft? A disorganized craft drawer can kill your creativity and waste precious time. This guide shows beginners how to create a tidy, customized organization system that keeps everything at your fingertips.
You'll learn a simple 8-step process to sort, categorize, and store your supplies using affordable dividers, bins, and labels. No advanced skills needed—just basic sorting and measuring. Expect to spend 1-2 hours for a complete overhaul, with ongoing maintenance taking just minutes weekly.
By the end, your drawers will be neat, labeled, and functional, boosting your crafting efficiency and joy.
Estimated Time: 1-2 hours Difficulty: beginner
Start by collecting every craft accessory and supply from your drawers, bags, or workspace. Lay them out on a large table or floor for a full inventory.
Empty the drawers completely, wiping them down with a damp cloth and mild soap to remove dust and residue. This clean slate prevents old grime from contaminating organized items.
Success looks like: A massive pile of sorted chaos turning into a clean, empty drawer ready for action. Expect to find forgotten gems or duplicates here.
💡 Tips:
⚠️ Warnings:
Go through your pile, discarding broken, dried-out, or unused items (e.g., old glue sticks, faded ribbons). Sort keepers into broad categories like beads, tools, stamps, threads, and embellishments.
Use trays or bowls for temporary piles. Be ruthless— if you haven't used it in a year, toss or donate it.
Success looks like: Neat piles grouped by type, with trash/recycle bags full. This step reduces volume by 20-30%, making organization easier.
💡 Tips:
⚠️ Warnings:
Use a measuring tape to note the exact interior dimensions of each drawer: length, width, depth. Measure multiple drawers if they vary.
Sketch a quick layout plan on paper, noting how many sections you'll need per category.
Success looks like: Accurate measurements (e.g., 12" x 6" x 2") jotted down, ready to shop for fitting organizers.
💡 Tips:
Select dividers, bins, or trays that fit your measurements. Install adjustable dividers by expanding them to fill the drawer width and securing with grips.
Place smaller bins inside larger drawers for tiny items like brads or sequins.
Success looks like: Drawers divided into 4-8 custom compartments, stable and non-slip.
💡 Tips:
⚠️ Warnings:
Assign categories to sections: e.g., front for most-used tools, back for rarely used. Place similar items together (all beads in one bin).
Fill from largest to smallest items to avoid gaps.
Success looks like: Each section full but not overflowing, items visible and accessible.
💡 Tips:
Create clear, printed labels for each compartment and drawer front (e.g., 'Beads - 6mm', 'Scissors & Punches'). Use a label maker for durability.
Apply labels to bin fronts and drawer edges.
Success looks like: Professional-looking setup where anyone (even kids) can find items quickly.
💡 Tips:
⚠️ Warnings:
Simulate a crafting session: pull items, use them, and return. Adjust dividers or relocate categories if access feels awkward.
Success looks like: Fluid workflow with no rummaging or spills.
💡 Tips:
Set a 5-minute weekly routine: purge new clutter, refill gaps. Reorganize seasonally as your craft projects evolve.
Success looks like: A system that stays tidy month after month.
💡 Tips:
Problem: Dividers slip or don't fit perfectly
Solution: Add rubber grips or shelf liner underneath; trim plastic dividers if needed.
Problem: Tiny items scatter in bins
Solution: Nest smaller pouches or use divided trays like egg carton inserts.
Problem: Drawers hard to open when full
Solution: Reduce load by 10% or upgrade to smooth-glide drawer slides.
Customizable length fits any drawer size perfectly, keeping sections stable.
Best for: Ideal for separating tools, ribbons, and cords in standard craft drawers.
Price Range: $14.99
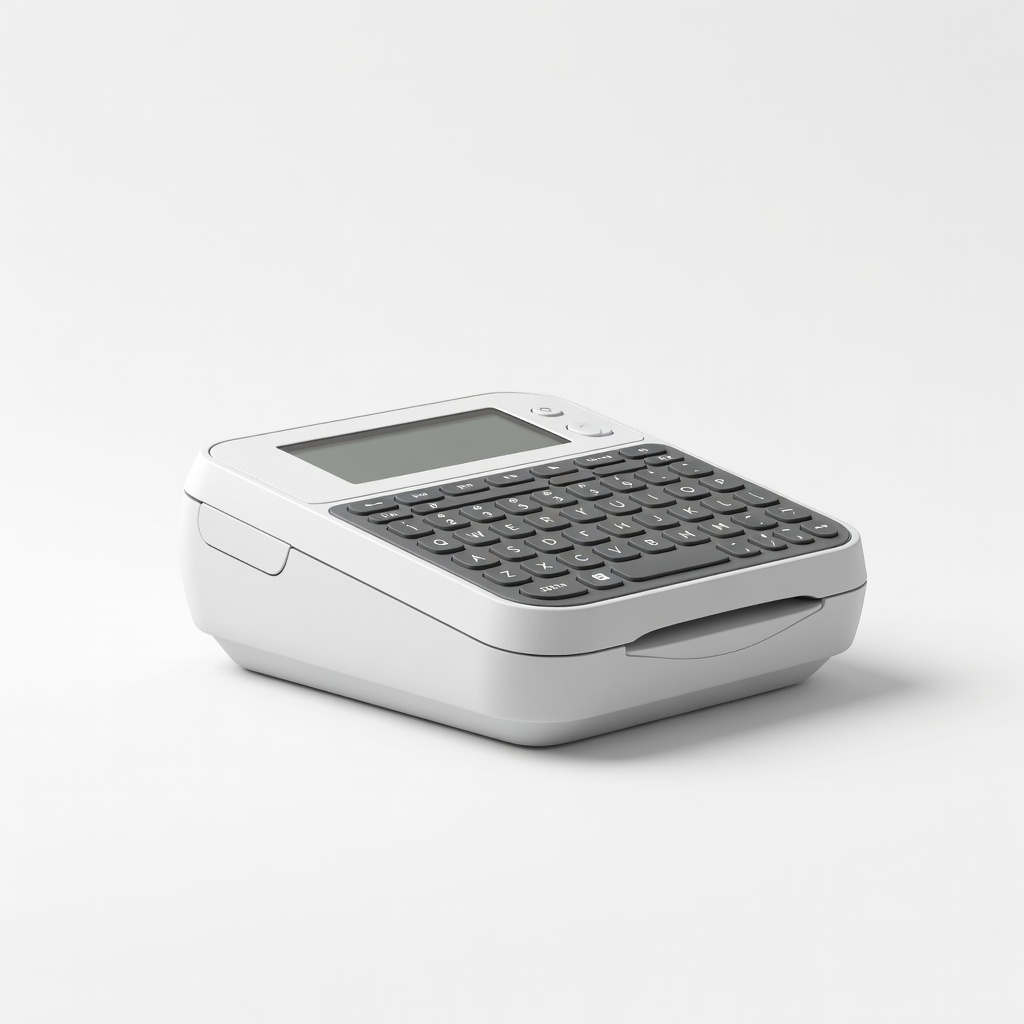
Easy-to-use with durable, laminated labels that won't smudge or peel.
Best for: Labeling bins and drawers for quick identification during crafts.
Price Range: $29.99
Crystal-clear bins in various sizes for visible storage of small accessories.
Best for: Organizing beads, sequins, and stamps without hiding contents.
Price Range: $24.99
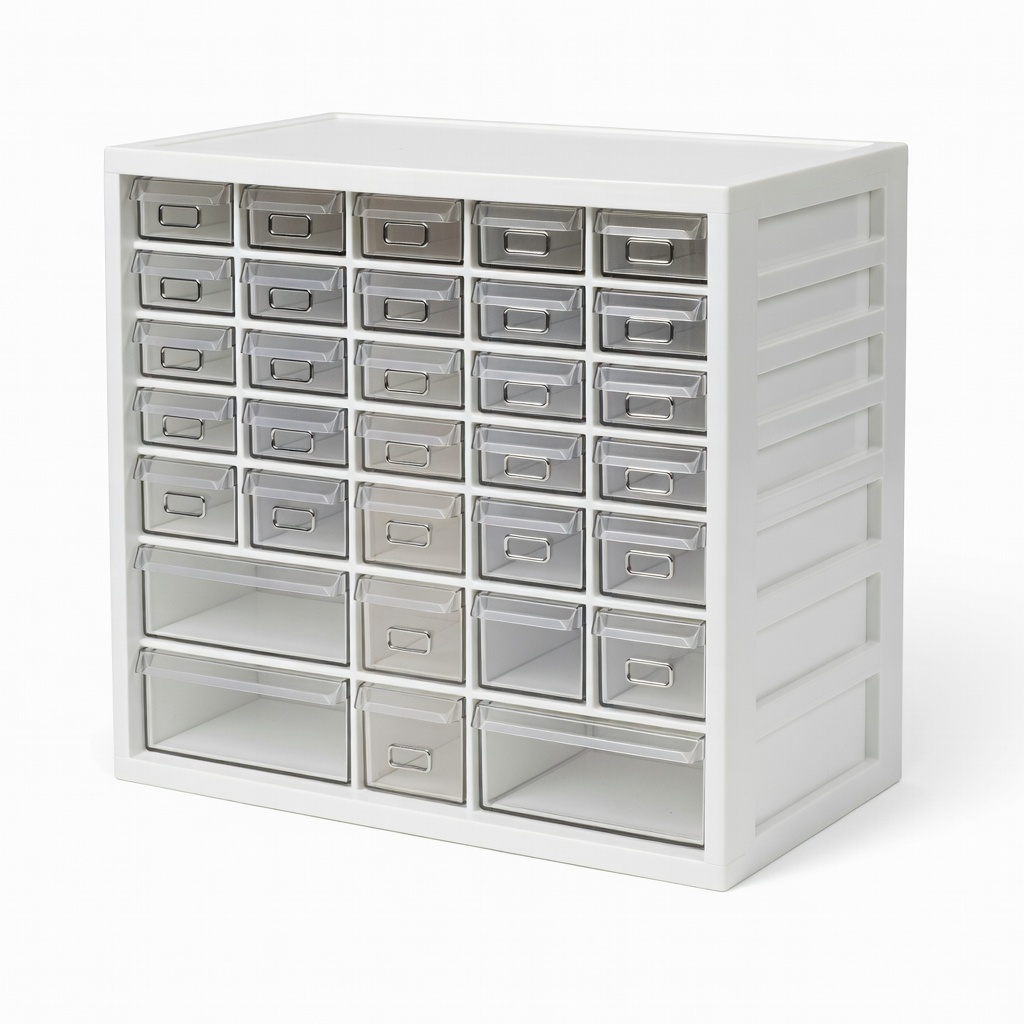
Stackable, durable drawers perfect as a base for organization systems.
Best for: If starting from scratch, holds organized inserts securely.
Price Range: $34.99
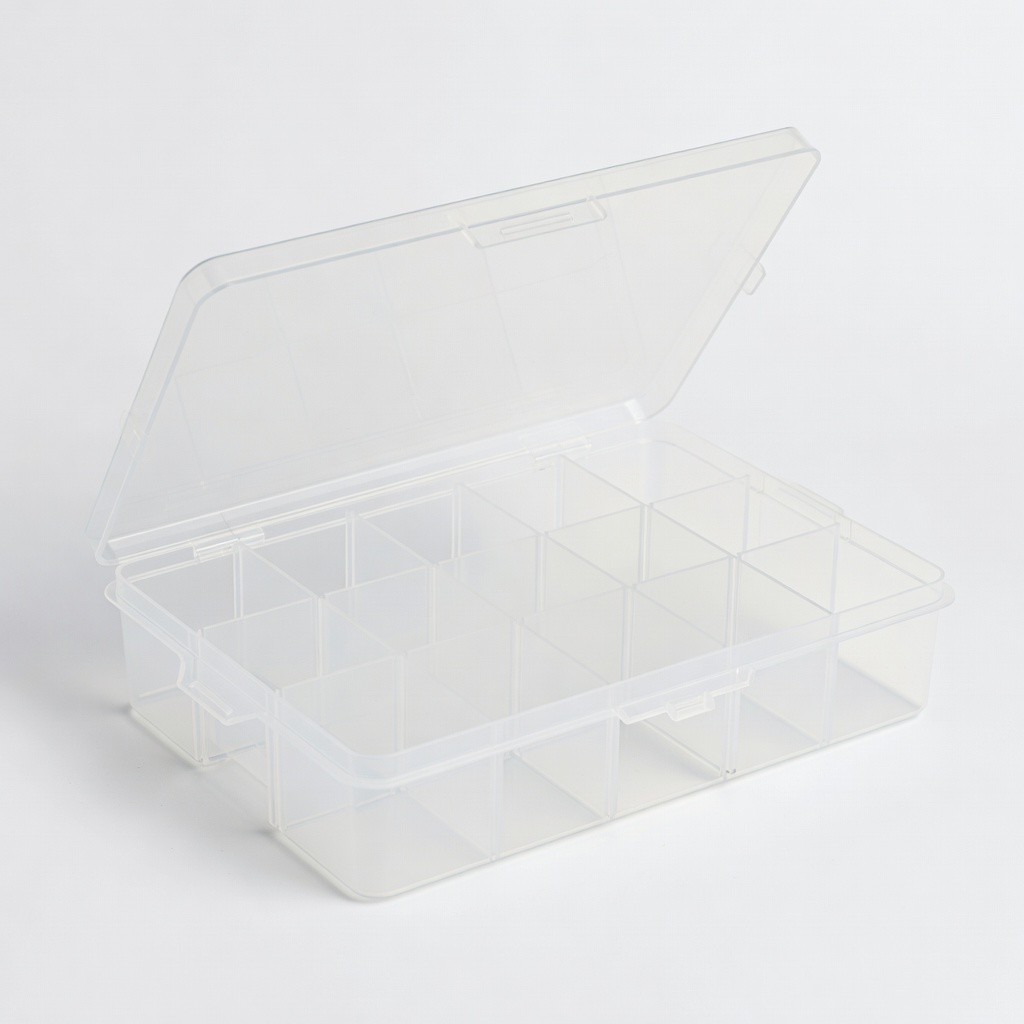
Removable dividers for flexible tiny supply storage.
Best for: Portable for beads, buttons, and findings inside larger drawers.
Price Range: $9.99
Ideal for separating tools, ribbons, and cords in standard craft drawers.
mDesign Adjustable Drawer Dividers (Set of 4) Customizable length fits any drawer size perfectly, keeping sections stable.
Labeling bins and drawers for quick identification during crafts.
Brother P-touch PT-D210 Label Maker Easy-to-use with durable, laminated labels that won't smudge or peel.

Organizing beads, sequins, and stamps without hiding contents.
STORi Clear Plastic Drawer Organizers (Set of 10) Crystal-clear bins in various sizes for visible storage of small accessories.
If starting from scratch, holds organized inserts securely.
Akro-Mils 26 Drawer Plastic Craft Cabinet Stackable, durable drawers perfect as a base for organization systems.
Portable for beads, buttons, and findings inside larger drawers.
Darice Adjustable Compartment Organizer Box Removable dividers for flexible tiny supply storage.