Traveling with a tangle of cables, loose jewelry, and scattered toiletries can turn excitement into frustration. Lost earbuds or a charger buried at the bottom of your bag? We've all been there. This guide solves that chaos by teaching you how to organize accessories in travel pouches efficiently.
You'll learn a beginner-friendly, step-by-step process to categorize, pack, and label your essentials. By the end, your accessories will be compact, accessible, and ready for any adventure—saving you time and reducing stress on the go.
The whole process takes just 20-30 minutes and requires no special skills. Expect perfectly organized pouches that fit easily into your carry-on.
▸What You'll Need
- •Travel pouches or organizer bags (multi-compartment preferred)
- •Your accessories: chargers, cables, earbuds, jewelry, toiletries, adapters
- •Ziplock bags or small dividers (optional for extra separation)
- •Labels or marker for labeling (permanent or removable)
- •Cleaning cloth or wipes (for pre-packing clean-up)
Estimated Time: 20-30 minutes
Difficulty: beginner
▸Step-by-Step Instructions
Step 1: Gather All Your Accessories
Start by collecting every travel accessory from around your home—chargers, cables, earbuds, power banks, jewelry, rings, earrings, toiletries like lip balm or tweezers, and adapters. Lay them out on a clean table or bed for a full visual inventory.
This step matters because it prevents forgetting items or duplicating purchases later. You'll see what you have, identify duplicates, and spot gaps (like missing cable ties). Expect a pile that looks messy at first—that's normal!
Tip: Use categories in your mind: electronics, jewelry, personal care.
💡 Tips:
- •Take a photo of your pile for future reference.
- •Toss or donate broken/damaged items now.
⚠️ Warnings:
- •Don't skip this—overlooking one item leads to airport panic.
Step 2: Sort and Categorize Items
Divide your pile into logical groups: electronics (cables, chargers, earbuds), jewelry (necklaces, rings), personal care (tweezers, nail clippers), and misc (adapters, memory cards). Use bowls or paper plates to separate them temporarily.
Categorizing streamlines packing and makes retrieval easy during travel. Success here looks like neat, distinct piles—no more rummaging.
Why it works: Travel pouches shine with themed compartments, reducing wear and tear on items.
💡 Tips:
- •Group by frequency of use: daily essentials first.
- •Prioritize breakables like glasses cases separately.
Step 3: Clean Your Accessories
Wipe down each item with a microfiber cloth or disinfectant wipe. Untangle cables, polish jewelry, and shake out dust from pouches. Dry everything completely.
Clean items last longer and prevent dirt transfer in your luggage. Expect items to look brand new and feel fresh.
This quick step (5 minutes) avoids grime buildup from past trips.
⚠️ Warnings:
- •Avoid soaking electronics—use dry wipes only.
Step 4: Choose Your Travel Pouches
Select 2-4 pouches based on categories: one for electronics, one for jewelry, etc. Opt for water-resistant, zippered ones with multiple compartments. Lay them out.
Right pouches make organization foolproof. Success: Pouches that close flat without bulging.
💡 Tips:
- •Measure pouch size against your luggage space.
Step 5: Pack Electronics Securely
Coil cables loosely and secure with ties or Velcro. Place chargers in main compartment, earbuds in a small pocket. Use bubble wrap for fragile ports.
This prevents tangles and damage. Expect compact, kink-free packing.
Pro move: Sandwich cables between dividers.
💡 Tips:
- •Wrap cables around chargers for space-saving.
- •Use earbud cases if available.
⚠️ Warnings:
- •Overstuffing strains zippers—leave 20% space.
Step 6: Organize Jewelry and Small Items
Thread necklaces through straws or use earring holders. Place rings in ziplocks, secure brooches. Distribute in pouch pockets.
No more knots! Items stay separated and visible.
💡 Tips:
- •Cut straws to necklace lengths for perfect fit.
Step 7: Add Labels to Pouches and Compartments
Write clear labels like 'Cables,' 'Earbuds,' 'Rings' on tape or stickers. Affix to pouch exteriors and inside flaps.
Labels speed up unpacking at 30,000 feet. Success: Instant identification.
💡 Tips:
- •Use waterproof labels for toiletries.
Step 8: Test and Pack into Luggage
Zip pouches, shake vigorously—nothing should rattle. Nest them into your suitcase or backpack.
Testing ensures durability. Your setup is now travel-ready!
💡 Tips:
- •Pack pouches flat to maximize space.
▸Pro Tips
- •Use Velcro cable ties for quick re-coiling.
- •Color-code pouches by category (blue for electronics, pink for jewelry).
- •Add a master list inside the main bag lid.
- •Opt for transparent pouches for visual access.
- •Roll soft items like socks around hard ones for cushioning.
- •Refresh organization every trip—takes 5 minutes.
- •Invest in magnetic pouches for metal items.
▸Common Mistakes to Avoid
- •Overpacking one pouch, causing bulges and zipper failure—use multiple pouches.
- •Skipping labels, leading to confusion—always label clearly.
- •Not cleaning first, transferring dirt—wipe everything.
- •Tightly coiling cables, causing kinks—coil loosely.
- •Ignoring pouch size, wasting luggage space—measure first.
▸Troubleshooting
Problem: Pouch won't close or bulges
Solution: Remove 1-2 items or use a larger pouch; redistribute weight evenly.
Problem: Items shift or tangle during travel
Solution: Add more dividers or bubble wrap; secure with extra ties.
Problem: Forgot an item
Solution: Keep a pre-trip checklist from your initial inventory photo.
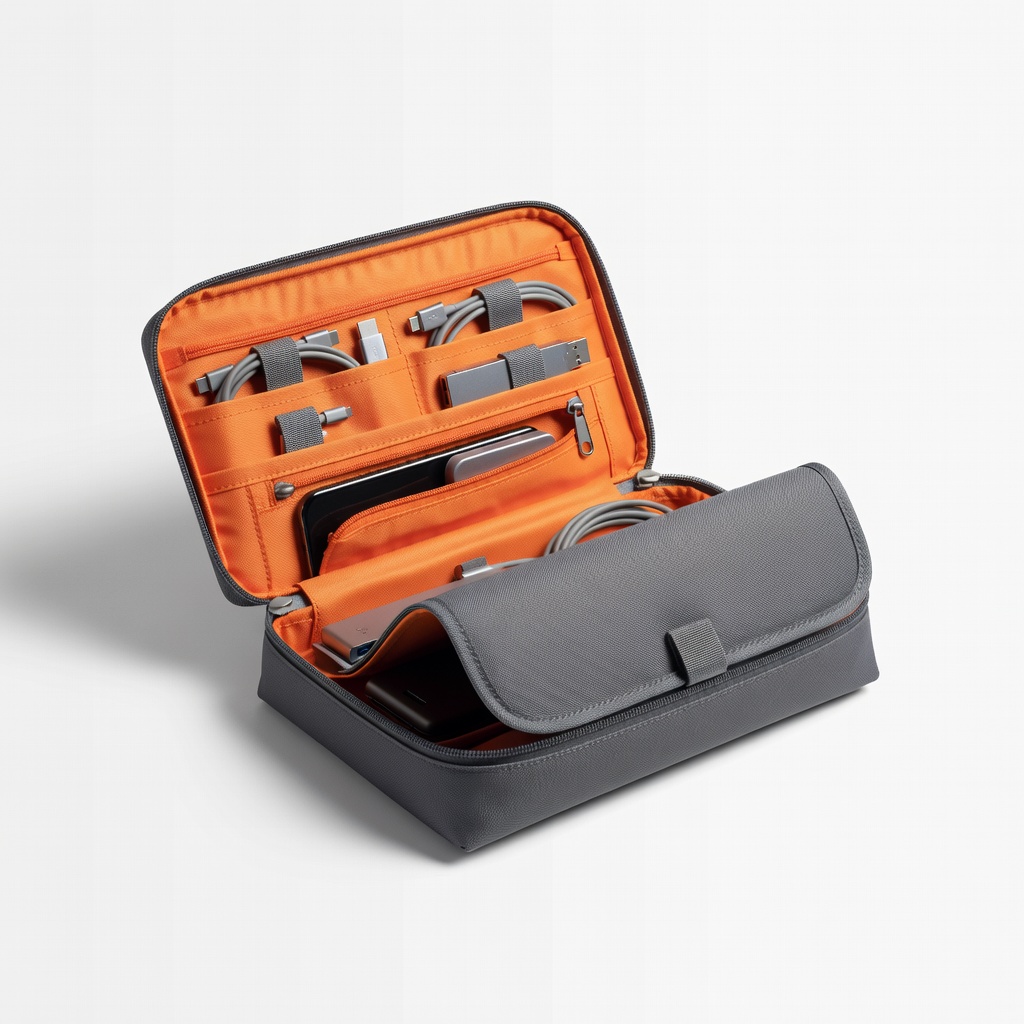
BAGSMART Electronics Organizer (ASIN: B07N41LNJZ)
Multiple compartments prevent cable tangles; water-resistant and durable for frequent travel.
Best for: Ideal for chargers, earbuds, and power banks on weekend trips.
Price Range: $19.99
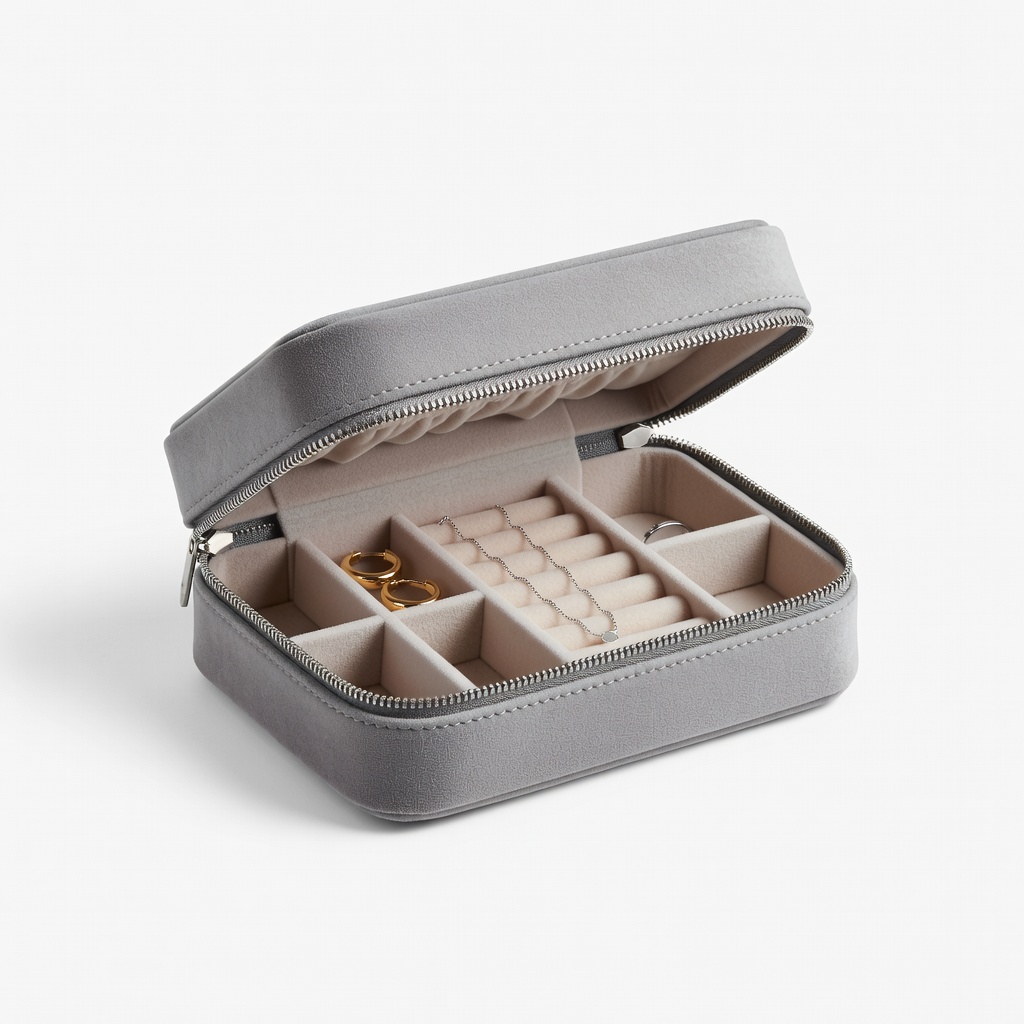
Nerecases Jewelry Travel Organizer (ASIN: B07Q5R6Z6Z)
Pillow inserts hold rings/earrings securely; compact for carry-ons.
Best for: Perfect for necklaces and small jewelry without knots.
Price Range: $14.99
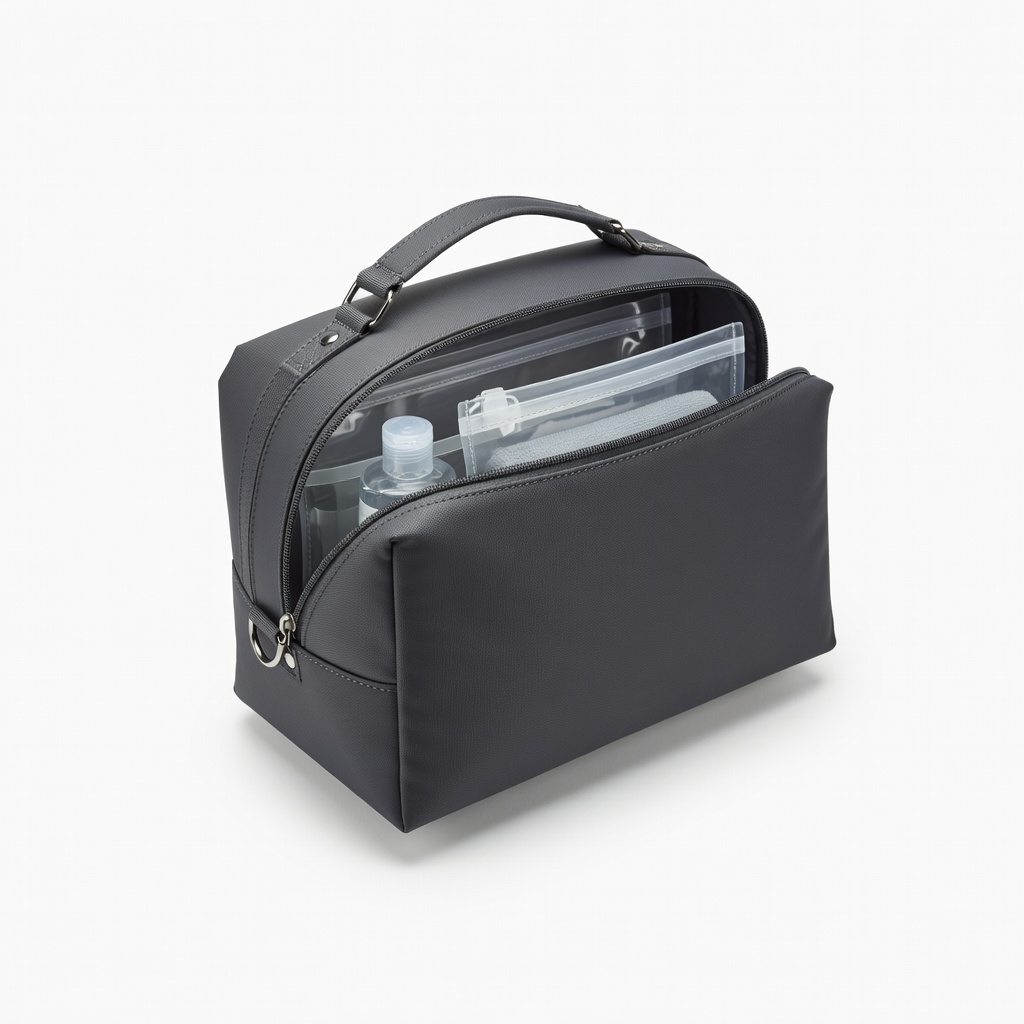
EZVBNE Toiletry Travel Bag (ASIN: B08L3Y5Z5Z)
Hanging design with clear pockets for easy access; leak-proof.
Best for: Great for personal care items like tweezers and creams.
Price Range: $16.99
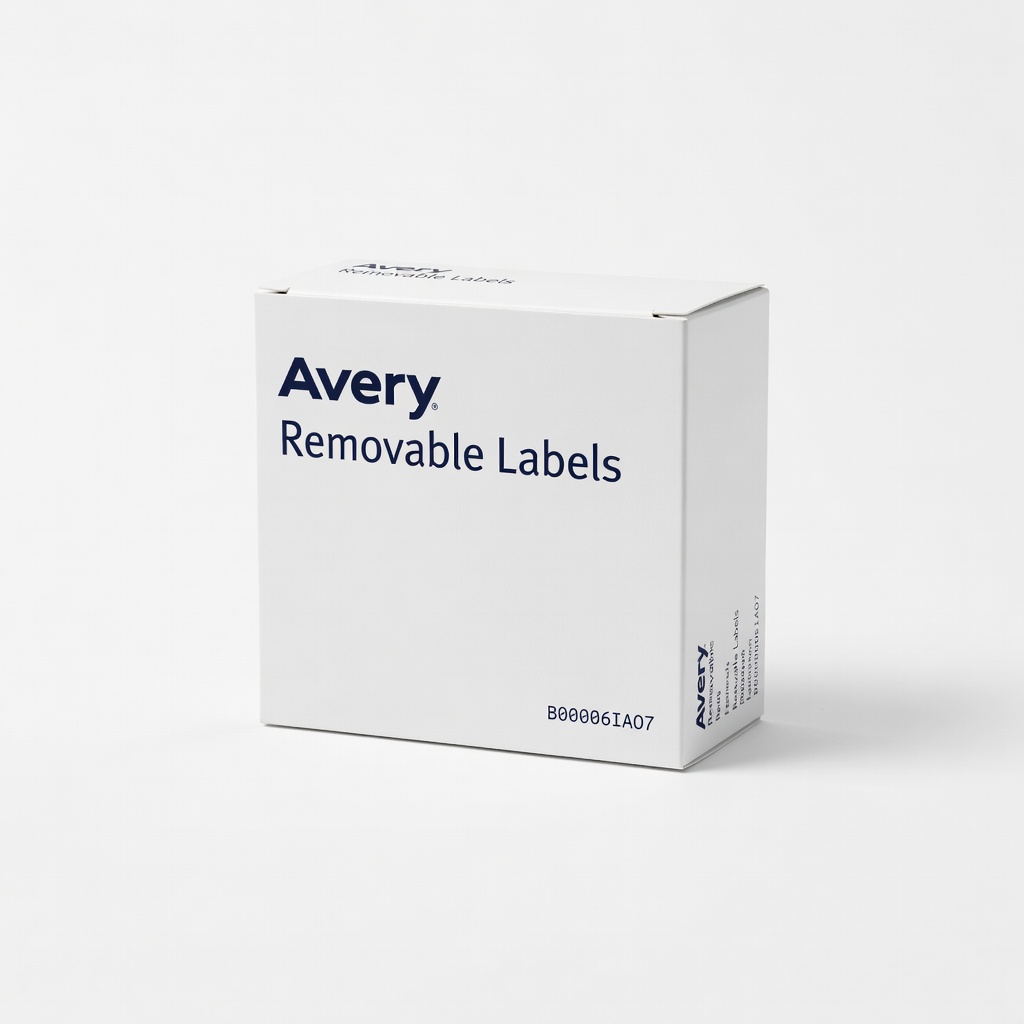
Avery Removable Labels (ASIN: B00006IAO7)
Peel-and-stick for quick labeling; residue-free removal.
Best for: Label pouches and compartments for foolproof organization.
Price Range: $5.99