Ever opened your jewelry drawer only to find necklaces knotted together, earrings missing mates, and rings scattered everywhere? This common frustration leads to lost items, damaged pieces, and wasted time hunting for the perfect accessory. Organizing your jewelry properly not only saves time but also extends the life of your precious items by preventing scratches and tangles.
In this beginner-friendly guide, you'll learn a straightforward, step-by-step process to sort, clean, and store your accessories in jewelry boxes. Whether you have a small collection or a growing stash, these methods use everyday items or affordable organizers. Expect to spend 30-45 minutes for a complete overhaul, with no special skills required—just patience and a little planning.
By the end, you'll have a customized system that's easy to maintain, making getting ready effortless and your jewelry looking showroom-ready.
▸What You'll Need
- •Jewelry box or organizer with compartments (required; see recommendations)
- •Small dividers or inserts (optional, for custom fitting)
- •Soft cleaning cloth or jewelry cleaner (required for polishing)
- •Labels or label maker (optional, for categorization)
- •Tweezers (optional, for handling small items)
- •Ziplock bags or pouches (optional, for travel storage)
Estimated Time: 30-45 minutes
Difficulty: beginner
▸Step-by-Step Instructions
Step 1: Gather All Your Jewelry
Start by collecting every piece of jewelry from drawers, bags, boxes, and anywhere else it might be hiding. Lay everything out on a large, clean surface like a table covered with a soft towel to avoid scratches.
This step matters because it gives you a full inventory, helping you spot duplicates, broken items, or pieces to declutter. Expect to find 20-100 items depending on your collection—sort them into piles as you go: necklaces, earrings, rings, bracelets, and brooches.
What success looks like: A single workspace with all accessories visible, no more 'lost' items.
💡 Tips:
- •Work in good lighting to spot tarnish or damage early.
- •Play music to make it fun!
Step 2: Sort and Declutter
Categorize your jewelry by type and frequency of use: daily favorites, occasional wear, and rarely used. Within each category, separate pairs (e.g., matching earrings) and discard or repair broken items.
Decluttering prevents overcrowding later. Be ruthless— if you haven't worn it in a year, consider donating. Expect to reduce your collection by 10-20%.
Success indicator: Neat piles grouped logically, with a 'discard/repair' pile aside.
⚠️ Warnings:
- •Don't toss heirlooms without checking—store sentimental items separately.
Step 3: Clean Your Accessories
Wipe each piece with a soft microfiber cloth. For tarnished silver or gold, use a gentle jewelry cleaner or baking soda paste (mix with water). Soak non-porous items like metals briefly, rinse, and dry immediately.
Cleaning removes dirt that causes tangles and dullness, making organization easier. Skip harsh chemicals on pearls or stones.
Success looks like: Sparkling, residue-free jewelry ready for storage.
💡 Tips:
- •Use a polishing cloth for quick shine between deep cleans.
Step 4: Choose and Prepare Your Jewelry Box
Select a box with adjustable compartments or multiple layers. Empty it completely and wipe the interior with a dry cloth.
A good box prevents mixing; multi-tier designs save space. If yours lacks dividers, cut foam or use inserts.
Success: Clean, empty box with compartments visible.
Step 5: Create Custom Compartments
Insert dividers to fit your categories—small for rings/earrings, longer for chains. Use egg carton inserts for odd shapes if needed.
Customization maximizes space and accessibility. Test fit by placing items loosely.
Success: Divided sections matching your sorted piles.
💡 Tips:
- •Stackable boxes allow growth without mess.
Step 6: Place Items by Category
Start with bulkier items (necklaces in hooks/channels), then earrings (in pairs), rings, and small pieces. Coil chains loosely to avoid knots.
Logical placement (daily use front/top) speeds access. Fill 80% max to prevent overflow.
Success: Box neatly filled, items visible without digging.
⚠️ Warnings:
- •Never force chains—use pouches for long ones.
Step 7: Label Compartments
Add small labels to sections (e.g., 'Gold Earrings', 'Daily Necklaces') using sticker paper or a label maker.
Labels maintain order long-term, especially for shared spaces.
Success: Fully labeled, professional-looking organizer.
Step 8: Final Check and Store
Close the box, shake gently—no rattles. Place in a cool, dry drawer away from sunlight.
This ensures durability. Schedule monthly checks.
Success: Tangle-free, easy-access jewelry system.
💡 Tips:
- •Photograph before/after for motivation.
▸Pro Tips
- •Use velvet-lined boxes to prevent scratches on soft metals.
- •Rotate seasonal jewelry to keep boxes from overcrowding.
- •Add silica packets to absorb humidity and prevent tarnish.
- •For travel, transfer to flat pouches within the box.
- •Group by color or metal for quick outfit matching.
- •Invest in stackable boxes for expanding collections.
- •Use magnetic sheets for earring backs and loose findings.
▸Common Mistakes to Avoid
- •Overfilling compartments, leading to tangles—keep 20% empty space.
- •Mixing metals/types, causing scratches—separate gold/silver.
- •Skipping cleaning, trapping dirt that dulls shine—always polish first.
- •Forgetting labels, causing future disorganization—label everything.
- •Storing in humid areas, accelerating tarnish—use dry, dark spots.
▸Troubleshooting
Problem: Items don't fit or shift around
Solution: Add foam padding or smaller dividers; choose a larger box.
Problem: Chains tangle despite organization
Solution: Use dedicated chain hooks or coil in individual pouches.
Problem: Jewelry tarnishes quickly
Solution: Add anti-tarnish strips or store with silica gel; clean monthly.
Problem: Box feels too full
Solution: Declutter more or upgrade to multi-layer/stackable options.
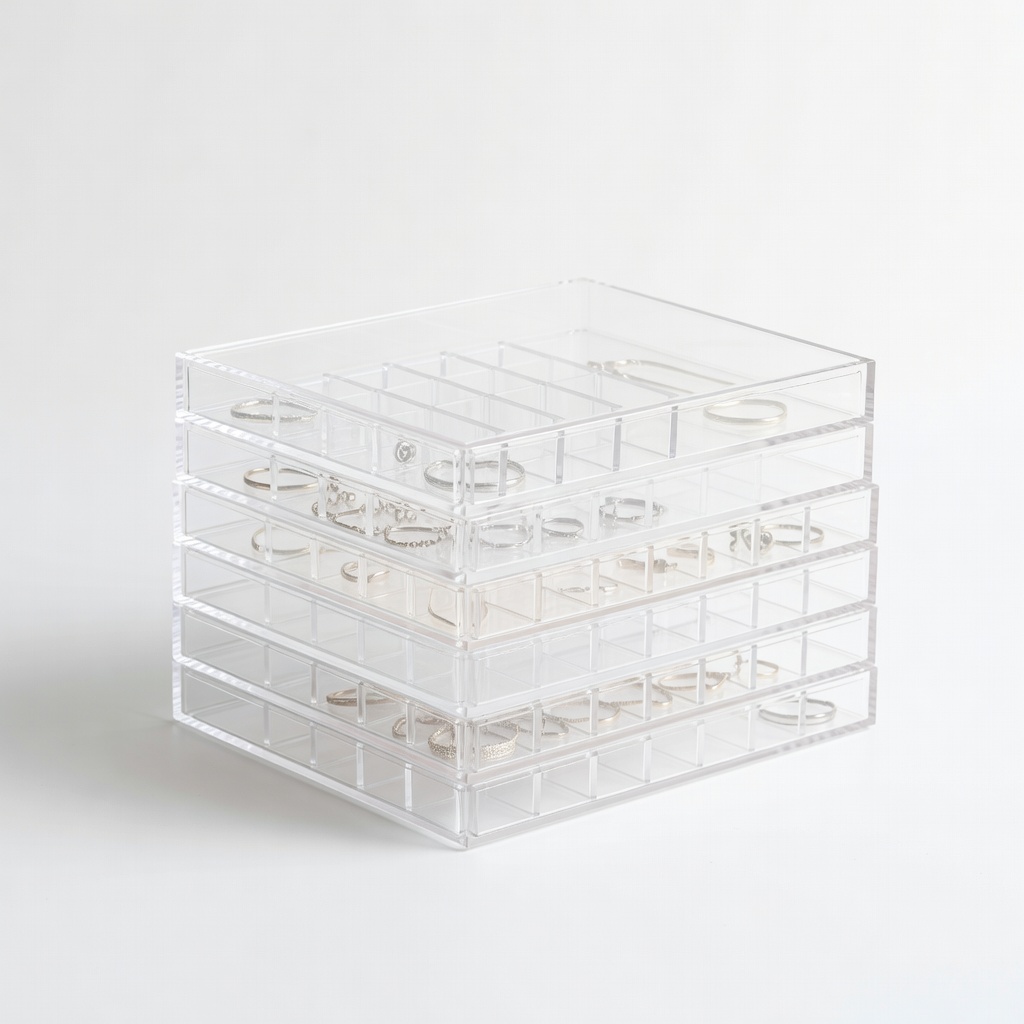
Sorbus Stackable Clear Jewelry Organizer
Transparent design lets you see everything at a glance, with removable dividers for customization.
Best for: Ideal for beginners with mixed accessories; stack multiples for growth.
Price Range: $24.99
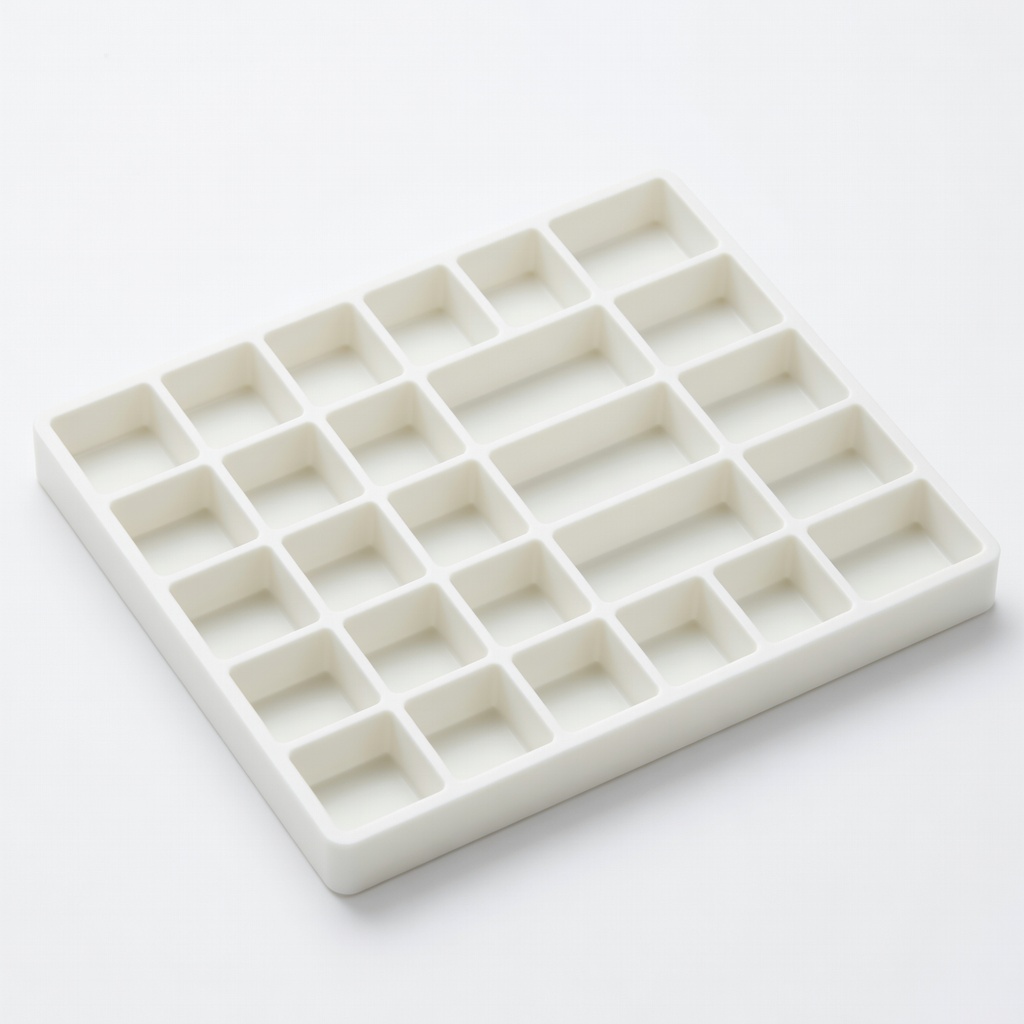
Darice Jewelry Organizer Tray Insert
Affordable foam inserts fit most boxes, creating perfect custom compartments.
Best for: Retrofit existing drawers or boxes without buying new ones.
Price Range: $9.99
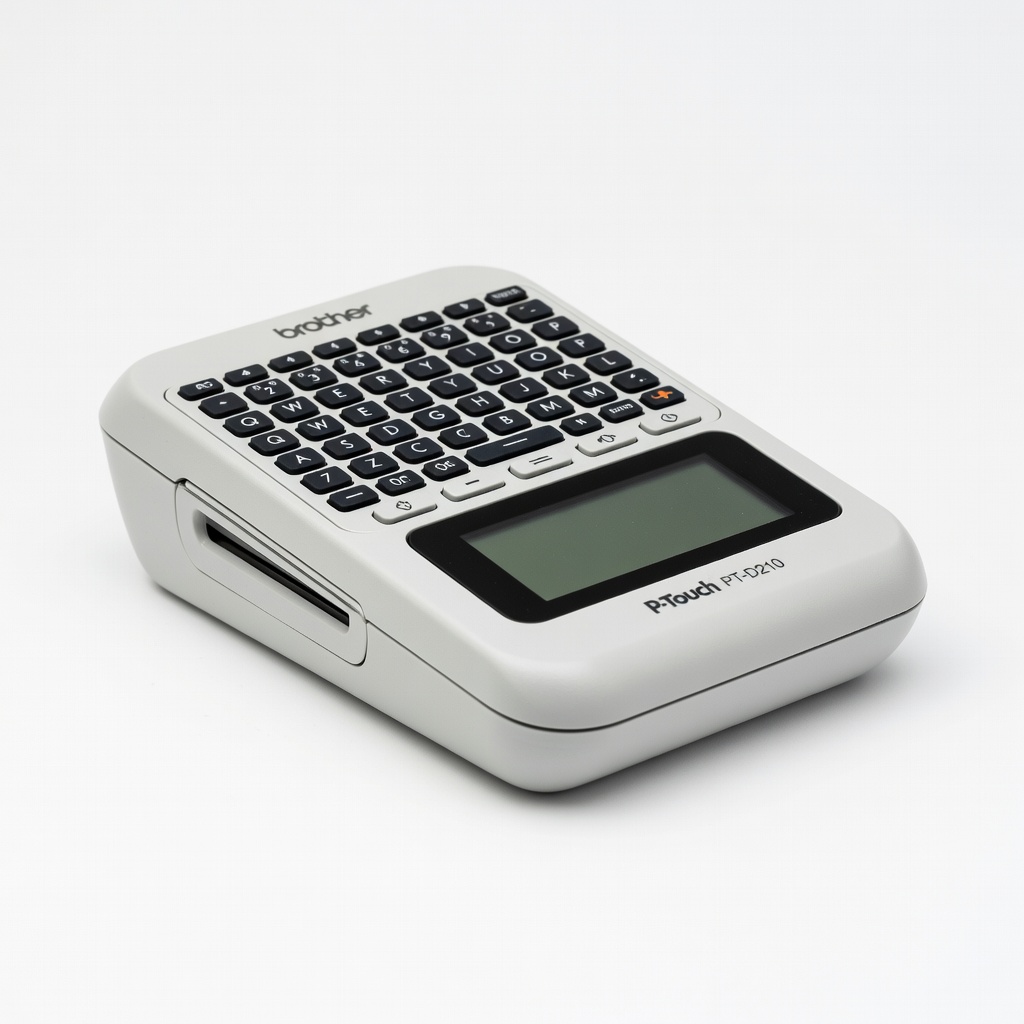
Brother P-Touch PT-D210 Label Maker
Quickly prints durable labels for long-lasting organization.
Best for: Label compartments precisely for shared or large collections.
Price Range: $29.99
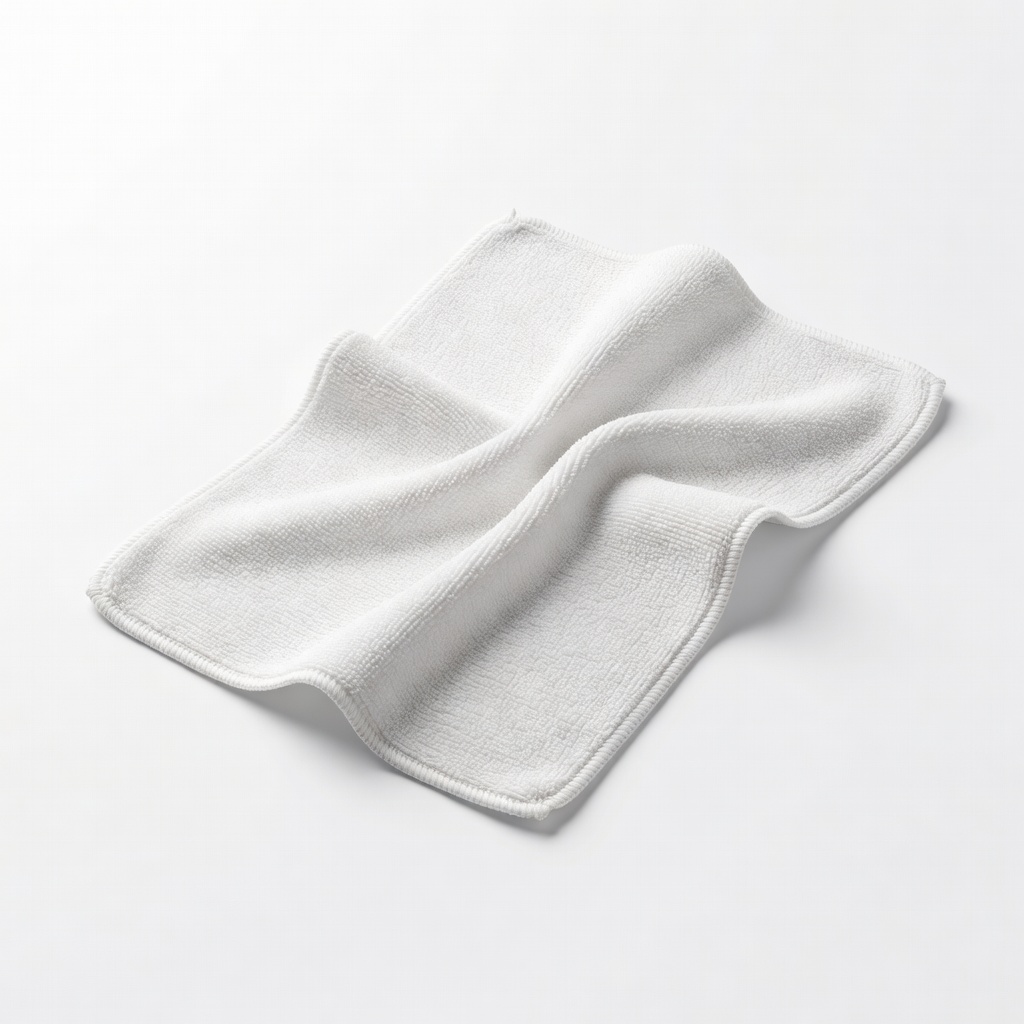
Solaris Jewelry Cleaning Cloth
Chemical-free polishing removes tarnish without damage.
Best for: Pre-organization cleaning step for all metals.
Price Range: $7.99
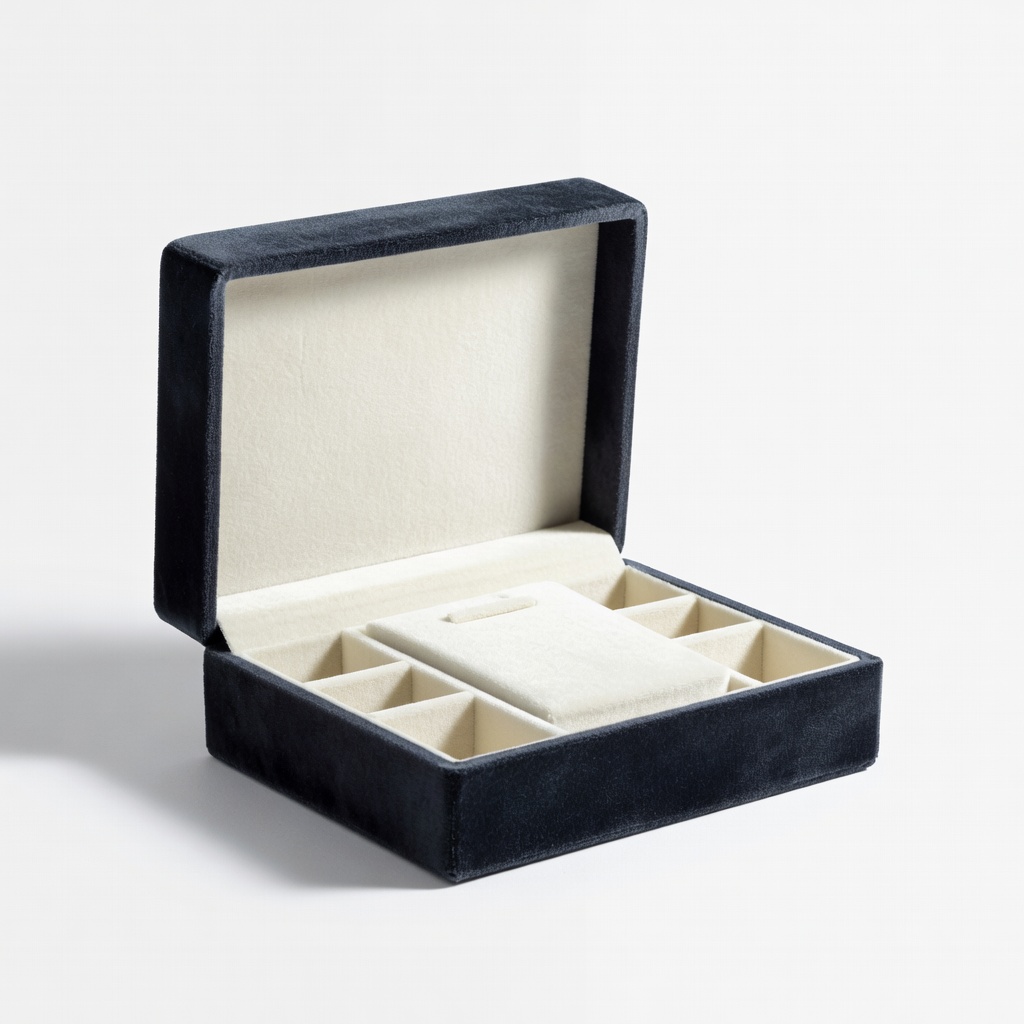
Case Elegance Velvet Jewelry Box
Soft lining protects delicate pieces, with multiple tiers.
Best for: Premium storage for valuable or heirloom jewelry.
Price Range: $39.99