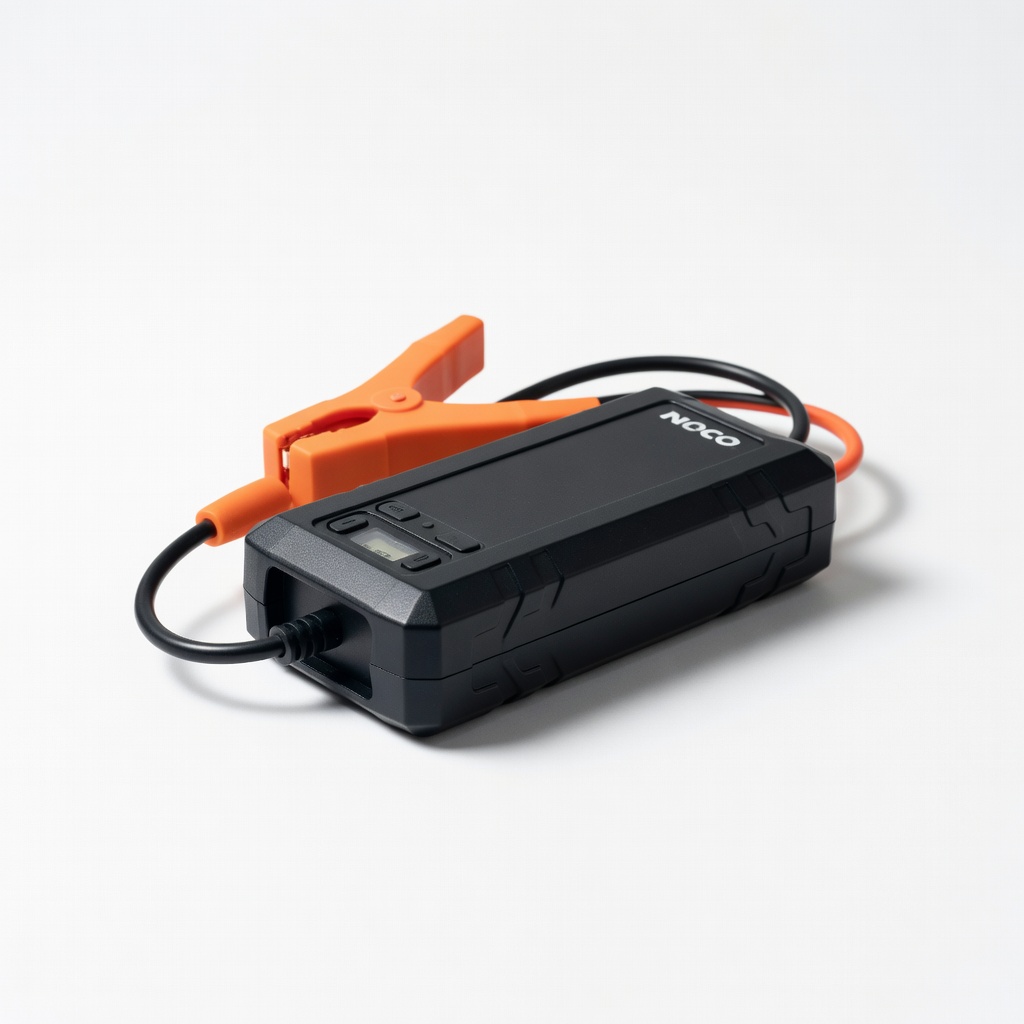
NOCO Boost Plus GB40 1000A
Everyday emergencies; compact for trunk storage.
$124.95
NOCO Boost Plus GB40 1000A Ultra-safe lithium design with spark-proof tech, perfect for most cars up to 6L.
Get the App
Better experience on mobile
Safely revive your dead car battery in minutes using a portable 12V power pack—no jumper cables or second vehicle required.
Imagine you're late for work, turn the key, and nothing happens—a dead battery. It happens to everyone, but with a 12V power pack (also called a jump starter), you can get back on the road fast without calling for help.
This beginner-friendly guide walks you through every step to jump-start your car safely and effectively. You'll learn the exact process, safety tips, and what to watch for, all in under 15 minutes.
No mechanical experience needed; just follow the steps. We'll cover everything from prep to post-start checks, ensuring you avoid common pitfalls.
Estimated Time: 10-15 minutes Difficulty: beginner
Park your car on a flat, stable surface away from traffic. Turn off the engine, all lights, radio, and accessories. Engage the parking brake. Remove the keys from the ignition.
Why it matters: This prevents sparks, electrical shorts, or accidental starts that could cause injury. Expect a quiet, safe environment—no humming accessories.
Open the hood and prop it securely. Locate the battery (usually under the hood; check manual if hidden). Clean any corrosion on terminals with a wire brush if needed.
💡 Tips:
⚠️ Warnings:
Ensure your power pack is at least 80% charged (check LED indicator). Read the manual for your model's peak amps (match to engine: 1000A+ for <6L gas, 2000A+ for diesel).
Why it matters: A low charge won't deliver enough power. You'll see green lights confirming readiness.
Turn on the pack's safety switch if equipped. Inspect clamps for damage—no frayed wires.
💡 Tips:
⚠️ Warnings:
Identify the positive (+) battery terminal (marked red, larger post). Attach the red clamp securely—firm twist or clip.
Why it matters: Positive first reduces spark risk. Expect a solid connection with no wobble.
If the battery is in the trunk (common in some cars), access it there.
💡 Tips:
⚠️ Warnings:
Attach the black clamp to the negative (-) terminal or a clean, unpainted metal ground on the engine block (away from battery/fuel lines).
Why it matters: Grounding prevents gas vapor ignition. Look for a solid hold—no slip.
Some packs have a 'spark-proof' feature; wait for any indicator light.
💡 Tips:
Turn on the power pack (press boost button). Wait 10-30 seconds for green 'ready' light or boost mode.
Why it matters: Allows capacitors to charge fully. You'll hear a beep or see flashing lights transition to steady.
Do not start the car yet—give it time.
💡 Tips:
⚠️ Warnings:
Insert key, turn to start position—crank for no more than 5 seconds. If it doesn't start, wait 1 min and retry (up to 3 times).
Why it matters: Prevents pack overload. Success: Engine turns over and idles smoothly.
Once running, let it idle 2-3 minutes.
💡 Tips:
⚠️ Warnings:
Turn off power pack. Remove black clamp first, then red. Close hood.
Why it matters: Reverse prevents shorts. Expect no sparks if done right.
Drive 20-30 mins to recharge battery fully.
💡 Tips:
⚠️ Warnings:
Monitor battery light, voltage (should be 13.7-14.7V running). Test drive; if stalls, battery may need replacement.
Why it matters: Confirms fix. Success: Smooth drive, no warnings.
💡 Tips:
⚠️ Warnings:
Problem: Car won't crank after 3 tries
Solution: Check connections, recharge pack, or test alternator. Try another ground.
Problem: Pack shows error light
Solution: Reverse polarity? Disconnect immediately, reconnect correctly.
Problem: Engine starts but dies
Solution: Faulty battery/alternator—drive to shop or replace battery.
Problem: Sparks when connecting
Solution: Accessories on? Turn off everything first.
Ultra-safe lithium design with spark-proof tech, perfect for most cars up to 6L.
Best for: Everyday emergencies; compact for trunk storage.
Price Range: $124.95
Budget-friendly with high amps for trucks/SUVs, plus flashlight/USB.
Best for: Larger vehicles or value seekers.
Price Range: $69.99
Heavy-duty clamps, air compressor included for flat tires too.
Best for: Multi-tool for roadside kits.
Price Range: $99.99
For diesel/large engines; waterproof and durable.
Best for: Trucks or harsh conditions.
Price Range: $249.95
Everyday emergencies; compact for trunk storage.
NOCO Boost Plus GB40 1000A Ultra-safe lithium design with spark-proof tech, perfect for most cars up to 6L.
Larger vehicles or value seekers.
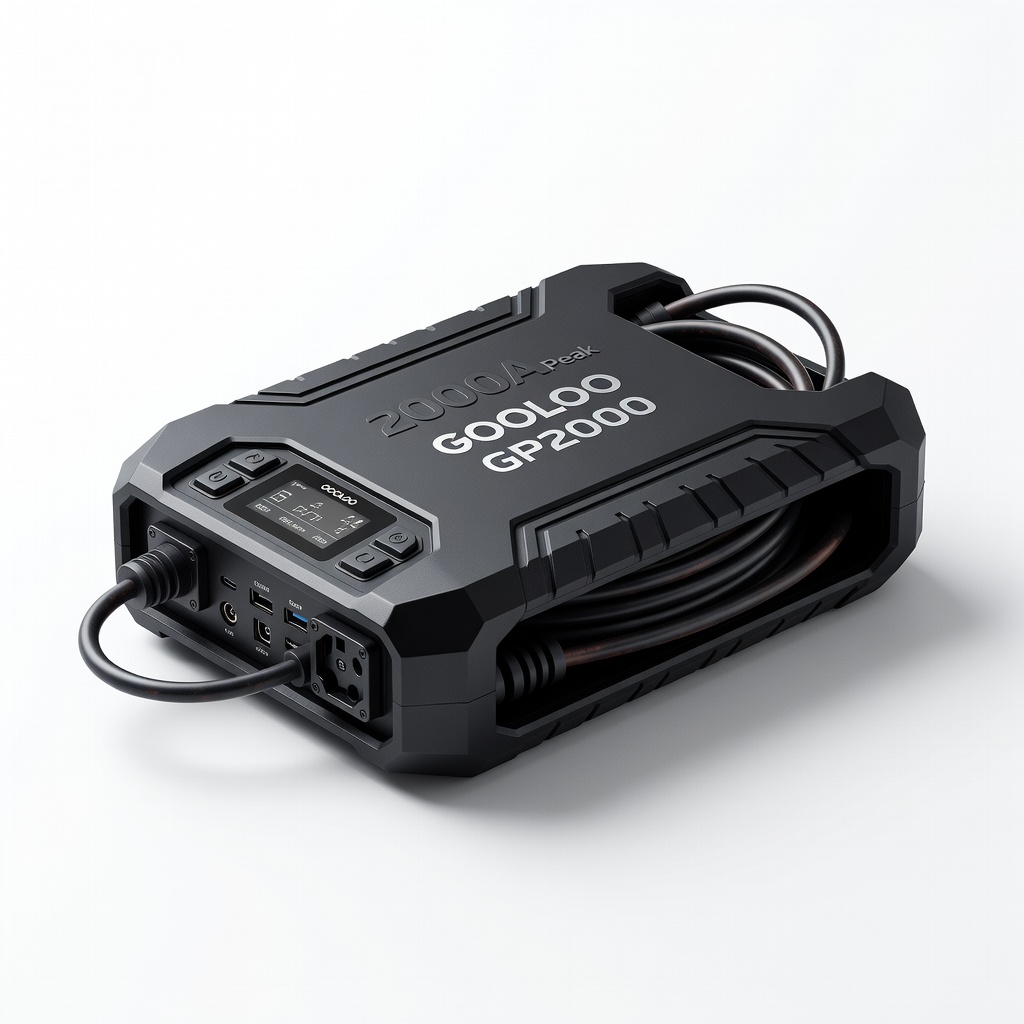
GOOLOO GP2000 2000A Peak Budget-friendly with high amps for trucks/SUVs, plus flashlight/USB.
Multi-tool for roadside kits.
Stanley J5C09 1000A Heavy-duty clamps, air compressor included for flat tires too.

Trucks or harsh conditions.
NOCO Boost HD GB70 2000A For diesel/large engines; waterproof and durable.