Amplifying an acoustic guitar without losing its organic voice is a game-changer for gigging players, but many shy away from permanent mods due to complexity and risk of damage. As an advanced luthier or modder, you're ready to tackle this yourself, saving hundreds over shop rates.
This guide teaches you to install an under-saddle piezo pickup system—like Fishman or LR Baggs—step-by-step, including drilling, soldering, and testing. You'll achieve balanced, feedback-resistant output perfect for stage or studio.
Expect 1-2 hours of focused work. You'll need soldering experience, steady hands for drilling, and basic electronics knowledge. Success means plug-and-play amplification with no tonal compromise.
▸What You'll Need
- •Under-saddle piezo pickup system (e.g., Fishman Matrix Infinity or LR Baggs Element)
- •Soldering iron (40-60W with fine tip) and rosin-core solder
- •Wire strippers/cutters
- •Precision drill with 1/16-inch (1.6mm) bit for bridge hole
- •Small flathead screwdriver
- •220-400 grit sandpaper
- •Multimeter for continuity testing
- •Shielded guitar cable (18-22 AWG)
- •Heat shrink tubing
- •Masking tape and marker
- •Optional: Dremel tool for clean routing, guitar polish for cleanup
Estimated Time: 1-2 hours
Difficulty: advanced
▸Step-by-Step Instructions
Step 1: Prepare Workspace and Remove Strings
Set up a well-lit, static-free workspace with a soft cloth to protect your guitar's finish. Loosen and remove all six strings from the bridge and tuners to access the saddle.
Why it matters: Strings obscure the saddle and create tension that could snap during work. Expect a bare bridge plate—clean any debris with a soft brush.
Tape off the surrounding area to prevent scratches.
💡 Tips:
- •Use a string winder for speed.
- •Photograph your guitar's interior for reference.
⚠️ Warnings:
- •Avoid bending the bridge—support the guitar body firmly.
Step 2: Remove and Inspect Saddle
Gently pry out the saddle using a small flathead screwdriver wrapped in cloth. Inspect for wear; lightly sand the bottom if needed for a snug fit with the piezo element.
Measure the saddle slot depth and width—piezo strips must fit flush. Why: Proper fit ensures even string-to-piezo contact for balanced output across all strings.
Test-fit the piezo strip (usually 1/8-inch thick) without adhesive yet.
💡 Tips:
- •Note saddle height for reinstall—use calipers for precision.
⚠️ Warnings:
- •Don't force the saddle; cracks are common on older guitars.
Step 3: Mark and Drill Bridge Exit Hole
Critical precision step. Mark the bridge's underside where the pickup wire will exit—typically 1/4-inch from the saddle end, aligned with the endpin jack path. Use masking tape to guide.
Drill slowly with a 1/16-inch bit at low speed, angling slightly toward the guitar's interior. Why: This routes the signal wire cleanly without visible external damage.
Clear sawdust and test-fit wire through the hole.
💡 Tips:
- •Practice on scrap wood first.
- •Use a drill stop to limit depth.
⚠️ Warnings:
- •Too deep a hole pierces the top—measure twice!
Step 4: Install Piezo Element Under Saddle
Apply manufacturer-recommended adhesive (often thin CA glue) to the piezo strip's bottom. Slide it into the saddle slot, centering it under string positions 1-6.
Secure the saddle temporarily. Why: The piezo senses string vibration through the saddle for authentic acoustic tone.
Let adhesive cure 10-15 minutes.
💡 Tips:
- •Wiggle gently for air bubbles.
- •Omit glue for reversible installs.
⚠️ Warnings:
- •Excess glue warps the saddle—use sparingly.
Step 5: Route Wire and Connect to Preamp
Feed the piezo's signal and ground wires through the drilled hole, routing along the guitar's interior toward the endpin area (use hot glue dots to secure).
Strip 1/4-inch insulation, tin wires with solder, and connect to preamp per diagram (hot to signal, shield to ground). Shrink tubing insulates joints.
Why: Proper routing prevents rattles and feedback.
💡 Tips:
- •Follow guitar's natural contours.
- •Label wires for sanity.
Step 6: Mount Preamp and Battery Box
Position the preamp/battery box inside near the endpin (often pre-drilled holes). Secure with screws or adhesive pads.
Solder output wires to endpin jack (tip to signal, sleeve to ground). Install 9V battery.
Why: Central placement balances controls and battery access.
⚠️ Warnings:
- •Don't overtighten screws—thin tops crack easily.
Step 7: Test Connections and Reinstall Strings
Use multimeter to check continuity (no shorts). Reinstall strings to tension, plug into amp at low volume.
Play each string—expect clear, balanced output. Tweak saddle height if imbalanced.
Why: Early testing catches issues before final assembly.
💡 Tips:
- •Start with low action strings for easier tuning.
⚠️ Warnings:
- •Ground loops cause hum—verify all grounds.
Step 8: Final Tune-Up and Cleanup
Polish off. Intonate by adjusting saddle position, clean finish, and play at gig volume to check feedback.
Seal wire holes with wood filler if needed. Success: Rich amplified tone matching unplugged sound.
Document for future reference.
💡 Tips:
- •Use EQ pedal for stage optimization.
▸Pro Tips
- •Always discharge static by touching grounded metal before handling electronics.
- •Practice soldering on scrap wire—clean joints are 90% of success.
- •Route wires away from bridge plate to avoid vibration noise.
- •Use a mirror for interior inspection without full disassembly.
- •Calibrate piezo output with a tuner app for precise balance.
- •Opt for active preamps to boost signal and reduce cable capacitance.
- •Keep spare saddles—mods often require height tweaks.
▸Common Mistakes to Avoid
- •Drilling misaligned holes: Off-center exits cause wire kinks. Measure from multiple angles.
- •Cold solder joints: Weak connections fail live. Heat pad and wire 3 seconds each.
- •Overlooking grounding: Leads to 60Hz hum. Connect all shields properly.
- •Ignoring saddle fit: Loose piezo mutes bass strings. Sand precisely.
- •Rushing cure times: Adhesive fails, shifting elements mid-gig.
▸Troubleshooting
Problem: No sound or weak output
Solution: Check solder joints and continuity with multimeter. Verify battery polarity and piezo orientation.
Problem: Hum or buzz
Solution: Ensure ground wire contacts chassis. Reroute away from fluorescent lights; add ferrite bead.
Problem: Uneven string balance
Solution: Reseat piezo under saddle; sand slot if binding. Adjust preamp EQ.
Problem: Feedback at low volume
Solution: Tighten wire slack; add foam dampers near pickup. Check seal on drilled hole.
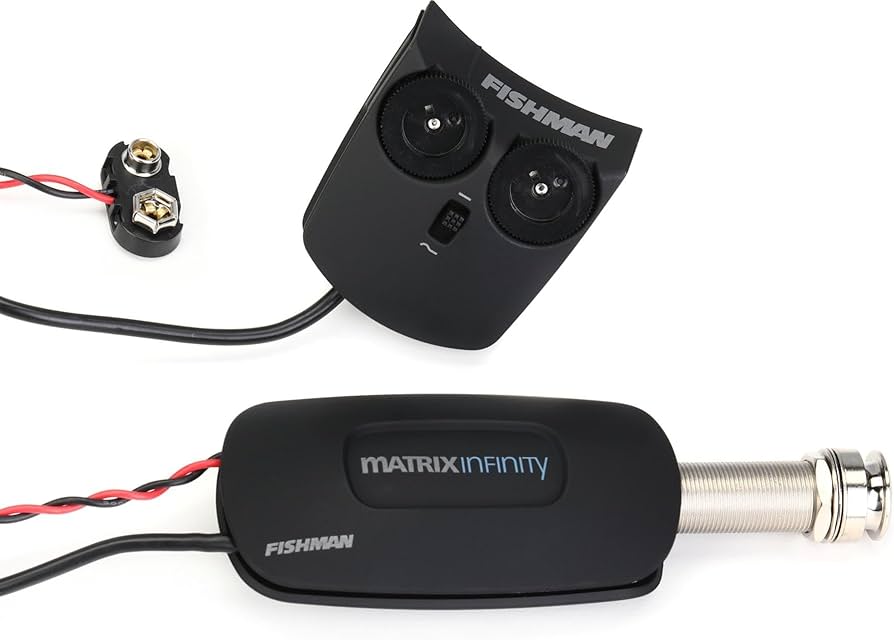
Fishman Matrix Infinity VTMB Under-Saddle Pickup System
Proven for natural tone capture with easy solderless connections, ideal for advanced installs.
Best for: Full systems for dreadnought acoustics needing stage-ready output.
Price Range: $150-$170
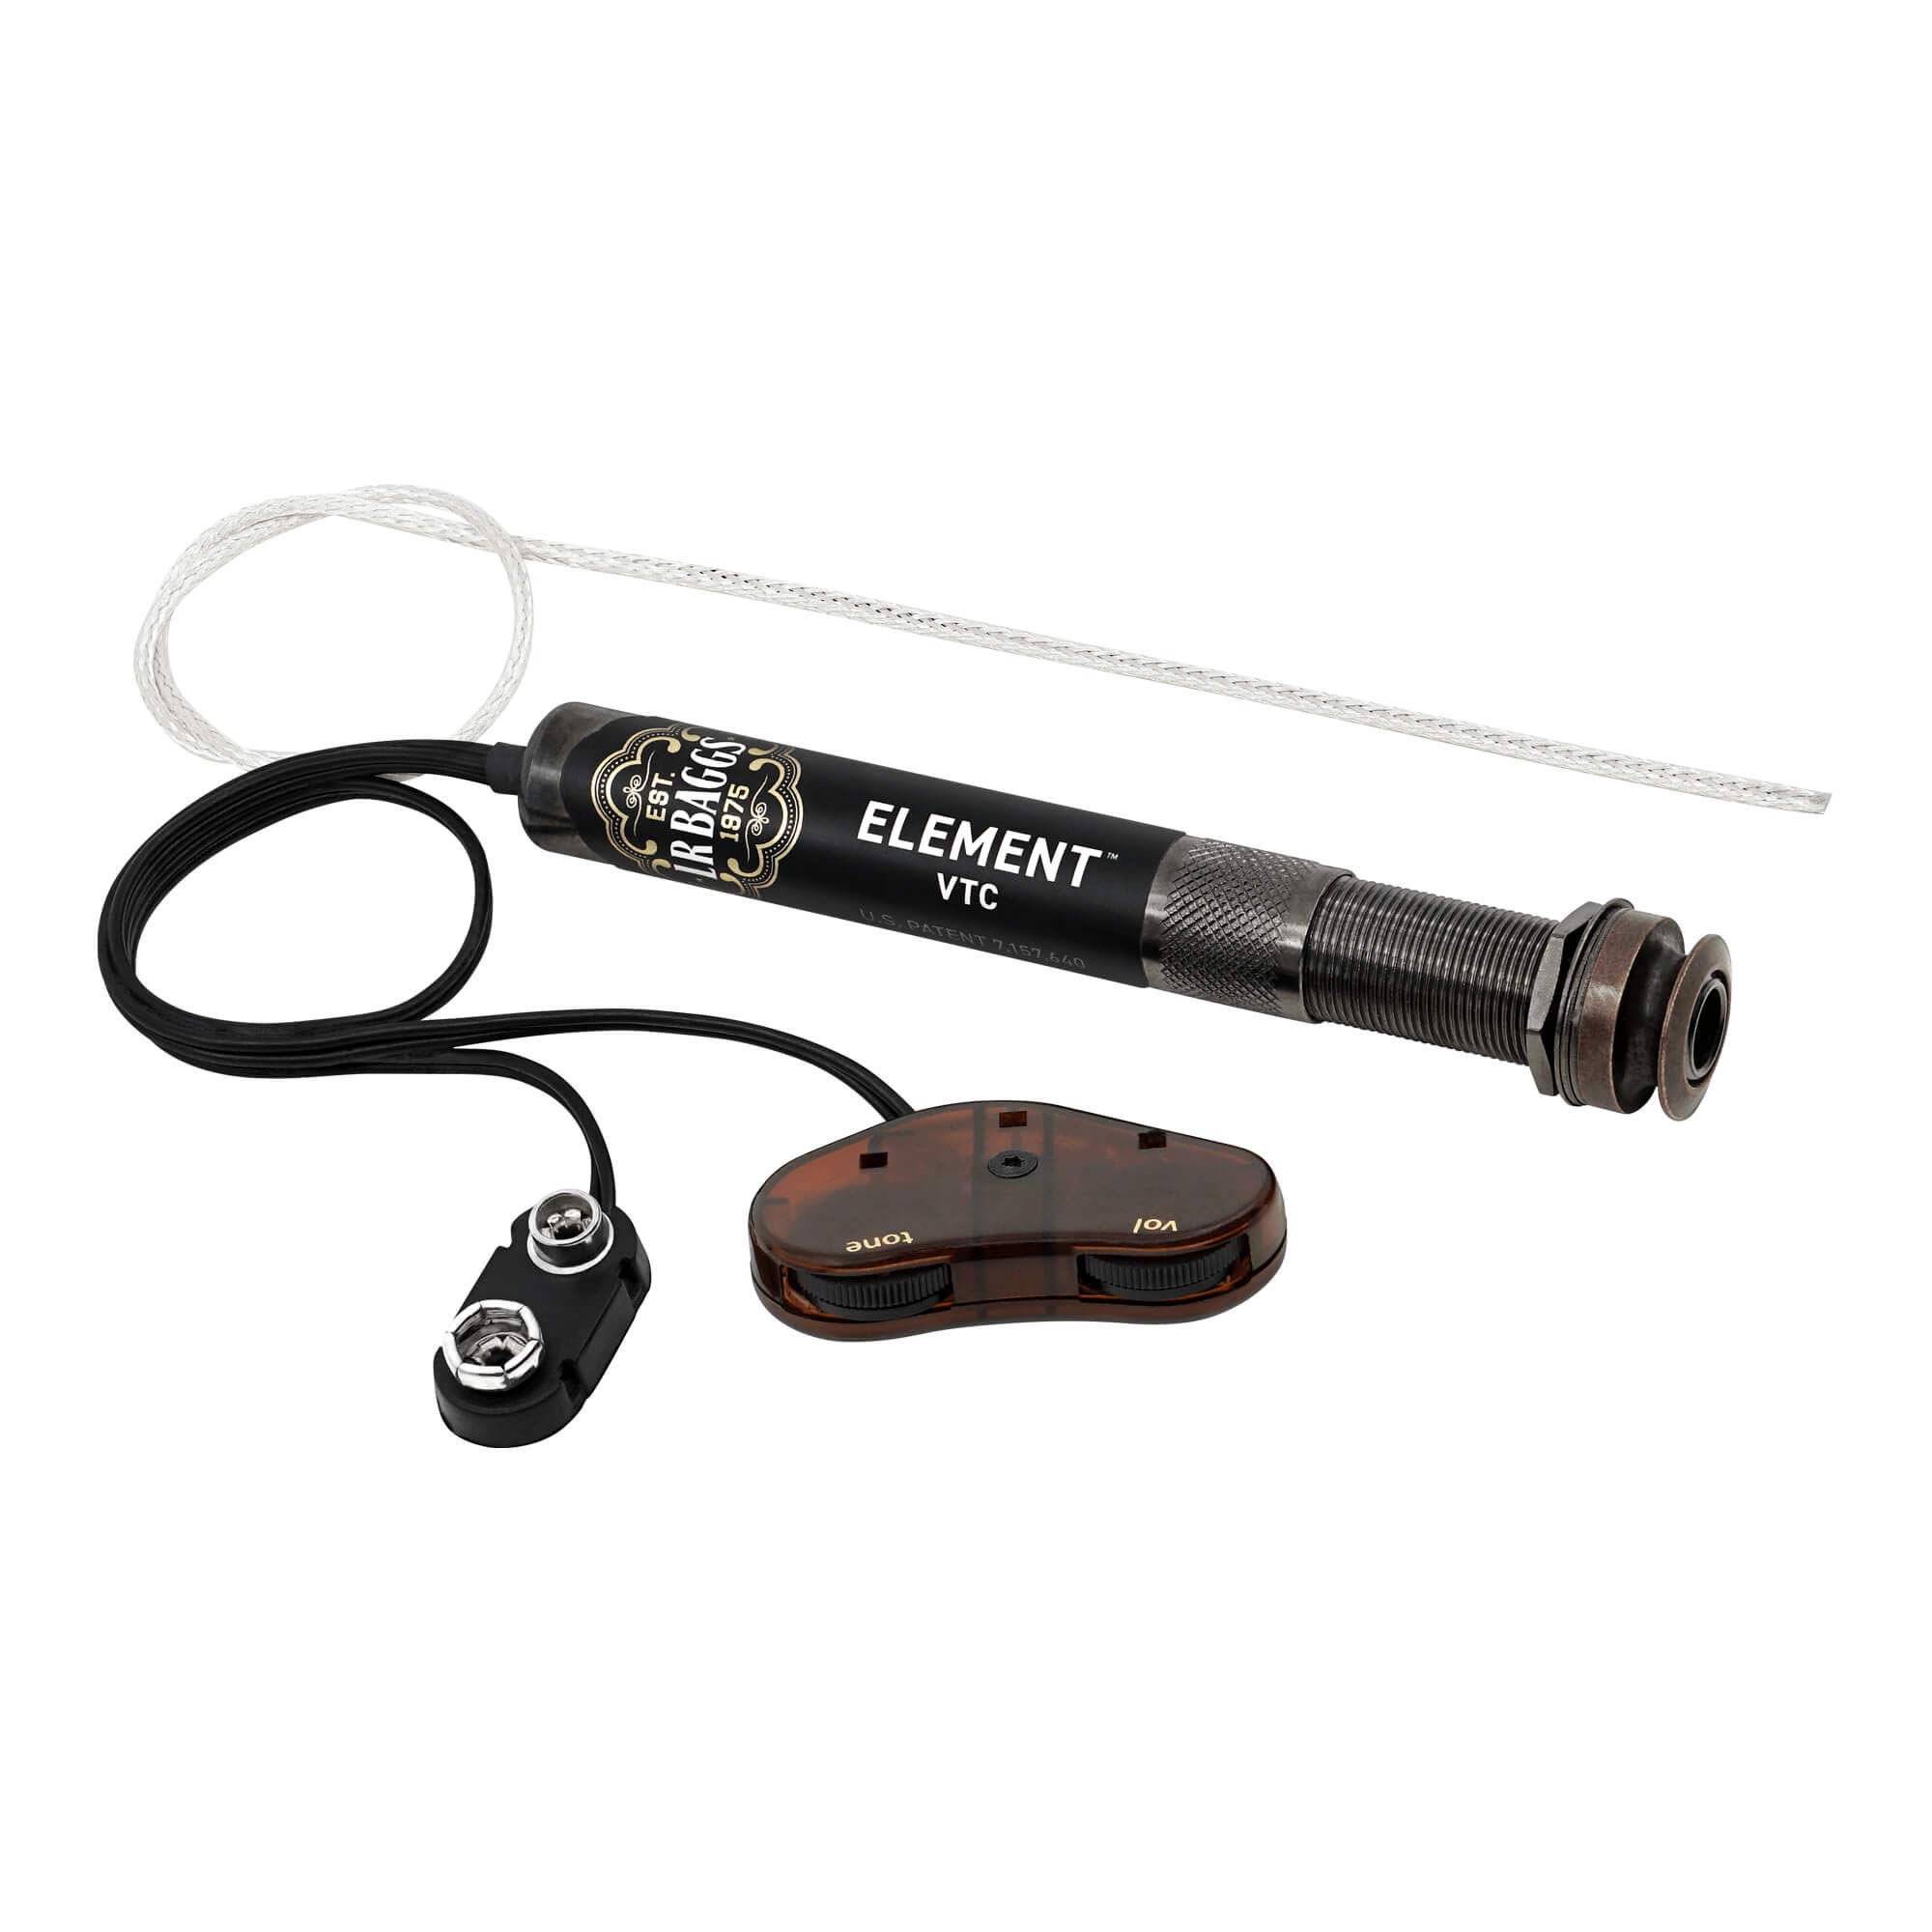
LR Baggs Element Active System
Compact, high-fidelity piezo with built-in preamp; minimizes feedback for live play.
Best for: Smaller guitars or players wanting simplicity post-install.
Price Range: $100-$120
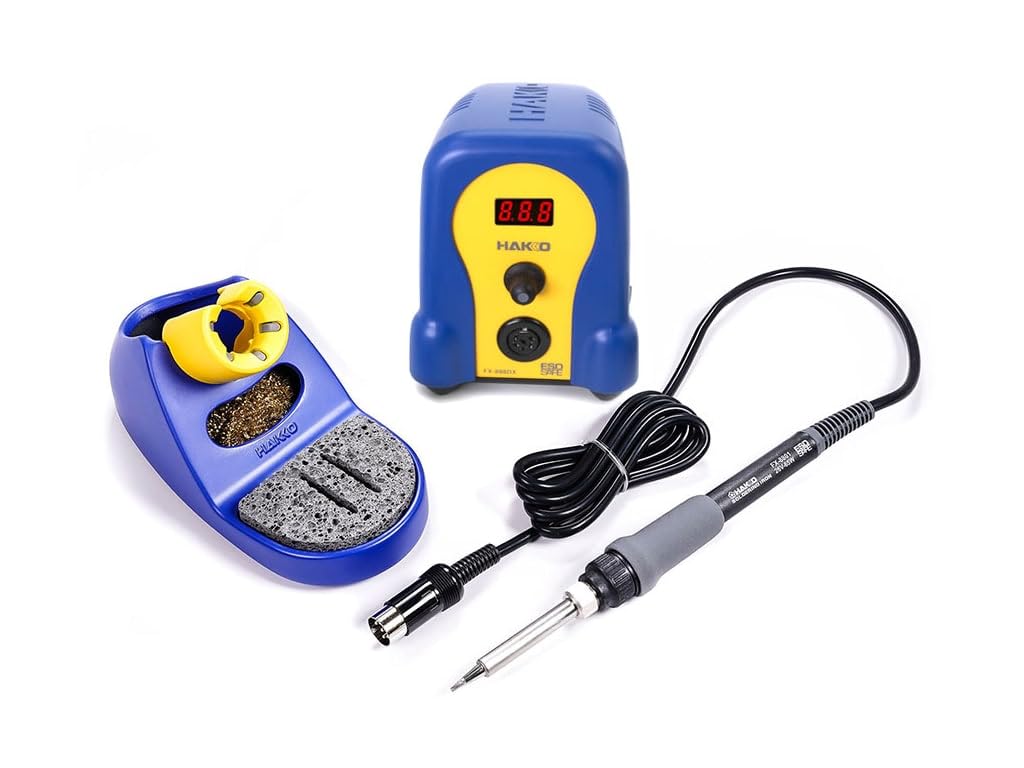
Hakko FX-888D Digital Soldering Station
Precise temperature control prevents cold joints on delicate guitar wires.
Best for: Any electronics mod requiring reliable soldering.
Price Range: $90-$110
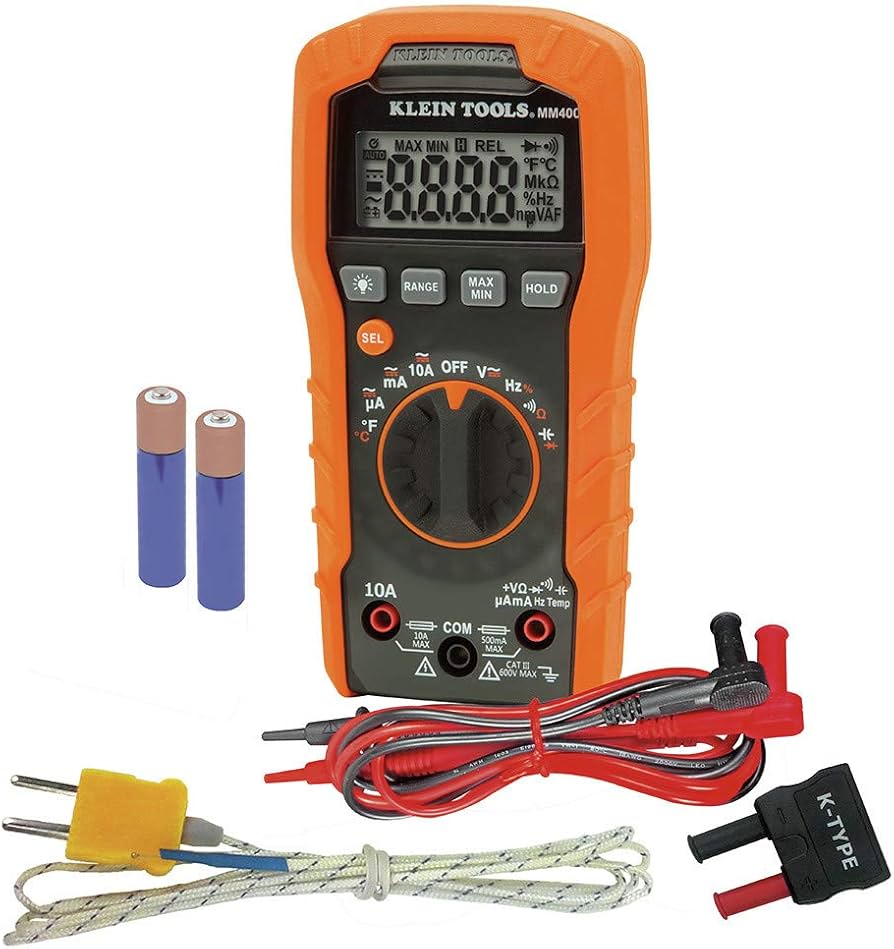
Klein Tools MM400 Digital Multimeter
Accurate continuity and voltage testing ensures flawless wiring.
Best for: Troubleshooting during and after install.
Price Range: $25-$35
Xuron 2175 Maxi-Shear Wire Stripper
Precision stripping without nicking shielded wires, crucial for clean signals.
Best for: All guitar wiring tasks.
Price Range: $15-$25