Clogged gutters are a homeowner's nightmare, leading to water damage, foundation issues, and even pest infestations if left unchecked. Every fall, leaves and debris pile up, blocking water flow and causing overflows that can rot your roofline or flood your basement. Installing gutter guards offers a simple, effective solution to keep debris out while allowing water to flow freely, saving you hours of cleaning time each year.
In this guide, you'll learn how to install gutter guards yourself, even if you're at an intermediate skill level with basic DIY experience. We'll cover everything from preparation to final checks, focusing on common types like mesh or snap-in guards. The process typically takes 2-4 hours for a standard single-story home, depending on roof length and accessibility. No advanced tools required—just safety and patience.
By the end, your gutters will be protected, reducing maintenance and extending their lifespan. Expect some ladder work and minor cutting, but the results are worth it for peace of mind.
▸What You'll Need
- •Ladder (extension ladder for two-story homes, rated for your weight)
- •Gutter guards (mesh, foam, or snap-in type; measure your gutter length first—e.g., 5-inch K-style gutters need matching width)
- •Tin snips or aviation snips (for cutting guards to size)
- •Measuring tape
- •Screwdriver or drill with Phillips bit (for securing guards if needed)
- •Work gloves and safety glasses
- •Optional: Gutter cleaning scoop or leaf blower (for prep cleaning)
- •Optional: Sealant or foam adhesive (for certain guard types)
Estimated Time: 2-4 hours for a standard home (add time for multi-story or long gutters)
Difficulty: intermediate
▸Step-by-Step Instructions
Step 1: Prepare Your Gutters and Safety Gear
Before installing, ensure your gutters are clean and dry to avoid trapping debris under the guards. Climb your ladder and use a scoop or leaf blower to remove leaves, dirt, and buildup. Rinse with a garden hose if needed, focusing on downspouts. This step prevents future clogs and ensures a secure fit.
Why it matters: Dirty gutters can cause guards to lift or fail prematurely. Expect to spend 30-60 minutes here—it's tedious but crucial. Dry everything thoroughly, as wet conditions make installation slippery.
Safety first: Set up your ladder on firm, level ground away from power lines. Have a spotter if working high.
💡 Tips:
- •Work on a dry day to avoid slips.
- •Clean section by section to stay organized.
⚠️ Warnings:
- •Never work alone on a ladder over 10 feet; use a harness if possible.
Step 2: Measure Your Gutters Accurately
Use a measuring tape to determine the total length of your gutters and note any sections around corners or downspouts. Standard gutters are 5 inches wide, but confirm yours (K-style or half-round). Add 1-2 inches extra per section for overlaps to ensure full coverage.
This precision avoids gaps where debris can enter. Sketch a simple diagram of your roofline to plan cuts. Success looks like measurements matching your purchased guard length—no more, no less.
💡 Tips:
- •Measure twice to cut once—errors mean wasted material.
⚠️ Warnings:
- •Don't guess; mismatched sizes lead to poor installation.
Step 3: Cut Gutter Guards to Size
Lay out your gutter guards on a flat surface and mark cut lines based on measurements. Use tin snips to cut straight lines, wearing gloves to protect from sharp edges. For mesh guards, cut along the frame; for foam, use a utility knife for clean edges.
Why it matters: Proper cuts ensure seamless fitting without overlaps that block water. Expect some metal shavings—clean them up immediately. Each cut section should fit snugly when test-placed.
💡 Tips:
- •Cut on grass or a drop cloth to contain debris.
- •For curves, make small notches instead of full cuts.
⚠️ Warnings:
- •Avoid dull snips; they cause jagged edges that snag debris.
Step 4: Start Installation at a Downspout
Begin at one end near a downspout for easiest alignment. For snap-in guards, slide the guard's lip under the gutter's inner edge, then press the outer edge over the lip. Use your hands or a rubber mallet to secure it firmly.
This method allows water to flow while blocking leaves. Why it matters: Starting here ensures proper drainage. Expect a satisfying 'click' as it snaps in—test by gently tugging.
💡 Tips:
- •Work in 5-10 foot sections for manageability.
⚠️ Warnings:
- •Don't force bent guards; they may pop out during rain.
Step 5: Secure Guards Along the Gutter Run
Continue placing cut sections, overlapping ends by 1-2 inches for continuity. For screw-in types, drill pilot holes and fasten with provided screws every 2 feet. Around corners, miter-cut guards at 45 degrees or use flexible sections.
Secure installation prevents wind lift. Success: Guards sit flush without gaps, covering the entire run. This step takes the most time but yields the best protection.
💡 Tips:
- •Use a level to check alignment on straight runs.
⚠️ Warnings:
- •Over-tightening screws can crack the gutter—hand-tighten only.
Step 6: Handle Special Areas Like Corners and Downspouts
For corners, cut and bend guards to fit the angle, or use corner connectors if included. At downspouts, trim guards to allow water entry but block debris—insert a filter screen if needed.
These spots are clog hotspots, so precision here is key. Expect minor adjustments; the area should direct water smoothly without obstruction.
💡 Tips:
- •Pre-bend mesh guards with pliers for custom fits.
⚠️ Warnings:
- •Blocked downspouts cause backups—double-check flow.
Step 7: Test and Final Check
Run a hose along the gutters to simulate rain, checking for proper water flow and no leaks or gaps. Inspect all sections from the ground and ladder, tightening any loose spots.
This verifies effectiveness before debris season. Success: Water drains freely without pooling or overflowing. Clean up tools and dispose of scraps.
💡 Tips:
- •Test in sections to isolate issues quickly.
⚠️ Warnings:
- •Fix problems immediately; waiting leads to water damage.
▸Pro Tips
- •Choose micro-mesh guards for finer debris like pine needles.
- •Install in mild weather—cold makes metal brittle.
- •Overlap guards in high-wind areas for extra hold.
- •Use zip ties temporarily for testing before permanent fixes.
- •Combine with gutter cleaning annually for best results.
- •For steep roofs, hire a pro for safety.
- •Save time by pre-cutting all pieces on the ground.
▸Common Mistakes to Avoid
- •Skipping gutter cleaning first, leading to trapped debris and quick clogs—always prep thoroughly.
- •Poor measurements causing gaps or overlaps that allow leaves in—measure meticulously.
- •Installing in wet conditions, increasing slip risks and poor adhesion—wait for dry days.
- •Ignoring downspouts, resulting in backups—custom-fit these areas carefully.
- •Using wrong guard type for your gutter style, like foam in steep pitches where it shifts—match to your setup.
▸Troubleshooting
Problem: Guards lift or pop out after installation
Solution: Secure with additional screws or clips; check for proper snap-in. If persistent, opt for heavier-duty guards.
Problem: Water overflows despite guards
Solution: Inspect for gaps or blockages at joints; clean and reseal. Ensure downspouts are clear.
Problem: Debris still enters through mesh
Solution: Upgrade to finer mesh (e.g., 200-micron); clean guards quarterly. Consider professional fine screens.
Problem: Ladder instability during work
Solution: Use ladder levelers or stabilizers; reposition on flat ground. Seek pro help for multi-story homes.
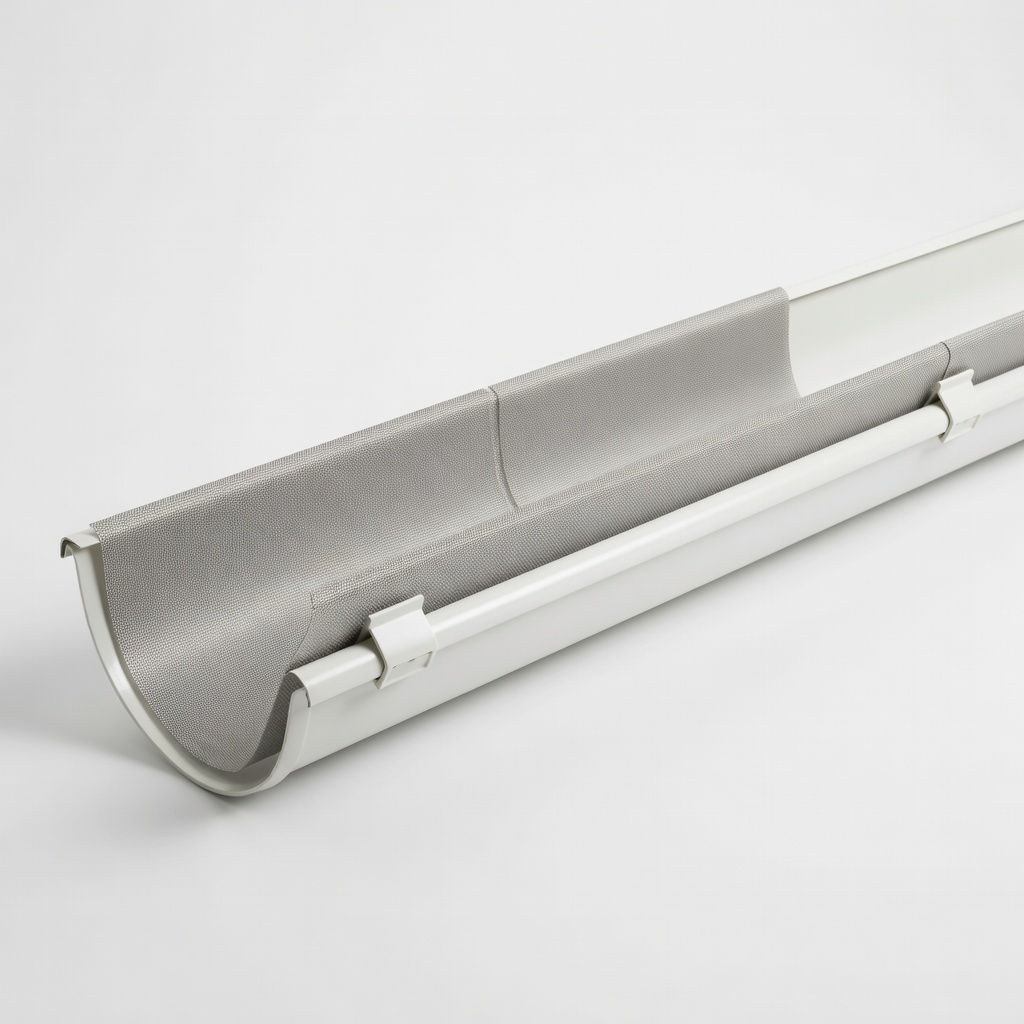
Amerimax Home Products Snap-In Gutter Guards
These are durable, easy-to-install aluminum guards that snap securely without tools, ideal for DIYers preventing leaf clogs.
Best for: Best for standard 5-inch gutters on single-family homes; covers long runs efficiently.
Price Range: $20-$30 for 35 linear feet
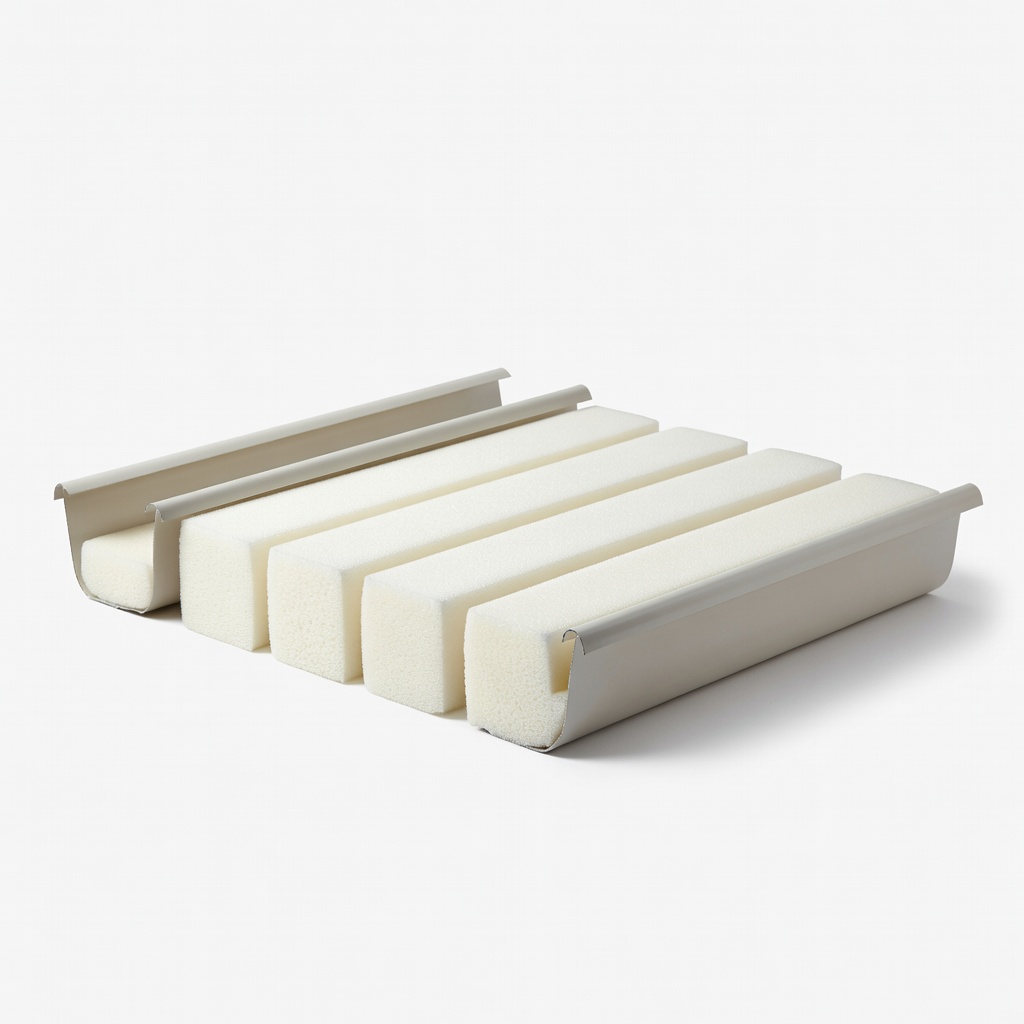
Frost King Gutter Guard Foam Inserts
Affordable foam strips filter small debris while allowing water through; simple drop-in installation for quick fixes.
Best for: Great for budget installs or rental properties where permanent changes aren't feasible.
Price Range: $15-$25 for 40 linear feet
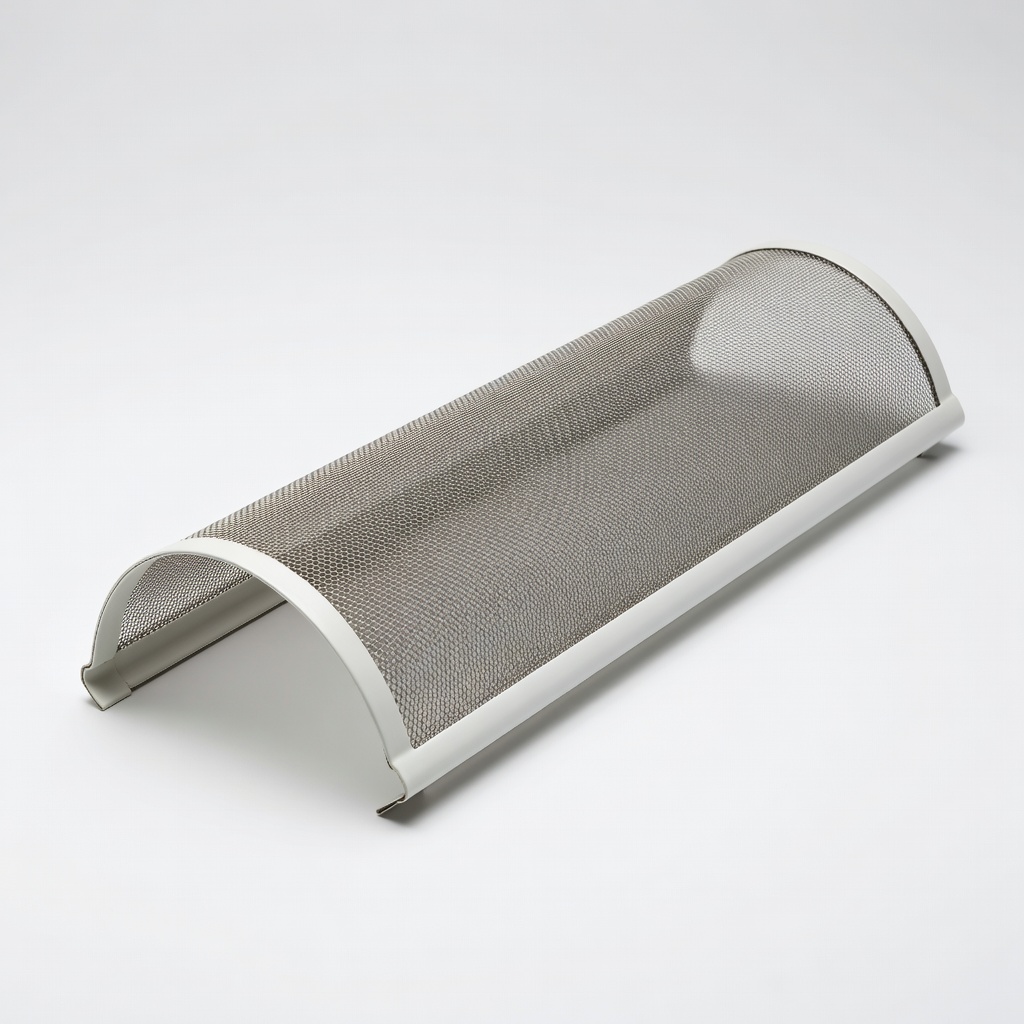
Intake Screen Micro Mesh Gutter Guard
High-quality stainless steel mesh blocks even fine particles like seeds; UV-resistant for long-term durability.
Best for: Recommended for areas with heavy tree cover or pine needles; professional-grade for intermediate installers.
Price Range: $50-$80 for 50 linear feet
Everbilt Tin Snips
Heavy-duty snips with compound leverage cut through metal guards cleanly, reducing hand fatigue.
Best for: Essential tool for precise cutting during installation; use for all metal guard types.
Price Range: $15-$20
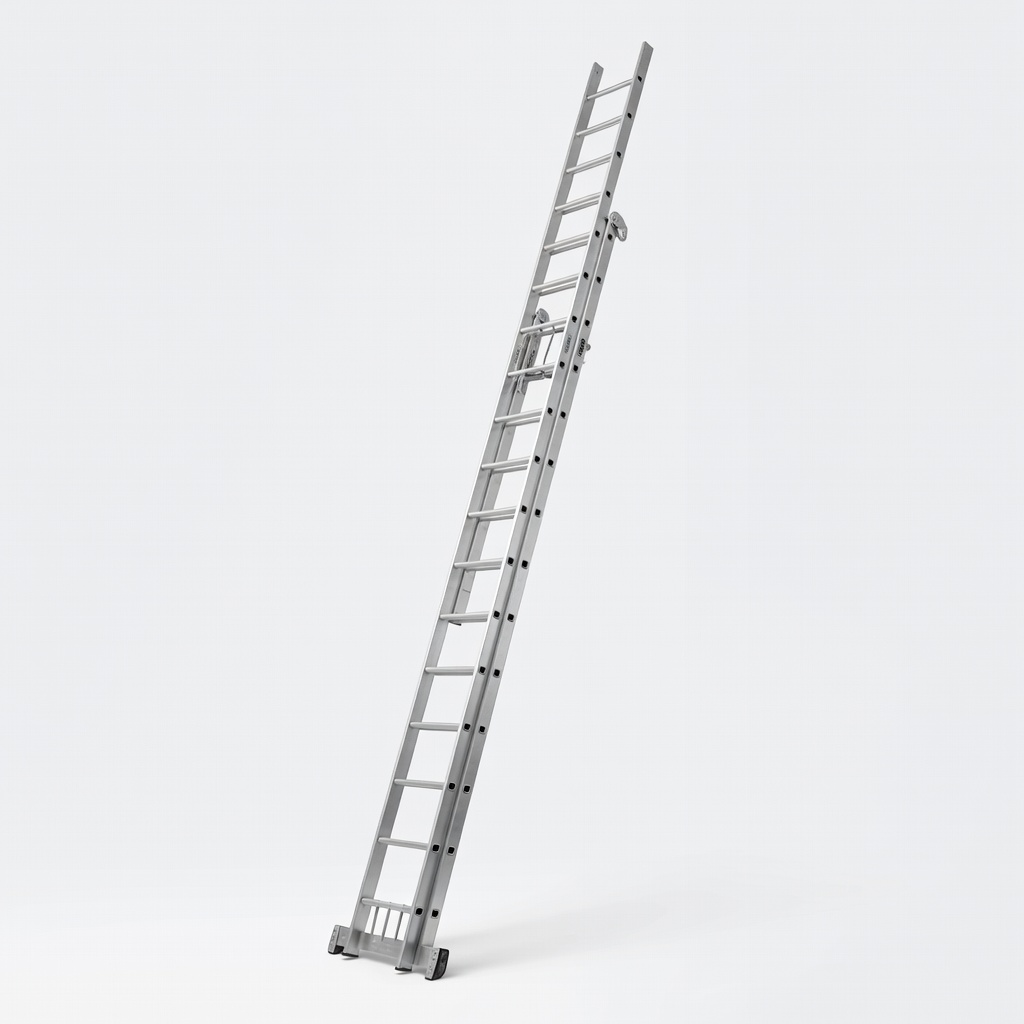
Werner 22-Foot Extension Ladder
Stable, lightweight aluminum ladder with safety features like wide rungs; supports up to 300 lbs for safe access.
Best for: For reaching two-story gutters; includes stabilizer bar for secure setup.
Price Range: $150-$200