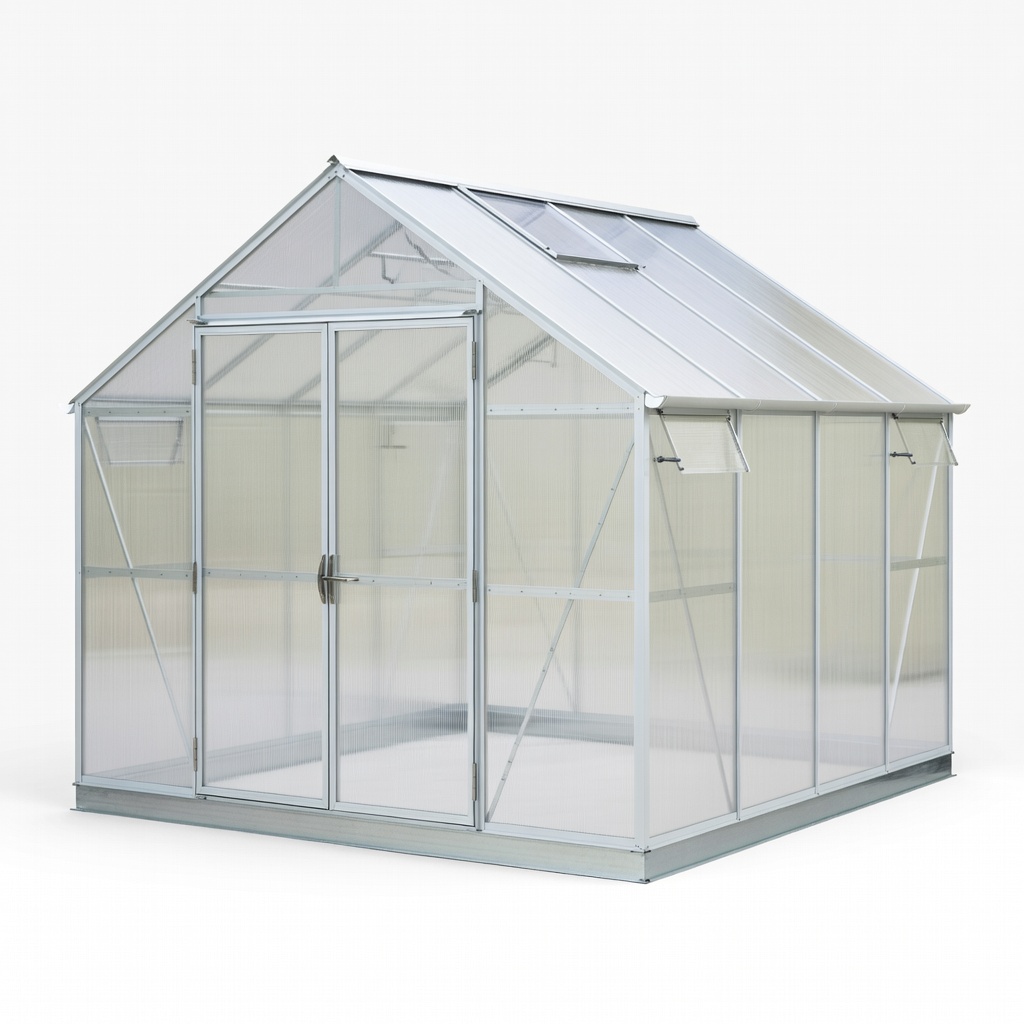
Palram Canopia Hybrid 6x10 Greenhouse Kit
Ideal starter kit for 10x12 sites; includes vents and base.
$500-$700
Palram Canopia Hybrid 6x10 Greenhouse Kit Durable rust-resistant frame with twin-wall panels for easy assembly and insulation.
Get the App
Better experience on mobile
Build your own durable backyard greenhouse step-by-step for year-round growing, even as an intermediate DIYer.
Imagine harvesting fresh vegetables in winter or starting seedlings months ahead—installing a greenhouse makes it possible. Many gardeners struggle with poor site choices or flimsy frames that collapse in wind, leading to lost crops and wasted money. This guide solves that with proven steps for success.
You'll learn everything from site selection to final anchoring for a sturdy structure that lasts. We'll focus on a typical 10x12 ft hoop or panel greenhouse kit, ideal for intermediates with basic DIY skills. Expect a sturdy frame ready for plants in days.
The process takes 2-4 days over a weekend, depending on size and help. It's intermediate: requires digging, leveling, and assembly but no advanced welding.
Estimated Time: 2-4 days (8-16 hours total, spread over weekends) Difficulty: intermediate
Choose a sunny, level spot with 6-8 hours of direct sun daily, away from trees that drop debris. Avoid low-lying areas prone to frost pockets or flooding. Measure the area to match your kit (e.g., 10x12 ft plus 2 ft clearance around).
Clear vegetation, rocks, and debris. Test soil drainage by digging a hole and filling with water—if it drains in 1-2 hours, it's good. Mark boundaries with stakes and string for precision.
Success looks like: A flat, sunny 12x14 ft cleared pad ready for foundation.
💡 Tips:
⚠️ Warnings:
Contact local zoning office for permits—many areas require them for structures over 100 sq ft. Review kit instructions for layout.
Sketch your greenhouse: doors facing south, vents on roof. Plan utilities like water/electric runs.
Success looks like: Approved plans and marked corners with batter boards.
💡 Tips:
⚠️ Warnings:
Dig trenches 6-12 inches deep for perimeter base. Set 4x4 corner posts in holes (18-24 inches deep), level them perfectly using a 4-ft level.
Pour concrete footings or lay gravel base, then attach 2x6 pressure-treated frame. Ensure square by measuring diagonals (equal lengths).
Success looks like: Rock-solid, level rectangular base frame.
💡 Tips:
⚠️ Warnings:
Unpack kit and sort parts: frame tubes/panels, connectors, braces. Start with base rails, bolting to foundation.
Raise end walls first, then arch hoops or side walls. Use braces to hold plumb. Team up for heavy lifts.
Success looks like: Freestanding skeleton frame, rigid and square.
💡 Tips:
For hoop houses: Stretch heavy-duty poly film over frame, secure with wiggle wire in channels. For rigid kits: Snap polycarbonate panels into place, seal edges with tape.
Double-check overlaps to prevent wind tears. Trim excess carefully.
Success looks like: Fully covered, taut enclosure with no gaps.
💡 Tips:
⚠️ Warnings:
Hang doors on hinges, install auto-vents or fans. Drive ground anchors through base into soil every 4 ft.
Test door swing and vent operation.
Success looks like: Secure, functional greenhouse ready for plants.
💡 Tips:
Walk around checking for loose bolts, gaps, or bows. Caulk seams, add shelving.
Test in wind/rain if possible.
Success looks like: Leak-proof, storm-ready structure.
💡 Tips:
⚠️ Warnings:
Problem: Frame bows or sags
Solution: Add cross-bracing or purlins; check foundation level.
Problem: Leaks at seams
Solution: Apply greenhouse tape or silicone sealant; replace damaged panels.
Problem: Door won't close
Solution: Re-level base; adjust hinges or frame square.
Problem: Excess condensation
Solution: Install circulation fans; use anti-condensate film.
Problem: Wind damage
Solution: Reinforce anchors; add guy wires. Seek pro if over 50 mph zones.
Durable rust-resistant frame with twin-wall panels for easy assembly and insulation.
Best for: Ideal starter kit for 10x12 sites; includes vents and base.
Price Range: $500-$700
Galvanized steel for secure hold in any soil; prevents uplift.
Best for: Anchoring frame corners and midpoints.
Price Range: $20-$30
UV-protected, tear-resistant for long life (4+ years).
Best for: Covering hoop frames; anti-drip coating.
Price Range: $50-$80
Precise leveling for foundation and frame; magnetic base.
Best for: Ensuring plumb posts and square bases.
Price Range: $25-$35
Quick-setup alternative for testing; no foundation needed.
Best for: Smaller sites or beginners before permanent build.
Price Range: $100-$150
Ideal starter kit for 10x12 sites; includes vents and base.
Palram Canopia Hybrid 6x10 Greenhouse Kit Durable rust-resistant frame with twin-wall panels for easy assembly and insulation.

Anchoring frame corners and midpoints.
MTC Heavy Duty Screw-in Ground Anchors (4 Pack) Galvanized steel for secure hold in any soil; prevents uplift.
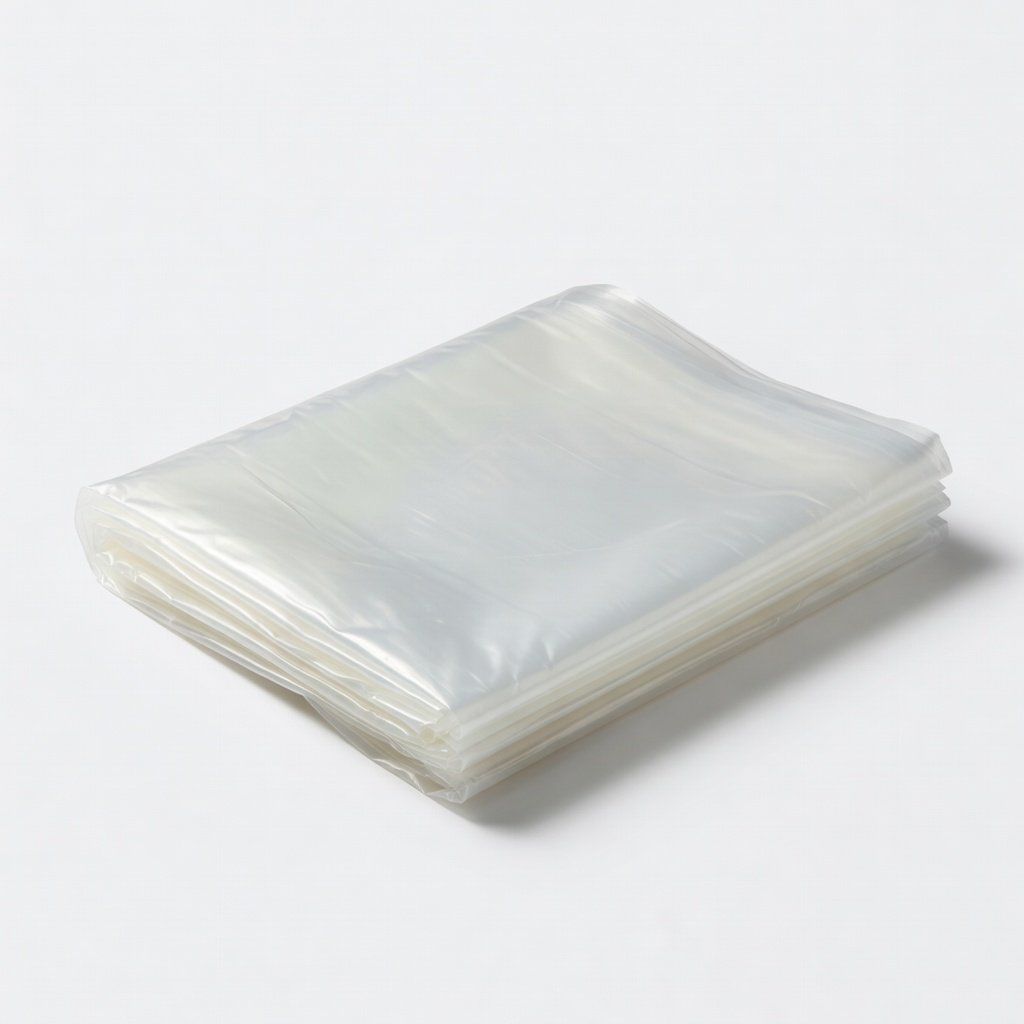
Covering hoop frames; anti-drip coating.
Agfabric 10x20 Heavy Duty Greenhouse Poly Film UV-protected, tear-resistant for long life (4+ years).
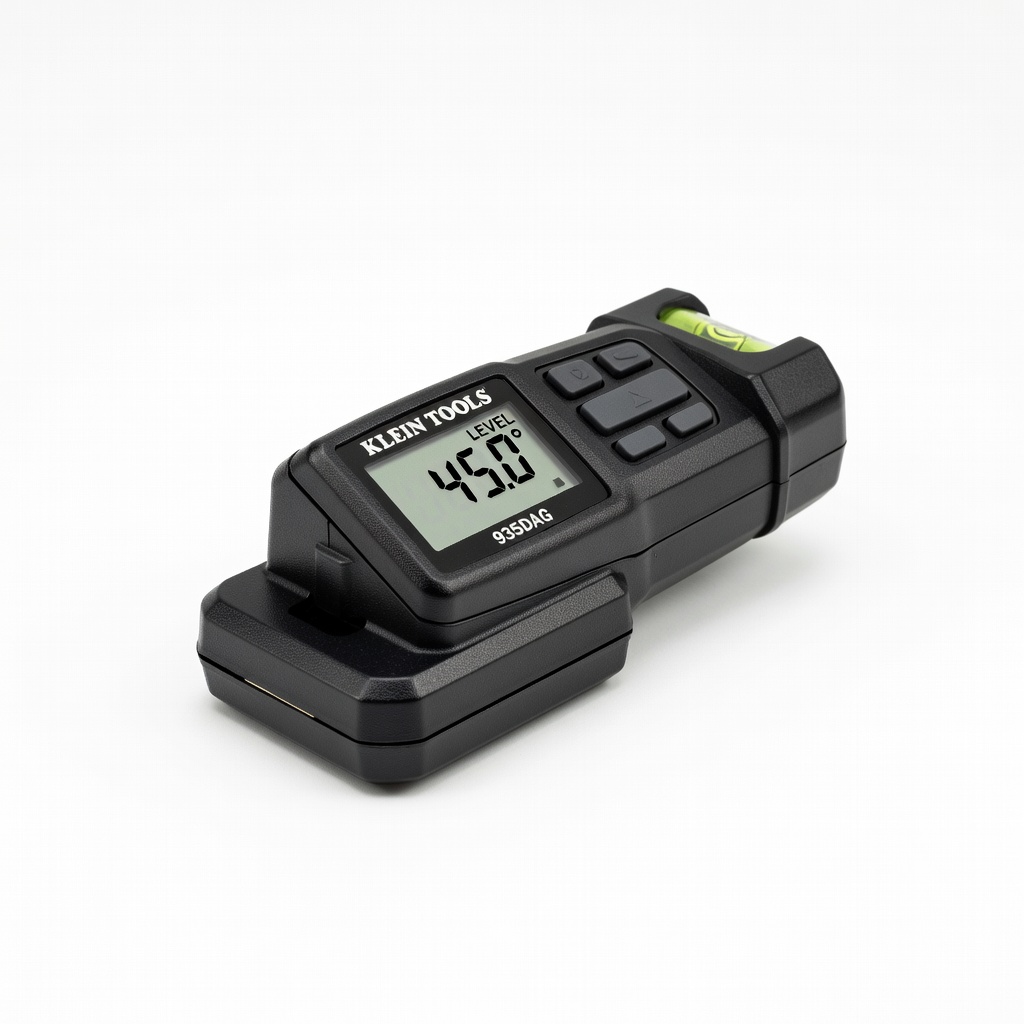
Ensuring plumb posts and square bases.
Klein Tools 935DAG Digital Angle Gauge and Level Precise leveling for foundation and frame; magnetic base.
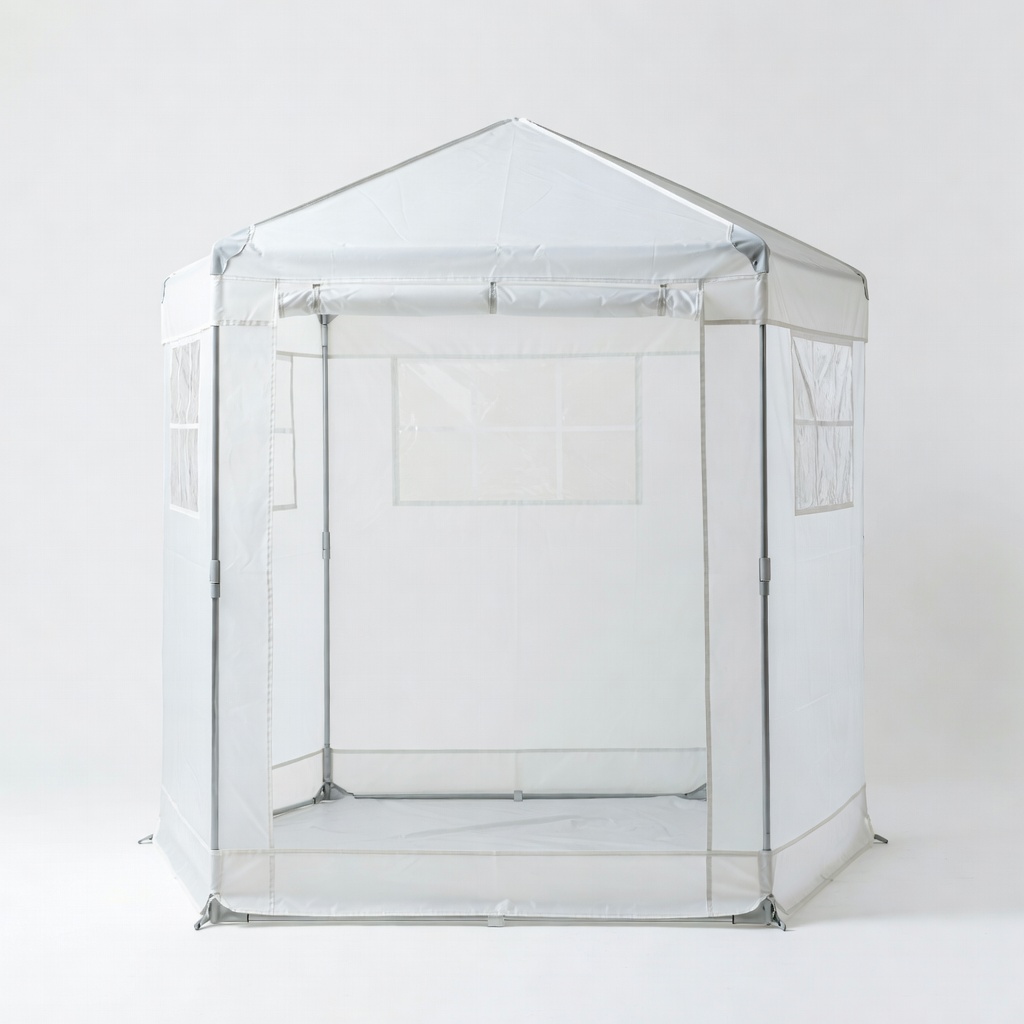
Smaller sites or beginners before permanent build.
Quictent 10x10 Pop-Up Greenhouse (Portable Option) Quick-setup alternative for testing; no foundation needed.