Ceiling fans are one of the most cost-effective ways to improve home comfort year-round. In summer, they create a wind-chill effect that can make a room feel up to 8 degrees cooler, allowing you to raise your thermostat and save on air conditioning. In winter, reversing the direction circulates warm air trapped near the ceiling. While hiring an electrician can cost $150-$400, installing a fan yourself is a rewarding weekend project that most intermediate DIYers can complete in 2-3 hours. This guide will walk you through every step—from turning off the power to balancing the blades—so you can enjoy a professional-quality installation without the expense.
▸What You'll Need
- •Ceiling fan kit (with remote or pull chains)
- •Voltage tester (non-contact recommended)
- •Screwdrivers (Phillips and flathead)
- •Wire stripper/cutter
- •Adjustable wrench or pliers
- •Ladder (step stool or extension ladder)
- •Safety glasses
- •Electrical tape
- •Wire nuts (if not included with fan)
- •Fan-rated electrical box (if existing box not rated)
- •Ceiling fan mounting bracket (usually included)
- •Helper (optional but recommended for lifting)
Estimated Time: 2-3 hours
Difficulty: intermediate
▸Step-by-Step Instructions
Step 1: Turn Off Power and Verify It's Off
Before touching any wires, shut off the circuit breaker that controls the light fixture. Do not rely on the wall switch alone. Once the breaker is off, use a non-contact voltage tester to confirm there's no power at the existing fixture. Touch the tester to the wires and the switch box—if it lights up or beeps, the power is still on. This simple step is critical for your safety.
💡 Tips:
- •Place a piece of tape over the breaker switch to prevent someone accidentally turning it back on.
- •Test the voltage tester on a known live circuit first to ensure it works.
⚠️ Warnings:
- •Never assume the power is off without testing. Even with the switch off, the junction box may still have live wires.
Step 2: Remove the Old Light Fixture
Unscrew the old fixture and carefully disconnect the wires. Typically, you'll find a black (hot), white (neutral), and copper or green (ground) wire. Use a screwdriver to loosen the wire nuts and separate the wires. Lower the fixture and set it aside. Leave the electrical box exposed. Note how the wires are arranged—you'll connect the fan the same way.
💡 Tips:
- •If the old fixture is heavy, ask a helper to support it while you disconnect wires.
- •Take a photo of the existing wiring with your phone for reference.
⚠️ Warnings:
- •Be careful not to let the wires fall back into the ceiling—they can be difficult to retrieve.
Step 3: Check and Upgrade the Electrical Box (If Needed)
Standard electrical outlet boxes are not designed to support the weight and motion of a ceiling fan. Look inside the box for a stamp that says 'Ceiling Fan Rated' or a weight rating (usually 50 lbs). If you see a plastic box or a small metal box without a rating, you must replace it with a fan-rated box. These boxes have heavy-duty brackets that attach directly to a ceiling joist. Installing a non-rated box risks the fan falling, which is dangerous.
💡 Tips:
- •If your ceiling has an attic above, you can install a fan-rated pancake box from above. Otherwise, use a remodeling box that expands against the drywall.
- •Fan-rated boxes often include a threaded rod for extra support.
⚠️ Warnings:
- •Never install a ceiling fan on a regular plastic electrical box—it can cause the fan to fall.
Step 4: Assemble the Fan Motor and Downrod
Most ceiling fans come with a downrod (the metal tube that connects the motor to the ceiling bracket). Slide the downrod into the motor housing, align the holes, and insert the locking pin. Tighten the set screws firmly. Some fans also include a canopy (decorative cover) that slides over the downrod later. Follow your fan's manual for the correct downrod length—for low ceilings, you may use a flush-mount adapter instead.
💡 Tips:
- •Lay a towel on the floor to protect the fan motor during assembly.
- •Pre-thread the wires through the downrod and canopy before fully tightening.
⚠️ Warnings:
- •The locking pin must be fully inserted and the set screws tight—otherwise the fan could separate from the downrod.
Step 5: Hang the Fan on the Mounting Bracket
Attach the mounting bracket (usually a metal plate) to the fan-rated electrical box using the screws provided. Then, hang the fan motor assembly onto the bracket. Most fans have a hook or a lip that holds the motor temporarily while you wire it. Make sure the fan feels secure and the hook is fully engaged.
💡 Tips:
- •If your bracket uses a ball-and-socket design, make sure the ball is seated firmly in the bracket groove.
- •Use a helper to lift the fan onto the bracket—it can be awkward alone.
⚠️ Warnings:
- •Don't let the fan hang only by the wires while you work—it must be supported by the bracket hook.
Step 6: Wire the Ceiling Fan to the House Wiring
Now connect the fan wires to the house wires. Typically, you'll have: house black (live) to fan black (live); house white (neutral) to fan white (neutral); and house copper/green (ground) to fan ground (green). If your fan has a blue wire, that's for the light kit—connect it to the black wire as well if you want the light to operate with the fan pull chain. Use wire nuts to secure each connection, then wrap with electrical tape. Tuck the wires neatly into the electrical box.
💡 Tips:
- •Twist the wire ends together with pliers before capping for a more secure connection.
- •If your fan has a remote receiver, connect it according to the manual (usually it splices between house and fan wires).
⚠️ Warnings:
- •Double-check your connections: a reversed neutral can create a shock hazard.
- •Make sure no bare copper is exposed beyond the wire nut.
Step 7: Secure the Fan to the Ceiling Bracket
Carefully push the wires into the electrical box (don't pinch them) and lift the fan motor up to the bracket. Most fans have two screws on the sides of the motor housing that tighten against the bracket to lock the fan in place. Some models require you to slide the canopy up and secure it with screws. Ensure the fan is flush against the ceiling and all screws are tight.
💡 Tips:
- •Some fans have a locking screw that must be tightened onto the downrod to prevent rotation.
⚠️ Warnings:
- •Overtightening can strip the screws—snug is sufficient.
Step 8: Attach the Ceiling Fan Blades
Unpack the fan blades and attach them to the blade irons (metal arms). Usually, each blade is secured with three screws. Then, attach the blade irons to the fan motor housing using the provided screws. Tighten each screw evenly, but don't overtighten. Some fans have a specific blade order—check the manual. In the rare case your fan uses a single screw per blade iron, ensure it's snug.
💡 Tips:
- •Use a torque screwdriver if you have one to ensure consistent tightness.
- •If the blades are painted or finished, handle them by the edges to avoid fingerprints.
⚠️ Warnings:
- •Attach all blades before moving on—some fans require alternating positions to maintain balance.
Step 9: Install the Light Kit (If Applicable)
Many ceiling fans include a light kit. Follow the manufacturer's instructions to attach the light fixture to the fan. This often involves connecting a small harness (push connectors) and then snapping or screwing the light housing into place. Install the light bulbs and any glass shades. If your fan has a remote, pair it with the receiver according to the manual (usually a button press or dip switch settings).
💡 Tips:
- •Wear cotton gloves when handling glass shades to avoid leaving fingerprints.
- •For LED light kits, check compatibility with dimmer switches if you plan to use one.
⚠️ Warnings:
- •Don't install bulbs with higher wattage than the fixture rating—it could cause overheating.
Step 10: Restore Power and Test the Fan
Turn the breaker back on and test the fan using the remote or pull chain. Check that the fan spins smoothly at all speeds and that the light turns on. If you hear a clicking or scraping sound, turn off the power immediately and check for obstructions (loose wires, blade hitting something). Verify the direction switch (usually on the motor) is set for summer (counterclockwise) or winter (clockwise). Run the fan for a few minutes to ensure everything is stable.
💡 Tips:
- •Use a ceiling fan balancing kit if you notice wobbling—it adds small weights to the blades.
- •Check the fan from a distance to ensure it's not visibly wobbling.
⚠️ Warnings:
- •If the fan shakes violently or makes grinding noises, turn it off and re-check all assembly steps.
▸Pro Tips
- •Always read the manufacturer's manual—even if you've installed fans before—as wiring and bracket designs vary.
- •Use a magnetic tray to keep screws and small parts organized and prevent loss.
- •Pre-assemble the fan on the ground as much as possible to reduce time on the ladder.
- •For high or vaulted ceilings, consider an extension downrod (sold separately) for proper airflow.
- •Check your ceiling fan's reverse switch seasonally to maximize energy efficiency.
- •Install the fan on the tallest ladder you can safely use—reaching overhead can cause off-balance movements.
- •If your fan wobbles after installation, start by tightening all blade screws, then try blade balancing weights.
▸Common Mistakes to Avoid
- •Not turning off the power at the breaker—causing risk of electrocution.
- •Using an electrical box not rated for ceiling fans—can lead to the fan falling.
- •Not confirming correct wiring: switching hot and neutral wires can create a shock hazard or prevent the fan from working.
- •Overtightening blade screws—strips screw holes and causes blade noise.
- •Installing the fan without a helper—can be dangerous trying to hold the fan while wiring.
▸Troubleshooting
Problem: Fan wobbles excessively
Solution: First, tighten all blade screws and blade iron screws. If wobbling continues, check that the ceiling bracket is tight and the downrod is secure. Use a blade balancing kit (small weights) to adjust balance by attaching them to the center of blades.
Problem: Fan light does not work
Solution: Check that the light kit is properly connected (push connectors fully seated). Test the light bulbs in a different fixture to ensure they aren't burned out. If using a remote, check that the switch on the fan is set to the correct position (often labeled 'Remote' or 'Pull Chain').
Problem: Fan does not start at all
Solution: Confirm the breaker is on and the wall switch is in the 'on' position. Check wire connections inside the canopy—ensure wire nuts are tight and no wires are loose. If the fan has a remote, pair it again (consult manual).
Problem: Fan makes clicking or scraping noise
Solution: Turn off power and inspect for obstructions: a wire may be hitting the spinning part, or a blade may be rubbing against the housing. Tighten any loose screws. Also confirm the blade irons are not bent.
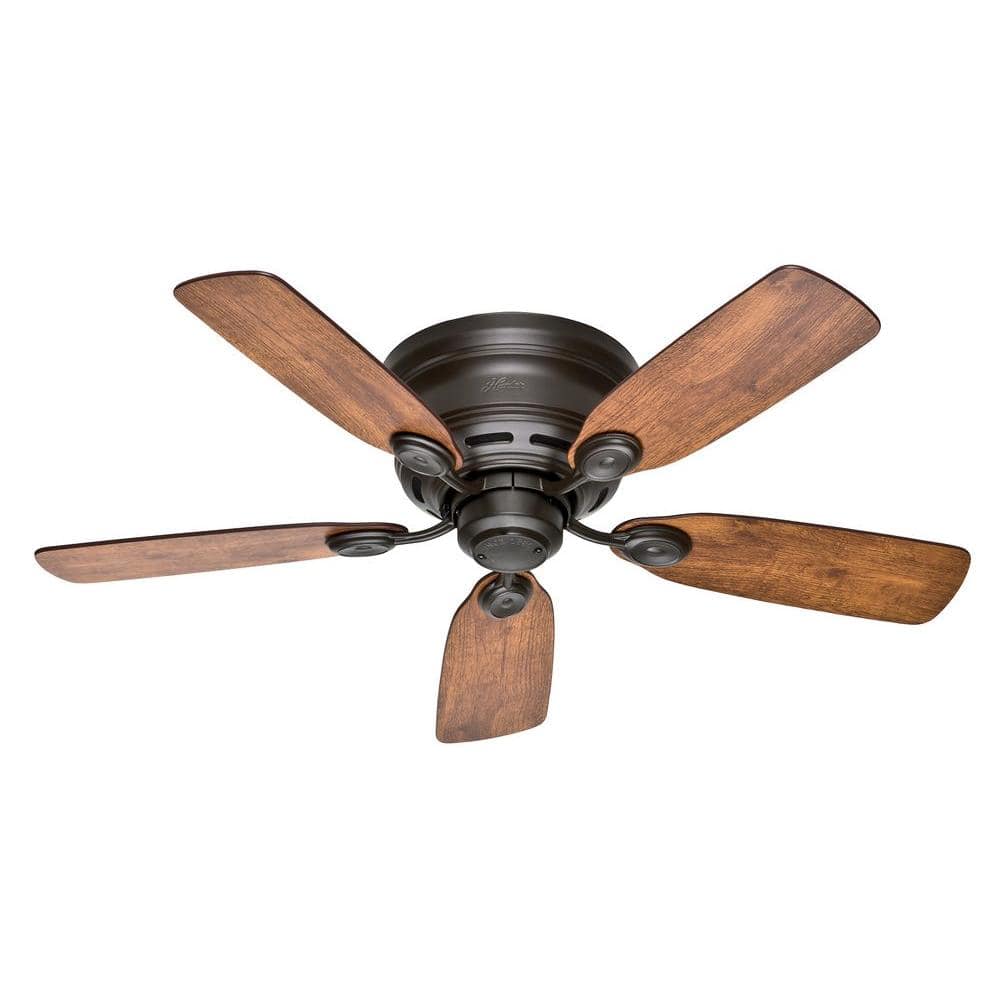
Hunter Fan Company 42-inch Low Profile Ceiling Fan
High-quality, reliable fan with a quiet motor and easy-to-follow installation instructions. Includes a lifetime motor warranty.
Best for: Ideal for rooms with low ceilings (8 ft or less) where a flush-mount design is needed.
Price Range: $150-$200
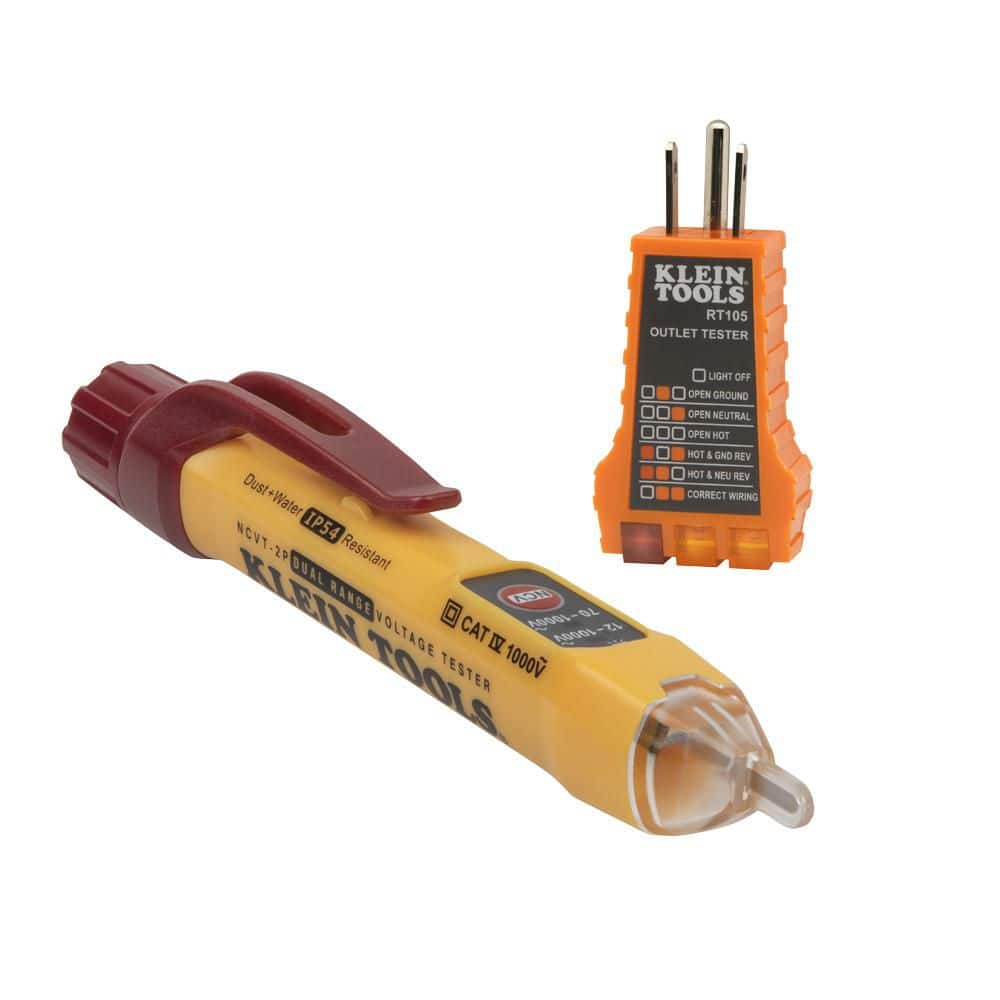
Klein Tools NCVT-2 Voltage Tester
Accurate non-contact voltage tester with clear visual and audible alerts. Essential for safely verifying power is off.
Best for: Use before touching any wires to confirm the circuit is dead. Also great for other home electrical projects.
Price Range: $15-$25
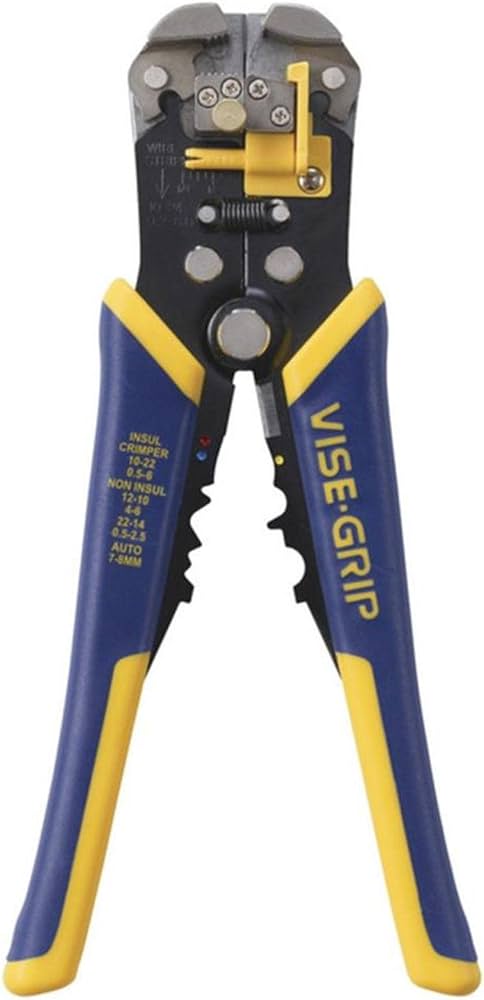
IRWIN VISE-GRIP Wire Stripper and Cutter
Durable, comfortable tool that strips wire gauges 10-22 AWG cleanly and cuts easily. Pro-grade quality for repeated use.
Best for: Stripping the ends of house wires and fan wires before connecting wire nuts.
Price Range: $12-$20
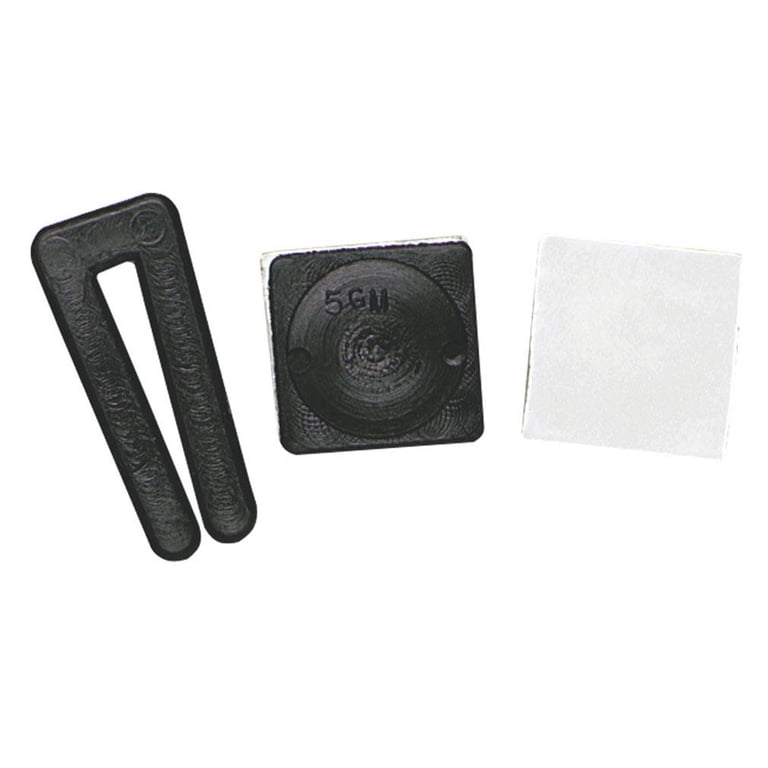
Westinghouse Lighting 7706800 Ceiling Fan Balancing Kit
Simple kit with adhesive weights and a clip-on balancing tool to eliminate wobble. Saves frustration after installation.
Best for: If your fan wobbles even with all screws tight, use this kit to find the best blade weight placement.
Price Range: $5-$10