Nothing derails a bike ride faster than a flat tire or underinflated wheels, leaving you stranded and frustrated. Whether you're commuting, exploring trails, or just cruising the neighborhood, knowing how to handle tire issues yourself can keep your adventures on track without needing a bike shop.
In this beginner-friendly guide, you'll learn the essentials of inflating bike tires to the right pressure for optimal performance and safety, plus quick patching techniques for punctures. We'll cover everything from checking pressure to sealing holes, using basic tools you likely already have or can easily get.
The process is straightforward and takes just 10-20 minutes total, depending on if patching is needed. No advanced skills required—just follow along, and you'll be confident fixing tire woes anywhere.
▸What You'll Need
- •Bicycle pump (floor pump for home use or mini pump for on-the-go; required)
- •Tire pressure gauge (built-in on many pumps or separate; required for accuracy)
- •Patch kit (includes patches, glue, and instructions; required for patching)
- •Tire levers (plastic or metal for removing the tire; required for patching)
- •Soap and water or tubeless sealant (optional for locating leaks)
- •Wheel removal tools like quick-release skewer or hex wrench (if your bike requires it; optional but helpful)
Estimated Time: 10-20 minutes
Difficulty: beginner
▸Step-by-Step Instructions
Step 1: Check Current Tire Pressure
Start by assessing your bike's tire pressure to know if inflation or a flat is the issue. Locate the sidewall of each tire and note the recommended PSI (pounds per square inch) range, usually 30-50 PSI for road bikes or 20-40 PSI for mountain bikes.
Use a tire pressure gauge to measure the current level. Insert it firmly onto the valve stem (Schrader or Presta type) and read the number. If it's below the minimum, you'll need to inflate; if the tire feels soft or you hear hissing, suspect a puncture.
This step ensures you're not over- or under-inflating, which can lead to poor handling or blowouts. Expect a quick reading—under 30 seconds per tire.
💡 Tips:
- •Mark your ideal PSI on the pump for quick reference next time.
- •Check pressure weekly to prevent issues before they start.
⚠️ Warnings:
- •Don't guess the pressure; always use the sidewall markings to avoid tire damage.
Step 2: Locate and Prepare the Valve
Identify the valve type on your tire: Schrader (car-like, wider) or Presta (narrower, with a lock nut). For Presta valves, unscrew the small tip counterclockwise to loosen it before use.
Wipe the valve stem clean with a cloth to remove dirt, ensuring a good seal with your pump. If patching is needed later, this is also a good time to listen for air leaks by spraying soapy water on the tire and looking for bubbles.
Proper prep prevents air loss during inflation and makes the process smoother. You should see the valve ready and accessible without obstruction.
💡 Tips:
- •Carry a multi-tool with a Presta head if you're often on the road.
⚠️ Warnings:
- •Forcing the wrong pump head can damage the valve—match the adapter if needed.
Step 3: Attach the Pump and Inflate
For inflation only: Secure the pump head firmly onto the valve—push down for Schrader or twist for Presta. Begin pumping steadily, watching the gauge rise toward your target PSI.
Pump in short, rhythmic strokes to build pressure efficiently. Stop once you reach the recommended PSI, then remove the pump carefully to avoid sudden air release. The tire should feel firm to the touch but not rock-hard.
If you're just inflating, repeat for the other tire. Success here means smooth rolling without wobbling, improving ride comfort and speed.
Transition to patching if flat: If air won't hold, proceed to removal.
💡 Tips:
- •Use a floor pump at home for faster inflation; mini pumps take more effort on the go.
⚠️ Warnings:
- •Overinflating can cause pinch flats—stop at the max PSI.
Step 4: Remove the Tire for Patching
If the tire is flat, deflate it fully by pressing the valve core. Use tire levers to pry the bead (edge) of the tire off the rim, starting opposite the valve. Insert one lever under the bead, hook it on a spoke, and work around with a second lever to loosen half the tire.
Flip the wheel over and pull the tire off one side, exposing the inner tube. Gently remove the tube, avoiding pinches that could cause new holes.
This step is key for accessing the puncture without damaging the rim or tire. Expect some resistance, but it should pop free after 2-3 minutes.
💡 Tips:
- •Use plastic levers to avoid scratching alloy rims.
⚠️ Warnings:
- •Don't use screwdrivers as levers—they can gouge the rim.
Step 5: Locate and Prepare the Puncture
Inflate the tube slightly to pinpoint the hole—listen for hissing or submerge in water to see bubbles. Mark the spot with chalk or a pin.
Roughen the area around the hole with sandpaper from the patch kit (about 1/2 inch diameter) to help the glue adhere. Apply a thin layer of rubber cement or glue from the kit, spreading it evenly.
Preparation ensures a strong, lasting seal. The tube should show the exact leak site clearly after a quick inflate.
💡 Tips:
- •Check both sides of the tube for multiple holes.
⚠️ Warnings:
- •Too much glue can make the patch slip; use sparingly.
Step 6: Apply the Patch and Reinstall
While the glue is tacky (10-20 seconds), press a patch firmly over the hole, centering it and rubbing vigorously for 30 seconds to activate the adhesive. Let it set for 5 minutes.
Reinsert the tube into the tire, starting opposite the valve, and tuck it evenly around. Use levers to reseat the bead onto the rim, ensuring no twists in the tube.
A successful patch means no air leaks when reinflated. The tire should seat smoothly without bulges.
💡 Tips:
- •Roll the tire by hand after reinstalling to confirm even tube placement.
⚠️ Warnings:
- •Rushing the set time leads to weak bonds—be patient.
Step 7: Reinstall Wheel and Final Inflation
Slide the wheel back onto the bike frame, securing it with the quick-release or bolts. Repeat the inflation process from Step 3, aiming for the recommended PSI.
Spin the wheel and check for wobbles or rubbing. Take a short test ride to ensure the patch holds and pressure is even.
You're done when the bike rolls smoothly and handles normally—ready for the road!
💡 Tips:
- •Tighten skewers finger-tight plus a quarter turn for safety.
⚠️ Warnings:
- •Loose wheels can cause accidents—double-check security.
▸Pro Tips
- •Always carry a mini patch kit and levers in your saddle bag for roadside fixes.
- •Use a digital gauge for precise readings, especially in low light.
- •For tubeless tires, add sealant during reinstall to prevent future flats.
- •Inflate to the higher end of PSI for speed on pavement, lower for comfort on trails.
- •Practice on an old tube to build confidence before a real repair.
- •Clean tools after use to keep them ready for next time.
- •If patching often, consider upgrading to self-sealing tubes for fewer stops.
▸Common Mistakes to Avoid
- •Inflating without checking PSI, leading to uneven wear or blowouts—always measure first.
- •Using too much glue on patches, which causes slippage—apply thinly and let it dry tacky.
- •Twisting the inner tube during reinstall, creating new pinch flats—tuck carefully.
- •Forgetting to roughen the tube surface, resulting in patches that peel off—sand lightly.
- •Over-tightening the valve nut on Presta valves, which can seal it shut—finger-tight is enough.
▸Troubleshooting
Problem: Air leaks slowly after patching
Solution: Re-roughen and reapply the patch with fresh glue; check for tube twists. If persistent, replace the tube.
Problem: Can't get the tire bead back on the rim
Solution: Use soapy water as lubricant on the bead; start at the valve and work around evenly. Avoid forcing it.
Problem: Pump won't attach to valve
Solution: Ensure the valve is unlocked (Presta) and clean; use an adapter if types don't match. Test on another tire.
Problem: Tire feels uneven after inflation
Solution: Deflate and reseat the tube; check for debris in the rim. Seek pro help if rim is damaged.
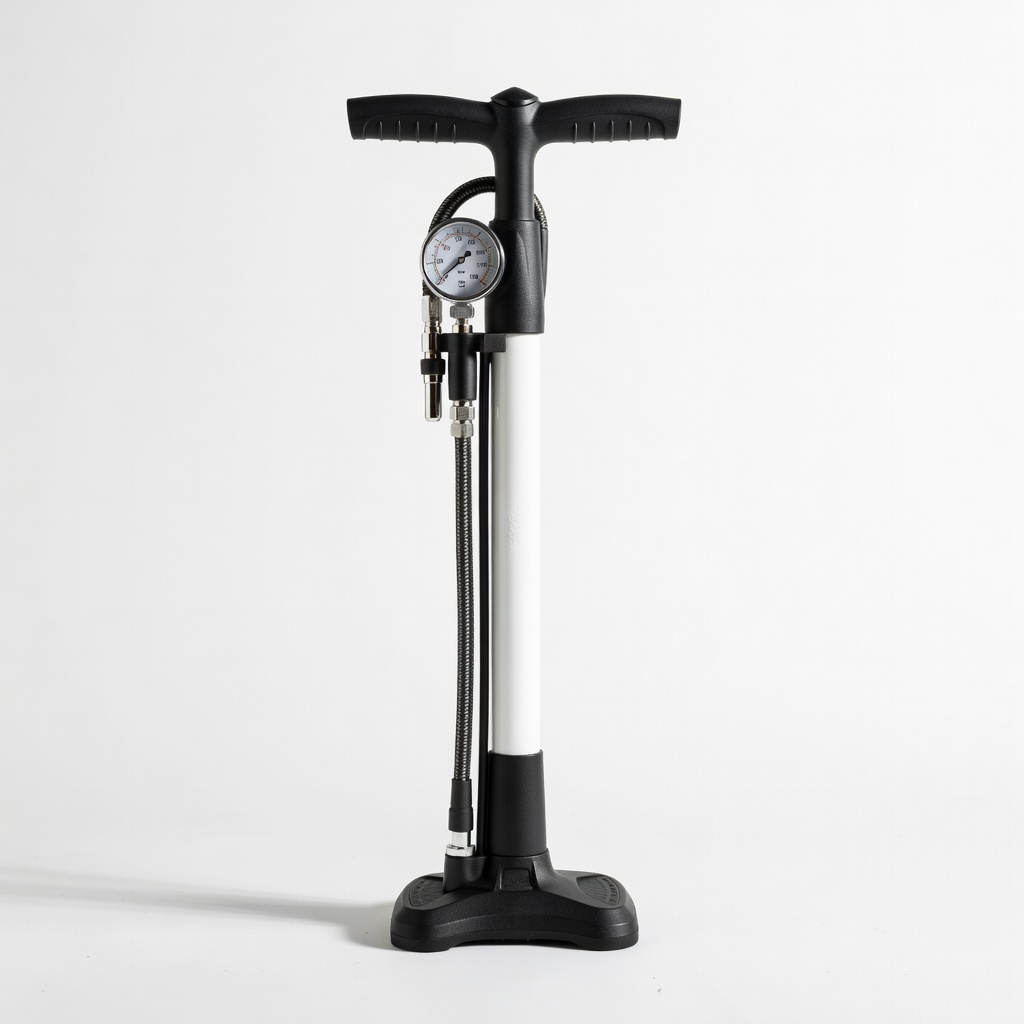
Topeak JoeBlow Sport III Floor Pump
This reliable floor pump has a built-in gauge and dual-head for easy Schrader/Presta use, making home inflation fast and accurate.
Best for: Ideal for garage setups or pre-ride checks; great for beginners needing stable pressure control.
Price Range: $40-$50
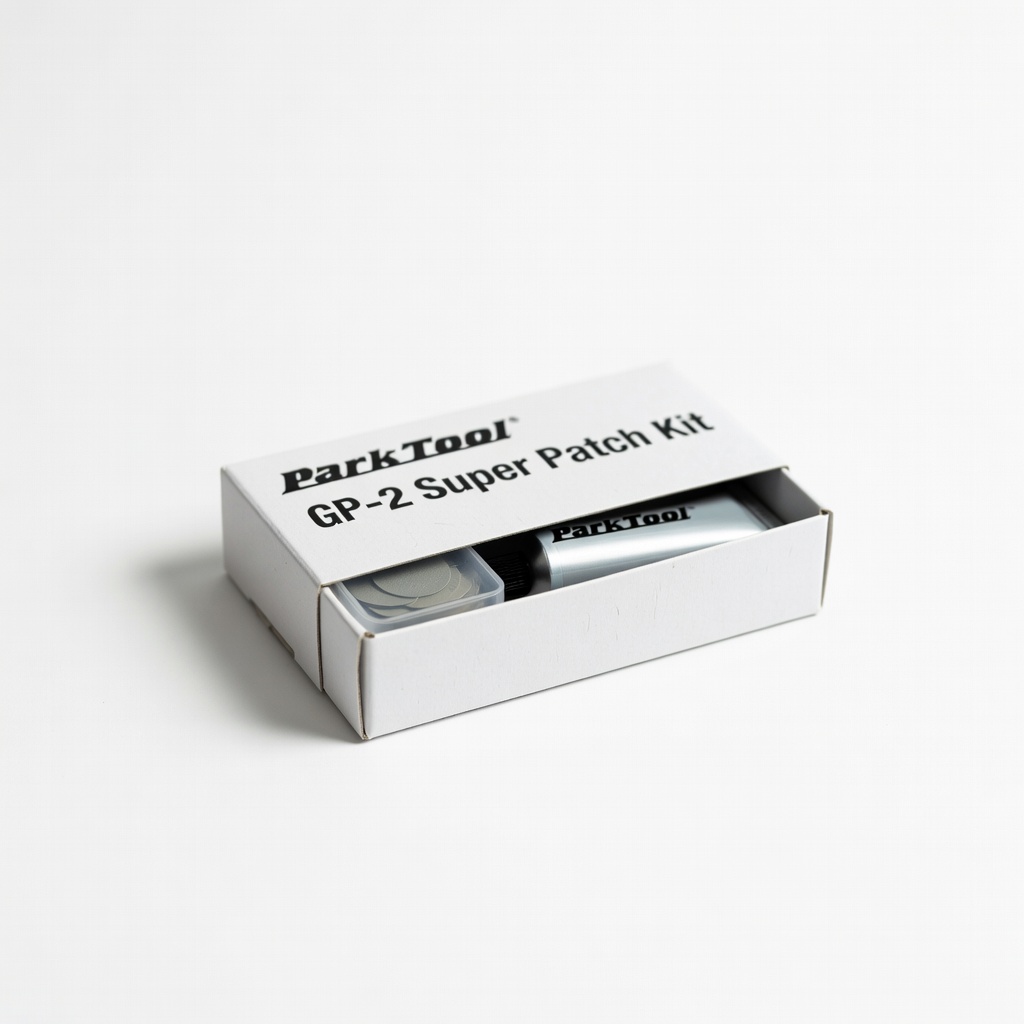
Park Tool GP-2 Super Patch Kit
Includes high-quality self-adhesive patches and glue that bond strongly, perfect for quick roadside repairs without mess.
Best for: Essential for patching inner tubes during rides; compact for your toolkit.
Price Range: $4-$6
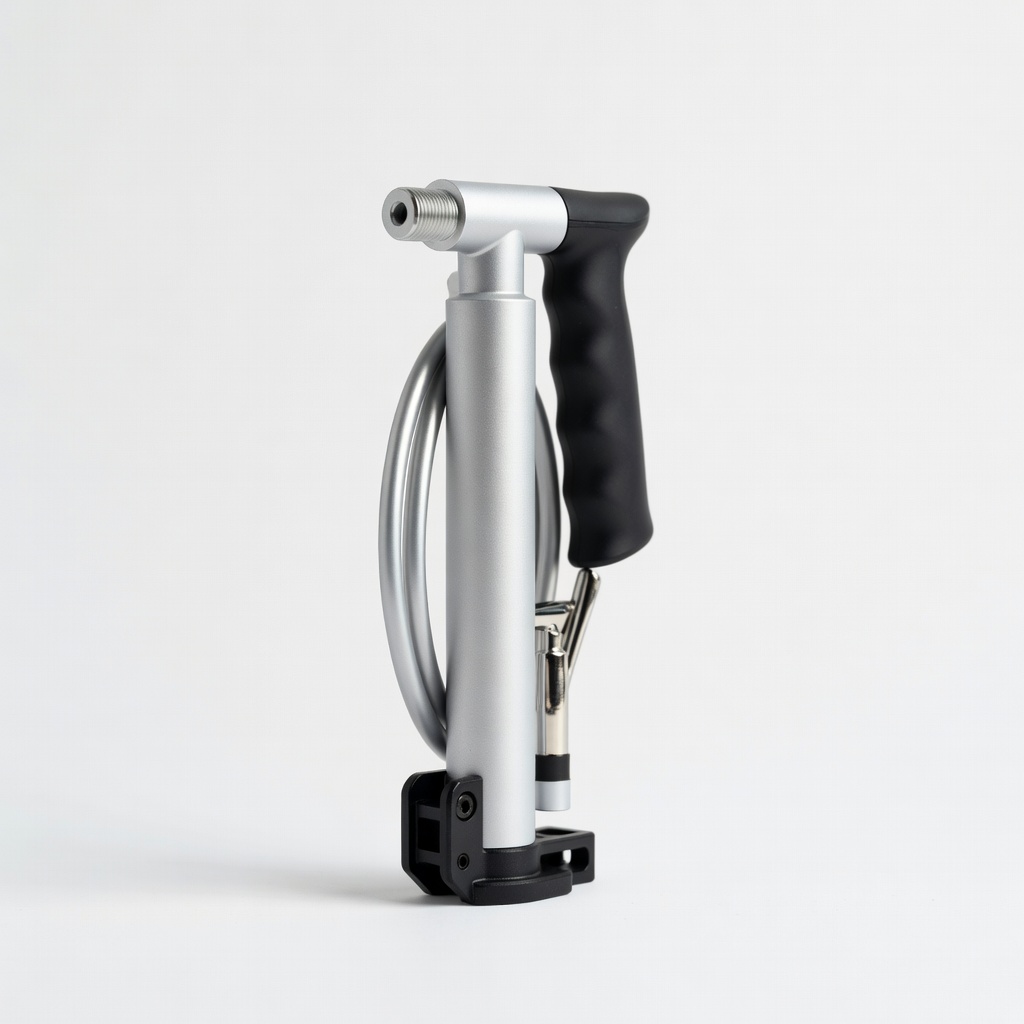
Lezyne Pressure Drive Mini Pump
Compact and high-pressure design inflates tires up to 90 PSI efficiently, with a flexible hose to avoid valve stress.
Best for: On-the-go inflation for flats; fits in jersey pockets for cyclists.
Price Range: $45-$55
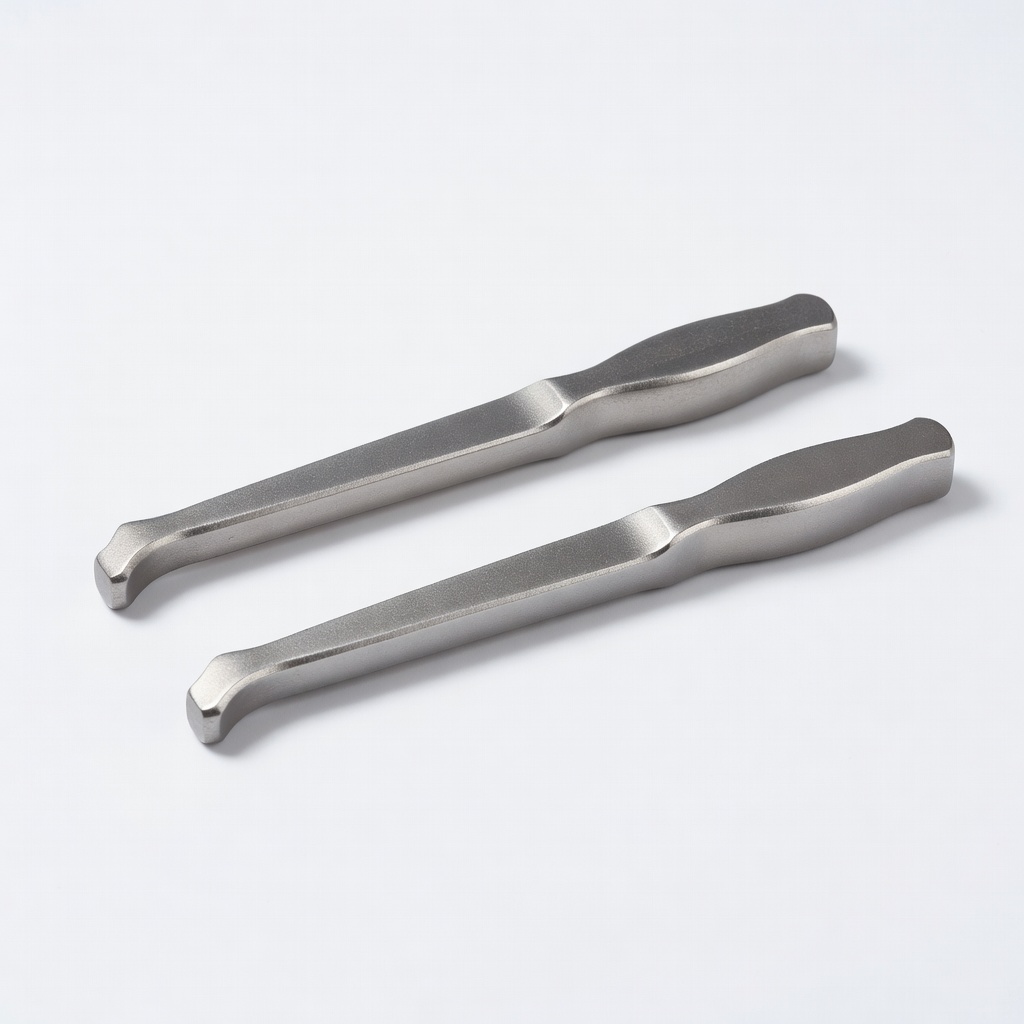
Park Tool TL-1.2 Steel Tire Levers
Durable steel construction with hooked ends grips rims securely without slipping, easing tire removal for beginners.
Best for: Removing stubborn tires during patching; set of three covers most jobs.
Price Range: $5-$7
BV Bicycle Repair Multi Tool
All-in-one tool with hex wrenches, screwdrivers, and chain breaker, simplifying wheel removal and adjustments.
Best for: Versatile for full repairs on the trail; lightweight for everyday carry.
Price Range: $15-$20